User Manual
Page 3
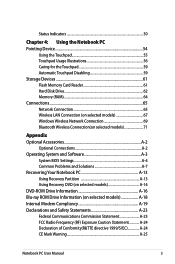
... Card Reader 61 Hard Disk Drive 62 Memory (RAM 64 Connections...65 Network Connection 65 Wireless LAN Connection (on selected models 67 Windows Wireless Network Connection 69 Bluetooth Wireless Connection(on selected models 71 Appendix Optional Accessories A-2 Optional Connections A-2 Operating System and Software A-3 System BIOS Settings A-4 Common Problems and Solutions A-7 Recovering Your Notebook PC A-13 Using Recovery Partition A-13 Using Recovery DVD (on selected models A-14 DVD-ROM Drive Information A-16 Blu-ray ROM Drive Information (on selected models A-18 Internal...
... Card Reader 61 Hard Disk Drive 62 Memory (RAM 64 Connections...65 Network Connection 65 Wireless LAN Connection (on selected models 67 Windows Wireless Network Connection 69 Bluetooth Wireless Connection(on selected models 71 Appendix Optional Accessories A-2 Optional Connections A-2 Operating System and Software A-3 System BIOS Settings A-4 Common Problems and Solutions A-7 Recovering Your Notebook PC A-13 Using Recovery Partition A-13 Using Recovery DVD (on selected models A-14 DVD-ROM Drive Information A-16 Blu-ray ROM Drive Information (on selected models A-18 Internal...
User Manual
Page 6
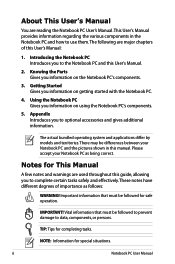
... started with the Notebook PC. 4. Appendix Introduces you to the Notebook PC and this User's Manual. 2. The actual bundled operating system and applications differ by models and territories. Notes for safe operation. There may be followed for This Manual A few notes and warnings are reading the Notebook PC User's Manual.This User's Manual provides information regarding the various components in this User's Manual: 1. About This User's Manual You are used...
... started with the Notebook PC. 4. Appendix Introduces you to the Notebook PC and this User's Manual. 2. The actual bundled operating system and applications differ by models and territories. Notes for safe operation. There may be followed for This Manual A few notes and warnings are reading the Notebook PC User's Manual.This User's Manual provides information regarding the various components in this User's Manual: 1. About This User's Manual You are used...
User Manual
Page 7
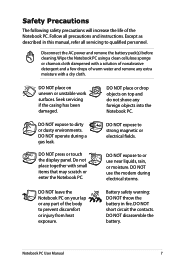
... using a clean cellulose sponge or chamois cloth dampened with small items that may scratch or enter the Notebook PC. DO NOT operate during electrical storms. DO NOT leave the Notebook PC on uneven or unstable work surfaces. DO NOT press or touch the display panel. Battery safety warning: DO NOT throw the battery in this manual, refer all precautions and instructions. DO NOT disassemble...
... using a clean cellulose sponge or chamois cloth dampened with small items that may scratch or enter the Notebook PC. DO NOT operate during electrical storms. DO NOT leave the Notebook PC on uneven or unstable work surfaces. DO NOT press or touch the display panel. Battery safety warning: DO NOT throw the battery in this manual, refer all precautions and instructions. DO NOT disassemble...
User Manual
Page 20
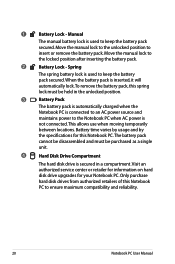
... hard disk drive upgrades for this Notebook PC.The battery pack cannot be disassembled and must be purchased as a single unit. 4 Hard Disk Drive Compartment The hard disk drive is used to ensure maximum compatibility and reliability. 20 Notebook PC User Manual Spring The spring battery lock is secured in the unlocked position. 3 Battery Pack The battery pack is automatically charged when the Notebook PC is connected to an AC power source and maintains power to the Notebook...
... hard disk drive upgrades for this Notebook PC.The battery pack cannot be disassembled and must be purchased as a single unit. 4 Hard Disk Drive Compartment The hard disk drive is used to ensure maximum compatibility and reliability. 20 Notebook PC User Manual Spring The spring battery lock is secured in the unlocked position. 3 Battery Pack The battery pack is automatically charged when the Notebook PC is connected to an AC power source and maintains power to the Notebook...
User Manual
Page 22
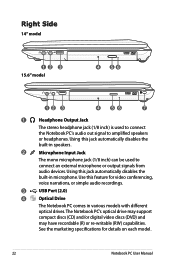
... Notebook PC's optical drive may support compact discs (CD) and/or digital video discs (DVD) and may have recordable (R) or re-writable (RW) capabilities. Using this jack automatically disables the built-in speakers. 2 Microphone Input Jack The mono microphone jack (1/8 inch) can be used to connect the Notebook PC's audio out signal to connect an external microphone or output signals from audio devices. Use this feature for details on each model. 22 Notebook PC User Manual Using this jack automatically disables...
... Notebook PC's optical drive may support compact discs (CD) and/or digital video discs (DVD) and may have recordable (R) or re-writable (RW) capabilities. Using this jack automatically disables the built-in speakers. 2 Microphone Input Jack The mono microphone jack (1/8 inch) can be used to connect the Notebook PC's audio out signal to connect an external microphone or output signals from audio devices. Use this feature for details on each model. 22 Notebook PC User Manual Using this jack automatically disables...
User Manual
Page 25
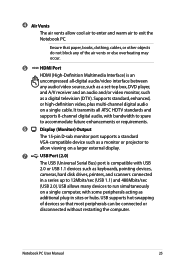
... audio and/or video monitor, such as additional plug-in a series up to exit the Notebook PC. USB supports hot-swapping of the air vents or else overheating may occur. 5 HDMI HDMI Port HDMI (High-Definition Multimedia Interface) is compatible with USB 2.0 or USB 1.1 devices such as keyboards, pointing devices, cameras, hard disk drives, printers, and scanners connected in sites or hubs. 4 Air Vents The air vents allow viewing on a larger external display. 7 USB Port (2.0) The USB...
... audio and/or video monitor, such as additional plug-in a series up to exit the Notebook PC. USB supports hot-swapping of the air vents or else overheating may occur. 5 HDMI HDMI Port HDMI (High-Definition Multimedia Interface) is compatible with USB 2.0 or USB 1.1 devices such as keyboards, pointing devices, cameras, hard disk drives, printers, and scanners connected in sites or hubs. 4 Air Vents The air vents allow viewing on a larger external display. 7 USB Port (2.0) The USB...
User Manual
Page 27
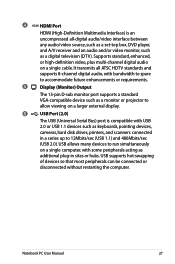
...-definition video, plus multi-channel digital audio on a single computer, with USB 2.0 or USB 1.1 devices such as keyboards, pointing devices, cameras, hard disk drives, printers, and scanners connected in sites or hubs. 4 HDMI HDMI Port HDMI (High-Definition Multimedia Interface) is an uncompressed all ATSC HDTV standards and supports 8-channel digital audio, with bandwidth to spare to accommodate future enhancements or requirements. 5 Display (Monitor) Output The 15-pin D-sub monitor port supports a standard...
...-definition video, plus multi-channel digital audio on a single computer, with USB 2.0 or USB 1.1 devices such as keyboards, pointing devices, cameras, hard disk drives, printers, and scanners connected in sites or hubs. 4 HDMI HDMI Port HDMI (High-Definition Multimedia Interface) is an uncompressed all ATSC HDTV standards and supports 8-channel digital audio, with bandwidth to spare to accommodate future enhancements or requirements. 5 Display (Monitor) Output The 15-pin D-sub monitor port supports a standard...
User Manual
Page 36
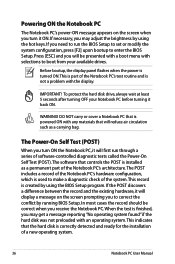
... adjust the brightness by using the hot keys. If you need to run through a series of the system. Powering ON the Notebook PC The Notebook PC's power-ON message appears on the screen prompting you to enter the BIOS Setup. DO NOT carry or cover a Notebook PC that is powered ON with the display. The Power-On Self Test (POST) When you turn ON the Notebook PC, it ON. This indicates that the hard disk...
... adjust the brightness by using the hot keys. If you need to run through a series of the system. Powering ON the Notebook PC The Notebook PC's power-ON message appears on the screen prompting you to enter the BIOS Setup. DO NOT carry or cover a Notebook PC that is powered ON with the display. The Power-On Self Test (POST) When you turn ON the Notebook PC, it ON. This indicates that the hard disk...
User Manual
Page 42
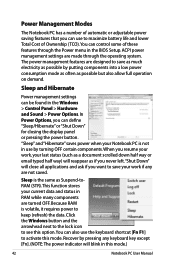
... you never left."Shut Down" will blink in this mode. When you resume your work, your Notebook PC is not in the Windows > Control Panel > Hardware and Sound > Power Options. Recover by turning OFF certain components. Sleep and Hibernate Power management settings can be found in use by pressing any are not saved. This function stores your work if any keyboard key except [Fn]. (NOTE: The power indicator will close all applications and ask...
... you never left."Shut Down" will blink in this mode. When you resume your work, your Notebook PC is not in the Windows > Control Panel > Hardware and Sound > Power Options. Recover by turning OFF certain components. Sleep and Hibernate Power management settings can be found in use by pressing any are not saved. This function stores your work if any keyboard key except [Fn]. (NOTE: The power indicator will close all applications and ask...

User Manual
Page 44
... not work in 256 Colors, select High Color in Display Property Settings.) NOTE: Must connect an external monitor "before" booting up. 44 Notebook PC User Manual Sun Down Icon (F5): Decreases the display brightness Sun Up Icon (F6): Increases the display brightness LCD Icon (F7): Toggles the display panel ON and OFF. (On certain models; stretches the screen area to use the wireless LAN or Bluetooth. Follow the icons instead of the function keys. The Hot Key locations...
... not work in 256 Colors, select High Color in Display Property Settings.) NOTE: Must connect an external monitor "before" booting up. 44 Notebook PC User Manual Sun Down Icon (F5): Decreases the display brightness Sun Up Icon (F6): Increases the display brightness LCD Icon (F7): Toggles the display panel ON and OFF. (On certain models; stretches the screen area to use the wireless LAN or Bluetooth. Follow the icons instead of the function keys. The Hot Key locations...

User Manual
Page 45
... Touchpad (F9): Toggles the built-in Windows OS) Fn+C: Toggles "Splendid Video Intelligent Technology" function ON and OFF. This allows switching between various power saving modes. Fn+V: Toggles "Life Frame" software application. You can see the current mode through the on-screen display (OSD). Locking the touchpad will light when the touchpad is UNLOCKED (enabled) and not light when the touchpad is best used with an external pointing device such as a mouse. Notebook PC User Manual...
... Touchpad (F9): Toggles the built-in Windows OS) Fn+C: Toggles "Splendid Video Intelligent Technology" function ON and OFF. This allows switching between various power saving modes. Fn+V: Toggles "Life Frame" software application. You can see the current mode through the on-screen display (OSD). Locking the touchpad will light when the touchpad is UNLOCKED (enabled) and not light when the touchpad is best used with an external pointing device such as a mouse. Notebook PC User Manual...
User Manual
Page 61
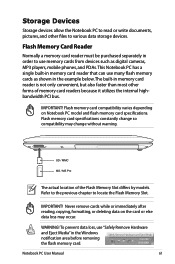
... on Notebook PC model and flash memory card specifications. Flash Memory Card Reader Normally a memory card reader must be purchased separately in order to use "Safely Remove Hardware and Eject Media" in memory card reader is not only convenient, but also faster than most other files to locate the Flash Memory Slot. Flash memory card compatibility varies depending on the card or else data loss may change so compatibility may occur. Flash memory card specifications constantly change without warning. IMPORTANT! To prevent data loss, use memory cards from devices such...
... on Notebook PC model and flash memory card specifications. Flash Memory Card Reader Normally a memory card reader must be purchased separately in order to use "Safely Remove Hardware and Eject Media" in memory card reader is not only convenient, but also faster than most other files to locate the Flash Memory Slot. Flash memory card compatibility varies depending on the card or else data loss may change so compatibility may occur. Flash memory card specifications constantly change without warning. IMPORTANT! To prevent data loss, use memory cards from devices such...
User Manual
Page 64
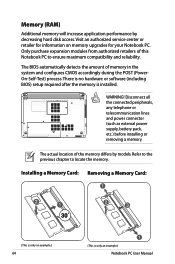
... as external power supply, battery pack, etc.) before installing or removing a memory. Refer to the previous chapter to ensure maximum compatibility and reliability. WARNING! The actual location of the memory differs by decreasing hard disk access. Installing a Memory Card: Removing a Memory Card: 33 (This is only an example.) 64 (This is installed. There is no hardware or software (including BIOS) setup required after the memory is only an example.) Notebook PC User Manual Visit an authorized service...
... as external power supply, battery pack, etc.) before installing or removing a memory. Refer to the previous chapter to ensure maximum compatibility and reliability. WARNING! The actual location of the memory differs by decreasing hard disk access. Installing a Memory Card: Removing a Memory Card: 33 (This is only an example.) 64 (This is installed. There is no hardware or software (including BIOS) setup required after the memory is only an example.) Notebook PC User Manual Visit an authorized service...
User Manual
Page 77
... pre-configured in good working state provided that your hard disk drive is in order to provide additional software not included as part of the factory pre-install. Notebook PC User Manual A-3 Operating System and Software This Notebook PC may offer (depending on the hard drive at the factory.The recovery disc provides a comprehensive recovery solution that quickly restores the Notebook PC's operating system to its customers the choice of a pre-installed Microsoft Windows operating system. Contact your Notebook PC...
... pre-configured in good working state provided that your hard disk drive is in order to provide additional software not included as part of the factory pre-install. Notebook PC User Manual A-3 Operating System and Software This Notebook PC may offer (depending on the hard drive at the factory.The recovery disc provides a comprehensive recovery solution that quickly restores the Notebook PC's operating system to its customers the choice of a pre-installed Microsoft Windows operating system. Contact your Notebook PC...
User Manual
Page 79
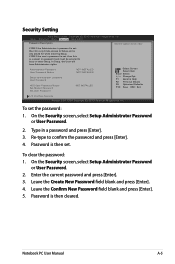
...Password is a power on password and must be entered to boot or enter Setup. On the Security screen, select Setup Administrator Password or User Password. 2. Leave the Create New Password field blank and press [Enter]. 4. Administrator Password User Password Status NOT INSTALLED NOT INSTALLED Setup administrator password User Password HDD User Password Status : Set Master Password Set User Password NOT INSTALLED : Select Screen : Select Item Enter: Select +/-: Change Opt. To clear the password: 1. Enter the current password and press [Enter]. 3. Leave the Confirm New Password...
...Password is a power on password and must be entered to boot or enter Setup. On the Security screen, select Setup Administrator Password or User Password. 2. Leave the Create New Password field blank and press [Enter]. 4. Administrator Password User Password Status NOT INSTALLED NOT INSTALLED Setup administrator password User Password HDD User Password Status : Set Master Password Set User Password NOT INSTALLED : Select Screen : Select Item Enter: Select +/-: Change Opt. To clear the password: 1. Enter the current password and press [Enter]. 3. Leave the Confirm New Password...
User Manual
Page 81
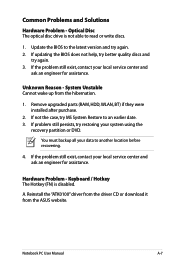
... driver CD or download it from the hibernation. 1. Unknown Reason - Notebook PC User Manual A-7 If the problem still exist, contact your data to an earlier date. 3. Remove upgraded parts (RAM, HDD, WLAN, BT) if they were installed after purchase. 2. Optical Disc The optical disc drive is disabled. Hardware Problem - If not the case, try again. 2. Update the BIOS to the latest version and try MS System Restore to another location before recovering. 4. If problem...
... driver CD or download it from the hibernation. 1. Unknown Reason - Notebook PC User Manual A-7 If the problem still exist, contact your data to an earlier date. 3. Remove upgraded parts (RAM, HDD, WLAN, BT) if they were installed after purchase. 2. Optical Disc The optical disc drive is disabled. Hardware Problem - If not the case, try again. 2. Update the BIOS to the latest version and try MS System Restore to another location before recovering. 4. If problem...

User Manual
Page 83
... another location before recovering. B. You must backup all your data to another location before recovering. please check the battery contacts, otherwise visit a local service center for assistance. Hardware Problem - check the power cord connections, otherwise visit a local service center for replacement. D. You will see taskbar), close them . 4. Enter Control Panel -> Device Manager. Problem might be caused by the operating system, try restoring your system using the recovery partition or DVD. Make sure that the FAN works when the CPU...
... another location before recovering. B. You must backup all your data to another location before recovering. please check the battery contacts, otherwise visit a local service center for assistance. Hardware Problem - check the power cord connections, otherwise visit a local service center for replacement. D. You will see taskbar), close them . 4. Enter Control Panel -> Device Manager. Problem might be caused by the operating system, try restoring your system using the recovery partition or DVD. Make sure that the FAN works when the CPU...
User Manual
Page 86
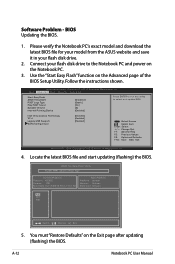
Main Advanced Boot Security Save & Exit Start Easy Flash ASUS FancyStart POST Logo Type Play POST Sound Speaker Volume Internal Pointing Device [Disabled] [Static] [No] [4] [Enabled] Press ENTER to run the utility to the Notebook PC and power on the Notebook PC. 3. A-12 Notebook PC User Manual Follow the instructions shown. Aptio Setup Utility - Copyright (C) 2010 American Megatrends, Inc. Intel Virtualization Technology VT-d Legacy USB Support SATA Configuration [Enabled] [Enabled] [Enabled] : Select Screen : Select Item Enter: Select +/-: Change Opt. F1: General Help...
Main Advanced Boot Security Save & Exit Start Easy Flash ASUS FancyStart POST Logo Type Play POST Sound Speaker Volume Internal Pointing Device [Disabled] [Static] [No] [4] [Enabled] Press ENTER to run the utility to the Notebook PC and power on the Notebook PC. 3. A-12 Notebook PC User Manual Follow the instructions shown. Aptio Setup Utility - Copyright (C) 2010 American Megatrends, Inc. Intel Virtualization Technology VT-d Legacy USB Support SATA Configuration [Enabled] [Enabled] [Enabled] : Select Screen : Select Item Enter: Select +/-: Change Opt. F1: General Help...
User Manual
Page 88
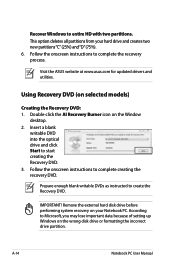
... instructions to entire HD with two partitions. Remove the external hard disk drive before performing system recovery on selected models) Creating the Recovery DVD: 1. Recover Windows to complete creating the recovery DVD. Double-click the AI Recovery Burner icon on the wrong disk drive or formatting the incorrect drive partition. Insert a blank writable DVD into the optical drive and click Start to Microsoft, you may lose important data because of setting up Windows on the Window desktop. 2. A-14 Notebook PC User Manual...
... instructions to entire HD with two partitions. Remove the external hard disk drive before performing system recovery on selected models) Creating the Recovery DVD: 1. Recover Windows to complete creating the recovery DVD. Double-click the AI Recovery Burner icon on the wrong disk drive or formatting the incorrect drive partition. Insert a blank writable DVD into the optical drive and click Start to Microsoft, you may lose important data because of setting up Windows on the Window desktop. 2. A-14 Notebook PC User Manual...
User Manual
Page 89
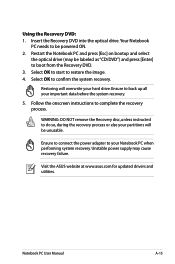
... for updated drivers and utilities. Follow the onscreen instructions to confirm the system recovery. WARNING: DO NOT remove the Recovery disc, unless instructed to do so, during the recovery process or else your partitions will overwrite your hard drive. Restoring will be unusable. Unstable power supply may be powered ON. 2. Restart the Notebook PC and press [Esc] on bootup and select the optical drive (may cause recovery failure. Notebook PC User Manual...
... for updated drivers and utilities. Follow the onscreen instructions to confirm the system recovery. WARNING: DO NOT remove the Recovery disc, unless instructed to do so, during the recovery process or else your partitions will overwrite your hard drive. Restoring will be unusable. Unstable power supply may be powered ON. 2. Restart the Notebook PC and press [Esc] on bootup and select the optical drive (may cause recovery failure. Notebook PC User Manual...


