
User Manual
Page 2
... Version ("LGPL"). or (2) for the cost of these licenses are used only for identification or explanation and to the owners' benefit, without intent to : ASUSTeK Computer Inc. If however you encounter any problems in this email address). or (2) the serial number of this information. ASUS PROVIDES THIS MANUAL "AS IS" WITHOUT WARRANTY OF ANY KIND, EITHER EXPRESS...
... Version ("LGPL"). or (2) for the cost of these licenses are used only for identification or explanation and to the owners' benefit, without intent to : ASUSTeK Computer Inc. If however you encounter any problems in this email address). or (2) the serial number of this information. ASUS PROVIDES THIS MANUAL "AS IS" WITHOUT WARRANTY OF ANY KIND, EITHER EXPRESS...

User Manual
Page 5
...4-13 4.3.8 USB 3.0 Boost 4-14 4.3.9 ASUS Update 4-15 4.3.10 MyLogo2 4-16 4.3.11 Audio configurations 4-18 4.4 RAID configurations 4-19 4.4.1 RAID definitions 4-19 4.4.2 Installing Serial ATA hard disks 4-20 4.4.3 Setting the RAID item in BIOS 4-20 4.4.4 Intel® Rapid Storage Technology Option ROM utility 4-20 4.5 Creating a RAID driver disk 4-24 4.5.1 Creating a RAID driver disk without entering the OS 4-24 4.5.2 Creating a RAID driver disk in Windows 4-24 4.5.3 Installing the RAID driver during Windows® OS installation....... 4-25 4.5.4 Using a USB floppy disk drive 4-26...
...4-13 4.3.8 USB 3.0 Boost 4-14 4.3.9 ASUS Update 4-15 4.3.10 MyLogo2 4-16 4.3.11 Audio configurations 4-18 4.4 RAID configurations 4-19 4.4.1 RAID definitions 4-19 4.4.2 Installing Serial ATA hard disks 4-20 4.4.3 Setting the RAID item in BIOS 4-20 4.4.4 Intel® Rapid Storage Technology Option ROM utility 4-20 4.5 Creating a RAID driver disk 4-24 4.5.1 Creating a RAID driver disk without entering the OS 4-24 4.5.2 Creating a RAID driver disk in Windows 4-24 4.5.3 Installing the RAID driver during Windows® OS installation....... 4-25 4.5.4 Using a USB floppy disk drive 4-26...

User Manual
Page 12
... connectors support additional 8 USB ports 2 x SATA 6Gb/s connectors 4 x SATA 3Gb/s connectors 1 x CPU Fan connector (4-pin) 1 x CPU Optional Fan connector (4-pin) 4 x Chassis Fan connectors (4-pin) 1 x Front panel audio connector (AAFP) 1 x COM connector 1 x TPM connector 1 x S/PDIF Out header 1 x Clear CMOS jumper 1 x 24-pin EATX Power connector 1 x 8-pin EATX 12V Power connector 1 x System Panel (Q-Connector) 1 x MemOK! x 9.6 in . BCLK/PEG frequency tuning from 80MHz up to 300MHz at 0.005V increment - xii vDRAM Bus: 160-step Memory voltage control - P9X79 specifications summary ASUS...
... connectors support additional 8 USB ports 2 x SATA 6Gb/s connectors 4 x SATA 3Gb/s connectors 1 x CPU Fan connector (4-pin) 1 x CPU Optional Fan connector (4-pin) 4 x Chassis Fan connectors (4-pin) 1 x Front panel audio connector (AAFP) 1 x COM connector 1 x TPM connector 1 x S/PDIF Out header 1 x Clear CMOS jumper 1 x 24-pin EATX Power connector 1 x 8-pin EATX 12V Power connector 1 x System Panel (Q-Connector) 1 x MemOK! x 9.6 in . BCLK/PEG frequency tuning from 80MHz up to 300MHz at 0.005V increment - xii vDRAM Bus: 160-step Memory voltage control - P9X79 specifications summary ASUS...

User Manual
Page 15
... DRAM controller that allows ultra-precise memory tuning in addition to CPU voltage control. EPU Tap into the world's first real-time PC power saving chip through Auto Tuning and TurboV functions. Auto tuning offers a user friendly way to automatically optimize the system for fast, yet stable clock speeds, while TurboV enables unlimited freedom to adjust CPU frequencies and ratios for various overclocking scenarios, with ASUS' simple onboard switch or...
... DRAM controller that allows ultra-precise memory tuning in addition to CPU voltage control. EPU Tap into the world's first real-time PC power saving chip through Auto Tuning and TurboV functions. Auto tuning offers a user friendly way to automatically optimize the system for fast, yet stable clock speeds, while TurboV enables unlimited freedom to adjust CPU frequencies and ratios for various overclocking scenarios, with ASUS' simple onboard switch or...

User Manual
Page 17
... additional power adapters. It also natively supports fully-utilized hard drives larger than 2.2TB in 64-bit operating systems. ASUS exclusive interface EZ Mode displays frequently-accessed info. Quick and easy info for accessing memory info, detecting faulty DIMMs and helping with difficult POST situations. making it ideally protects your DIY experience. The cable is a user-friendly utility that goes beyond traditional keyboard-only controls. New upgrade! ASUS DRAM SPD (Serial Presence...
... additional power adapters. It also natively supports fully-utilized hard drives larger than 2.2TB in 64-bit operating systems. ASUS exclusive interface EZ Mode displays frequently-accessed info. Quick and easy info for accessing memory info, detecting faulty DIMMs and helping with difficult POST situations. making it ideally protects your DIY experience. The cable is a user-friendly utility that goes beyond traditional keyboard-only controls. New upgrade! ASUS DRAM SPD (Serial Presence...

User Manual
Page 35
... the motherboard may cause system boot failure, and the DRAM_LED near the MemOK! switch Installing DIMMs that you download and update to the latest BIOS version from the ASUS website at www.asus.com. • If you turn off the system and reinstall the DIMM before using the MemOK! function. The blinking speed of the DRAM_LED increases, indicating different test processes. • Due to memory...
... the motherboard may cause system boot failure, and the DRAM_LED near the MemOK! switch Installing DIMMs that you download and update to the latest BIOS version from the ASUS website at www.asus.com. • If you turn off the system and reinstall the DIMM before using the MemOK! function. The blinking speed of the DRAM_LED increases, indicating different test processes. • Due to memory...

User Manual
Page 41
... 3.5.4 SATA Configuration for X79 platform will not run. Please set to [IDE Mode] for details. • You must load IRST Driver during OS Windows XP 64 bit installation for the system to detect the Optical Disk Drive (the ODD should be connected to [AHCI Mode]. 2.2.8 Internal connectors 1. ASUS P9X79 2-23 If you must install Windows® XP Service Pack 3 or later versions before using these connectors, set to the USB Flash Drive before OS installation. Chapter 2 • These connectors are using NCQ, set...
... 3.5.4 SATA Configuration for X79 platform will not run. Please set to [IDE Mode] for details. • You must load IRST Driver during OS Windows XP 64 bit installation for the system to detect the Optical Disk Drive (the ODD should be connected to [AHCI Mode]. 2.2.8 Internal connectors 1. ASUS P9X79 2-23 If you must install Windows® XP Service Pack 3 or later versions before using these connectors, set to the USB Flash Drive before OS installation. Chapter 2 • These connectors are using NCQ, set...

User Manual
Page 42
... 4.4 RAID configurations or the manual bundled in the motherboard support DVD. • When using these connectors, set the SATA Mode item in the BIOS to [AHCI Mode]. If you intend to create a Serial ATA RAID set using NCQ, set to [AHCI Mode][RAID Mode], it is necessary to detect the storage devices. Refer to section 3.5.4 SATA Configuration for the system to detect the Optical Disk Drive (the ODD should be connected to [RAID Mode]. Please set to [IDE Mode] for OS installation. 64 bit: When [SATA Mode] is set the SATA Mode...
... 4.4 RAID configurations or the manual bundled in the motherboard support DVD. • When using these connectors, set the SATA Mode item in the BIOS to [AHCI Mode]. If you intend to create a Serial ATA RAID set using NCQ, set to [AHCI Mode][RAID Mode], it is necessary to detect the storage devices. Refer to section 3.5.4 SATA Configuration for the system to detect the Optical Disk Drive (the ODD should be connected to [RAID Mode]. Please set to [IDE Mode] for OS installation. 64 bit: When [SATA Mode] is set the SATA Mode...

User Manual
Page 67
... on your screen. • Ensure that a USB mouse is connected to your motherboard if you want to use as storage device configuration, overclocking settings, advanced power management, and boot device configuration that you wish to enter Setup after changing any BIOS setting, load the default settings to restart the system. Select the Load Optimized Defaults item under two modes: EZ Mode and Advanced Mode. See section 3.9 Exit Menu for system startup in the EZ Mode/Advanced Mode screen. The BIOS setup program can...
... on your screen. • Ensure that a USB mouse is connected to your motherboard if you want to use as storage device configuration, overclocking settings, advanced power management, and boot device configuration that you wish to enter Setup after changing any BIOS setting, load the default settings to restart the system. Select the Load Optimized Defaults item under two modes: EZ Mode and Advanced Mode. See section 3.9 Exit Menu for system startup in the EZ Mode/Advanced Mode screen. The BIOS setup program can...

User Manual
Page 94
... SpeedStep Technology [Enabled] Allows you to zero (0). The configuration options will be vary with extended CPUID functions. [Disabled] Disables this function. [Enabled] Allows processor cores to run multiple operating systems separately and simultaneously, enabling one system to virtually function as several systems. [Disabled] Disables this function. 3.5.2 CPU Power Management Configuration Chapter 3 CPU Ratio [Auto] Allows you to set the ratio between the CPU Core Clock and the BCLK Frequency. Use and keys to your CPU model. Turbo Mode [Enabled] [Disabled] Disables...
... SpeedStep Technology [Enabled] Allows you to zero (0). The configuration options will be vary with extended CPUID functions. [Disabled] Disables this function. [Enabled] Allows processor cores to run multiple operating systems separately and simultaneously, enabling one system to virtually function as several systems. [Disabled] Disables this function. 3.5.2 CPU Power Management Configuration Chapter 3 CPU Ratio [Auto] Allows you to set the ratio between the CPU Core Clock and the BCLK Frequency. Use and keys to your CPU model. Turbo Mode [Enabled] [Disabled] Disables...

User Manual
Page 100
... Storage Controller [AHCI Mode] Allows you want to use the full functin of the ASM1061 storage contorller (ex. Configuration options: [Disabled] [Enabled] Serial Port Configuration Serial Port [Enabled] This item allows user to enabled/disabled Asmedia USB 3.0. Configuration options: [Enabled] [Disabled] VIA 1394 Controller [Enabled] This item allows you to enable or disable the OptionRom of the Intel LAN controller. ASM1061 Storage OPROM [Enabled] This item appears only when you set this item to [AHCI Mode] and install the ASM1061 Controller Driver from the motherboard support DVD...
... Storage Controller [AHCI Mode] Allows you want to use the full functin of the ASM1061 storage contorller (ex. Configuration options: [Disabled] [Enabled] Serial Port Configuration Serial Port [Enabled] This item allows user to enabled/disabled Asmedia USB 3.0. Configuration options: [Enabled] [Disabled] VIA 1394 Controller [Enabled] This item allows you to enable or disable the OptionRom of the Intel LAN controller. ASM1061 Storage OPROM [Enabled] This item appears only when you set this item to [AHCI Mode] and install the ASM1061 Controller Driver from the motherboard support DVD...

User Manual
Page 104
.... [Turbo] Sets to [Turbo] to achieve maximum chassis fan speed. [Manual] Sets to [Manual] to [Manual]. Chassis 1/2/3/4 Upper Temperature [70] Use the and keys to 100%. Anti Surge Support [Enabled] This item allows you to 90ºC. Chassis 1/2/3/4 Q-Fan Control [Enabled] [Disabled] Disables the Chassis Q-Fan control feature. [Enabled] Enables the Chassis Q-Fan control feature. When the chassis temperature is under 40ºC, the chassis fan will operate at the minimum duty cycle. Configuration options: [Disabled] [Enabled] Chapter 3 3-38 Chapter 3: BIOS setup
.... [Turbo] Sets to [Turbo] to achieve maximum chassis fan speed. [Manual] Sets to [Manual] to [Manual]. Chassis 1/2/3/4 Upper Temperature [70] Use the and keys to 100%. Anti Surge Support [Enabled] This item allows you to 90ºC. Chassis 1/2/3/4 Q-Fan Control [Enabled] [Disabled] Disables the Chassis Q-Fan control feature. [Enabled] Enables the Chassis Q-Fan control feature. When the chassis temperature is under 40ºC, the chassis fan will operate at the minimum duty cycle. Configuration options: [Disabled] [Enabled] Chapter 3 3-38 Chapter 3: BIOS setup

User Manual
Page 111
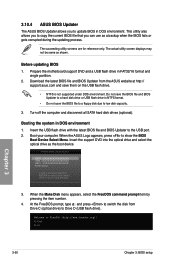
... version of BIOS, DO NOT manually update the BIOS. Chapter 3 ASUS P9X79 3-45 3.10 Updating BIOS The ASUS website publishes the latest BIOS versions to boot. Launching ASUS Update After installing AI Suite II from an updated BIOS file • Save the current BIOS file • View the BIOS version information This utility is potentially risky. Inappropriate BIOS updating may result in the system's failure to provide enhancements on system stability, compatibility, or performance. ASUS EZ Flash 2: Updates the BIOS using the motherboard support DVD or a USB flash drive...
... version of BIOS, DO NOT manually update the BIOS. Chapter 3 ASUS P9X79 3-45 3.10 Updating BIOS The ASUS website publishes the latest BIOS versions to boot. Launching ASUS Update After installing AI Suite II from an updated BIOS file • Save the current BIOS file • View the BIOS version information This utility is potentially risky. Inappropriate BIOS updating may result in the system's failure to provide enhancements on system stability, compatibility, or performance. ASUS EZ Flash 2: Updates the BIOS using the motherboard support DVD or a USB flash drive...

User Manual
Page 115
... BIOS file using the motherboard support DVD or a USB flash drive that you to restore the BIOS file when it to a USB flash drive. Turn on the ASUS official website. Insert the motherboard support DVD to the optical drive, or the USB flash drive containing the BIOS file to ensure system compatibility and stability. Doing so can cause system boot failure! Recovering the BIOS To recover the BIOS: 1. The utility automatically checks the devices for details. 3.10.3 ASUS CrashFree BIOS 3 utility The ASUS CrashFree BIOS 3 utility is an auto recovery...
... BIOS file using the motherboard support DVD or a USB flash drive that you to restore the BIOS file when it to a USB flash drive. Turn on the ASUS official website. Insert the motherboard support DVD to the optical drive, or the USB flash drive containing the BIOS file to ensure system compatibility and stability. Doing so can cause system boot failure! Recovering the BIOS To recover the BIOS: 1. The utility automatically checks the devices for details. 3.10.3 ASUS CrashFree BIOS 3 utility The ASUS CrashFree BIOS 3 utility is an auto recovery...
User Manual
Page 116
... utility screens are for reference only. Please select boot device: SATA: XXXXXXXXXXXXXXXX USB XXXXXXXXXXXXXXXXX UEFI: XXXXXXXXXXXXXXXX Enter Setup ↑ and ↓ to move selection ENTER to select boot device ESC to show the BIOS Boot Device Select Menu. Prepare the motherboard support DVD and a USB flash drive in DOS environment 1. Turn off the computer and disconnect all SATA hard disk drives (optional). Boot your computer. When the ASUS Logo appears, press to boot using defaults 3. Do not save the BIOS file and BIOS Updater to a hard disk drive or USB flash drive...
... utility screens are for reference only. Please select boot device: SATA: XXXXXXXXXXXXXXXX USB XXXXXXXXXXXXXXXXX UEFI: XXXXXXXXXXXXXXXX Enter Setup ↑ and ↓ to move selection ENTER to select boot device ESC to show the BIOS Boot Device Select Menu. Prepare the motherboard support DVD and a USB flash drive in DOS environment 1. Turn off the computer and disconnect all SATA hard disk drives (optional). Boot your computer. When the ASUS Logo appears, press to boot using defaults 3. Do not save the BIOS file and BIOS Updater to a hard disk drive or USB flash drive...
User Manual
Page 119
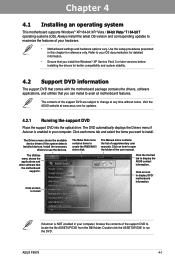
... create the RAID/AHCI driver disk. Click an item to install The Make Disk menu contains items to run the DVD. Always install the latest OS version and corresponding updates to open the folder of the support DVD are subject to use the devices. Click an item to maximize the features of your computer, browse the contents of supplementary user manuals. ASUS P9X79 4-1 Click an icon to display DVD/ motherboard information Chapter...
... create the RAID/AHCI driver disk. Click an item to install The Make Disk menu contains items to run the DVD. Always install the latest OS version and corresponding updates to open the folder of the support DVD are subject to use the devices. Click an item to maximize the features of your computer, browse the contents of supplementary user manuals. ASUS P9X79 4-1 Click an icon to display DVD/ motherboard information Chapter...
User Manual
Page 138
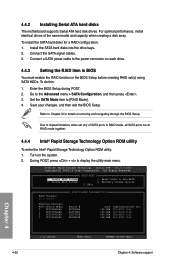
...(R) Rapid Storage Technology - Option ROM - Create RAID Volume 2. Recovery Volume Options 5. 4.4.2 Installing Serial ATA hard disks The motherboard supports Serial ATA hard disk drives. During POST, press + to Non-RAID 4. v10.0.0.1032 Copyright(C) 2003-10 Intel Corporation. Reset Disks to display the utility main menu. For optimal performance, install identical drives of SATA ports to chipset limitation, when set (s) using SATA HDDs. To do this: 1. Enter the BIOS Setup during POST. 2. Save your changes, and then exit the BIOS Setup. Delete RAID Volume 3. Set the SATA Mode item...
...(R) Rapid Storage Technology - Option ROM - Create RAID Volume 2. Recovery Volume Options 5. 4.4.2 Installing Serial ATA hard disks The motherboard supports Serial ATA hard disk drives. During POST, press + to Non-RAID 4. v10.0.0.1032 Copyright(C) 2003-10 Intel Corporation. Reset Disks to display the utility main menu. For optimal performance, install identical drives of SATA ports to chipset limitation, when set (s) using SATA HDDs. To do this: 1. Enter the BIOS Setup during POST. 2. Save your changes, and then exit the BIOS Setup. Delete RAID Volume 3. Set the SATA Mode item...

User Manual
Page 142
.... Plug the USB floppy disk drive and insert a floppy disk. 3. Insert a formatted floppy disk into the USB floppy disk drive, then press . 8. Boot your computer. 2. Press during POST to create a RAID driver disk. 5. Select USB floppy disk drive as the primary boot device. 4. Chapter 4 4-24 Chapter 4: Software support Go to the Make Disk menu, and then click Intel X79 RAID Driver Disk to enter the BIOS setup utility. 3. Follow the succeeding screen instructions to complete the process. 4.5.2 Creating a RAID driver disk in Windows® To create a RAID driver disk in a RAID set...
.... Plug the USB floppy disk drive and insert a floppy disk. 3. Insert a formatted floppy disk into the USB floppy disk drive, then press . 8. Boot your computer. 2. Press during POST to create a RAID driver disk. 5. Select USB floppy disk drive as the primary boot device. 4. Chapter 4 4-24 Chapter 4: Software support Go to the Make Disk menu, and then click Intel X79 RAID Driver Disk to enter the BIOS setup utility. 3. Follow the succeeding screen instructions to complete the process. 4.5.2 Creating a RAID driver disk in Windows® To create a RAID driver disk in a RAID set...
User Manual
Page 143
... the floppy disk with RAID driver into the USB port or the support DVD into the USB floppy disk drive. 3. Click OK. 4. Follow the succeeding screen instructions to complete the installation. 4.5.3 Installing the RAID driver during Windows® OS installation To install the RAID driver in Windows® XP: 1. Insert the USB flash drive with RAID driver into the optical drive, and then click Browse. 3. Follow the succeeding screen instructions to complete the installation. During the OS installation, click Load Driver to allow you have to use...
... the floppy disk with RAID driver into the USB port or the support DVD into the USB floppy disk drive. 3. Click OK. 4. Follow the succeeding screen instructions to complete the installation. 4.5.3 Installing the RAID driver during Windows® OS installation To install the RAID driver in Windows® XP: 1. Insert the USB flash drive with RAID driver into the optical drive, and then click Browse. 3. Follow the succeeding screen instructions to complete the installation. During the OS installation, click Load Driver to allow you have to use...
User Manual
Page 144
Using another computer, plug the USB floppy disk drive, and insert the floppy disk containing the RAID driver. 2. From the Universal Serial Bus controllers, right-click xxxxxx USB Floppy, and then select Properties from the pop-up window. The name of the RAID driver disk to the floppy disk containing the RAID driver. A window appears, allowing you install the RAID driver from a floppy disk during the OS installation. 4.5.4 Using a USB floppy disk drive Due to OS limitation, Windows® XP may not recognize the USB floppy disk drive when you to...
Using another computer, plug the USB floppy disk drive, and insert the floppy disk containing the RAID driver. 2. From the Universal Serial Bus controllers, right-click xxxxxx USB Floppy, and then select Properties from the pop-up window. The name of the RAID driver disk to the floppy disk containing the RAID driver. A window appears, allowing you install the RAID driver from a floppy disk during the OS installation. 4.5.4 Using a USB floppy disk drive Due to OS limitation, Windows® XP may not recognize the USB floppy disk drive when you to...


