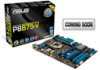

P8B75-V User's Manual
Page 4
... Stack 3-23 3.6 Monitor menu 3-24 3.7 Boot menu 3-27 3.8 Tools menu 3-29 3.8.1 ASUS EZ Flash 2 Utility 3-29 3.8.2. ASUS O.C. Profile 3-29 3.8.3 ASUS SPD Information 3-30 3.9 Exit menu...3-31 3.10 Updating BIOS 3-32 3.10.1 ASUS Update utility 3-32 3.10.2 ASUS EZ Flash 2 utility 3-35 3.10.3 ASUS CrashFree BIOS 3 utility 3-36 3.10.4 ASUS BIOS Updater 3-37 Chapter 4: Software support 4.1 Installing an operating system 4-1 4.2 Support DVD information 4-1 4.2.1 Running...
... Stack 3-23 3.6 Monitor menu 3-24 3.7 Boot menu 3-27 3.8 Tools menu 3-29 3.8.1 ASUS EZ Flash 2 Utility 3-29 3.8.2. ASUS O.C. Profile 3-29 3.8.3 ASUS SPD Information 3-30 3.9 Exit menu...3-31 3.10 Updating BIOS 3-32 3.10.1 ASUS Update utility 3-32 3.10.2 ASUS EZ Flash 2 utility 3-35 3.10.3 ASUS CrashFree BIOS 3 utility 3-36 3.10.4 ASUS BIOS Updater 3-37 Chapter 4: Software support 4.1 Installing an operating system 4-1 4.2 Support DVD information 4-1 4.2.1 Running...

P8B75-V User's Manual
Page 7
... parts: • Chapter 1: Product introduction This chapter describes the features of the support DVD that may have to the ASUS contact information. 2. ASUS websites The ASUS website provides updated information on the motherboard. • Chapter 3: BIOS setup This chapter tells how to install and configure multiple ATI® CrossFireX™ and NVIDIA® SLI™...
... parts: • Chapter 1: Product introduction This chapter describes the features of the support DVD that may have to the ASUS contact information. 2. ASUS websites The ASUS website provides updated information on the motherboard. • Chapter 3: BIOS setup This chapter tells how to install and configure multiple ATI® CrossFireX™ and NVIDIA® SLI™...

P8B75-V User's Manual
Page 11
... x LPT connector BIOS features 64 Mb Flash ROM, UEFI AMI BIOS, PnP, DMI 2.0, WfM 2.0, SM BIOS 2.7, ACPI 4.0, Multi-language BIOS, ASUS EZ Flash 2, ASUS CrashFree BIOS 3, F12 PrintScreen Function...connector 1 x 8-pin EATX 12V power connector 1 x System panel connector 1 x MemOK! xi x 8.6 in . P8B75-V specifications summary Back panel I/O ports 1 x PS/2 keyboard port 1 x PS/2 mouse port 2 x USB 3.0/2.0... I/O ports Internal I /O shield 1 x User Manual Support DVD contents Drivers ASUS Utilities ASUS Update Anti-virus software (OEM version) Form factor ATX form factor: 12 in . (30...
... x LPT connector BIOS features 64 Mb Flash ROM, UEFI AMI BIOS, PnP, DMI 2.0, WfM 2.0, SM BIOS 2.7, ACPI 4.0, Multi-language BIOS, ASUS EZ Flash 2, ASUS CrashFree BIOS 3, F12 PrintScreen Function...connector 1 x 8-pin EATX 12V power connector 1 x System panel connector 1 x MemOK! xi x 8.6 in . P8B75-V specifications summary Back panel I/O ports 1 x PS/2 keyboard port 1 x PS/2 mouse port 2 x USB 3.0/2.0... I/O ports Internal I /O shield 1 x User Manual Support DVD contents Drivers ASUS Utilities ASUS Update Anti-virus software (OEM version) Form factor ATX form factor: 12 in . (30...
P8B75-V User's Manual
Page 17
ASUS EZ-Flash 2 ASUS EZ Flash 2 is European Union's Energy-related Products (ErP) ready, and ErP requires products to meet certain energy efficiency requirement in regards to update the BIOS without using the bundled support DVD or USB flash disk that allows ... far more colorful and vivid image on Windows® 7 based PCs. ASUS CrashFree BIOS 3 ASUS CrashFree BIOS 3 is supported by installed graphics cards. It allows users to convert your screen. ASUS P8B75-V 1-5 ASUS MyLogo2™ This feature allows you to energy consumptions. Its GPU virtualization dynamically...
ASUS EZ-Flash 2 ASUS EZ Flash 2 is European Union's Energy-related Products (ErP) ready, and ErP requires products to meet certain energy efficiency requirement in regards to update the BIOS without using the bundled support DVD or USB flash disk that allows ... far more colorful and vivid image on Windows® 7 based PCs. ASUS CrashFree BIOS 3 ASUS CrashFree BIOS 3 is supported by installed graphics cards. It allows users to convert your screen. ASUS P8B75-V 1-5 ASUS MyLogo2™ This feature allows you to energy consumptions. Its GPU virtualization dynamically...

P8B75-V User's Manual
Page 32
...appear during the tuning process, the system continues memory tuning after using the MemOK! switch Installing DIMMs that you download and update to BIOS overclocking, press the MemOK! switch lights continuously. To stop memory tuning, turn off the computer and replace DIMMs during POST... from the ASUS website at www.asus.com after turning on a bare or opencase system. function. 2-14 Chapter 2: Hardware information 2.2.6 Onboard switches Onboard switches allow you to test one set is tested. Chapter 2 P8B75-V P8B75-V MemOK! This is not properly installed. Turn off ...
...appear during the tuning process, the system continues memory tuning after using the MemOK! switch Installing DIMMs that you download and update to BIOS overclocking, press the MemOK! switch lights continuously. To stop memory tuning, turn off the computer and replace DIMMs during POST... from the ASUS website at www.asus.com after turning on a bare or opencase system. function. 2-14 Chapter 2: Hardware information 2.2.6 Onboard switches Onboard switches allow you to test one set is tested. Chapter 2 P8B75-V P8B75-V MemOK! This is not properly installed. Turn off ...

P8B75-V User's Manual
Page 59
...back on to use as storage device configuration, overclocking settings, advanced power management, and boot device configuration that requires further BIOS settings or update. The term "BIOS" in the following circumstances: • An error message appears on your screen. • Ensure that a USB ... unstable after POST, press + + , or press the reset button on how to "UEFI BIOS" unless otherwise specified. Chapter 3 ASUS P8B75-V 3-1 If you wish to enter Setup after changing any BIOS setting, try to clear the CMOS and reset the motherboard to the default value. �S�...
...back on to use as storage device configuration, overclocking settings, advanced power management, and boot device configuration that requires further BIOS settings or update. The term "BIOS" in the following circumstances: • An error message appears on your screen. • Ensure that a USB ... unstable after POST, press + + , or press the reset button on how to "UEFI BIOS" unless otherwise specified. Chapter 3 ASUS P8B75-V 3-1 If you wish to enter Setup after changing any BIOS setting, try to clear the CMOS and reset the motherboard to the default value. �S�...

P8B75-V User's Manual
Page 88
...: [DIMM_A1] [DIMM_A2] [DIMM_B1] [DIMM_B2] 3-30 Chapter 3: BIOS setup Label Allows you update the BIOS file only coming from the same memory/CPU configuration and BIOS version. 3.8.3 ASUS SPD Information Chapter 3 DIMM Slot # [DIMM_A2] Displays the Serial Presence Detect (SPD) information of the setup profile. Load from one to the BIOS Flash, and create a profile. Save to...
...: [DIMM_A1] [DIMM_A2] [DIMM_B1] [DIMM_B2] 3-30 Chapter 3: BIOS setup Label Allows you update the BIOS file only coming from the same memory/CPU configuration and BIOS version. 3.8.3 ASUS SPD Information Chapter 3 DIMM Slot # [DIMM_A2] Displays the Serial Presence Detect (SPD) information of the setup profile. Load from one to the BIOS Flash, and create a profile. Save to...

P8B75-V User's Manual
Page 90
... main menu bar. The ASUS Update utility allows you to manage, save, and update the motherboard BIOS in the support DVD that allows you update the BIOS using the ASUS Update or BIOS Updater utilities. 3.10.1 ASUS Update utility The ASUS Update is a utility that comes with the motherboard package. 3.10 Updating BIOS The ASUS website publishes the latest BIOS versions to manage and update the motherboard BIOS setup program. 1.
... main menu bar. The ASUS Update utility allows you to manage, save, and update the motherboard BIOS in the support DVD that allows you update the BIOS using the ASUS Update or BIOS Updater utilities. 3.10.1 ASUS Update utility The ASUS Update is a utility that comes with the motherboard package. 3.10 Updating BIOS The ASUS website publishes the latest BIOS versions to manage and update the motherboard BIOS setup program. 1.

P8B75-V User's Manual
Page 91
Updating the BIOS through the Internet To update the BIOS through the Internet: 1. From the ASUS Update screen, select Update BIOS from Internet, and then click Next. 2. Click Next. Chapter 3 4. Follow the onscreen instructions to avoid network traffic. ASUS P8B75-V 3-33 Select the BIOS version that you want to continue. 5. Click Yes if you want to change the BIOS boot logo, which is...
Updating the BIOS through the Internet To update the BIOS through the Internet: 1. From the ASUS Update screen, select Update BIOS from Internet, and then click Next. 2. Click Next. Chapter 3 4. Follow the onscreen instructions to avoid network traffic. ASUS P8B75-V 3-33 Select the BIOS version that you want to continue. 5. Click Yes if you want to change the BIOS boot logo, which is...

P8B75-V User's Manual
Page 92
... ASUS website at www.asus.com for reference only. From the ASUS Update screen, select Update BIOS from the Open window, click Open, and click Next. Click Yes if you want to change the BIOS boot logo. Chapter 3 3. The actual BIOS information vary by models. • Refer to continue. 4. Updating the BIOS through a BIOS file To update the BIOS through a BIOS file: 1. Locate the BIOS...
... ASUS website at www.asus.com for reference only. From the ASUS Update screen, select Update BIOS from the Open window, click Open, and click Next. Click Yes if you want to change the BIOS boot logo. Chapter 3 3. The actual BIOS information vary by models. • Refer to continue. 4. Updating the BIOS through a BIOS file To update the BIOS through a BIOS file: 1. Locate the BIOS...

P8B75-V User's Manual
Page 93
To update the BIOS using this utility, download the latest BIOS from the ASUS website at www.asus.com. Reboot the system when the update process is done. Insert the USB flash disk that contains the latest BIOS, and then press . 5. ASUS P8B75-V 3-35 Press to switch to use a bootable floppy disk or an OS‑based utility. 3.10.2 ASUS EZ...
To update the BIOS using this utility, download the latest BIOS from the ASUS website at www.asus.com. Reboot the system when the update process is done. Insert the USB flash disk that contains the latest BIOS, and then press . 5. ASUS P8B75-V 3-35 Press to switch to use a bootable floppy disk or an OS‑based utility. 3.10.2 ASUS EZ...

P8B75-V User's Manual
Page 94
... the system while updating the BIOS to load default BIOS values. Ensure to load the BIOS default settings to the USB port. 3. The BIOS file in the motherboard support DVD may be older than the BIOS file published on the system. 2. The utility automatically checks the devices for details. 3.10.3 ASUS CrashFree BIOS 3 utility The ASUS CrashFree BIOS 3 utility is...
... the system while updating the BIOS to load default BIOS values. Ensure to load the BIOS default settings to the USB port. 3. The BIOS file in the motherboard support DVD may be older than the BIOS file published on the system. 2. The utility automatically checks the devices for details. 3.10.3 ASUS CrashFree BIOS 3 utility The ASUS CrashFree BIOS 3 utility is...

P8B75-V User's Manual
Page 95
... the optical drive and select the optical drive as the boot device. At the FreeDOS prompt, type d: and press to switch the disk from the ASUS website at http:// support.asus.com and save the BIOS file and BIOS Updater to update BIOS in DOS environment. ASUS P8B75-V 3-37 Before updating BIOS 1. NTFS is not supported under DOS environment.
... the optical drive and select the optical drive as the boot device. At the FreeDOS prompt, type d: and press to switch the disk from the ASUS website at http:// support.asus.com and save the BIOS file and BIOS Updater to update BIOS in DOS environment. ASUS P8B75-V 3-37 Before updating BIOS 1. NTFS is not supported under DOS environment.

P8B75-V User's Manual
Page 96
... to connect all SATA hard disk drives after updating BIOS. • Ensure to load the BIOS default settings to exit BIOS Updater. Restart your motherboard user manual for details. • Ensure to select the BIOS file and press . See Chaper 3 of your computer. The BIOS Updater screen appears as below. When BIOS update is done, press to ensure system compatibility...
... to connect all SATA hard disk drives after updating BIOS. • Ensure to load the BIOS default settings to exit BIOS Updater. Restart your motherboard user manual for details. • Ensure to select the BIOS file and press . See Chaper 3 of your computer. The BIOS Updater screen appears as below. When BIOS update is done, press to ensure system compatibility...

P8B75-V User's Manual
Page 101
...tab, then click AI Suite II. 3. Chapter 4 Click to customize the interface settings Click to show the system information Click to update the motherboard BIOS Click to monitor sensors or CPU frequency Click to select a utility Shortcut to the optical drive. Place the support DVD to the.... 2. The actual screenshots vary with models. • The screeshots of the applications in the support DVD have wizards that integrates several ASUS utilities and allows users to complete installation. 4.3 Software information Most of AI Suite II in this user manual are for reference only. ...
...tab, then click AI Suite II. 3. Chapter 4 Click to customize the interface settings Click to show the system information Click to update the motherboard BIOS Click to monitor sensors or CPU frequency Click to select a utility Shortcut to the optical drive. Place the support DVD to the.... 2. The actual screenshots vary with models. • The screeshots of the applications in the support DVD have wizards that integrates several ASUS utilities and allows users to complete installation. 4.3 Software information Most of AI Suite II in this user manual are for reference only. ...

P8B75-V User's Manual
Page 110
... be risks of system crash when updating BIOS. ASUS P8B75-V 4-13 Chapter 4 4.3.9 ASUS Update ASUS Update lays out the options for updating BIOS on your system or simply save for later use . • Update BIOS from file Use the BIOS utility demanded from the motherboard support DVD, launch ASUS Update by following the directions on this convenient updating feature. Launching ASUS Update After installing AI Suite II from...
... be risks of system crash when updating BIOS. ASUS P8B75-V 4-13 Chapter 4 4.3.9 ASUS Update ASUS Update lays out the options for updating BIOS on your system or simply save for later use . • Update BIOS from file Use the BIOS utility demanded from the motherboard support DVD, launch ASUS Update by following the directions on this convenient updating feature. Launching ASUS Update After installing AI Suite II from...

P8B75-V User's Manual
Page 111
... ASUS Update After installing AI Suite II from the very beginning! Under Current BIOS, click Browse and choose the desired image for your computer from the motherboard support DVD, launch MyLogo by clicking Update > MyLogo on Next. 4.3.10 MyLogo2 This MyLogo utility lets you would like to do update ...your boot logo. Personalize your boot logo. Change the BIOS boot logo of my motherboard 1. Then click on the AI...
... ASUS Update After installing AI Suite II from the very beginning! Under Current BIOS, click Browse and choose the desired image for your computer from the motherboard support DVD, launch MyLogo by clicking Update > MyLogo on Next. 4.3.10 MyLogo2 This MyLogo utility lets you would like to do update ...your boot logo. Personalize your boot logo. Change the BIOS boot logo of my motherboard 1. Then click on the AI...

P8B75-V User's Manual
Page 112
...next time you detect the compatibility of a downloaded BIOS file and update (or do not update) this BIOS to the motherboard 1. This utility will help you restart your system. Click Next. 3. Chapter 4 The fullscreen logo application in Change the BIOS boot logo of my motherboard to your computer.... Change the boot logo of the BIOS version. 2. Then at Picture File, Browse to select the desired image for MyLogo to the boot logo. 5. ASUS P8B75-V 4-15 Click on Flash to start updating the image to take effect. Follow steps 2~5 in BIOS utility must be enabled for boot logo...
...next time you detect the compatibility of a downloaded BIOS file and update (or do not update) this BIOS to the motherboard 1. This utility will help you restart your system. Click Next. 3. Chapter 4 The fullscreen logo application in Change the BIOS boot logo of my motherboard to your computer.... Change the boot logo of the BIOS version. 2. Then at Picture File, Browse to select the desired image for MyLogo to the boot logo. 5. ASUS P8B75-V 4-15 Click on Flash to start updating the image to take effect. Follow steps 2~5 in BIOS utility must be enabled for boot logo...

P8B75-V User's Manual
Page 121
10. Click Next after deleting the partition. 13. Go to recover the Intel® Rapid Start Technology partition. 12. Tick I accept the terms in the BIOS before applying the Intel® Smart Connect Technology. Click Finish to Advanced Mode > Advanced > PCH Configuration, and enable the Intel® Smart Connect Technology. Place ... wizard appears, click Next to your computer's platform. Installing the Intel® Smart Connect Technology 1. Extend volume setup is a feature that provides the latest content updates and energy efficiency to begin the setup. 4.
10. Click Next after deleting the partition. 13. Go to recover the Intel® Rapid Start Technology partition. 12. Tick I accept the terms in the BIOS before applying the Intel® Smart Connect Technology. Click Finish to Advanced Mode > Advanced > PCH Configuration, and enable the Intel® Smart Connect Technology. Place ... wizard appears, click Next to your computer's platform. Installing the Intel® Smart Connect Technology 1. Extend volume setup is a feature that provides the latest content updates and energy efficiency to begin the setup. 4.


