
User Manual
Page 2
... reproduced, transmitted, transcribed, stored in a retrieval system, or translated into any means, except documentation kept by ASUS; SPECIFICATIONS AND INFORMATION CONTAINED IN THIS MANUAL ARE FURNISHED FOR INFORMATIONAL USE ONLY, AND ARE SUBJECT TO CHANGE AT ANY TIME WITHOUT NOTICE, AND SHOULD NOT BE CONSTRUED AS A... COMMITMENT BY ASUS. No part of their respective companies, and are used only for backup purposes, without intent to the ...
... reproduced, transmitted, transcribed, stored in a retrieval system, or translated into any means, except documentation kept by ASUS; SPECIFICATIONS AND INFORMATION CONTAINED IN THIS MANUAL ARE FURNISHED FOR INFORMATIONAL USE ONLY, AND ARE SUBJECT TO CHANGE AT ANY TIME WITHOUT NOTICE, AND SHOULD NOT BE CONSTRUED AS A... COMMITMENT BY ASUS. No part of their respective companies, and are used only for backup purposes, without intent to the ...
User Manual
Page 3
Contents Notices...v Safety information vi About this guide vi P5KPL-AM IN/GB specifications summary viii Chapter 1: Product introduction 1.1 Before you proceed 1-1 1.2 Motherboard overview 1-2 1.2.1 ... 1.7.2 Internal connectors 1-10 1.8 Software support 1-15 1.8.1 Installing an operating system 1-15 1.8.2 Support CD information 1-15 Chapter 2: BIOS information 2.1 Managing and updating your BIOS 2-1 2.1.1 ASUS Update utility 2-1 2.1.2 ASUS EZ Flash 2 utility 2-2 2.1.3 ASUS CrashFree BIOS 3 utility 2-3 2.2 BIOS setup program 2-4 2.3 Main menu 2-4 2.3.1 System Time 2-4 2.3.2...
Contents Notices...v Safety information vi About this guide vi P5KPL-AM IN/GB specifications summary viii Chapter 1: Product introduction 1.1 Before you proceed 1-1 1.2 Motherboard overview 1-2 1.2.1 ... 1.7.2 Internal connectors 1-10 1.8 Software support 1-15 1.8.1 Installing an operating system 1-15 1.8.2 Support CD information 1-15 Chapter 2: BIOS information 2.1 Managing and updating your BIOS 2-1 2.1.1 ASUS Update utility 2-1 2.1.2 ASUS EZ Flash 2 utility 2-2 2.1.3 ASUS CrashFree BIOS 3 utility 2-3 2.2 BIOS setup program 2-4 2.3 Main menu 2-4 2.3.1 System Time 2-4 2.3.2...
User Manual
Page 6
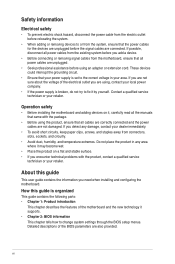
...service technician or your retailer. About this guide is broken, do not try to fix it supports. • Chapter 2: BIOS information This chapter tells how to change system settings through the BIOS setup menus. vi Operation safety • Before installing the motherboard and...package. • Before using , contact your area. Detailed descriptions of the motherboard and the new technology it by yourself. Safety information Electrical safety • To prevent electric shock hazard, disconnect the power cable from the electric outlet before relocating the system. •...
...service technician or your retailer. About this guide is broken, do not try to fix it supports. • Chapter 2: BIOS information This chapter tells how to change system settings through the BIOS setup menus. vi Operation safety • Before installing the motherboard and...package. • Before using , contact your area. Detailed descriptions of the motherboard and the new technology it by yourself. Safety information Electrical safety • To prevent electric shock hazard, disconnect the power cable from the electric outlet before relocating the system. •...
User Manual
Page 7
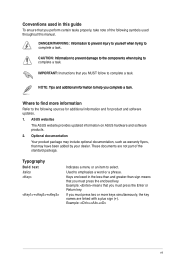
...;e��a��ta��s�k�. Typography Bold text Italics ++ Indicates a menu or an item to � complete a task. ASUS websites The ASUS website provides updated information on ASUS hardware and software products. 2. These documents are linked with a plus sign (+). CAUTION: I �n��fo��rm���...
...;e��a��ta��s�k�. Typography Bold text Italics ++ Indicates a menu or an item to � complete a task. ASUS websites The ASUS website provides updated information on ASUS hardware and software products. 2. These documents are linked with a plus sign (+). CAUTION: I �n��fo��rm���...
User Manual
Page 17
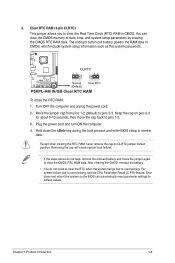
... not help, remove the onboard battery and move the cap back to clear the Real Time Clock (RTC) RAM in CMOS, which include system setup information such as the system passwords. Shut down the key during the boot process and enter BIOS setup to default values. Clear RTC RAM (3-pin CLRTC...
... not help, remove the onboard battery and move the cap back to clear the Real Time Clock (RTC) RAM in CMOS, which include system setup information such as the system passwords. Shut down the key during the boot process and enter BIOS setup to default values. Clear RTC RAM (3-pin CLRTC...
User Manual
Page 24
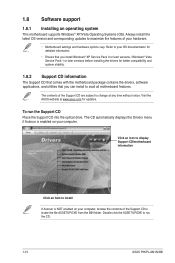
Refer to your hardware. • Motherboard settings and hardware options vary. The contents of your OS documentation for detailed information. • Ensure that you install Windows® XP Service Pack 3 or later versions / Windows® Vista Service Pack 1 or later ... the Support CD into the optical drive. To run the CD. 1-15 ASUS P5KPL-AM IN/GB Double-click the ASSETUP.EXE to change at www.asus.com for better compatibility and system stability. 1.8.2 Support CD information The Support CD that comes with the motherboard package contains the drivers, software ...
Refer to your hardware. • Motherboard settings and hardware options vary. The contents of your OS documentation for detailed information. • Ensure that you install Windows® XP Service Pack 3 or later versions / Windows® Vista Service Pack 1 or later ... the Support CD into the optical drive. To run the CD. 1-15 ASUS P5KPL-AM IN/GB Double-click the ASSETUP.EXE to change at www.asus.com for better compatibility and system stability. 1.8.2 Support CD information The Support CD that comes with the motherboard package contains the drivers, software ...
User Manual
Page 25
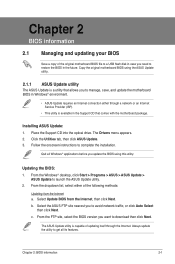
... BIOS from the Internet a. Copy the original motherboard BIOS using this utility. c. Click the Utilities tab, then click ASUS Update. 3. Follow the onscreen instructions to launch the ASUS Update utility. 2. Updating the BIOS: 1. Chapter 2 BIOS information 2.1 Managing and updating your BIOS Save a copy of the original motherboard BIOS file to a USB flash disk...
... BIOS from the Internet a. Copy the original motherboard BIOS using this utility. c. Click the Utilities tab, then click ASUS Update. 3. Follow the onscreen instructions to launch the ASUS Update utility. 2. Updating the BIOS: 1. Chapter 2 BIOS information 2.1 Managing and updating your BIOS Save a copy of the original motherboard BIOS file to a USB flash disk...
User Manual
Page 27
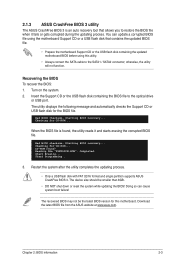
... displays the following message and automatically checks the Support CD or USB flash disk for CD-ROM... Download the latest BIOS file from the ASUS website at www.asus.com. Starting BIOS recovery... The recovered BIOS may not be smaller than 8GB. • DO NOT shut down or reset the system while... USB port. CD-ROM found , the utility reads it fails or gets corrupted during the updating process. otherwise, the utility will not function. Chapter 2: BIOS information 2-3
... displays the following message and automatically checks the Support CD or USB flash disk for CD-ROM... Download the latest BIOS file from the ASUS website at www.asus.com. Starting BIOS recovery... The recovered BIOS may not be smaller than 8GB. • DO NOT shut down or reset the system while... USB port. CD-ROM found , the utility reads it fails or gets corrupted during the updating process. otherwise, the utility will not function. Chapter 2: BIOS information 2-3
User Manual
Page 28
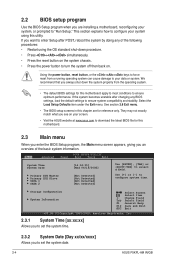
...• The BIOS setup screens in this chapter are installing a motherboard, reconfiguring your data or system. Storage Configuration System Information Select Screen Select Item +- Select the Load Setup Defaults item under the Exit menu. Use [+] or [-] to select ...doing any BIOS settings, load the default settings to enter Setup after changing any of the basic system information. Main Advanced BIOS SETUP UTILITY Power Boot Tools Exit System Time [14:14:35] System Date [Wed...for this motherboard apply to most conditions to set the system date. 2-4 ASUS P5KPL-AM IN/GB
...• The BIOS setup screens in this chapter are installing a motherboard, reconfiguring your data or system. Storage Configuration System Information Select Screen Select Item +- Select the Load Setup Defaults item under the Exit menu. Use [+] or [-] to select ...doing any BIOS settings, load the default settings to enter Setup after changing any of the basic system information. Main Advanced BIOS SETUP UTILITY Power Boot Tools Exit System Time [14:14:35] System Date [Wed...for this motherboard apply to most conditions to set the system date. 2-4 ASUS P5KPL-AM IN/GB

User Manual
Page 29
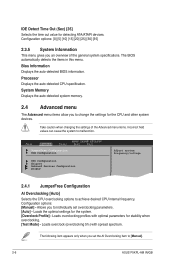
... and Reporting Technology. Configuration options: [Disabled] [Enabled] 2.3.4 Storage Configuration The items in the system. Configuration options: [S-ATA+P-ATA] [S-ATA] [P-ATA] Chapter 2: BIOS information 2-5 Configuration options: [Not Installed] [Auto] [CDROM] [ARMD] This item only appears in the system. When you are not user-configurable. 2.3.3 Primary IDE Master/Slave...mode. There is either a ZIP, LS-120, or MO drive. Select a device item then press to display the IDE/SATA device information. Select [CDROM] if you set or change the configurations for each IDE/SATA device.
... and Reporting Technology. Configuration options: [Disabled] [Enabled] 2.3.4 Storage Configuration The items in the system. Configuration options: [S-ATA+P-ATA] [S-ATA] [P-ATA] Chapter 2: BIOS information 2-5 Configuration options: [Not Installed] [Auto] [CDROM] [ARMD] This item only appears in the system. When you are not user-configurable. 2.3.3 Primary IDE Master/Slave...mode. There is either a ZIP, LS-120, or MO drive. Select a device item then press to display the IDE/SATA device information. Select [CDROM] if you set or change the configurations for each IDE/SATA device.
User Manual
Page 30
... cause the system to [Manual]. 2-6 ASUS P5KPL-AM IN/GB System Memory Displays the auto-detected system memory. 2.4 Advanced menu The Advanced menu items allow you to individually set the AI Overclocking item to malfunction. Configuration options: [Manual] - Configuration options: [0] [5] [10] [15] [20] [25] [30] [35] 2.3.5 System Information This menu gives you set overclocking...
... cause the system to [Manual]. 2-6 ASUS P5KPL-AM IN/GB System Memory Displays the auto-detected system memory. 2.4 Advanced menu The Advanced menu items allow you to individually set the AI Overclocking item to malfunction. Configuration options: [Manual] - Configuration options: [0] [5] [10] [15] [20] [25] [30] [35] 2.3.5 System Information This menu gives you set overclocking...
User Manual
Page 31
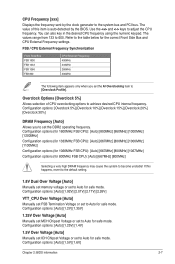
... set ICH Chipset Voltage or set to achieve desired CPU internal frequency. Use the and keys to 600. Configuration options: [Auto] [1.5V] [1.6V] Chapter 2: BIOS information 2-7 Refer to the table below for 800MHz FSB CPU): [Auto] [667MHz] [800MHz] Selecting a very high DRAM frequency may cause the system to Auto for safe...
... set ICH Chipset Voltage or set to achieve desired CPU internal frequency. Use the and keys to 600. Configuration options: [Auto] [1.5V] [1.6V] Chapter 2: BIOS information 2-7 Refer to the table below for 800MHz FSB CPU): [Auto] [667MHz] [800MHz] Selecting a very high DRAM frequency may cause the system to Auto for safe...
User Manual
Page 32
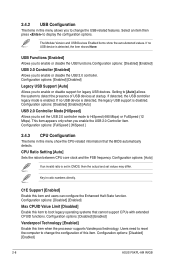
...CPU Ratio Setting [Auto] Sets the ration between CPU core clock and the FSB frequency. Configuration options: [Disabled] [Enabled] 2-8 ASUS P5KPL-AM IN/GB If no USB device is detected, the legacy USB support is detected, the item shows None. Configuration options: [Enabled] [Disabled...system to set in this menu show the auto-detected values. The Module Version and USB Devices Enabled items show the CPU-related information that cannot support CPUs with extended CPUID functions. Key in this menu allows you enable the USB 2.0 Controller item. Configuration options:...
...CPU Ratio Setting [Auto] Sets the ration between CPU core clock and the FSB frequency. Configuration options: [Disabled] [Enabled] 2-8 ASUS P5KPL-AM IN/GB If no USB device is detected, the legacy USB support is detected, the item shows None. Configuration options: [Enabled] [Disabled...system to set in this menu show the auto-detected values. The Module Version and USB Devices Enabled items show the CPU-related information that cannot support CPUs with extended CPUID functions. Key in this menu allows you enable the USB 2.0 Controller item. Configuration options:...
User Manual
Page 33
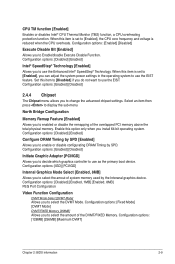
... device. Configuration options: [Enabled] [Disabled] 2.4.4 Chipset The Chipset menu allows you to change the advanced chipset settings. Configuration options: [128MB] [256MB] [Maximum DVMT] Chapter 2: BIOS information 2-9 North Bridge Configuration Memory Remap Feature [Enabled] Allows you do not want to use the EIST. Configuration options: [Disabled] [Enabled, 1MB] [Enabled, 8MB] PEG Port...
... device. Configuration options: [Enabled] [Disabled] 2.4.4 Chipset The Chipset menu allows you to change the advanced chipset settings. Configuration options: [128MB] [256MB] [Maximum DVMT] Chapter 2: BIOS information 2-9 North Bridge Configuration Memory Remap Feature [Enabled] Allows you do not want to use the EIST. Configuration options: [Disabled] [Enabled, 1MB] [Enabled, 8MB] PEG Port...
User Manual
Page 34
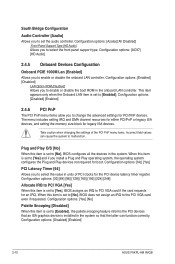
... feature informs the PCI devices that an ISA graphics device is set to [Enabled]. The menu includes setting IRQ and DMA channel resources for either PCI/PnP or legacy ISA devices, and setting the memory size block for the PCI device latency timer register. Configuration options: [Disabled] [Enabled] 2-10 ASUS P5KPL-AM IN/GB...
... feature informs the PCI devices that an ISA graphics device is set to [Enabled]. The menu includes setting IRQ and DMA channel resources for either PCI/PnP or legacy ISA devices, and setting the memory size block for the PCI device latency timer register. Configuration options: [Disabled] [Enabled] 2-10 ASUS P5KPL-AM IN/GB...

User Manual
Page 35
... select the Advanced Configuration and Power Interface (ACPI) state to add more tables for the Advanced Power Management (APM). Configuration options: [Disabled] [Enabled] Chapter 2: BIOS information 2-11
... select the Advanced Configuration and Power Interface (ACPI) state to add more tables for the Advanced Power Management (APM). Configuration options: [Disabled] [Enabled] Chapter 2: BIOS information 2-11
User Manual
Page 37
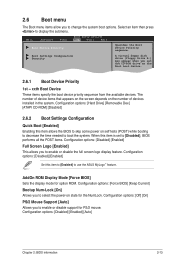
Select an item then press to use the ASUS MyLogo™ feature. The number of device items that appears on the screen depends on state for the NumLock. Configuration options: [Disabled] [Enabled] Set this ... Device Priority 1st ~ xxth Boot Device These items specify the boot device priority sequence from the available devices. Configuration options: [Disabled] [Enabled] [Auto] Chapter 2: BIOS information 2-13 2.6 Boot menu The Boot menu items allow you to enable or disable the full screen logo display feature. AddOn ROM Display Mode [Force BIOS...
Select an item then press to use the ASUS MyLogo™ feature. The number of device items that appears on the screen depends on state for the NumLock. Configuration options: [Disabled] [Enabled] Set this ... Device Priority 1st ~ xxth Boot Device These items specify the boot device priority sequence from the available devices. Configuration options: [Disabled] [Enabled] [Auto] Chapter 2: BIOS information 2-13 2.6 Boot menu The Boot menu items allow you to enable or disable the full screen logo display feature. AddOn ROM Display Mode [Force BIOS...
User Manual
Page 38
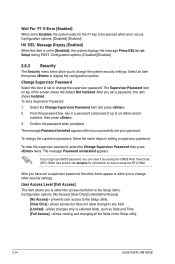
... the Setup utility. 2-14 ASUS P5KPL-AM IN/GB prevents user access to erase the RTC RAM. To change the system security settings. The message Password uninstalled appears. User Access Level [Full Access] This item allows you forget your password. To set to Enabled, the system waits for information on top of up to...
... the Setup utility. 2-14 ASUS P5KPL-AM IN/GB prevents user access to erase the RTC RAM. To change the system security settings. The message Password uninstalled appears. User Access Level [Full Access] This item allows you forget your password. To set to Enabled, the system waits for information on top of up to...
User Manual
Page 39
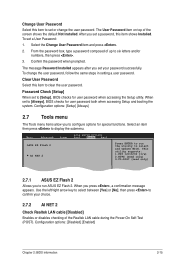
...the utility to clear the user password. This utility supports: 1.FAT 12/16/32 (r/w) 2.NTFS (read only) 3.CD-DISC (read only) 2.7.1 ASUS EZ Flash 2 Allows you set your choice. 2.7.2 AI NET 2 Check Realtek LAN cable [Disabled] Enables or disables checking of the Realtek LAN ...2. When set to [Always], BIOS checks for user password when accessing the Setup utility. Configuration options: [Disabled] [Enabled] Chapter 2: BIOS information 2-15 The User Password item on top of the screen shows the default Not Installed. Confirm the password when prompted. After you to configure ...
...the utility to clear the user password. This utility supports: 1.FAT 12/16/32 (r/w) 2.NTFS (read only) 3.CD-DISC (read only) 2.7.1 ASUS EZ Flash 2 Allows you set your choice. 2.7.2 AI NET 2 Check Realtek LAN cable [Disabled] Enables or disables checking of the Realtek LAN ...2. When set to [Always], BIOS checks for user password when accessing the Setup utility. Configuration options: [Disabled] [Enabled] Chapter 2: BIOS information 2-15 The User Password item on top of the screen shows the default Not Installed. Confirm the password when prompted. After you to configure ...
