
User Manual
Page 48
The touchpad is fully compatible with some application software. DO NOT use any objects in place of your finger to operate the touchpad or else damage may occur to the touchpad's surface. 48 Notebook PC User Manual therefore, mechanical failures can be avoided. Pointer Movement Right Click Left Click IMPORTANT! Pointing Device The Notebook PC's integrated touchpad pointing device is pressure sensitive and contains no moving parts; A device driver is still required for working with all two/three-button and scrolling knob PS/2 mice.
The touchpad is fully compatible with some application software. DO NOT use any objects in place of your finger to operate the touchpad or else damage may occur to the touchpad's surface. 48 Notebook PC User Manual therefore, mechanical failures can be avoided. Pointer Movement Right Click Left Click IMPORTANT! Pointing Device The Notebook PC's integrated touchpad pointing device is pressure sensitive and contains no moving parts; A device driver is still required for working with all two/three-button and scrolling knob PS/2 mice.

User Manual
Page 76
... peripherals through a single cable. USB Hub (Optional) Attaching an optional USB hub will work simultaneously with the Notebook PC's built-in current operating systems, no drivers are necessary.
... peripherals through a single cable. USB Hub (Optional) Attaching an optional USB hub will work simultaneously with the Notebook PC's built-in current operating systems, no drivers are necessary.
User Manual
Page 77
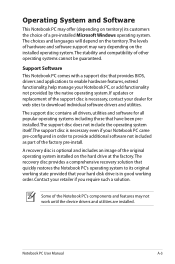
... the original operating system installed on the territory.The levels of hardware and software support may not work until the device drivers and utilities are installed. If updates or replacement of the factory pre-install. The support disc contains all popular operating ...systems including those that provides BIOS, drivers and applications to its customers the choice of other operating systems cannot be guaranteed. Notebook PC User Manual A-3 The choices and...
... the original operating system installed on the territory.The levels of hardware and software support may not work until the device drivers and utilities are installed. If updates or replacement of the factory pre-install. The support disc contains all popular operating ...systems including those that provides BIOS, drivers and applications to its customers the choice of other operating systems cannot be guaranteed. Notebook PC User Manual A-3 The choices and...

User Manual
Page 81
Unknown Reason - If not the case, try again. 2. System Unstable Cannot wake up from the ASUS website. Remove upgraded parts (RAM, HDD, WLAN, BT) if they were installed after purchase. 2. Hardware Problem - If updating the BIOS does not help, try better... persists, try again. 3. Notebook PC User Manual A-7 You must backup all your local service center and ask an engineer for assistance. Reinstall the "ATK0100" driver from the driver CD or download it from the hibernation. 1. A. Optical Disc The optical disc drive is disabled. Keyboard / Hotkey The Hotkey (FN) is not able to...
Unknown Reason - If not the case, try again. 2. System Unstable Cannot wake up from the ASUS website. Remove upgraded parts (RAM, HDD, WLAN, BT) if they were installed after purchase. 2. Hardware Problem - If updating the BIOS does not help, try better... persists, try again. 3. Notebook PC User Manual A-7 You must backup all your local service center and ask an engineer for assistance. Reinstall the "ATK0100" driver from the driver CD or download it from the hibernation. 1. A. Optical Disc The optical disc drive is disabled. Keyboard / Hotkey The Hotkey (FN) is not able to...

User Manual
Page 82
...the latest version and try again. 4. Power ON by Battery only? (Y = 2, N = 4) 2. Able to solve the problem. 3. Try reinstalling the webcam driver to see BIOS (ASUS Logo)? (Y = 7, N = A) 7. If the problem still exist, contact your local service center and ask an engineer for a one-year-warranty using the Notebook...-in the Notebook PC. Battery Battery maintenance. 1. Do NOT remove the battery pack while using the following website: http://member.asus.com/login.aspx?SLanguage=en-us 2. Hardware Problem - Diagnostics: 1. Check "Device Manager" to prevent over-charging so it ...
...the latest version and try again. 4. Power ON by Battery only? (Y = 2, N = 4) 2. Able to solve the problem. 3. Try reinstalling the webcam driver to see BIOS (ASUS Logo)? (Y = 7, N = A) 7. If the problem still exist, contact your local service center and ask an engineer for a one-year-warranty using the Notebook...-in the Notebook PC. Battery Battery maintenance. 1. Do NOT remove the battery pack while using the following website: http://member.asus.com/login.aspx?SLanguage=en-us 2. Hardware Problem - Diagnostics: 1. Check "Device Manager" to prevent over-charging so it ...

User Manual
Page 85
CAUTION! Ensure that you have installed an anti-virus software and Internet firewall to the Internet before recovering. 5. IMPORTANT! You must backup all your local service center and ask an engineer for assistance. If problem still cannot be recognized. 6. If the problem still exist, contact your data to another location before you install the "Intel INF Update" and "ATKACPI" drivers first so that hardware devices can be solved, use the recovery process to reinstall your entire system. Notebook PC User Manual A-11 DO NOT connect to protect yourself from viruses.
CAUTION! Ensure that you have installed an anti-virus software and Internet firewall to the Internet before recovering. 5. IMPORTANT! You must backup all your local service center and ask an engineer for assistance. If problem still cannot be recognized. 6. If the problem still exist, contact your data to another location before you install the "Intel INF Update" and "ATKACPI" drivers first so that hardware devices can be solved, use the recovery process to reinstall your entire system. Notebook PC User Manual A-11 DO NOT connect to protect yourself from viruses.

User Manual
Page 87
... option deletes only the first partition and allows you have problems with the recovery process. Take your Notebook PC to an authorized ASUS service center if you to keep other partitions,and to create a new system partition as drive"C". About the Recovery Partition The ...used to its original working state. Using the Recovery Partition: 1. Read the ASUS Preload Wizard messages and click Next. 5. Before using the Recovery Partition, copy your Notebook PC's software to restore the operating system, drivers, and utilities installed on your hard disk drive and creates a new system ...
... option deletes only the first partition and allows you have problems with the recovery process. Take your Notebook PC to an authorized ASUS service center if you to keep other partitions,and to create a new system partition as drive"C". About the Recovery Partition The ...used to its original working state. Using the Recovery Partition: 1. Read the ASUS Preload Wizard messages and click Next. 5. Before using the Recovery Partition, copy your Notebook PC's software to restore the operating system, drivers, and utilities installed on your hard disk drive and creates a new system ...

User Manual
Page 88
Visit the ASUS website at www.asus.com for updated drivers and utilities. Double-click the AI Recovery Burner icon on selected models) Creating the Recovery DVD: 1. Prepare enough blank writable DVDs as instructed to complete ...
Visit the ASUS website at www.asus.com for updated drivers and utilities. Double-click the AI Recovery Burner icon on selected models) Creating the Recovery DVD: 1. Prepare enough blank writable DVDs as instructed to complete ...

User Manual
Page 89
Ensure to your important data before the system recovery. 5. Visit the ASUS website at www.asus.com for updated drivers and utilities. Select OK to start to complete the recovery process. Follow the onscreen instructions to restore the image. 4. Ensure to connect the power adapter ...
Ensure to your important data before the system recovery. 5. Visit the ASUS website at www.asus.com for updated drivers and utilities. Select OK to start to complete the recovery process. Follow the onscreen instructions to restore the image. 4. Ensure to connect the power adapter ...


