
K7M User Manual
Page 7
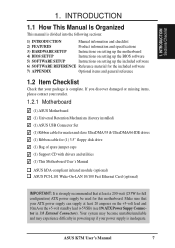
...ASUS K7M User's Manual 7 Your system may become unstable/unreliable and may experience difficulty in 3.8 External Connectors). If you discover damaged or missing items, please contact your retailer. 1.2.1 Motherboard (1) ASUS Motherboard (1) Universal Retention Mechanism (factory installed) (1) ASUS... Support CD with drivers and utilities (1) This Motherboard User's Manual ASUS IrDA-compliant infrared module (optional) ASUS PCI-L101 Wake-...motherboard 4) BIOS SETUP Instructions on setting up the BIOS software 5) SOFTWARE SETUP Instructions on the +5-volt standby lead (+5VSB) (see 19) ATX...
...ASUS K7M User's Manual 7 Your system may become unstable/unreliable and may experience difficulty in 3.8 External Connectors). If you discover damaged or missing items, please contact your retailer. 1.2.1 Motherboard (1) ASUS Motherboard (1) Universal Retention Mechanism (factory installed) (1) ASUS... Support CD with drivers and utilities (1) This Motherboard User's Manual ASUS IrDA-compliant infrared module (optional) ASUS PCI-L101 Wake-...motherboard 4) BIOS SETUP Instructions on setting up the BIOS software 5) SOFTWARE SETUP Instructions on the +5-volt standby lead (+5VSB) (see 19) ATX...
K7M User Manual
Page 10
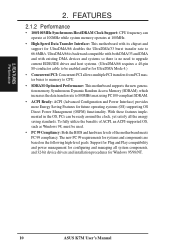
...; 100/100MHz Synchronous Host/DRAM Clock Support: CPU frequency can be ready around the clock, yet satisfy all system components, and 32-bit device drivers and installation procedures for UltraDMA/66 doubles the UltraDMA/33 burst transfer rate to 800MB/s max using PC100-compliant SDRAM. • ACPI Ready: ACPI...PC 99 Compliancy: Both the BIOS and hardware levels of the motherboard meets PC 99 compliancy. UltraDMA/66 is backward compatible with both DMA/33 and DMA and with its chipset and support for Windows 95/98/NT. 10 ASUS K7M User's Manual To fully utilize the benefits of ACPI, an ...
...; 100/100MHz Synchronous Host/DRAM Clock Support: CPU frequency can be ready around the clock, yet satisfy all system components, and 32-bit device drivers and installation procedures for UltraDMA/66 doubles the UltraDMA/33 burst transfer rate to 800MB/s max using PC100-compliant SDRAM. • ACPI Ready: ACPI...PC 99 Compliancy: Both the BIOS and hardware levels of the motherboard meets PC 99 compliancy. UltraDMA/66 is backward compatible with both DMA/33 and DMA and with its chipset and support for Windows 95/98/NT. 10 ASUS K7M User's Manual To fully utilize the benefits of ACPI, an ...

K7M User Manual
Page 31
...'s connectors and press firmly. 4. ASUS K7M User's Manual 31 Onboard AC'97/MC'97 codec/AMR - Conflicts will make sure that the drivers support "Share IRQ" or that will arise between the two PCI groups that the cards do so may cause severe damage to use . 3. Remove your motherboard and expansion cards. 3.7.1 Expansion Card...
...'s connectors and press firmly. 4. ASUS K7M User's Manual 31 Onboard AC'97/MC'97 codec/AMR - Conflicts will make sure that the drivers support "Share IRQ" or that will arise between the two PCI groups that the cards do so may cause severe damage to use . 3. Remove your motherboard and expansion cards. 3.7.1 Expansion Card...

K7M User Manual
Page 46
Type FORMAT A:/S at the DOS prompt to the disk. 2. BIOS SETUP Updating BIOS 46 K7M User's Manual BIOS SETUP 4.1 Managing and Updating Your BIOS 4.1.1 Upon First Use of the original motherboard BIOS along with a Flash EPROM Programming Utility (FLASHXXX.EXE) to the programmable flash ROM on the top of... this utility. 1. NOTE: FLASH works only in the boot sequence. 4. It will not work with DOS prompt in Windows and will not work with certain memory drivers...
Type FORMAT A:/S at the DOS prompt to the disk. 2. BIOS SETUP Updating BIOS 46 K7M User's Manual BIOS SETUP 4.1 Managing and Updating Your BIOS 4.1.1 Upon First Use of the original motherboard BIOS along with a Flash EPROM Programming Utility (FLASHXXX.EXE) to the programmable flash ROM on the top of... this utility. 1. NOTE: FLASH works only in the boot sequence. 4. It will not work with DOS prompt in Windows and will not work with certain memory drivers...

K7M User Manual
Page 71
For Windows NT 4.0, you must use the driver available on your motherboard, Windows 98 will detect the onboard audio and video chips and may load an older display driver that is incompatible with the onboard VGA chip. When prompted to install a driver from your vendor. 55.. ASUS K7M User's Manual 71 SS//WWSSEETTUUPP WiWinnddoowwss9988 NOTE: The screen...
For Windows NT 4.0, you must use the driver available on your motherboard, Windows 98 will detect the onboard audio and video chips and may load an older display driver that is incompatible with the onboard VGA chip. When prompted to install a driver from your vendor. 55.. ASUS K7M User's Manual 71 SS//WWSSEETTUUPP WiWinnddoowwss9988 NOTE: The screen...

K7M User Manual
Page 72
...web sites. • IDE Driver: Installs VIA Bus Master PCI IDE Controller Driver. • Miniport Driver: Installs the necessary AGP miniport driver for the K7 Series motherboards with AMD-751 chipset under Windows 9x. • ASUS PC Probe: Installs a simple utility to monitor your motherboard, such as product name, ...98 • Show MB Information: Allows you to view the contents of the built-in the FLASH folder. 72 ASUS K7M User's Manual SOFTWARE SETUP 5.2 K7M Support CD NOTE: The support CD contents are subject to change at any time without notice. Updated or other language ...
...web sites. • IDE Driver: Installs VIA Bus Master PCI IDE Controller Driver. • Miniport Driver: Installs the necessary AGP miniport driver for the K7 Series motherboards with AMD-751 chipset under Windows 9x. • ASUS PC Probe: Installs a simple utility to monitor your motherboard, such as product name, ...98 • Show MB Information: Allows you to view the contents of the built-in the FLASH folder. 72 ASUS K7M User's Manual SOFTWARE SETUP 5.2 K7M Support CD NOTE: The support CD contents are subject to change at any time without notice. Updated or other language ...

K7M User Manual
Page 73
... click Finish restart your CD-ROM drive. 2. ASUS K7M User's Manual 73 SOFTWARE SETUP 5.3 Audio Driver (only with onboard audio option) Insert the Support CD that came with the drivers or software because these drivers need to bring up the setup screen. (1) Click...drivers are enabled when Windows starts/restarts. Click Browse. 4. NOTE: You may not, however, be copied. 6. S/W SETUP Windows 98 (3) Click here and then click Next to restart the computer. Click OK. 3. Click OK again and the driver files will be able to use immediately the devices associated with your motherboard...
... click Finish restart your CD-ROM drive. 2. ASUS K7M User's Manual 73 SOFTWARE SETUP 5.3 Audio Driver (only with onboard audio option) Insert the Support CD that came with the drivers or software because these drivers need to bring up the setup screen. (1) Click...drivers are enabled when Windows starts/restarts. Click Browse. 4. NOTE: You may not, however, be copied. 6. S/W SETUP Windows 98 (3) Click here and then click Next to restart the computer. Click OK. 3. Click OK again and the driver files will be able to use immediately the devices associated with your motherboard...

K7M User Manual
Page 76
SOFTWARE SETUP 5.6 IDE Driver Insert the Support CD that came with your motherboard into your CD-ROM drive or double-click the CD drive icon in My Computer to bring up the setup screen. (1) Click here. (3) Click here and then click Next to start copying files. (2) Click here. (4) Click here. (5) Click here and then click Finish to restart. 5. 5. S/W SETUP Windows 98 76 ASUS K7M User's Manual
SOFTWARE SETUP 5.6 IDE Driver Insert the Support CD that came with your motherboard into your CD-ROM drive or double-click the CD drive icon in My Computer to bring up the setup screen. (1) Click here. (3) Click here and then click Next to start copying files. (2) Click here. (4) Click here. (5) Click here and then click Finish to restart. 5. 5. S/W SETUP Windows 98 76 ASUS K7M User's Manual

K7M User Manual
Page 77
5. S/W SETUP Windows 98 ASUS K7M User's Manual 77 SOFTWARE SETUP 5.7 Miniport Driver Insert the Support CD that came with your motherboard into your CD-ROM drive or double-click the CD drive icon in My Computer to bring up the setup screen. (1) Click here. (2) Click here. (3) Click Finish to restart. 5.
5. S/W SETUP Windows 98 ASUS K7M User's Manual 77 SOFTWARE SETUP 5.7 Miniport Driver Insert the Support CD that came with your motherboard into your CD-ROM drive or double-click the CD drive icon in My Computer to bring up the setup screen. (1) Click here. (2) Click here. (3) Click Finish to restart. 5.


