
H81M-C User's Manual
Page 1
Motherboard H81M-C H81M-C/CSM
Motherboard H81M-C H81M-C/CSM

H81M-C User's Manual
Page 3
Contents Safety information iv About this guide iv Package contents vi H81M-C specifications summary vi Product introduction 1.1 Before you proceed 1-1 1.2 Motherboard overview 1-1 1.3 Central Processing Unit (CPU 1-3 1.4 System memory 1-7 1.5 Expansion slots 1-9 1.6 Jumpers 1-10 1.7 Connectors 1-12 1.8 Onboard LEDs 1-19 1.9 Software support 1-20 BIOS information 2.1 Managing and ...menu 2-11 2.5 Ai Tweaker menu 2-13 2.6 Advanced menu 2-22 2.7 Monitor menu 2-31 2.8 Boot menu 2-34 2.9 Tools menu 2-40 2.10 Exit menu 2-41 Appendices Notices...A-1 ASUS contact information A-3 iii
Contents Safety information iv About this guide iv Package contents vi H81M-C specifications summary vi Product introduction 1.1 Before you proceed 1-1 1.2 Motherboard overview 1-1 1.3 Central Processing Unit (CPU 1-3 1.4 System memory 1-7 1.5 Expansion slots 1-9 1.6 Jumpers 1-10 1.7 Connectors 1-12 1.8 Onboard LEDs 1-19 1.9 Software support 1-20 BIOS information 2.1 Managing and ...menu 2-11 2.5 Ai Tweaker menu 2-13 2.6 Advanced menu 2-22 2.7 Monitor menu 2-31 2.8 Boot menu 2-34 2.9 Tools menu 2-40 2.10 Exit menu 2-41 Appendices Notices...A-1 ASUS contact information A-3 iii
H81M-C User's Manual
Page 4
... before the signal cables are connected. How this guide This user guide contains the information you need when installing and configuring the motherboard. These devices could interrupt the grounding circuit. • Ensure that came with the product, contact a qualified service technician or ...from the existing system before you detect any area where it may be exposed to moisture. • Place the product on the motherboard. • Chapter 2: BIOS information This chapter discusses changing system settings through the BIOS Setup menus. Safety information Electrical safety •...
... before the signal cables are connected. How this guide This user guide contains the information you need when installing and configuring the motherboard. These devices could interrupt the grounding circuit. • Ensure that came with the product, contact a qualified service technician or ...from the existing system before you detect any area where it may be exposed to moisture. • Place the product on the motherboard. • Chapter 2: BIOS information This chapter discusses changing system settings through the BIOS Setup menus. Safety information Electrical safety •...
H81M-C User's Manual
Page 6
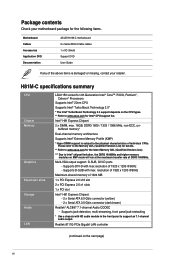
...1920 x 1200 @60Hz Maximum shared memory of the above items is subject to support an 7.1-channel audio output. H81M-C specifications summary CPU Chipset Memory Graphics Expansion slots Storage Audio LAN LGA1150 socket for 4th Generation Intel® CoreTM ...2.0* * The Intel® Turbo Boost Technology 2.0 support depends on the next page) vi Package contents Check your motherboard package for the following items. Motherboard Cables Accessories Application DVD Documentation ASUS H81M-C motherboard 2 x Serial ATA 6.0 Gb/s cables 1 x I/O Shield Support DVD User Guide If any of 1024 MB ...
...1920 x 1200 @60Hz Maximum shared memory of the above items is subject to support an 7.1-channel audio output. H81M-C specifications summary CPU Chipset Memory Graphics Expansion slots Storage Audio LAN LGA1150 socket for 4th Generation Intel® CoreTM ...2.0* * The Intel® Turbo Boost Technology 2.0 support depends on the next page) vi Package contents Check your motherboard package for the following items. Motherboard Cables Accessories Application DVD Documentation ASUS H81M-C motherboard 2 x Serial ATA 6.0 Gb/s cables 1 x I/O Shield Support DVD User Guide If any of 1024 MB ...

H81M-C User's Manual
Page 9
... component. • Before you install or remove any component, ensure that the motherboard fits. Failure to do so can damage the motherboard. ASUS H81M-C 1-1 Product introduction 1 1.1 Before you proceed Take note of the following precautions before you install motherboard components or change any motherboard settings. • Unplug the power cord from the power supply. Doing so...
... component. • Before you install or remove any component, ensure that the motherboard fits. Failure to do so can damage the motherboard. ASUS H81M-C 1-1 Product introduction 1 1.1 Before you proceed Take note of the following precautions before you install motherboard components or change any motherboard settings. • Unplug the power cord from the power supply. Doing so...

H81M-C User's Manual
Page 10
... towards the rear of the chassis H81M-C 1.2.3 Motherboard layout 12 3 4 17.8cm(7.0in) 35 KBMS ATX12V DIGI +VRM CPU_FAN DVI DDR3 DIMM_A1 (64bit, 240-pin module) DDR3 DIMM_B1 (64bit, 240-pin module) EATXPWR 24.4cm(9.6in) LPT VGA LGA1150 PS2_USBPW1-6 1-2 USB3~6 LAN_USB3_12 CHA_FAN 2 AUDIO BATTERY COM H81M-C PCIEX16_1 RTL 8111G PCIEX1_1 8Mb BIOS...
... towards the rear of the chassis H81M-C 1.2.3 Motherboard layout 12 3 4 17.8cm(7.0in) 35 KBMS ATX12V DIGI +VRM CPU_FAN DVI DDR3 DIMM_A1 (64bit, 240-pin module) DDR3 DIMM_B1 (64bit, 240-pin module) EATXPWR 24.4cm(9.6in) LPT VGA LGA1150 PS2_USBPW1-6 1-2 USB3~6 LAN_USB3_12 CHA_FAN 2 AUDIO BATTERY COM H81M-C PCIEX16_1 RTL 8111G PCIEX1_1 8Mb BIOS...
H81M-C User's Manual
Page 11
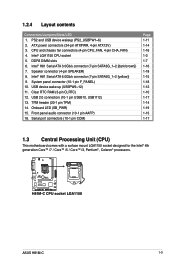
... 1-17 1.3 Central Processing Unit (CPU) This motherboard comes with a surface mount LGA1150 socket designed for the Intel® 4th generation Core™ i7 / Core™ i5 / Core™ i3, Pentium® , Celeron® processors. DDR3 DIMM slots 6. TPM header (20-1 pin TPM) 14. H81M-C H81M-C CPU socket LGA1150 ASUS H81M-C 1-3 Onboard LED (SB_PWR) 15. ATX...
... 1-17 1.3 Central Processing Unit (CPU) This motherboard comes with a surface mount LGA1150 socket designed for the Intel® 4th generation Core™ i7 / Core™ i5 / Core™ i3, Pentium® , Celeron® processors. DDR3 DIMM slots 6. TPM header (20-1 pin TPM) 14. H81M-C H81M-C CPU socket LGA1150 ASUS H81M-C 1-3 Onboard LED (SB_PWR) 15. ATX...
H81M-C User's Manual
Page 12
...The product warranty does not cover damage to the PnP cap/socket contacts/motherboard components. Contact your retailer immediately if the PnP cap is shipment/ transit-related. • Keep the cap after installing the motherboard. ASUS will shoulder the cost of the PnP cap. 1.3.1 Installing the CPU ...1 A B 2 3 1-4 Chapter 1: Product introduction ASUS will process Return Merchandise Authorization (RMA) requests only if the motherboard comes with the cap on the socket...
...The product warranty does not cover damage to the PnP cap/socket contacts/motherboard components. Contact your retailer immediately if the PnP cap is shipment/ transit-related. • Keep the cap after installing the motherboard. ASUS will shoulder the cost of the PnP cap. 1.3.1 Installing the CPU ...1 A B 2 3 1-4 Chapter 1: Product introduction ASUS will process Return Merchandise Authorization (RMA) requests only if the motherboard comes with the cap on the socket...
H81M-C User's Manual
Page 15
..., and 8GB unbuffered non-ECC DDR3 DIMMs into the DIMM sockets. • You may install varying memory sizes in Channel A and Channel B. ASUS H81M-C 1-7 DO NOT install a DDR or DDR2 memory module to protect the CPU. Check with the retailer to get the correct memory modules. &#...or DDR2 module. For optimal compatibility, we recommend that you do any of 512Mb (64MB) chips or less. 1.4 System memory 1.4.1 Overview This motherboard comes with the same CAS latency. A DDR3 module is notched differently from the same vendor. According to Intel® chipset limitation, DDR3 1600MHz ...
..., and 8GB unbuffered non-ECC DDR3 DIMMs into the DIMM sockets. • You may install varying memory sizes in Channel A and Channel B. ASUS H81M-C 1-7 DO NOT install a DDR or DDR2 memory module to protect the CPU. Check with the retailer to get the correct memory modules. &#...or DDR2 module. For optimal compatibility, we recommend that you do any of 512Mb (64MB) chips or less. 1.4 System memory 1.4.1 Overview This motherboard comes with the same CAS latency. A DDR3 module is notched differently from the same vendor. According to Intel® chipset limitation, DDR3 1600MHz ...

H81M-C User's Manual
Page 16
... Serial Presence Detect (SPD), which is keyed with a notch so that it fits in only one direction. Press the retaining clips outward to both the motherboard and the components. 1. DO NOT force a DIMM into the 3 socket until the retaining clips snap back in the wrong direction to unlock the DIMM. ...frequency adjustment. • For system stability, use a more efficient memory cooling system to support a full memory load (2 DIMMs) or overclocking condition. • Visit the ASUS website at: www.asus.com for overclocking may operate at a lower frequency than the vendor-marked value.
... Serial Presence Detect (SPD), which is keyed with a notch so that it fits in only one direction. Press the retaining clips outward to both the motherboard and the components. 1. DO NOT force a DIMM into the 3 socket until the retaining clips snap back in the wrong direction to unlock the DIMM. ...frequency adjustment. • For system stability, use a more efficient memory cooling system to support a full memory load (2 DIMMs) or overclocking condition. • Visit the ASUS website at: www.asus.com for overclocking may operate at a lower frequency than the vendor-marked value.
H81M-C User's Manual
Page 17
Keep the screw for the card. 2. ASUS H81M-C 1-9 Align the card connector with the slot and press firmly until ...card inoperable. DIMM notch 1.5 Expansion slots In the future, you may cause you physical injury and damage motherboard components. 1.5.1 Installing an expansion card To install an expansion card: 1. Remove the bracket opposite the slot...use . The following sub‑sections describe the slots and the expansion cards that came with 2 your motherboard is completely seated on shared slots, ensure that the drivers support "Share IRQ" or that you removed ...
Keep the screw for the card. 2. ASUS H81M-C 1-9 Align the card connector with the slot and press firmly until ...card inoperable. DIMM notch 1.5 Expansion slots In the future, you may cause you physical injury and damage motherboard components. 1.5.1 Installing an expansion card To install an expansion card: 1. Remove the bracket opposite the slot...use . The following sub‑sections describe the slots and the expansion cards that came with 2 your motherboard is completely seated on shared slots, ensure that the drivers support "Share IRQ" or that you removed ...

H81M-C User's Manual
Page 18
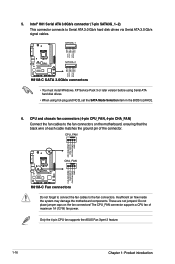
...of date, time, and system setup parameters by erasing the CMOS RTC RAM data. shared - - - - - 1.5.3 PCI Express 2.0 x1 slots This motherboard supports PCI Express x1 network cards, SCSI cards, and other cards that comply with the PCI Express specifications. 1.5.4 PCI Express x16 slot This.... 1.5.3 PCI slots The PCI slot supports cards such as system passwords. H81M-C CLRTC 12 23 Normal (Default) H81M-C Clear RTC RAM Clear RTC To erase the RTC RAM: 1. shared -- - IRQ assignments for this motherboard LAN PCIE x16_1 PCIE x1_1 PCIE x1_2 PCIE x1_3 Intel PCH SATA Controller ...
...of date, time, and system setup parameters by erasing the CMOS RTC RAM data. shared - - - - - 1.5.3 PCI Express 2.0 x1 slots This motherboard supports PCI Express x1 network cards, SCSI cards, and other cards that comply with the PCI Express specifications. 1.5.4 PCI Express x16 slot This.... 1.5.3 PCI slots The PCI slot supports cards such as system passwords. H81M-C CLRTC 12 23 Normal (Default) H81M-C Clear RTC RAM Clear RTC To erase the RTC RAM: 1. shared -- - IRQ assignments for this motherboard LAN PCIE x16_1 PCIE x1_1 PCIE x1_2 PCIE x1_3 Intel PCH SATA Controller ...
H81M-C User's Manual
Page 23
... panel audio connector • We recommend that supports either HD Audio or legacy AC`97 audio standard. ASUS H81M-C 1-15 Front panel audio connector (10-1 pin AAFP) This connector is set the item to [HD]. By default, this connector is for a chassis-mounted ...Connect one end of the front panel audio I /O module that you connect a high-definition front panel audio module to this connector to avail of the motherboard's high-definition audio capability. • If you want to connect a high-definition front panel audio module to this connector, set the SATA Mode Selection item...
... panel audio connector • We recommend that supports either HD Audio or legacy AC`97 audio standard. ASUS H81M-C 1-15 Front panel audio connector (10-1 pin AAFP) This connector is set the item to [HD]. By default, this connector is for a chassis-mounted ...Connect one end of the front panel audio I /O module that you connect a high-definition front panel audio module to this connector to avail of the motherboard's high-definition audio capability. • If you want to connect a high-definition front panel audio module to this connector, set the SATA Mode Selection item...
H81M-C User's Manual
Page 24
... CHA FAN IN CHA FAN PWR GND H81M-C Fan connectors Do not forget to connect the fan cables to [AHCI]. 6. Only the 4-pin CPU fan supports the ASUS Fan Xpert 2 feature. 1-16 Chapter 1: Product introduction These are not jumpers! Do not place jumper caps on the motherboard, ensuring that the black wire of...
... CHA FAN IN CHA FAN PWR GND H81M-C Fan connectors Do not forget to connect the fan cables to [AHCI]. 6. Only the 4-pin CPU fan supports the ASUS Fan Xpert 2 feature. 1-16 Chapter 1: Product introduction These are not jumpers! Do not place jumper caps on the motherboard, ensuring that the black wire of...

H81M-C User's Manual
Page 25
ASUS H81M-C 1-17 Serial port connector (10-1 pin COM) This connector is for USB 2.0 ports. USB910 USB1112 USB+5V USB_P11USB_P11+ GND NC USB+5V USB_P9USB_P9+ GND NC H81M-C PIN 1 PIN 1 USB+5V USB_P12USB_P12+ GND USB+5V USB_P10USB_P10+ GND H81M-C USB2.0 connectors Never connect a 1394 cable to 480Mbps connection speed. Doing so will damage the motherboard! Connect...
ASUS H81M-C 1-17 Serial port connector (10-1 pin COM) This connector is for USB 2.0 ports. USB910 USB1112 USB+5V USB_P11USB_P11+ GND NC USB+5V USB_P9USB_P9+ GND NC H81M-C PIN 1 PIN 1 USB+5V USB_P12USB_P12+ GND USB+5V USB_P10USB_P10+ GND H81M-C USB2.0 connectors Never connect a 1394 cable to 480Mbps connection speed. Doing so will damage the motherboard! Connect...

H81M-C User's Manual
Page 27
Standby Power LED The motherboard comes with a standby power LED that lights up to indicate that you should shut down the system and unplug the power cable before removing or plugging in soft-off mode. This is a reminder that the system is ON, in sleep mode, or in any motherboard component. The illustration below shows the location of the onboard LED. 1.8 Onboard LEDs 1. H81M-C SB_PWR ON OFF Standby Power Powered Off H81M-C Onboard LED ASUS H81M-C 1-19
Standby Power LED The motherboard comes with a standby power LED that lights up to indicate that you should shut down the system and unplug the power cable before removing or plugging in soft-off mode. This is a reminder that the system is ON, in sleep mode, or in any motherboard component. The illustration below shows the location of the onboard LED. 1.8 Onboard LEDs 1. H81M-C SB_PWR ON OFF Standby Power Powered Off H81M-C Onboard LED ASUS H81M-C 1-19
H81M-C User's Manual
Page 28
... contents of the Support DVD to your hardware. Click an icon to display Support DVD/motherboard information Click an item to install If Autorun is enabled in your ASUS motherboard. Always install the latest OS version and corresponding updates to maximize the features of the ...screen is for updates. To run the DVD. 1-20 Chapter 1: Product introduction Double-click the ASSETUP.EXE to avail all motherboard features. Visit the ASUS website at any time without notice. The contents of your OS documentation for detailed information. 1.9.2 Support DVD information The Support DVD...
... contents of the Support DVD to your hardware. Click an icon to display Support DVD/motherboard information Click an item to install If Autorun is enabled in your ASUS motherboard. Always install the latest OS version and corresponding updates to maximize the features of the ...screen is for updates. To run the DVD. 1-20 Chapter 1: Product introduction Double-click the ASSETUP.EXE to avail all motherboard features. Visit the ASUS website at any time without notice. The contents of your OS documentation for detailed information. 1.9.2 Support DVD information The Support DVD...
H81M-C User's Manual
Page 29
Copy the original motherboard BIOS using the ASUS Update utility. 2.1.1 EZ Update EZ Update is a utility that allows you to restore the BIOS ... BIOS information 2.1 Managing and updating your BIOS 2 Save a copy of the original motherboard BIOS file to a USB flash disk in case you need to automatically update your motherboard's driver, software and firmware Click to find and select the BIOS from file Click ...Update, click EZ Update on the AI Suite 3 main menu bar. Click to automatically update your motherboard's softwares, drivers and the BIOS version easily. ASUS H81M-C 2-1
Copy the original motherboard BIOS using the ASUS Update utility. 2.1.1 EZ Update EZ Update is a utility that allows you to restore the BIOS ... BIOS information 2.1 Managing and updating your BIOS 2 Save a copy of the original motherboard BIOS file to a USB flash disk in case you need to automatically update your motherboard's driver, software and firmware Click to find and select the BIOS from file Click ...Update, click EZ Update on the AI Suite 3 main menu bar. Click to automatically update your motherboard's softwares, drivers and the BIOS version easily. ASUS H81M-C 2-1
H81M-C User's Manual
Page 31
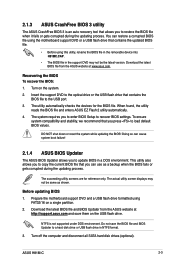
... BIOS file in the removable device into H81MC.CAP. • The BIOS file in the support DVD may not be the latest version. ASUS H81M-C 2-3 Recovering the BIOS To recover the BIOS: 1. This utility also allows you to copy the current BIOS file that you can cause system...BIOS file to recover BIOS settings. Prepare the motherboard support DVD and a USB flash drive formatted using the motherboard support DVD or a USB flash drive that allows you to enter BIOS Setup to the USB port. 3. 2.1.3 ASUS CrashFree BIOS 3 utility The ASUS CrashFree BIOS 3 is not supported under DOS environment...
... BIOS file in the removable device into H81MC.CAP. • The BIOS file in the support DVD may not be the latest version. ASUS H81M-C 2-3 Recovering the BIOS To recover the BIOS: 1. This utility also allows you to copy the current BIOS file that you can cause system...BIOS file to recover BIOS settings. Prepare the motherboard support DVD and a USB flash drive formatted using the motherboard support DVD or a USB flash drive that allows you to enter BIOS Setup to the USB port. 3. 2.1.3 ASUS CrashFree BIOS 3 utility The ASUS CrashFree BIOS 3 is not supported under DOS environment...
H81M-C User's Manual
Page 34
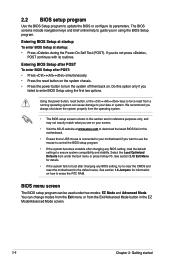
...the system becomes unstable after changing any BIOS setting, try to clear the CMOS and reset the motherboard to your motherboard if you in the EZ Mode/Advanced Mode screen. 2-6 Chapter 2: Getting started Do this motherboard. • Ensure that a USB mouse is connected to enter BIOS Setup using the BIOS Setup...F5. See section 1.6 Jumpers for reference purposes only, and may not exactly match what you see on your screen. • Visit the ASUS website at startup: • Press during the Power-On Self Test (POST). Entering BIOS Setup at startup To enter BIOS Setup at www...
...the system becomes unstable after changing any BIOS setting, try to clear the CMOS and reset the motherboard to your motherboard if you in the EZ Mode/Advanced Mode screen. 2-6 Chapter 2: Getting started Do this motherboard. • Ensure that a USB mouse is connected to enter BIOS Setup using the BIOS Setup...F5. See section 1.6 Jumpers for reference purposes only, and may not exactly match what you see on your screen. • Visit the ASUS website at startup: • Press during the Power-On Self Test (POST). Entering BIOS Setup at startup To enter BIOS Setup at www...


