
User Manual
Page 25
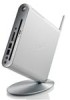
HDMI E-SATA English Positioning your EeeBox PC Installing the stand Erect your EeeBox PC with a screw driver. 1 Screw hole 2 Screw hole Stand screw You can also place your EeeBox PC on the bottom of the EeeBox PC. 2. Align the stand screw to the PC screw hole, and then secure the stand to the PC with the supplied stand. Locate the screw hole on the desktop without the stand. To do so: 1. EeeBox PC 25
HDMI E-SATA English Positioning your EeeBox PC Installing the stand Erect your EeeBox PC with a screw driver. 1 Screw hole 2 Screw hole Stand screw You can also place your EeeBox PC on the bottom of the EeeBox PC. 2. Align the stand screw to the PC screw hole, and then secure the stand to the PC with the supplied stand. Locate the screw hole on the desktop without the stand. To do so: 1. EeeBox PC 25

User Manual
Page 39
Select Update to display the items you can download. 5. English ASUS Easy Update ASUS Easy Update is a software tool that automatically detects and downloads the latest BIOS, drivers, and applications for your system. 3. EeeBox PC 39 Select Schedule to set how often you want to download, and then click OK. Click OK to activate the update. 4. Check the item(s) you want to update your EeeBox PC. 1. From the Windows® notification area, right-click the ASUS Easy Update icon. 2.
Select Update to display the items you can download. 5. English ASUS Easy Update ASUS Easy Update is a software tool that automatically detects and downloads the latest BIOS, drivers, and applications for your system. 3. EeeBox PC 39 Select Schedule to set how often you want to download, and then click OK. Click OK to activate the update. 4. Check the item(s) you want to update your EeeBox PC. 1. From the Windows® notification area, right-click the ASUS Easy Update icon. 2.
User Manual
Page 44
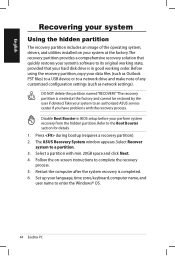
..., keyboard, computer name, and user name to enter the Windows® OS. 44 EeeBox PC Press during bootup (requires a recovery partition). 2. The ASUS Recovery System window appears. Set up your data files (such as Outlook PST files) to a USB device or to a network drive and make note ...of the operating system, drivers, and utilities installed on -screen instructions to a partition. 3. DO NOT delete the partition named "RECOVERY."The recovery partition is completed. 6. Follow the on...
..., keyboard, computer name, and user name to enter the Windows® OS. 44 EeeBox PC Press during bootup (requires a recovery partition). 2. The ASUS Recovery System window appears. Set up your data files (such as Outlook PST files) to a USB device or to a network drive and make note ...of the operating system, drivers, and utilities installed on -screen instructions to a partition. 3. DO NOT delete the partition named "RECOVERY."The recovery partition is completed. 6. Follow the on...


