
User Guide
Page 106
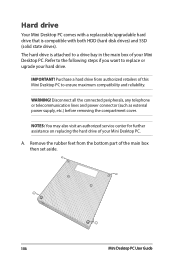
... you want to replace or ugrade your Mini Desktop PC. The hard drive is compatible with a replaceable/upgradable hard drive that is attached to a drive bay in the main box of your Mini Desktop PC. NOTES: You may also visit an authorized service center for further assistance on replacing the hard...
... you want to replace or ugrade your Mini Desktop PC. The hard drive is compatible with a replaceable/upgradable hard drive that is attached to a drive bay in the main box of your Mini Desktop PC. NOTES: You may also visit an authorized service center for further assistance on replacing the hard...

User Guide
Page 108
D. drive bay E. Carefully disconnect the SATA connector from the HDD or SSD, as shown. hard drive connector 108 Mini Desktop PC User Guide Remove the three screws securing the drive bay to the motherboard, then set aside.
D. drive bay E. Carefully disconnect the SATA connector from the HDD or SSD, as shown. hard drive connector 108 Mini Desktop PC User Guide Remove the three screws securing the drive bay to the motherboard, then set aside.

User Guide
Page 109
Carefully detach the drive bay then set aside. Mini Desktop PC User Guide 109 F. G. drive NOTE: The hard drive illustration is for reference only and may vary depending on actual model. Remove the four screws securing the hard drive into the drive bay and set aside.
Carefully detach the drive bay then set aside. Mini Desktop PC User Guide 109 F. G. drive NOTE: The hard drive illustration is for reference only and may vary depending on actual model. Remove the four screws securing the hard drive into the drive bay and set aside.

User Guide
Page 110
Reconnect the drive bay with the hard drive connector on actual model. NOTE: The hard drive illustration is for reference only and may vary depending on the motherboard. 110 Mini Desktop PC User Guide I. Align and attach the new drive as shown, then secure the drive using the four screws you removed in step F. H.
Reconnect the drive bay with the hard drive connector on actual model. NOTE: The hard drive illustration is for reference only and may vary depending on the motherboard. 110 Mini Desktop PC User Guide I. Align and attach the new drive as shown, then secure the drive using the four screws you removed in step F. H.

User Guide
Page 111
Use the short screw on the lower left hole of the drive bay and the two long screws on the main box. K. Mini Desktop PC User Guide 111 J. Align an insert the cover back on the upper part of the drive bay. Replace the drive bay then secure it with the three screws, as shown. IMPORTANT!
Use the short screw on the lower left hole of the drive bay and the two long screws on the main box. K. Mini Desktop PC User Guide 111 J. Align an insert the cover back on the upper part of the drive bay. Replace the drive bay then secure it with the three screws, as shown. IMPORTANT!

User Guide
Page 120
D. Carefully disconnect the SATA connector from the HDD or SSD, as shown. hard drive connector 120 Mini Desktop PC User Guide drive bay E. Remove the three screws securing the drive bay to the motherboard, then set aside.
D. Carefully disconnect the SATA connector from the HDD or SSD, as shown. hard drive connector 120 Mini Desktop PC User Guide drive bay E. Remove the three screws securing the drive bay to the motherboard, then set aside.

User Guide
Page 127
Reconnect the drive bay with the hard drive connector on the motherboard. P. Mini Desktop PC User Guide 127 O. Reattach the screws securing the CPU according to the number sequence indicated beside each screw.
Reconnect the drive bay with the hard drive connector on the motherboard. P. Mini Desktop PC User Guide 127 O. Reattach the screws securing the CPU according to the number sequence indicated beside each screw.

User Guide
Page 128
Q. R. IMPORTANT! Align an insert the cover back on the upper part of the drive bay. Use the short screw on the lower left hole of the drive bay and the two long screws on the main box. 128 Mini Desktop PC User Guide Replace the drive bay then secure it with the three screws, as shown.
Q. R. IMPORTANT! Align an insert the cover back on the upper part of the drive bay. Use the short screw on the lower left hole of the drive bay and the two long screws on the main box. 128 Mini Desktop PC User Guide Replace the drive bay then secure it with the three screws, as shown.