
A8R32-MVP Deluxe English Edition User's Manual
Page 4
...switch 3-2 Chapter 4: BIOS setup 4.1 Managing and updating your BIOS 4-1 4.1.1 ASUS Update utility 4-1 4.1.2 Creating a bootable floppy disk 4-4 4.1.3 ASUS EZ Flash utility 4-5 4.1.4 AFUDOS utility 4-6 4.1.5 ASUS CrashFree BIOS 2 utility 4-9 4.2 BIOS setup program 4-11 4.2.1 BIOS menu ...screen 4-12 4.2.2 Menu bar 4-12 4.2.3 Navigation keys 4-12 4.2.4 Menu items 4-13 4.2.5 Sub-menu items 4-13 4.2.6 Configuration fields 4-13 4.2.7 Pop-up window...
...switch 3-2 Chapter 4: BIOS setup 4.1 Managing and updating your BIOS 4-1 4.1.1 ASUS Update utility 4-1 4.1.2 Creating a bootable floppy disk 4-4 4.1.3 ASUS EZ Flash utility 4-5 4.1.4 AFUDOS utility 4-6 4.1.5 ASUS CrashFree BIOS 2 utility 4-9 4.2 BIOS setup program 4-11 4.2.1 BIOS menu ...screen 4-12 4.2.2 Menu bar 4-12 4.2.3 Navigation keys 4-12 4.2.4 Menu items 4-13 4.2.5 Sub-menu items 4-13 4.2.6 Configuration fields 4-13 4.2.7 Pop-up window...

A8R32-MVP Deluxe English Edition User's Manual
Page 36
... * Use only identical DDR DIMM pairs. * For dual-channel configuration (2), you may detect less than 3 GB of total memory because of each module downgrades to Windows® XP 32-bit version operating system since it does not support Physical Address Extension (PAE). • When using only one DDR DIMM module, install...
... * Use only identical DDR DIMM pairs. * For dual-channel configuration (2), you may detect less than 3 GB of total memory because of each module downgrades to Windows® XP 32-bit version operating system since it does not support Physical Address Extension (PAE). • When using only one DDR DIMM module, install...

A8R32-MVP Deluxe English Edition User's Manual
Page 49
• Plug your Serial ATA boot disk on the master port (SATA1/2 to support S3 function). • Install the Windows® 2000 Service Pack 4 or the Windows® XP Service Pack1 or later when using Serial ATA. • In RAID mode, the system cannot boot from a SATA CD-ROM which is connected with the ULi M1575 controller. Serial ATA hard disk drive connection Connector SATA1/SATA2 SATA3/SATA4 Color Red Black Setting Master Slave Use Boot disk Data Disk ASUS A8R32-MVP DELUXE 2-25
• Plug your Serial ATA boot disk on the master port (SATA1/2 to support S3 function). • Install the Windows® 2000 Service Pack 4 or the Windows® XP Service Pack1 or later when using Serial ATA. • In RAID mode, the system cannot boot from a SATA CD-ROM which is connected with the ULi M1575 controller. Serial ATA hard disk drive connection Connector SATA1/SATA2 SATA3/SATA4 Color Red Black Setting Master Slave Use Boot disk Data Disk ASUS A8R32-MVP DELUXE 2-25

A8R32-MVP Deluxe English Edition User's Manual
Page 62
... S h u t D o w n . . . 2. Refer to shut down the computer. 3. Click the S t a r t button then select T u r n O f f C o m p u t e r . 2. The power supply should turn off after Windows® shuts down. The power supply should turn off after Windows® shuts down. 3.2.2 Using the dual function power switch While the system is selected, then click the O K button to section... u r n O f f button to soft-off mode, depending on the BIOS setting. 3.2 Powering off the computer 3.2.1 Using the OS shut down function If you are using Windows® XP: 1. If you are using...
... S h u t D o w n . . . 2. Refer to shut down the computer. 3. Click the S t a r t button then select T u r n O f f C o m p u t e r . 2. The power supply should turn off after Windows® shuts down. The power supply should turn off after Windows® shuts down. 3.2.2 Using the dual function power switch While the system is selected, then click the O K button to section... u r n O f f button to soft-off mode, depending on the BIOS setting. 3.2 Powering off the computer 3.2.1 Using the OS shut down function If you are using Windows® XP: 1. If you are using...

A8R32-MVP Deluxe English Edition User's Manual
Page 65
... copy of the original motherboard BIOS file to a bootable floppy disk in case you to restore the BIOS in Windows® environment.) 2. The ASUS Update utility allows you need to : • Save the current BIOS file • Download the latest BIOS ... the Internet, and • View the BIOS version information. ASUS Update requires an Internet connection either through a network or an Internet Service Provider (ISP). The D r i v e r s menu appears. 2. Click the U t i l i t i e s tab, then click I O S 2 (Updates the BIOS using a bootable floppy disk.) 4. ASUS A8R32-MVP DELUXE 4-1
... copy of the original motherboard BIOS file to a bootable floppy disk in case you to restore the BIOS in Windows® environment.) 2. The ASUS Update utility allows you need to : • Save the current BIOS file • Download the latest BIOS ... the Internet, and • View the BIOS version information. ASUS Update requires an Internet connection either through a network or an Internet Service Provider (ISP). The D r i v e r s menu appears. 2. Click the U t i l i t i e s tab, then click I O S 2 (Updates the BIOS using a bootable floppy disk.) 4. ASUS A8R32-MVP DELUXE 4-1

A8R32-MVP Deluxe English Edition User's Manual
Page 66
... you update the BIOS using this utility. Updating the BIOS through the Internet To update the BIOS through the Internet: 1. The ASUS Update main window appears. 2. Select the ASUS FTP site t h e I O S f r o m 3. Quit all Windows® applications before you to avoid network drop-down menu, then click traffic, or click A u t o S e l e c t. N e x t. Click N e x t. 4-2 Chapter 4: BIOS setup Select...
... you update the BIOS using this utility. Updating the BIOS through the Internet To update the BIOS through the Internet: 1. The ASUS Update main window appears. 2. Select the ASUS FTP site t h e I O S f r o m 3. Quit all Windows® applications before you to avoid network drop-down menu, then click traffic, or click A u t o S e l e c t. N e x t. Click N e x t. 4-2 Chapter 4: BIOS setup Select...

A8R32-MVP Deluxe English Edition User's Manual
Page 67
... updating itself through a BIOS file: 1. Updating the BIOS through a BIOS file To update the BIOS through the Internet. The ASUS Update main window appears. 2. Select U p d a t e B I O S f r o m a f i l e option from the Windows® desktop by clicking S t a r t > P r o g r a m s > A S U S > A S U S U p d a t e > A S U S U p d a t e. ASUS A8R32-MVP DELUXE 4-3 Launch the ASUS Update utility from the drop-down menu, then click N e x t. 3. From the FTP site, select the BIOS version that...
... updating itself through a BIOS file: 1. Updating the BIOS through a BIOS file To update the BIOS through the Internet. The ASUS Update main window appears. 2. Select U p d a t e B I O S f r o m a f i l e option from the Windows® desktop by clicking S t a r t > P r o g r a m s > A S U S > A S U S U p d a t e > A S U S U p d a t e. ASUS A8R32-MVP DELUXE 4-3 Launch the ASUS Update utility from the drop-down menu, then click N e x t. 3. From the FTP site, select the BIOS version that...

A8R32-MVP Deluxe English Edition User's Manual
Page 68
... then click S t a r t. e. d. Press , then follow screen instructions to the optical drive. b. Windows® XP environment a. c. D O S s t a r t u p d i s k from the menu, then select F o r m a t. Windows® 2000 environment To create a set of the following to create a bootable floppy disk. c. From the Open ...field, type D:\bootdisk\makeboot a: assuming that D: is your optical drive. At the DOS prompt, type format A:/S then press . Insert the Windows® 2000 CD to continue. 2. Click S t a r t, then select R u n. Copy the original or the latest motherboard ...
... then click S t a r t. e. d. Press , then follow screen instructions to the optical drive. b. Windows® XP environment a. c. D O S s t a r t u p d i s k from the menu, then select F o r m a t. Windows® 2000 environment To create a set of the following to create a bootable floppy disk. c. From the Open ...field, type D:\bootdisk\makeboot a: assuming that D: is your optical drive. At the DOS prompt, type format A:/S then press . Insert the Windows® 2000 CD to continue. 2. Click S t a r t, then select R u n. Copy the original or the latest motherboard ...

A8R32-MVP Deluxe English Edition User's Manual
Page 77
...screen means that is enclosed in .] [English] Use [ENTER], [TAB], or [SHIFT-TAB] to select a field. Refer to "4.2.7 Pop-up window." 4.2.7 Pop-up window with the configuration options for that item. 4.2.8 Scroll bar A scroll bar appears on the right side of a menu screen when there are items ... Time System Date Legacy Diskette A Language [10:55:25] [Wed 10/25/2005] [1.44M, 3.5 in brackets, and is highlighted when selected. ASUS A8R32-MVP DELUXE 4-13 To display the sub-menu, select the item and press . 4.2.6 Configuration fields These fields show the values for that do not fit on...
...screen means that is enclosed in .] [English] Use [ENTER], [TAB], or [SHIFT-TAB] to select a field. Refer to "4.2.7 Pop-up window." 4.2.7 Pop-up window with the configuration options for that item. 4.2.8 Scroll bar A scroll bar appears on the right side of a menu screen when there are items ... Time System Date Legacy Diskette A Language [10:55:25] [Wed 10/25/2005] [1.44M, 3.5 in brackets, and is highlighted when selected. ASUS A8R32-MVP DELUXE 4-13 To display the sub-menu, select the item and press . 4.2.6 Configuration fields These fields show the values for that do not fit on...

A8R32-MVP Deluxe English Edition User's Manual
Page 110
...values for a confirmation before exiting. Load Setup Defaults This option allows you to discard the selections you select this option, a confirmation window appears. If you made to save the changes while exiting. After selecting this option or if you made changes to fields other changes... before saving the values to the CMOS RAM. Select [ O k ] to save the changes that you press , a confirmation window appears. Select [ O k ] to discard any changes and load the previously saved values. Exit & Discard Changes Select this option from the Exit menu...
...values for a confirmation before exiting. Load Setup Defaults This option allows you to discard the selections you select this option, a confirmation window appears. If you made to save the changes while exiting. After selecting this option or if you made changes to fields other changes... before saving the values to the CMOS RAM. Select [ O k ] to save the changes that you press , a confirmation window appears. Select [ O k ] to discard any changes and load the previously saved values. Exit & Discard Changes Select this option from the Exit menu...
A8R32-MVP Deluxe English Edition User's Manual
Page 113
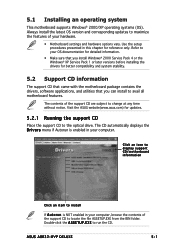
...updates. 5.2.1 Running the support CD Place the support CD to maximize the features of your hardware. • Motherboard settings and hardware options vary. ASUS A8R32-MVP DELUXE 5-1 The CD automatically displays the D r i v e r s menu if Autorun is NOT enabled in your computer, browse the contents of... support CD that came with the motherboard package contains the drivers, software applications, and utilities that you install Windows® 2000 Service Pack 4 or the Windows® XP Service Pack 1 or later versions before installing the drivers for reference only. Refer to your ...
...updates. 5.2.1 Running the support CD Place the support CD to maximize the features of your hardware. • Motherboard settings and hardware options vary. ASUS A8R32-MVP DELUXE 5-1 The CD automatically displays the D r i v e r s menu if Autorun is NOT enabled in your computer, browse the contents of... support CD that came with the motherboard package contains the drivers, software applications, and utilities that you install Windows® 2000 Service Pack 4 or the Windows® XP Service Pack 1 or later versions before installing the drivers for reference only. Refer to your ...

A8R32-MVP Deluxe English Edition User's Manual
Page 116
..., and alerts you of any detected problems. This utility helps you keep your computer in Windows® environment. See section "4.1.1 ASUS Update utility" for Utilities Launches the ASUS InstallAll utilities installation wizard. Marvell Yukon VCT Application The Virtual Cable Tester (VCT) is a... cable diagnostic application that allows you to the ASUS website. 5-4 Chapter 5: Software support Before using the ASUS Update, make sure that the motherboard supports. Installation Wizard for details. This utility requires an Internet ...
..., and alerts you of any detected problems. This utility helps you keep your computer in Windows® environment. See section "4.1.1 ASUS Update utility" for Utilities Launches the ASUS InstallAll utilities installation wizard. Marvell Yukon VCT Application The Virtual Cable Tester (VCT) is a... cable diagnostic application that allows you to the ASUS website. 5-4 Chapter 5: Software support Before using the ASUS Update, make sure that the motherboard supports. Installation Wizard for details. This utility requires an Internet ...

A8R32-MVP Deluxe English Edition User's Manual
Page 117
...your computer so you to open, view, and print documents in Windows® environment. Anti-virus utility The anti-virus application scans, identifies, and removes computer viruses. ASUS AI Booster The ASUS AI Booster application allows you can enjoy watching TV and movies, ...or playing games on your computer screen by installing the ASUS Screen Saver. The Microsoft® DirectX® 9.0c is a multimedia technology that allows you to overclock the CPU speed in Portable Document Format (PDF). ASUS A8R32-MVP DELUXE 5-5 ASUS Screen Saver Bring life to your computer.
...your computer so you to open, view, and print documents in Windows® environment. Anti-virus utility The anti-virus application scans, identifies, and removes computer viruses. ASUS AI Booster The ASUS AI Booster application allows you can enjoy watching TV and movies, ...or playing games on your computer screen by installing the ASUS Screen Saver. The Microsoft® DirectX® 9.0c is a multimedia technology that allows you to overclock the CPU speed in Portable Document Format (PDF). ASUS A8R32-MVP DELUXE 5-5 ASUS Screen Saver Bring life to your computer.

A8R32-MVP Deluxe English Edition User's Manual
Page 122
...latest BIOS version from the support CD. Refer to use ASUS MyLogo. From the left window pane, select the folder that contains the image you wish to section "4.1.1 ASUS Update utility" for more information. 5.3.1 ASUS MyLogo2™ The ASUS MyLogo2™ utility lets you through the installation. To ...intend to use the AFUDOS utility to make a copy of the applications in GIF, JPG, or BMP file formats. The ASUS MyLogo window appears. 6. Launch the ASUS Update utility. 5.3 Software information Most of your own boot logo image in the support CD have wizards that will conveniently ...
...latest BIOS version from the support CD. Refer to use ASUS MyLogo. From the left window pane, select the folder that contains the image you wish to section "4.1.1 ASUS Update utility" for more information. 5.3.1 ASUS MyLogo2™ The ASUS MyLogo2™ utility lets you through the installation. To ...intend to use the AFUDOS utility to make a copy of the applications in GIF, JPG, or BMP file formats. The ASUS MyLogo window appears. 6. Launch the ASUS Update utility. 5.3 Software information Most of your own boot logo image in the support CD have wizards that will conveniently ...

A8R32-MVP Deluxe English Edition User's Manual
Page 123
After flashing the BIOS, restart the computer to load the new boot logo. 10. ASUS A8R32-MVP DELUXE 5-11 7. When the logo images appear on the right window pane, select an image to your desired size by clicking on the R a t i o box. 9. Adjust the boot image to enlarge by selecting a value on it. 8. When the screen returns to the ASUS Update utility, flash the original BIOS to display the new boot logo during POST.
After flashing the BIOS, restart the computer to load the new boot logo. 10. ASUS A8R32-MVP DELUXE 5-11 7. When the logo images appear on the right window pane, select an image to your desired size by clicking on the R a t i o box. 9. Adjust the boot image to enlarge by selecting a value on it. 8. When the screen returns to the ASUS Update utility, flash the original BIOS to display the new boot logo during POST.

A8R32-MVP Deluxe English Edition User's Manual
Page 124
... This utility can be incorporated in the BIOS. 5-12 Chapter 5: Software support Click V i r t u a l C a b l e T e s t e r from the Windows® desktop by clicking Start > All Programs > Marvell > Virtual Cable Tester. 2. Click the R u n button to perform a cable test. • The VCT only runs on systems... with Windows® XP or Windows® 2000 operating systems. • The VCT utility only tests Ethernet cables connected to Gigabit LAN port(s). • The R u n ...
... This utility can be incorporated in the BIOS. 5-12 Chapter 5: Software support Click V i r t u a l C a b l e T e s t e r from the Windows® desktop by clicking Start > All Programs > Marvell > Virtual Cable Tester. 2. Click the R u n button to perform a cable test. • The VCT only runs on systems... with Windows® XP or Windows® 2000 operating systems. • The VCT utility only tests Ethernet cables connected to Gigabit LAN port(s). • The R u n ...

A8R32-MVP Deluxe English Edition User's Manual
Page 125
...'s vital components, and detects and alerts you to locate the setup.exe file from the ASUS PC Probe II folder. Installing PC Probe II To install PC Probe II on the main window right handle. Place the support CD to close or restore the application. If Autorun is...; taskbar. To launch the PC Probe II from the Windows® desktop. Using PC Probe II Main window The PC Probe II main window allows you of your system and change the utility configuration. You can close the Preference panel ASUS A8R32-MVP DELUXE 5-13 The D r i v e r s installation tab appears if your computer: 1. Double-...
...'s vital components, and detects and alerts you to locate the setup.exe file from the ASUS PC Probe II folder. Installing PC Probe II To install PC Probe II on the main window right handle. Place the support CD to close or restore the application. If Autorun is...; taskbar. To launch the PC Probe II from the Windows® desktop. Using PC Probe II Main window The PC Probe II main window allows you of your system and change the utility configuration. You can close the Preference panel ASUS A8R32-MVP DELUXE 5-13 The D r i v e r s installation tab appears if your computer: 1. Double-...

A8R32-MVP Deluxe English Edition User's Manual
Page 126
... can customize the application using the Preference section in the main window. When displayed, the monitor panel for details. Button Function Opens the C o n f i g u r a t i o n window Opens the R e p o r t window Opens the D e s k t o p M a n a g e m e n t I n t e r f a c e window Opens the P e r i p h e r a l C o m p o n e n t I n t e r c o n n e c t window Opens the W i n d o w s M a n a g e m e n t I n s t r u m e n t a t i o n window Opens the hard disk drive, memory, CPU usage window Shows/Hides the P r e f e r e n c e section Minimizes the application Closes the application Sensor...
... can customize the application using the Preference section in the main window. When displayed, the monitor panel for details. Button Function Opens the C o n f i g u r a t i o n window Opens the R e p o r t window Opens the D e s k t o p M a n a g e m e n t I n t e r f a c e window Opens the P e r i p h e r a l C o m p o n e n t I n t e r c o n n e c t window Opens the W i n d o w s M a n a g e m e n t I n s t r u m e n t a t i o n window Opens the hard disk drive, memory, CPU usage window Shows/Hides the P r e f e r e n c e section Minimizes the application Closes the application Sensor...

A8R32-MVP Deluxe English Edition User's Manual
Page 127
.... You can now move together using the C o n f i g window. Hardware monitor panels The hardware monitor panels display the current value of the S c h e m e options, then select another position from the P r e f e r e n c e section, the monitor panels appear on your computer's desktop. When you want to decrease value ASUS A8R32-MVP DELUXE 5-15 Large display Small display Changing the monitor...
.... You can now move together using the C o n f i g window. Hardware monitor panels The hardware monitor panels display the current value of the S c h e m e options, then select another position from the P r e f e r e n c e section, the monitor panels appear on your computer's desktop. When you want to decrease value ASUS A8R32-MVP DELUXE 5-15 Large display Small display Changing the monitor...

A8R32-MVP Deluxe English Edition User's Manual
Page 128
... an item from the left panel to display the DMI (Desktop Management Interface) browser. This browser displays various Windows® management information. You can enlarge or reduce the browser size by dragging the bottom right corner of the... browser. DMI browser Click to display on the right panel. This browser displays various desktop and system information. Refer to display the WMI (Windows Management Instrumentation) browser. Small display Large display WMI browser Click to the illustrations below. Click the plus sign (+) before W M I I n f o...
... an item from the left panel to display the DMI (Desktop Management Interface) browser. This browser displays various Windows® management information. You can enlarge or reduce the browser size by dragging the bottom right corner of the... browser. DMI browser Click to display on the right panel. This browser displays various desktop and system information. Refer to display the WMI (Windows Management Instrumentation) browser. Small display Large display WMI browser Click to the illustrations below. Click the plus sign (+) before W M I I n f o...


