
Setup Guide
Page 3
Contents 5 About This Guide 7 Chapter 1: Installing the Xserve 8 Tools and Parts You'll Need 9 Choosing a Suitable Location 11 Installing the Xserve 20 Where to Go from Here 21 Chapter 2: Installing or Replacing Components 22 Xserve at a Glance-Internal Components 24 Installing or Replacing an Apple Drive Module 28 Removing or Installing a Power Supply 30 Opening and Closing the Xserve 33 Adding Memory 38 Installing a PCI Card 44 Replacing the Battery 47 Appendix A: Specifications 51 Appendix B: Safety and Maintenance 51 Important Safety Information 3
Contents 5 About This Guide 7 Chapter 1: Installing the Xserve 8 Tools and Parts You'll Need 9 Choosing a Suitable Location 11 Installing the Xserve 20 Where to Go from Here 21 Chapter 2: Installing or Replacing Components 22 Xserve at a Glance-Internal Components 24 Installing or Replacing an Apple Drive Module 28 Removing or Installing a Power Supply 30 Opening and Closing the Xserve 33 Adding Memory 38 Installing a PCI Card 44 Replacing the Battery 47 Appendix A: Specifications 51 Appendix B: Safety and Maintenance 51 Important Safety Information 3

Setup Guide
Page 4
52 Handling the Xserve 53 Protecting the Optical Drive 53 Power Supply 54 Cleaning the Xserve 54 Apple and the Environment 54 Health-Related Information About Computer Use 57 Regulatory Compliance Information 4 Contents
52 Handling the Xserve 53 Protecting the Optical Drive 53 Power Supply 54 Cleaning the Xserve 54 Apple and the Environment 54 Health-Related Information About Computer Use 57 Regulatory Compliance Information 4 Contents

Setup Guide
Page 5
..., Mac OS X Server Getting Started, and other server guides are also available at www.apple.com/server/documentation. 5 When You Finish Installing the Xserve For information about installing or replacing drive modules, memory, PCI cards, power supplies, or the system battery, see the Xserve User's Guide on the Admin Tools disc that comes with the...
..., Mac OS X Server Getting Started, and other server guides are also available at www.apple.com/server/documentation. 5 When You Finish Installing the Xserve For information about installing or replacing drive modules, memory, PCI cards, power supplies, or the system battery, see the Xserve User's Guide on the Admin Tools disc that comes with the...
Setup Guide
Page 18
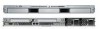
.... Serial console port Display port Ethernet port 2 Ethernet port 1 USB 2.0 ports (2) System identifier button/light System information tag (pullout tab) FireWire 800 Power supply Power supply ports (2) bay 1 bay 2 18 Chapter 1 Installing the Xserve Step 6: Connect the Cables 1 Connect a power cord to port 1. Note: The fan in the power supply and some system status lights come on the...
.... Serial console port Display port Ethernet port 2 Ethernet port 1 USB 2.0 ports (2) System identifier button/light System information tag (pullout tab) FireWire 800 Power supply Power supply ports (2) bay 1 bay 2 18 Chapter 1 Installing the Xserve Step 6: Connect the Cables 1 Connect a power cord to port 1. Note: The fan in the power supply and some system status lights come on the...

Setup Guide
Page 21
You can add or replace these components while the Xserve is in the rack: Â Drive module (page 24) Â Power supply (page 28) To install these components, you must remove the Xserve from the rack and open it: Â Memory (page 33) Â PCI card (page 38) Â Battery (page 44) For a quick glance inside the Xserve, turn the page. 21 Installing or Replacing 2 Components 2 This chapter shows how to install or replace drive modules and internal Xserve components.
You can add or replace these components while the Xserve is in the rack: Â Drive module (page 24) Â Power supply (page 28) To install these components, you must remove the Xserve from the rack and open it: Â Memory (page 33) Â PCI card (page 38) Â Battery (page 44) For a quick glance inside the Xserve, turn the page. 21 Installing or Replacing 2 Components 2 This chapter shows how to install or replace drive modules and internal Xserve components.

Setup Guide
Page 22
Xserve at a Glance-Internal Components Power supply bay 2 Power supply bay 1 Expansion slot 1 Expansion slot 2 DIMM slots (8) Battery Fan array Rack release latch Drive bay 1 Drive bay 2 Drive bay 3 22 Chapter 2 Installing or Replacing Components
Xserve at a Glance-Internal Components Power supply bay 2 Power supply bay 1 Expansion slot 1 Expansion slot 2 DIMM slots (8) Battery Fan array Rack release latch Drive bay 1 Drive bay 2 Drive bay 3 22 Chapter 2 Installing or Replacing Components

Setup Guide
Page 23
...battery on page 44. For information, see "Installing or Replacing an Apple Drive Module" on page 28. PCI-E slot (slot 2) You can expand memory in these slots. Rack release latch This latch stops the Xserve about halfway out of fully buffered, error-correcting dual inline memory modules ...(FB-DIMMs) in the Xserve up to 32 gigabytes (GB) by installing pairs of the rack. PCI-X and PCI-E card slot (slot 1) You can install SAS (Serial Attached SCSI) and SATA (Serial ATA) drives. If one or two power supplies in NVRAM) when power supplies are installed, they share the...
...battery on page 44. For information, see "Installing or Replacing an Apple Drive Module" on page 28. PCI-E slot (slot 2) You can expand memory in these slots. Rack release latch This latch stops the Xserve about halfway out of fully buffered, error-correcting dual inline memory modules ...(FB-DIMMs) in the Xserve up to 32 gigabytes (GB) by installing pairs of the rack. PCI-X and PCI-E card slot (slot 1) You can install SAS (Serial Attached SCSI) and SATA (Serial ATA) drives. If one or two power supplies in NVRAM) when power supplies are installed, they share the...

Setup Guide
Page 28
... removed. WARNING: The power supplies in a running Xserve might be hot. If the Xserve has two power supplies, they are removing. 2 Pull the handle to release the power supply and slide it . 28 Chapter 2 Installing or Replacing Components Removing or Installing a Power Supply You can replace or install a power supply from the back panel without removing the Xserve from the power supply you are hot...
... removed. WARNING: The power supplies in a running Xserve might be hot. If the Xserve has two power supplies, they are removing. 2 Pull the handle to release the power supply and slide it . 28 Chapter 2 Installing or Replacing Components Removing or Installing a Power Supply You can replace or install a power supply from the back panel without removing the Xserve from the power supply you are hot...

Setup Guide
Page 29
... an outlet with power. If the Xserve is not turned on, the supply status light blinks green when the power cord is already running on a second power supply, the status light on the new supply turns green to seat the power supply and lock it in to the power supply. If the Xserve is plugged in place. To install a power supply: 3 Pull to open...
... an outlet with power. If the Xserve is not turned on, the supply status light blinks green when the power cord is already running on a second power supply, the status light on the new supply turns green to seat the power supply and lock it in to the power supply. If the Xserve is plugged in place. To install a power supply: 3 Pull to open...

Setup Guide
Page 44
Replacing the Battery The Xserve uses a CR2032 lithium coin cell battery to preserve settings such as the date and time when the system is not connected to replace the battery. If the date and time change unexpectedly or other system settings are lost, you might need to power. The negative (-) side faces away from an Apple-authorized service provider. For best results, purchase a replacement battery from the power supply. 44 Chapter 2 Installing or Replacing Components
Replacing the Battery The Xserve uses a CR2032 lithium coin cell battery to preserve settings such as the date and time when the system is not connected to replace the battery. If the date and time change unexpectedly or other system settings are lost, you might need to power. The negative (-) side faces away from an Apple-authorized service provider. For best results, purchase a replacement battery from the power supply. 44 Chapter 2 Installing or Replacing Components

Setup Guide
Page 45
... battery only with type CR2032. 5 Insert the new battery in the holder with the negative (-) side facing away from the power supply. 6 If you removed a PCI card, replace it. 7 Close the Xserve and return it blocks access to the rack. See the battery disposal information in slot 1 if it to the battery holder... the PCI card in the Regulatory Compliance Information section at the end of the old battery according to replace the battery. Important: Be sure the Xserve is turned off and the power cords are unplugged before you replace the battery. 2 Remove the...
... battery only with type CR2032. 5 Insert the new battery in the holder with the negative (-) side facing away from the power supply. 6 If you removed a PCI card, replace it. 7 Close the Xserve and return it blocks access to the rack. See the battery disposal information in slot 1 if it to the battery holder... the PCI card in the Regulatory Compliance Information section at the end of the old battery according to replace the battery. Important: Be sure the Xserve is turned off and the power cords are unplugged before you replace the battery. 2 Remove the...

Setup Guide
Page 47
....7 cm) for mounting in standard 19-in . (76.2 cm) Weight  31.7 lb. (14.4 kg) with 2 DIMMs, 1 drive module, and 1 power supply  38.3 lb. (17.4 kg) with 8 DIMMs, 3 drive modules, and 2 power supplies Operating Environment  Operating temperature: 50° to 95° F (10° to 35° C)  Storage temperature: -40°...
....7 cm) for mounting in standard 19-in . (76.2 cm) Weight  31.7 lb. (14.4 kg) with 2 DIMMs, 1 drive module, and 1 power supply  38.3 lb. (17.4 kg) with 8 DIMMs, 3 drive modules, and 2 power supplies Operating Environment  Operating temperature: 50° to 95° F (10° to 35° C)  Storage temperature: -40°...

Setup Guide
Page 50
Serial Port  9-pin D connector 12345 6789  Pin signals 1: Received line signal detector (RLSD) 2: Received data (RD) 3: Transmitted data (TD) 4: DTE ready (DRT CD) 5: Signal ground (SGND) 6: DCE ready (DCR CC) 7: Request to send (RTS) 8: Clear to send (CTS) 9: Ring indicator (RI) 50 Appendix A Specifications Power Supply  One or two 650 Watt power supplies  AC line input: 100-240 V alternating current (AC), single phase, 50-60 hertz (Hz)  Maximum AC line current: 8A (100-120V) or 4A (200-240V). If two power supplies are installed, they split this load.
Serial Port  9-pin D connector 12345 6789  Pin signals 1: Received line signal detector (RLSD) 2: Received data (RD) 3: Transmitted data (TD) 4: DTE ready (DRT CD) 5: Signal ground (SGND) 6: DCE ready (DCR CC) 7: Request to send (RTS) 8: Clear to send (CTS) 9: Ring indicator (RI) 50 Appendix A Specifications Power Supply  One or two 650 Watt power supplies  AC line input: 100-240 V alternating current (AC), single phase, 50-60 hertz (Hz)  Maximum AC line current: 8A (100-120V) or 4A (200-240V). If two power supplies are installed, they split this load.

Setup Guide
Page 53
...to inspect or repair the Xserve. Â Protect the Xserve and its components from the optical drive; for an Apple-authorized service provider to start up from direct sunlight and rain or other components. If the power supply needs service, contact your Apple-authorized dealer or service provider.... If the connector and port do , turn off . If no mouse is attached, you have positioned the connector correctly in the Xserve is off the Xserve immediately and unplug it ...
...to inspect or repair the Xserve. Â Protect the Xserve and its components from the optical drive; for an Apple-authorized service provider to start up from direct sunlight and rain or other components. If the power supply needs service, contact your Apple-authorized dealer or service provider.... If the connector and port do , turn off . If no mouse is attached, you have positioned the connector correctly in the Xserve is off the Xserve immediately and unplug it ...

