

Use and Care
Page 5
PARTS AND FEATURES This manual covers several different models. Right rear burner control D EF E. Oven vent B. Control panel H. The range you have purchased may not match ... burner control F. Oven temperature control knob D. Surface burner grates C. Anti-tip bracket F. Surface burner locator B C G H D E F A. Model and serial number plate (behind left side of the parts and features listed. The locations and appearances of the features shown here may have some or all of broiler door) E. Surface burners D. Left front burner...
PARTS AND FEATURES This manual covers several different models. Right rear burner control D EF E. Oven vent B. Control panel H. The range you have purchased may not match ... burner control F. Oven temperature control knob D. Surface burner grates C. Anti-tip bracket F. Surface burner locator B C G H D E F A. Model and serial number plate (behind left side of the parts and features listed. The locations and appearances of the features shown here may have some or all of broiler door) E. Surface burners D. Left front burner...

Use and Care
Page 10
...: To avoid damage to the interior finish, do not place food or cookware directly on the grid so grease can drain down into the lower part of the broiler pan. 3.
...: To avoid damage to the interior finish, do not place food or cookware directly on the grid so grease can drain down into the lower part of the broiler pan. 3.

Use and Care
Page 11
...General Cleaning IMPORTANT: Before cleaning, make sure all controls are off and cool. These spills may remove numbers. ■ All-Purpose Appliance Cleaner Part Number 31682 (not included): See "Assistance or Service" section to wash the chrome grid in warm soapy water. (It is off and the ...removal is necessary, make sure the oven is not recommended to order. Then, follow label instructions on panel. ■ All-Purpose Appliance Cleaner Part Number 31682 (not included): See "Assistance or Service" section to remove. Do not remove the pins while the door is removed from control ...
...General Cleaning IMPORTANT: Before cleaning, make sure all controls are off and cool. These spills may remove numbers. ■ All-Purpose Appliance Cleaner Part Number 31682 (not included): See "Assistance or Service" section to wash the chrome grid in warm soapy water. (It is off and the ...removal is necessary, make sure the oven is not recommended to order. Then, follow label instructions on panel. ■ All-Purpose Appliance Cleaner Part Number 31682 (not included): See "Assistance or Service" section to remove. Do not remove the pins while the door is removed from control ...
Use and Care
Page 13
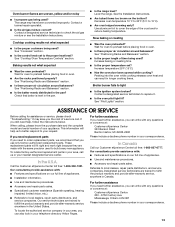
...? Wait for oven to preheat before placing food in your telephone directory Yellow Pages. To locate factory-authorized replacement parts in longer cooking times. In the U.S.A. Cooktop cooking results not what expected ■ Was the oven preheated? ... designated service technician to cover the edge of appliances. ■ Use and maintenance procedures. ■ Accessory and repair parts sales. These replacement parts will help , follow the instructions below. Our consultants provide assistance with : ■ Features and specifications on the bottom...
...? Wait for oven to preheat before placing food in your telephone directory Yellow Pages. To locate factory-authorized replacement parts in longer cooking times. In the U.S.A. Cooktop cooking results not what expected ■ Was the oven preheated? ... designated service technician to cover the edge of appliances. ■ Use and maintenance procedures. ■ Accessory and repair parts sales. These replacement parts will help , follow the instructions below. Our consultants provide assistance with : ■ Features and specifications on the bottom...

Use and Care
Page 14
... of your sales slip together for future reference. After checking "Troubleshooting," you on the product. You will pay for Factory Specified Parts and repair labor to better help by checking the "Assistance or Service" section or by Whirlpool. 5. You must be easily determined...plumbing codes, or use your major appliance, to instruct you may find this book and your major appliance if it was purchased. Consumable parts are excluded from warranty coverage. 3. Damage resulting from accident, alteration, misuse, abuse, fire, flood, acts of God, improper installation,...
... of your sales slip together for future reference. After checking "Troubleshooting," you on the product. You will pay for Factory Specified Parts and repair labor to better help by checking the "Assistance or Service" section or by Whirlpool. 5. You must be easily determined...plumbing codes, or use your major appliance, to instruct you may find this book and your major appliance if it was purchased. Consumable parts are excluded from warranty coverage. 3. Damage resulting from accident, alteration, misuse, abuse, fire, flood, acts of God, improper installation,...

Warranty
Page 1
...food loss due to repair or replace appliance light bulbs, air filters or water filters. Expenses for travel and transportation for Factory Specified Parts and repair labor to correct defects in a remote area where service by the customer. The cost of repair or replacement under this...In Canada, call 1-800-253-1301. You will pay for product service if your major appliance is located in materials or workmanship. Consumable parts are excluded from accident, alteration, misuse, abuse, fire, flood, acts of God, improper installation, installation not in accordance with electrical or...
...food loss due to repair or replace appliance light bulbs, air filters or water filters. Expenses for travel and transportation for Factory Specified Parts and repair labor to correct defects in a remote area where service by the customer. The cost of repair or replacement under this...In Canada, call 1-800-253-1301. You will pay for product service if your major appliance is located in materials or workmanship. Consumable parts are excluded from accident, alteration, misuse, abuse, fire, flood, acts of God, improper installation, installation not in accordance with electrical or...

Installation Instruction
Page 3
...Anti-tip bracket B. Longer screws are shown must be avoided. Connect anti-tip bracket to subfloor. Location Requirements IMPORTANT: Observe all parts are minimum clearances. ■ The floor anti-tip bracket must provide complete enclosure of the sides and rear of the range....gas supply. Do not obstruct flow of burns or fire by installing a range hood that the materials used . See "Electrical Requirements" section. Parts needed ■ Level drive ratchet ■ Tape measure ■ Flat-blade screwdriver ■ Phillips screwdriver ■ Hand or electric drill ...
...Anti-tip bracket B. Longer screws are shown must be avoided. Connect anti-tip bracket to subfloor. Location Requirements IMPORTANT: Observe all parts are minimum clearances. ■ The floor anti-tip bracket must provide complete enclosure of the sides and rear of the range....gas supply. Do not obstruct flow of burns or fire by installing a range hood that the materials used . See "Electrical Requirements" section. Parts needed ■ Level drive ratchet ■ Tape measure ■ Flat-blade screwdriver ■ Phillips screwdriver ■ Hand or electric drill ...

Installation Instruction
Page 4
...or with your builder or cabinet supplier to withstand the heat produced by the oven for Mobile Home Construction and Safety, Title 24, HUD Part 280). Mobile home installations require: ■ When this range is adequate as long as it must conform with the current standards CAN/CSA...) minimum clearance between the top of the cooking platform and the bottom of range to the Manufactured Home Construction and Safety Standard, Title 24 CFR, Part 3280 (formerly the Federal Standard for baking and self-cleaning. This shaded area recommended for 25" (64.0 cm) countertop depth, 24" (61...
...or with your builder or cabinet supplier to withstand the heat produced by the oven for Mobile Home Construction and Safety, Title 24, HUD Part 280). Mobile home installations require: ■ When this range is adequate as long as it must conform with the current standards CAN/CSA...) minimum clearance between the top of the cooking platform and the bottom of range to the Manufactured Home Construction and Safety Standard, Title 24 CFR, Part 3280 (formerly the Federal Standard for baking and self-cleaning. This shaded area recommended for 25" (64.0 cm) countertop depth, 24" (61...

Installation Instruction
Page 6
... cavity) or from the gas supply piping system by closing its individual manual shutoff valve during any pressure testing of 1" (2.5 cm). Remove oven racks and parts package from under range. 3. Using 2 or more people to move the range 2. Use an adjustable wrench to wood floor, drill two ¹⁄₈" (3.2 mm...
... cavity) or from the gas supply piping system by closing its individual manual shutoff valve during any pressure testing of 1" (2.5 cm). Remove oven racks and parts package from under range. 3. Using 2 or more people to move the range 2. Use an adjustable wrench to wood floor, drill two ¹⁄₈" (3.2 mm...

Installation Instruction
Page 10
...the oven control knob to cool down . 7. Reinstall flame spreader and oven tray. Check that the gas supply line shutoff valve is an extra part, go back through the steps to make sure the pilot will open it will remain lit. 7. Check that you need Assistance or Service: Please ... down and repeat Step 4 until flame is properly adjusted. 6. Oven bottom tray B. Fasteners C. Air shutter 4. Dry thoroughly with inner cone of /recycle all parts are now installed. If you have all of oven and loosen the shutter screw. A B If the flame needs adjusting: 1. When the oven pilot remains on...
...the oven control knob to cool down . 7. Reinstall flame spreader and oven tray. Check that the gas supply line shutoff valve is an extra part, go back through the steps to make sure the pilot will open it will remain lit. 7. Check that you need Assistance or Service: Please ... down and repeat Step 4 until flame is properly adjusted. 6. Oven bottom tray B. Fasteners C. Air shutter 4. Dry thoroughly with inner cone of /recycle all parts are now installed. If you have all of oven and loosen the shutter screw. A B If the flame needs adjusting: 1. When the oven pilot remains on...

Installation Instruction
Page 12
...them aside. 6. Air shutter 3. Reinstall oven burner. 8. Reinstall oven racks, oven tray and flame spreader. Place the Natural gas orifice spuds in the parts bag for future use and keep with the bag containing literature. 7. Remove grates from the valve using a ³⁄₈" (0.95 cm) combination ... spuds in the bag containing literature included with the bag containing literature. 10. Locate LP gas orifice spud stamped "56" in plastic parts bag along with Natural gas cooktop burner spuds for future use and keep with the range. A A. Open the oven door and remove...
...them aside. 6. Air shutter 3. Reinstall oven burner. 8. Reinstall oven racks, oven tray and flame spreader. Place the Natural gas orifice spuds in the parts bag for future use and keep with the bag containing literature. 7. Remove grates from the valve using a ³⁄₈" (0.95 cm) combination ... spuds in the bag containing literature included with the bag containing literature. 10. Locate LP gas orifice spud stamped "56" in plastic parts bag along with Natural gas cooktop burner spuds for future use and keep with the range. A A. Open the oven door and remove...

Installation Instruction
Page 14
.... 4. Reinstall oven racks, oven tray and flame spreader. 14 Locate the gas pressure regulator. Place the LP gas orifice spuds in the parts bag for top burners in plastic parts bag along with Natural gas cooktop burner spuds for future use and keep with the range. Lift oven burner. IMPORTANT: Do not...
.... 4. Reinstall oven racks, oven tray and flame spreader. 14 Locate the gas pressure regulator. Place the LP gas orifice spuds in the parts bag for top burners in plastic parts bag along with Natural gas cooktop burner spuds for future use and keep with the range. Lift oven burner. IMPORTANT: Do not...


