Owners Manual
Page 4
... 26 Cancelling the Simultaneous Function ........ 26 Blackout Mode On and Off 26 Setup DVD Setup DVD Setup Operation 27 Setting of the Menu Language 28 Setting of the Audio Language 28... Input Audio Level ... 34 Setting of the Rear Camera 35 Setting of the External Monitor Output ...... 35 Setting the VISUAL Soft Button 35 Setting the Digital Output 35 Subwoofer ...the Brightness of the Backlighting 36 Adjusting the Minimum Level of Backlight 36 Switching Background Textures 36 Setting Automatic Background Textures .... 36 Switching the Font Back Display Color ...... 36 Turning the ...
... 26 Cancelling the Simultaneous Function ........ 26 Blackout Mode On and Off 26 Setup DVD Setup DVD Setup Operation 27 Setting of the Menu Language 28 Setting of the Audio Language 28... Input Audio Level ... 34 Setting of the Rear Camera 35 Setting of the External Monitor Output ...... 35 Setting the VISUAL Soft Button 35 Setting the Digital Output 35 Subwoofer ...the Brightness of the Backlighting 36 Adjusting the Minimum Level of Backlight 36 Switching Background Textures 36 Setting Automatic Background Textures .... 36 Switching the Font Back Display Color ...... 36 Turning the ...

Owners Manual
Page 37
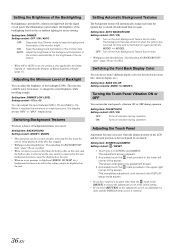
.... 4 Touch [ ], [ ] or [OFF], [ON], etc., of DISPLAY SETUP. Setting items: DIMMER / DIMMER LOW LEVEL / BACKGROUND / AUTO BACKGROUND / BASE COLOR / PULSETOUCH / SCREEN ALIGNMENT 5 Touch [RETURN] to return to the previous screen. Setting of the External Monitor Output Set it ON again. Setting items: MONITOR OUT Setting contents: OFF / ON ON: By setting the connected external...
.... 4 Touch [ ], [ ] or [OFF], [ON], etc., of DISPLAY SETUP. Setting items: DIMMER / DIMMER LOW LEVEL / BACKGROUND / AUTO BACKGROUND / BASE COLOR / PULSETOUCH / SCREEN ALIGNMENT 5 Touch [RETURN] to return to the previous screen. Setting of the External Monitor Output Set it ON again. Setting items: MONITOR OUT Setting contents: OFF / ON ON: By setting the connected external...
Owners Manual
Page 38
...touch [RETURN] on the unit. Adjusting the Touch Panel Adjustment becomes necessary when the display position on the LCD and the touch position on the Auto Background Texture Scroll mode. This function could be displayed on the adjustment screen, no adjustment is done and the ...adjustment, and returns to change each time the ignition key is selected on the rear monitor connected to keep the background illumination of background textures you can adjust the brightness of the monitor dark. The adjustment screen appears. 2 Accurately touch the mark provided in disc is turned...
...touch [RETURN] on the unit. Adjusting the Touch Panel Adjustment becomes necessary when the display position on the LCD and the touch position on the Auto Background Texture Scroll mode. This function could be displayed on the adjustment screen, no adjustment is done and the ...adjustment, and returns to change each time the ignition key is selected on the rear monitor connected to keep the background illumination of background textures you can adjust the brightness of the monitor dark. The adjustment screen appears. 2 Accurately touch the mark provided in disc is turned...
Owners Manual
Page 40
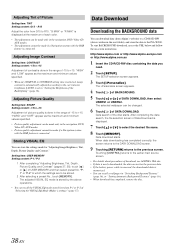
...IVA-W200. "HARD" and "SOFT" appear as the maximum and minimum values specified. • When any NIGHT M. http://www.alpine.com or http://www.alpine-europe.com or http://www.alpine.com.au 1 Insert the CD-R/CD-RW disc containing the data you need. 2 Touch [SETUP]. Data download starts. To start BACKGROUND...on-screen instructions. The i-Personalize screen appears. 4 Touch [ ] of BACKGROUND. 5 Touch [ ] or [ ] of -15 to select the desired file name. 8 Touch [MEMORY]. "G MAX" or "R MAX" is done in the navigation, DVD, Video CD, AUX modes. • Tint adjustment cannot be stored....
...IVA-W200. "HARD" and "SOFT" appear as the maximum and minimum values specified. • When any NIGHT M. http://www.alpine.com or http://www.alpine-europe.com or http://www.alpine.com.au 1 Insert the CD-R/CD-RW disc containing the data you need. 2 Touch [SETUP]. Data download starts. To start BACKGROUND...on-screen instructions. The i-Personalize screen appears. 4 Touch [ ] of BACKGROUND. 5 Touch [ ] or [ ] of -15 to select the desired file name. 8 Touch [MEMORY]. "G MAX" or "R MAX" is done in the navigation, DVD, Video CD, AUX modes. • Tint adjustment cannot be stored....


