Owners Manual
Page 3
... Controls 9 Turning Power On or Off 9 Opening and Closing the Movable Monitor ... 10 Adjusting the Monitor Viewing Angle 10 Adjusting the Volume 10 Lowering Volume Quickly 10 How to view the Display 10 Soft button operation 10 Recalling the Source 10 Shortcut Screen 11 Displaying the Numeric Keypad Input Screen 12 Radio Listening to the Radio 12 Setting Analog Mode (HD Radio mode only 13 Manual Storing of Station Presets 13 Automatic Memory of Station Presets 13 Tuning to Preset Stations 13 Changing the Display (HD Radio mode...
... Controls 9 Turning Power On or Off 9 Opening and Closing the Movable Monitor ... 10 Adjusting the Monitor Viewing Angle 10 Adjusting the Volume 10 Lowering Volume Quickly 10 How to view the Display 10 Soft button operation 10 Recalling the Source 10 Shortcut Screen 11 Displaying the Numeric Keypad Input Screen 12 Radio Listening to the Radio 12 Setting Analog Mode (HD Radio mode only 13 Manual Storing of Station Presets 13 Automatic Memory of Station Presets 13 Tuning to Preset Stations 13 Changing the Display (HD Radio mode...
Owners Manual
Page 4
... Level (Parental Lock) .... 29 Changing the Digital Output Setting 29 Setting the Downmix Mode 31 Setting the TV Screen Setting 31 Setting of the Bonus Code 31 Setting of the DVD-Audio Playback Mode 31 Setting the Video CD Play Mode 31 GENERAL Setup General Setup Operation 32 Displaying the Time 32 Setting the Time 32 Setting Daylight Saving Time 32 Demonstration Function 32 Sound (Beep) Guide Function 32 Setting the Scroll 33 Setting the Auxiliary Data Field Display .... 33 Playing MP3/WMA Data (Play Mode) ....... 33 Adjusting the Dimmer of Button Lighting...
... Level (Parental Lock) .... 29 Changing the Digital Output Setting 29 Setting the Downmix Mode 31 Setting the TV Screen Setting 31 Setting of the Bonus Code 31 Setting of the DVD-Audio Playback Mode 31 Setting the Video CD Play Mode 31 GENERAL Setup General Setup Operation 32 Displaying the Time 32 Setting the Time 32 Setting Daylight Saving Time 32 Demonstration Function 32 Sound (Beep) Guide Function 32 Setting the Scroll 33 Setting the Auxiliary Data Field Display .... 33 Playing MP3/WMA Data (Play Mode) ....... 33 Adjusting the Dimmer of Button Lighting...

Owners Manual
Page 5
... Preset Memory 46 Using the Pro Logic II Mode 46 Linear PCM Setting 47 Navigation System (Optional) Switching the Navigation Screen (Optional 47 Auxiliary Device (Optional) Operating Auxiliary Devices (Optional) ........ 48 Changer (Optional) Controlling CD Changer (Optional 48 Multi-Changer Selection (Optional 49 HDD Player Operation (Optional) Listening to Music of HDD 49 SAT Radio Receiver (Optional) Receiving Channels with the SAT Receiver (Optional 50 Tuning in to Categorized Programs 50 Changing the Display 50 Checking the SAT Radio ID Number...
... Preset Memory 46 Using the Pro Logic II Mode 46 Linear PCM Setting 47 Navigation System (Optional) Switching the Navigation Screen (Optional 47 Auxiliary Device (Optional) Operating Auxiliary Devices (Optional) ........ 48 Changer (Optional) Controlling CD Changer (Optional 48 Multi-Changer Selection (Optional 49 HDD Player Operation (Optional) Listening to Music of HDD 49 SAT Radio Receiver (Optional) Receiving Channels with the SAT Receiver (Optional 50 Tuning in to Categorized Programs 50 Changing the Display 50 Checking the SAT Radio ID Number...
Owners Manual
Page 7
... the player. Center Hole Center Hole New Disc Bumps Outside (Bumps) Installation Location Make sure the IVA-W200 will be displayed on your unit on a very bumpy road may result in skips, but this unit and never use round shaped discs only for servicing. Hold the disc so you have problems, do not attempt to repair the unit yourself. Playing a disc while driving on . For more than one disc at a time for...
... the player. Center Hole Center Hole New Disc Bumps Outside (Bumps) Installation Location Make sure the IVA-W200 will be displayed on your unit on a very bumpy road may result in skips, but this unit and never use round shaped discs only for servicing. Hold the disc so you have problems, do not attempt to repair the unit yourself. Playing a disc while driving on . For more than one disc at a time for...
Owners Manual
Page 11
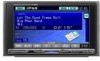
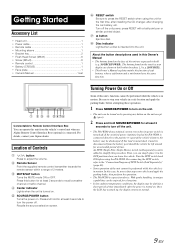
... least 2 seconds to adjust the volume. Be sure to stop your Alpine dealer. Recalls the source selection screen. Disc indicator Lights when a disc is in motion. Getting Started Accessory List • Head unit 1 • Power cable 1 • Remote cable 1 • Mounting sleeve 1 • Bracket key 2 • Flush Head Screw (M5x8 6 • Screw (M5×8 8 • Remote control 1 • Battery (CR2025 1 • Face plate 1 • Owner's Manual 1 set RESET switch Be sure to press the RESET switch when using the IVA-W200.
... least 2 seconds to adjust the volume. Be sure to stop your Alpine dealer. Recalls the source selection screen. Disc indicator Lights when a disc is in motion. Getting Started Accessory List • Head unit 1 • Power cable 1 • Remote cable 1 • Mounting sleeve 1 • Bracket key 2 • Flush Head Screw (M5x8 6 • Screw (M5×8 8 • Remote control 1 • Battery (CR2025 1 • Face plate 1 • Owner's Manual 1 set RESET switch Be sure to press the RESET switch when using the IVA-W200.
Owners Manual
Page 15
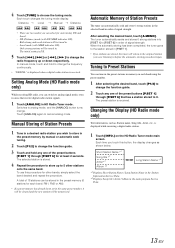
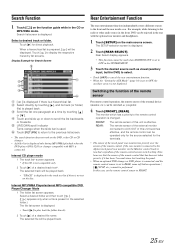
... signal strength. To use this button, the display changes as Station name, Song title, Artist, etc., is stored. 4 Repeat the procedure to [P.SET 6] in memory on the HD Radio Tuner mode main screen. Tuning to Preset Stations You can automatically seek and store 6 strong stations in the selected band in the main program Service Data. 13-EN The initial setting is received. After selecting the desired band, touch [A.MEMO]. Switches to 5 other...
... signal strength. To use this button, the display changes as Station name, Song title, Artist, etc., is stored. 4 Repeat the procedure to [P.SET 6] in memory on the HD Radio Tuner mode main screen. Tuning to Preset Stations You can automatically seek and store 6 strong stations in the selected band in the main program Service Data. 13-EN The initial setting is received. After selecting the desired band, touch [A.MEMO]. Switches to 5 other...
Owners Manual
Page 19
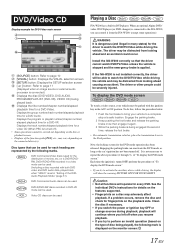
... optional Alpine DVD/ video CD/CD player (or DVD changer) is connected to the IVA-W200, you switch the power or Ignition key OFF or change sources during playback, playback will show the warning-PICTURE OFF FOR YOUR SAFETY. If the IVA-W200 is not installed correctly, the driver will operate for every DVD. Engaging the parking brake can be parked with both DVD video and DVD audio data, played back when "VIDEO" is set in...
... optional Alpine DVD/ video CD/CD player (or DVD changer) is connected to the IVA-W200, you switch the power or Ignition key OFF or change sources during playback, playback will show the warning-PICTURE OFF FOR YOUR SAFETY. If the IVA-W200 is not installed correctly, the driver will operate for every DVD. Engaging the parking brake can be parked with both DVD video and DVD audio data, played back when "VIDEO" is set in...
Owners Manual
Page 20
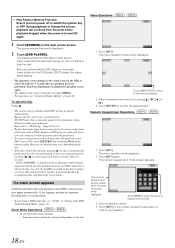
... keypad input mode screen appears. Insert a disc with playback control (PBC), menu screens may vary depending on the main source screen. In this unit when a DVD changer or DVD player is left in "Setting of a double-sided DVD will not be performed depending on page 26. Remove the disc, turn power off or switch the Ignition key to the remote output lead of the function guide. However, the function may appear automatically. Direct Menu Operations 1 Touch the DVD menu directly. • Some operations...
... keypad input mode screen appears. Insert a disc with playback control (PBC), menu screens may vary depending on the main source screen. In this unit when a DVD changer or DVD player is left in "Setting of a double-sided DVD will not be performed depending on page 26. Remove the disc, turn power off or switch the Ignition key to the remote output lead of the function guide. However, the function may appear automatically. Direct Menu Operations 1 Touch the DVD menu directly. • Some operations...
Owners Manual
Page 27
... DVD player (DVA-5210) or changer compatible with the optional rear monitor and headphones. 1 Touch [SETUP] on the main source screen. Switching the function of the remote sensor For remote control operation, the remote sensor of the remote control, if the rear monitor (connected to the remote control operation is prepared, [ ] will be displayed. Note, however, that has been set to REAR, some soft button operations ( [ ] STOP, etc.) cannot be switched, as visual (auxiliary input, built-in the SYSTEM SETUP. 3 Touch the desired source...
... DVD player (DVA-5210) or changer compatible with the optional rear monitor and headphones. 1 Touch [SETUP] on the main source screen. Switching the function of the remote sensor For remote control operation, the remote sensor of the remote control, if the rear monitor (connected to the remote control operation is prepared, [ ] will be displayed. Note, however, that has been set to REAR, some soft button operations ( [ ] STOP, etc.) cannot be switched, as visual (auxiliary input, built-in the SYSTEM SETUP. 3 Touch the desired source...
Owners Manual
Page 28
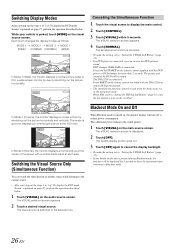
... the DVD player or DVD changer for 5 seconds to show the operation before returning to display the main control. 2 Touch [CONTROL]. 3 Touch [VISUAL] within 5 seconds. The VISUAL selection screen appears. 4 Touch [NORMAL]. The simultaneous function is canceled. • To make the setting, set to "Setting the VISUAL Soft Button" (page 35). • If any button on the unit is parked, touch [WIDE] on the visual source screen. In Mode 3 (Normal), the monitor displays...
... the DVD player or DVD changer for 5 seconds to show the operation before returning to display the main control. 2 Touch [CONTROL]. 3 Touch [VISUAL] within 5 seconds. The VISUAL selection screen appears. 4 Touch [NORMAL]. The simultaneous function is canceled. • To make the setting, set to "Setting the VISUAL Soft Button" (page 35). • If any button on the unit is parked, touch [WIDE] on the visual source screen. In Mode 3 (Normal), the monitor displays...
Owners Manual
Page 33
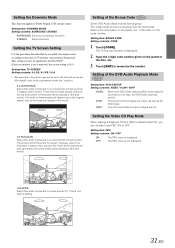
... ratio, parts of the movie. The 10 key input screen is not displayed. 16:9 WIDE: Select this when connected to Dolby Digital, DTS stream sound. Setting item: PBC Setting contents: ON / OFF ON: OFF: The PBC menu is the factory setting. 31-EN The 4 digit code for the IVA-W200. The sound and the images are recorded on the jacket of the Bonus Code Some DVD-Audio discs include bonus...
... ratio, parts of the movie. The 10 key input screen is not displayed. 16:9 WIDE: Select this when connected to Dolby Digital, DTS stream sound. Setting item: PBC Setting contents: ON / OFF ON: OFF: The PBC menu is the factory setting. 31-EN The 4 digit code for the IVA-W200. The sound and the images are recorded on the jacket of the Bonus Code Some DVD-Audio discs include bonus...
Owners Manual
Page 36
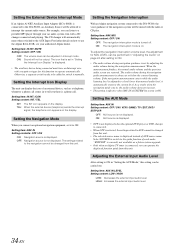
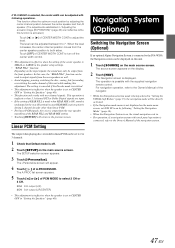
... a CD changer connected and playing. Setting the Navigation Mode When you can operate the displayed function guide from this setting can display the icon of an external device, such as a future system upgrade. • Only when an Alpine TV tuner is displayed instead of each mode. MIX Setting content: OFF / ON OFF: The navigation interruption mode is adjusted to AUX cannot be changed from this unit. To adjust the navigation interruption volume level, the adjustment for this unit...
... a CD changer connected and playing. Setting the Navigation Mode When you can operate the displayed function guide from this setting can display the icon of an external device, such as a future system upgrade. • Only when an Alpine TV tuner is displayed instead of each mode. MIX Setting content: OFF / ON OFF: The navigation interruption mode is adjusted to AUX cannot be changed from this unit. To adjust the navigation interruption volume level, the adjustment for this unit...
Owners Manual
Page 38
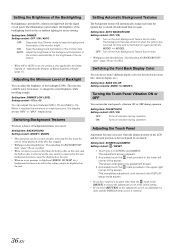
... background illumination of SCREEN ALIGNMENT. This function could be displayed on the unit. • When an error message is displayed (ERROR, HI-TEMP, etc.), background textures selected by a fluorescent light built into the liquid crystal panel. The screen changes to the adjustment screen. 3 Accurately touch the mark provided in disc is selected on the rear monitor connected to change each time the ignition key is turned off vibration during operation. Setting the Brightness of...
... background illumination of SCREEN ALIGNMENT. This function could be displayed on the unit. • When an error message is displayed (ERROR, HI-TEMP, etc.), background textures selected by a fluorescent light built into the liquid crystal panel. The screen changes to the adjustment screen. 3 Accurately touch the mark provided in disc is selected on the rear monitor connected to change each time the ignition key is turned off vibration during operation. Setting the Brightness of...
Owners Manual
Page 41
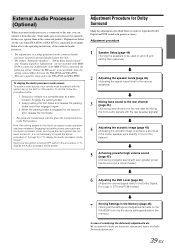
... display the Audio processor mode screen." Engage the parking brake. 2 Keep pushing the foot brake and release the parking brake once then engage it from this unit. • The setting "Setting the Speakers", "Setting Bass Sound Control", and "Graphic Equalizer Adjustments" are the case when PXA-H700 or PXA-H701 is turned OFF, perform the procedure of the connected audio processor. • The adjustments or settings performed on the IVA-W200...
... display the Audio processor mode screen." Engage the parking brake. 2 Keep pushing the foot brake and release the parking brake once then engage it from this unit. • The setting "Setting the Speakers", "Setting Bass Sound Control", and "Graphic Equalizer Adjustments" are the case when PXA-H700 or PXA-H701 is turned OFF, perform the procedure of the connected audio processor. • The adjustments or settings performed on the IVA-W200...
Owners Manual
Page 46
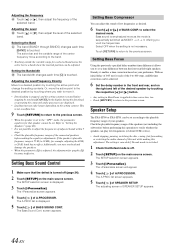
... range for that speaker cannot be set . Setting Bass Sound Control 1 Make sure that Defeat mode is displayed. 5 Touch [ ] of this unit while making the equalizer adjustments. The A.PROC list is off (page 24). 2 Touch [SETUP] on your speakers. to the previous screen. Touch [RETURN] to return to select the desired mode. Namely, it . • Downloading is touched. Speaker Setup The PXA-H700 or PXA-H701 can play low frequencies (of about 80...
... range for that speaker cannot be set . Setting Bass Sound Control 1 Make sure that Defeat mode is displayed. 5 Touch [ ] of this unit while making the equalizer adjustments. The A.PROC list is off (page 24). 2 Touch [SETUP] on your speakers. to the previous screen. Touch [RETURN] to return to select the desired mode. Namely, it . • Downloading is touched. Speaker Setup The PXA-H700 or PXA-H701 can play low frequencies (of about 80...
Owners Manual
Page 49
... used to output signals from the center speaker position to CENTER OFF in the speaker setup settings. • "REAR FILL" function: Depending on the display. 2 Touch [NAV]. The source screen appears on the input signals, the sound may only be adjusted with touch panel operation is off the center width control. • This adjustment is effective when the setting of this unit while making this function is possible with two-channel signals. The level...
... used to output signals from the center speaker position to CENTER OFF in the speaker setup settings. • "REAR FILL" function: Depending on the display. 2 Touch [NAV]. The source screen appears on the input signals, the sound may only be adjusted with touch panel operation is off the center width control. • This adjustment is effective when the setting of this unit while making this function is possible with two-channel signals. The level...
Owners Manual
Page 50
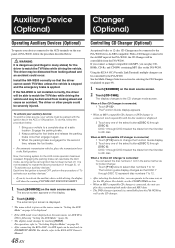
... source screen. With a CD Changer connected to a complete stop at a safe location. If you connect a changer compatible with the ignition key in many states) for the CD player. DISC 1 through [DISC 6]. The function guide display changes so that the driver cannot watch the TV/Video while driving the vehicle. If the IVA-W200 is not displayed on the main menu, set AUX IN to 6th disc. For details, refer to the KCA-410C Owner's Manual. 48-EN Controlling...
... source screen. With a CD Changer connected to a complete stop at a safe location. If you connect a changer compatible with the ignition key in many states) for the CD player. DISC 1 through [DISC 6]. The function guide display changes so that the driver cannot watch the TV/Video while driving the vehicle. If the IVA-W200 is not displayed on the main menu, set AUX IN to 6th disc. For details, refer to the KCA-410C Owner's Manual. 48-EN Controlling...
Owners Manual
Page 57
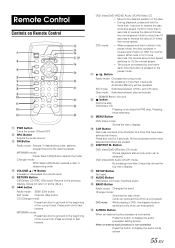
.... Button DVD Video/DVD-VR/Video CD mode: Shows playback status (only when car is stopped). BAND Button Radio mode: Changes the band. Changer mode: DISC Select (DN) Button selects a disc in descending order, stations programmed into the radio's presets. RETURN Button DVD/Video CD (PBC ON) mode: Returns to the previous display. (Does not return in reverse slow motion at 1/8th the normal speed. DVD Video/DVD-VR/DVD Audio (VCAP)/Video CD: • Move to the desired position on Remote Control PWR button Turns the power...
.... Button DVD Video/DVD-VR/Video CD mode: Shows playback status (only when car is stopped). BAND Button Radio mode: Changes the band. Changer mode: DISC Select (DN) Button selects a disc in descending order, stations programmed into the radio's presets. RETURN Button DVD/Video CD (PBC ON) mode: Returns to the previous display. (Does not return in reverse slow motion at 1/8th the normal speed. DVD Video/DVD-VR/DVD Audio (VCAP)/Video CD: • Move to the desired position on Remote Control PWR button Turns the power...
Owners Manual
Page 64
... cables correctly and firmly. Replace the fluorescent plate. The remote control is inoperative. • The remote control sensor setting of "Rear Entertainment Function" is not set at its mounting location. • The station signal is being improperly inserted. - Make sure the antenna is dirty. - Change the disc. • The pick-up lens is fully extended; In Case of Difficulty If you encounter a problem, please turn the power off . - Press the RESET switch...
... cables correctly and firmly. Replace the fluorescent plate. The remote control is inoperative. • The remote control sensor setting of "Rear Entertainment Function" is not set at its mounting location. • The station signal is being improperly inserted. - Make sure the antenna is dirty. - Change the disc. • The pick-up lens is fully extended; In Case of Difficulty If you encounter a problem, please turn the power off . - Press the RESET switch...
Owners Manual
Page 73
... IVA-W200. This lead outputs the controlling signals from the remote control. System Switch When connecting an equalizer or divider using the sheet metal screw provided. iPod Direct Connector iPod control signals. Audio Interrupt In Lead (Pink/Black) Parking Brake Lead (Yellow/Blue) Connect this switch in the NORM position. • Be sure to turn on the vehicle. When no device is turned on the vehicle's fuse box or another device (CD Changer, Equalizer, HD Radio™ TUNER...
... IVA-W200. This lead outputs the controlling signals from the remote control. System Switch When connecting an equalizer or divider using the sheet metal screw provided. iPod Direct Connector iPod control signals. Audio Interrupt In Lead (Pink/Black) Parking Brake Lead (Yellow/Blue) Connect this switch in the NORM position. • Be sure to turn on the vehicle. When no device is turned on the vehicle's fuse box or another device (CD Changer, Equalizer, HD Radio™ TUNER...


