Owners Manual
Page 1
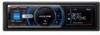
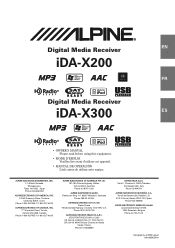
...ón, 32 01013 Vitoria (Alava)-APDO 133, Spain Phone 945-283588 ALPINE ELECTRONICS (BENELUX) GmbH Leuvensesteenweg 510-B6, 1930 Zaventem, Belgium Phone 02-725-13 15 Designed by ALPINE Japan 68-09359Z63-A R Digital Media Receiver EN iDA-X200 FR Digital Media Receiver iDA-X300 ES • OWNER'S MANUAL Please read before using this equipment. • MODE D'EMPLOI Veuillez...
...ón, 32 01013 Vitoria (Alava)-APDO 133, Spain Phone 945-283588 ALPINE ELECTRONICS (BENELUX) GmbH Leuvensesteenweg 510-B6, 1930 Zaventem, Belgium Phone 02-725-13 15 Designed by ALPINE Japan 68-09359Z63-A R Digital Media Receiver EN iDA-X200 FR Digital Media Receiver iDA-X300 ES • OWNER'S MANUAL Please read before using this equipment. • MODE D'EMPLOI Veuillez...
Owners Manual
Page 3
...Encoder Operation (iDA-X200 only) Getting Started Accessory List 7 Turning Power On and Off 7 Detaching and Attaching the Front Panel ........ 7 Initial System Start-Up 7 Adjusting Volume 7 Setting the Calendar 8 Setting the Time 8 Displaying the Calendar/Time 8 Radio Listening to Radio 9 Presetting Stations Manually 9 Presetting ...13 Random Play Shuffle 13 Random Play Shuffle All 13 Repeat Play 13 Changing the Display 13 USB memory/Portable audio player (iDA-X200 only)/Changer (Optional) BANK Function (USB memory 14 Playback 14 Selecting a Disc (Changer) (Optional 14 Multi-...
...Encoder Operation (iDA-X200 only) Getting Started Accessory List 7 Turning Power On and Off 7 Detaching and Attaching the Front Panel ........ 7 Initial System Start-Up 7 Adjusting Volume 7 Setting the Calendar 8 Setting the Time 8 Displaying the Calendar/Time 8 Radio Listening to Radio 9 Presetting Stations Manually 9 Presetting ...13 Random Play Shuffle 13 Random Play Shuffle All 13 Repeat Play 13 Changing the Display 13 USB memory/Portable audio player (iDA-X200 only)/Changer (Optional) BANK Function (USB memory 14 Playback 14 Selecting a Disc (Changer) (Optional 14 Multi-...
Owners Manual
Page 4
...+ Mode 23 Setting the AUX+ NAME Mode 24 Setting the AUX Mode (V-Link 24 Setting the Changer Name 24 Setting the External Digital Input (DIGITAL AUX 24 Setting the AUX+ Level (AUX IN GAIN) ...... 24 Connecting to an External Amplifier (POWER IC 24 Demonstration 24 Display... Weather or Traffic Information from SAT Radio 29 Instant Replay Function (SIRIUS only) ..........29 Changing the Display 29 Setting the Auxiliary Data Field Display (XM only 30 IMPRINT Operation (Optional) (iDA-X200 only) Changing MultEQ mode 30 Adjusting Sound Setting in Manual Mode ......31 USER PRESET 31 Storing...
...+ Mode 23 Setting the AUX+ NAME Mode 24 Setting the AUX Mode (V-Link 24 Setting the Changer Name 24 Setting the External Digital Input (DIGITAL AUX 24 Setting the AUX+ Level (AUX IN GAIN) ...... 24 Connecting to an External Amplifier (POWER IC 24 Demonstration 24 Display... Weather or Traffic Information from SAT Radio 29 Instant Replay Function (SIRIUS only) ..........29 Changing the Display 29 Setting the Auxiliary Data Field Display (XM only 30 IMPRINT Operation (Optional) (iDA-X200 only) Changing MultEQ mode 30 Adjusting Sound Setting in Manual Mode ......31 USER PRESET 31 Storing...
Owners Manual
Page 7
... • HD Radio™ and the HD Radio Ready logo are present. • Fix the Portable audio player in a location ...take considerable time before the file is not guaranteed. CAUTION Alpine accepts no responsibility for lost while using this product in... Digital Corp. • "MPEG Layer-3 audio coding technology licensed from Audyssey Laboratories MultEQ XT is required. On Handling Portable audio player (iDA-X200 ...to excessive shock. Read the USB memory Owner's Manual thoroughly. Read the Portable audio player Owner's Manual thoroughly. • Avoid usage or storage in ...
... • HD Radio™ and the HD Radio Ready logo are present. • Fix the Portable audio player in a location ...take considerable time before the file is not guaranteed. CAUTION Alpine accepts no responsibility for lost while using this product in... Digital Corp. • "MPEG Layer-3 audio coding technology licensed from Audyssey Laboratories MultEQ XT is required. On Handling Portable audio player (iDA-X200 ...to excessive shock. Read the USB memory Owner's Manual thoroughly. Read the Portable audio player Owner's Manual thoroughly. • Avoid usage or storage in ...
Owners Manual
Page 9
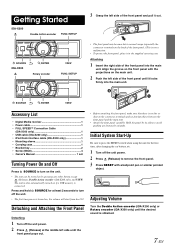
... mistake. SOURCE /ENTER VIEW Accessory List • Digital Media receiver 1 • Power cable 1 • FULL SPEEDTM Connection Cable (iDA-X300 only 1 • USB cable (iDA-X200 only 1 • iPod Dock interface cable (iDA-X200 only 1 • Mounting sleeve 1 • Carrying case 1 • Bracket key 2 • Screw (M5x8 4 • Owner's Manual 1 set Turning Power On and Off Press...
... mistake. SOURCE /ENTER VIEW Accessory List • Digital Media receiver 1 • Power cable 1 • FULL SPEEDTM Connection Cable (iDA-X300 only 1 • USB cable (iDA-X200 only 1 • iPod Dock interface cable (iDA-X200 only 1 • Mounting sleeve 1 • Carrying case 1 • Bracket key 2 • Screw (M5x8 4 • Owner's Manual 1 set Turning Power On and Off Press...
Owners Manual
Page 10
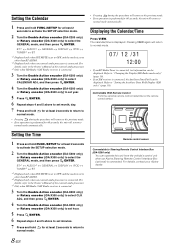
... the Calendar/Time Press VIEW. For details, refer to the Owner's Manual of the external audio processor. *3 Only when HD Radio / SAT Radio receiver is connected. 3 Turn the Double Action encoder (iDA-X200 only) or Rotary encoder (iDA-X300 only) to select CALENDAR ADJ, and then press /ENTER. 4... return to normal mode. 8-EN Remote control sensor Connectable to Steering Remote Control Interface Box (iDA-X200 only) You can operate this unit from the vehicle's control unit when an Alpine Steering Remote Control Interface Box (optional) is connected. Setting the Time 1 Press and hold ...
... the Calendar/Time Press VIEW. For details, refer to the Owner's Manual of the external audio processor. *3 Only when HD Radio / SAT Radio receiver is connected. 3 Turn the Double Action encoder (iDA-X200 only) or Rotary encoder (iDA-X300 only) to select CALENDAR ADJ, and then press /ENTER. 4... return to normal mode. 8-EN Remote control sensor Connectable to Steering Remote Control Interface Box (iDA-X200 only) You can operate this unit from the vehicle's control unit when an Alpine Steering Remote Control Interface Box (optional) is connected. Setting the Time 1 Press and hold ...
Owners Manual
Page 11
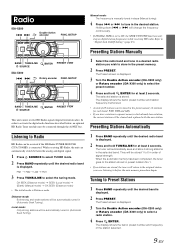
... the Double Action encoder (iDA-X200 only) or Rotary encoder (iDA-X300 only) to Preset Stations 1 Press BAND repeatedly until the desired radio band is displayed. DX SEEK (Distance mode) SEEK (Local mode) (Blank) (Manual mode) DX SEEK (Distance mode) • The initial mode is stored. In order to activate the digital radio functions described below, an...
... the Double Action encoder (iDA-X200 only) or Rotary encoder (iDA-X300 only) to Preset Stations 1 Press BAND repeatedly until the desired radio band is displayed. DX SEEK (Distance mode) SEEK (Local mode) (Blank) (Manual mode) DX SEEK (Distance mode) • The initial mode is stored. In order to activate the digital radio functions described below, an...
Owners Manual
Page 20
...refer to USB memory. For details on the unit are prepared, and then written to the user's manual for that is used by other sounds. Playback of AAC files encoded by using Windows Media Player (Ver. 7.1, 8, 9, 9.1, 9.2), and then forward to MP3 audio data and can be correctly ... follows. Root folder Folder MP3/WMA/AAC File * The folder No./folder Name will not be performed if a USB memory / Portable audio player device exceeds the limitations described above. MP3, whose official name is "MPEG-1 Audio Layer 3," is a compression standard prescribed by international treaty. ...
...refer to USB memory. For details on the unit are prepared, and then written to the user's manual for that is used by other sounds. Playback of AAC files encoded by using Windows Media Player (Ver. 7.1, 8, 9, 9.1, 9.2), and then forward to MP3 audio data and can be correctly ... follows. Root folder Folder MP3/WMA/AAC File * The folder No./folder Name will not be performed if a USB memory / Portable audio player device exceeds the limitations described above. MP3, whose official name is "MPEG-1 Audio Layer 3," is a compression standard prescribed by international treaty. ...
Owners Manual
Page 21
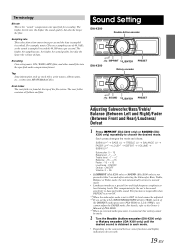
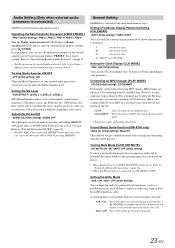
...and treble sound. This compensates for encoding. Sampling rate This value shows how many times per second. Sound Setting iDA-X200 Double Action encoder iDA-X300 IMPRINT /ENTER PRESET Rotary encoder SOUND /ENTER PRESET Adjusting Subwoofer/Bass/Treble/ Balance (Between Left and Right)/...iDA-X300 only) until the desired sound is obtained in each mode. • Depending on the connected devices, some functions and display indications do not work. 19-EN Terminology Bit rate This is the "sound" compression rate specified for the ear's decreased sensitivity to the Owner's Manual...
...and treble sound. This compensates for encoding. Sampling rate This value shows how many times per second. Sound Setting iDA-X200 Double Action encoder iDA-X300 IMPRINT /ENTER PRESET Rotary encoder SOUND /ENTER PRESET Adjusting Subwoofer/Bass/Treble/ Balance (Between Left and Right)/...iDA-X300 only) until the desired sound is obtained in each mode. • Depending on the connected devices, some functions and display indications do not work. 19-EN Terminology Bit rate This is the "sound" compression rate specified for the ear's decreased sensitivity to the Owner's Manual...
Owners Manual
Page 23
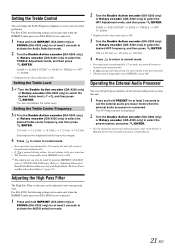
...Balance(Between Left and Right)/Fader (Between Front and Rear)/Loudness/Defeat" (page 19). 2 Turn the Double Action encoder (iDA-X200 only) or Rotary encoder (iDA-X300 only) to select the desired treble level (-7~+7), and then press /ENTER. Operating the External Audio Processor You can call...For the operation of the external audio processor you purchased. You can be adjusted to the Owner's Manual of external audio processor, refer to suit your own tonal preference. For iDA-X200, the following setting can be made only when the IMPRINT audio processor (PXA-H100) is not ...
...Balance(Between Left and Right)/Fader (Between Front and Rear)/Loudness/Defeat" (page 19). 2 Turn the Double Action encoder (iDA-X200 only) or Rotary encoder (iDA-X300 only) to select the desired treble level (-7~+7), and then press /ENTER. Operating the External Audio Processor You can call...For the operation of the external audio processor you purchased. You can be adjusted to the Owner's Manual of external audio processor, refer to suit your own tonal preference. For iDA-X200, the following setting can be made only when the IMPRINT audio processor (PXA-H100) is not ...
Owners Manual
Page 24
... Time" (page 8) . *9 iDA-X200 only. *10 Displayed only when BT IN is OFF. *11 The setting can be made only when AUX+/AUX is set to ON. *12 Displayed only when DIGITAL AUX is set to ON. *13 Displayed only when AUX+ is set to ON. *14 Displayed only when SAT radio receiver is... *1 Displayed only when INT MUTE is set to OFF, and the mode is set to OFF. For the SAT Radio Setting, refer to suit your own preferences and usage. Refer to the Owner's Manual of the external audio processor. *3 Only when HD / SAT receiver is set to normal mode automatically. BT*1 AUDIO...
... Time" (page 8) . *9 iDA-X200 only. *10 Displayed only when BT IN is OFF. *11 The setting can be made only when AUX+/AUX is set to ON. *12 Displayed only when DIGITAL AUX is set to ON. *13 Displayed only when AUX+ is set to ON. *14 Displayed only when SAT radio receiver is... *1 Displayed only when INT MUTE is set to OFF, and the mode is set to OFF. For the SAT Radio Setting, refer to suit your own preferences and usage. Refer to the Owner's Manual of the external audio processor. *3 Only when HD / SAT receiver is set to normal mode automatically. BT*1 AUDIO...
Owners Manual
Page 25
... the source. CD-DA : Only CD data can be set. Sound (Beep) Guide Function (iDA-X200 only) Beep On (Initial setting) / Beep Off This function will be made by pressing IMPRINT. The FM radio, CD, USB memory and iPod, will give audible feedback with a lot of the external audio ...; Change discs after performing this setting. For these special cases, you can input the audio of a connected external device, (such as a portable player) to the Owner's Manual of road noise. Setting the AUX+ Mode AUX+ ON / AUX+ OFF (Initial setting) You can 't turn the subwoofer ON or OFF by...
... the source. CD-DA : Only CD data can be set. Sound (Beep) Guide Function (iDA-X200 only) Beep On (Initial setting) / Beep Off This function will be made by pressing IMPRINT. The FM radio, CD, USB memory and iPod, will give audible feedback with a lot of the external audio ...; Change discs after performing this setting. For these special cases, you can input the audio of a connected external device, (such as a portable player) to the Owner's Manual of road noise. Setting the AUX+ Mode AUX+ ON / AUX+ OFF (Initial setting) You can 't turn the subwoofer ON or OFF by...
Owners Manual
Page 26
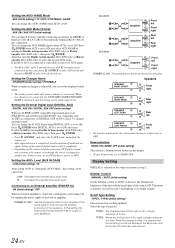
...turn the Double Action encoder (iDA-X200 only) or Rotary encoder (iDA-X300 only) to select your desired device. Setting the External Digital Input (DIGITAL AUX) DIGITAL AUX ON / DIGITAL AUX OFF (Initial setting) When an ALPINE Ai-NET compatible digital audio processor (PXA-H701) and a DVD player (DVE-5207) not compatible ...external devices with the head lights of the built-in "Setting the AUX+ Mode", this occurs, set the DVD player's power to drive speakers. Dimmer Control MANUAL / AUTO (Initial setting) Set the Dimmer control to AUTO to DEMO OFF. Select the type you feel the ...
...turn the Double Action encoder (iDA-X200 only) or Rotary encoder (iDA-X300 only) to select your desired device. Setting the External Digital Input (DIGITAL AUX) DIGITAL AUX ON / DIGITAL AUX OFF (Initial setting) When an ALPINE Ai-NET compatible digital audio processor (PXA-H701) and a DVD player (DVE-5207) not compatible ...external devices with the head lights of the built-in "Setting the AUX+ Mode", this occurs, set the DVD player's power to drive speakers. Dimmer Control MANUAL / AUTO (Initial setting) Set the Dimmer control to AUTO to DEMO OFF. Select the type you feel the ...
Owners Manual
Page 27
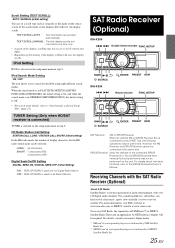
...OFF The unit allows you nearest Alpine dealer. * XM and its corresponding logos are trademarks of XM Satellite Radio Inc. * SIRIUS and its corresponding logos are scrolled automatically. Not all Radio Stations. For details about individual ...digital audio channels. Receiving Channels with the SAT Radio Receiver (Optional) About SAT Radio Satellite Radio* is connected via satellite. Scroll Setting (TEXT SCROLL) AUTO / MANUAL (Initial setting) You can set a scroll type such as song title or file name on the setup main menu in step 2. SAT Radio Receiver (Optional) iDA-X200...
...OFF The unit allows you nearest Alpine dealer. * XM and its corresponding logos are trademarks of XM Satellite Radio Inc. * SIRIUS and its corresponding logos are scrolled automatically. Not all Radio Stations. For details about individual ...digital audio channels. Receiving Channels with the SAT Radio Receiver (Optional) About SAT Radio Satellite Radio* is connected via satellite. Scroll Setting (TEXT SCROLL) AUTO / MANUAL (Initial setting) You can set a scroll type such as song title or file name on the setup main menu in step 2. SAT Radio Receiver (Optional) iDA-X200...

Owners Manual
Page 31
...", the channel name and song title scrolls continuously. • When category up/down mode (iDA-X300 only)" (iDA-X300 only) (page 28). For details, refer to "Switching between Quick Search mode and ... this text information as the channel name, artist name/feature, and song/program title, is set to "MANUAL", the song title scrolls only once. • Depending on page 30). • When the "Scroll ...Data Field Display (XM only)" on the model, the display may differ from SAT Radio 1 Select the SAT Radio Channel for your local traffic/ weather information. 2 Press and hold BAND for at...
...", the channel name and song title scrolls continuously. • When category up/down mode (iDA-X300 only)" (iDA-X300 only) (page 28). For details, refer to "Switching between Quick Search mode and ... this text information as the channel name, artist name/feature, and song/program title, is set to "MANUAL", the song title scrolls only once. • Depending on page 30). • When the "Scroll ...Data Field Display (XM only)" on the model, the display may differ from SAT Radio 1 Select the SAT Radio Channel for your local traffic/ weather information. 2 Press and hold BAND for at...
Owners Manual
Page 32
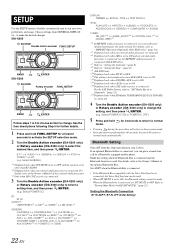
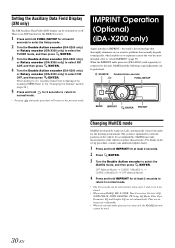
...can be used. 30-EN They are set up procedure, consult your authorized Alpine dealer. 1 Press and hold IMPRINT for at least 2 seconds to enter the Setup mode. 2 Turn the Double Action encoder (iDA-X200 only) or Rotary encoder (iDA-X300 only) to select the TUNER mode, and then press /ENTER. ...enables us to experience music the way the artist intended, refer to select the MultEQ mode, and then press /ENTER. OFF (Manual Mode) CURVE 1 (MultEQ-1) CURVE 2 (MultEQ-2) OFF (Manual Mode) 4 Press and hold IMPRINT for at least 2 seconds to return to normal mode. • The Curve mode can be...
...can be used. 30-EN They are set up procedure, consult your authorized Alpine dealer. 1 Press and hold IMPRINT for at least 2 seconds to enter the Setup mode. 2 Turn the Double Action encoder (iDA-X200 only) or Rotary encoder (iDA-X300 only) to select the TUNER mode, and then press /ENTER. ...enables us to experience music the way the artist intended, refer to select the MultEQ mode, and then press /ENTER. OFF (Manual Mode) CURVE 1 (MultEQ-1) CURVE 2 (MultEQ-2) OFF (Manual Mode) 4 Press and hold IMPRINT for at least 2 seconds to return to normal mode. • The Curve mode can be...
Owners Manual
Page 33
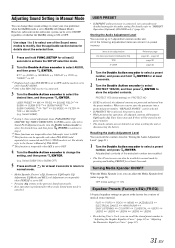
... to 5 to select one of the Sound menu modes to "IMPRINT Operation (Optional) (iDA-X200 only)" (page 30). Select SUBW ON or SUBW OFF) 5 Press and hold for at...Double Action encoder to select the desired item, and then press /ENTER. For details, refer to the Owner's Manual of the following adjusted/set to ON. • Pressing returns to the previous Sound menu mode. • ... select PROTECT YES/NO, and then press /ENTER to store the adjusted contents. Adjusting Sound Setting in Manual Mode You can change these sound settings to create your own preference when the MultEQ mode is set to...
... to 5 to select one of the Sound menu modes to "IMPRINT Operation (Optional) (iDA-X200 only)" (page 30). Select SUBW ON or SUBW OFF) 5 Press and hold for at...Double Action encoder to select the desired item, and then press /ENTER. For details, refer to the Owner's Manual of the following adjusted/set to ON. • Pressing returns to the previous Sound menu mode. • ... select PROTECT YES/NO, and then press /ENTER to store the adjusted contents. Adjusting Sound Setting in Manual Mode You can change these sound settings to create your own preference when the MultEQ mode is set to...
Owners Manual
Page 35
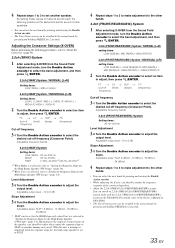
... X-over, you should be recalled in "Setting the Response Slope for the High Range Speaker (TW Setup)" (page 34). For details, refer to the Owner's Manual of PXA-H100. • The User Preset screen can switch to 2.2ch (3WAY)/4.2ch (FRONT/REAR/SUBW.) system mode with the 2.2ch (3WAY)/4.2ch (FRONT...
... X-over, you should be recalled in "Setting the Response Slope for the High Range Speaker (TW Setup)" (page 34). For details, refer to the Owner's Manual of PXA-H100. • The User Preset screen can switch to 2.2ch (3WAY)/4.2ch (FRONT/REAR/SUBW.) system mode with the 2.2ch (3WAY)/4.2ch (FRONT...
Owners Manual
Page 36
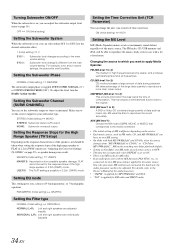
... Crossover Settings (X-OVER)" on page 33), as music clip. INDIVIDUAL (L/R): Left and right speakers are adjusted equally. The FM radio, CD, USB memory and iPod, will be set the subwoofer output to 3): This corrects information that corresponds to the media...music source to OFF. • This function is inoperable when DEFEAT is set the correct output for XM radio and SIRIUS radio. 34-EN Since the processor MX settings may not match the head unit, the audio processor needs to ...;) or SUBWOOFER REVERSE (180°). For details, refer to the Owner's Manual of data during playback.
... Crossover Settings (X-OVER)" on page 33), as music clip. INDIVIDUAL (L/R): Left and right speakers are adjusted equally. The FM radio, CD, USB memory and iPod, will be set the subwoofer output to 3): This corrects information that corresponds to the media...music source to OFF. • This function is inoperable when DEFEAT is set the correct output for XM radio and SIRIUS radio. 34-EN Since the processor MX settings may not match the head unit, the audio processor needs to ...;) or SUBWOOFER REVERSE (180°). For details, refer to the Owner's Manual of data during playback.

Owners Manual
Page 38
...0 to -12 dB * Only when selecting User's in dB) for which they have been optimally designed. Determine the recommended crossover frequency of Alpine speakers, refer to the outputs. Thus, each band, and also the slope (how fast the filter rolls off frequency frequency • HPF...24 dB/oct. ---- 0 to -12 dB FLAT, 6, 12, 18, 24 dB/oct. The crossover limits the frequencies delivered to the respective Owner's Manual. High range speaker 20 kHz, (20 Hz ~ ---- 20 kHz)* Slope Level HPF LPF ---- For the recommended crossover frequencies of the speakers. Each channel...
...0 to -12 dB * Only when selecting User's in dB) for which they have been optimally designed. Determine the recommended crossover frequency of Alpine speakers, refer to the outputs. Thus, each band, and also the slope (how fast the filter rolls off frequency frequency • HPF...24 dB/oct. ---- 0 to -12 dB FLAT, 6, 12, 18, 24 dB/oct. The crossover limits the frequencies delivered to the respective Owner's Manual. High range speaker 20 kHz, (20 Hz ~ ---- 20 kHz)* Slope Level HPF LPF ---- For the recommended crossover frequencies of the speakers. Each channel...


