
User Manual
Page 18
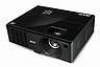
... red. 3 Turn on the projector by pressing (POWER) on the control panel or remote control, and the Power indicator LED will detect your source (computer, notebook, video player, etc.). English 8 Turning the Projector On/Off Turning On the Projector 1 Remove the lens cap. 2 Ensure that the power cord and signal cable...
... red. 3 Turn on the projector by pressing (POWER) on the control panel or remote control, and the Power indicator LED will detect your source (computer, notebook, video player, etc.). English 8 Turning the Projector On/Off Turning On the Projector 1 Remove the lens cap. 2 Ensure that the power cord and signal cable...
User Manual
Page 43
...• Adjusts the focus ring on the projector lens. • Make sure the projection screen is within the required distance: X1111/X1111H/X1111A/X1211/X1211H/X1211K/ X1213P/X1213PH: 4.9 to 37 feet (1.5 to 11.3 meters) X1311KW/X1313PW/X1313PWH: 4.3 to 32 feet (1.3 to 9.7 meters) X1211S: 3 to ...• Follow the steps for detailed information. • If you are using a Microsoft® Windows® based notebook computer is not displaying your notebook: Some notebook PCs may deactivate their own screens when a second display device is unstable • Use "Tracking" to correct it ...
...• Adjusts the focus ring on the projector lens. • Make sure the projection screen is within the required distance: X1111/X1111H/X1111A/X1211/X1211H/X1211K/ X1213P/X1213PH: 4.9 to 37 feet (1.5 to 11.3 meters) X1311KW/X1313PW/X1313PWH: 4.3 to 32 feet (1.3 to 9.7 meters) X1211S: 3 to ...• Follow the steps for detailed information. • If you are using a Microsoft® Windows® based notebook computer is not displaying your notebook: Some notebook PCs may deactivate their own screens when a second display device is unstable • Use "Tracking" to correct it ...