
Acer Veriton 3900/5900/6900/7900 User's Guide EN
Page 11
To replace the side panel 59 Upgrading your computer 60 Installing additional memory 60 To remove a DDR2 DIMM 60 To install a DDR2 DIMM 61 To reconfigure your computer 62 Replacing the Veriton 3900Pro's hard disk 62 Installing an expansion card 65 Replacing the Veriton 5900Pro's hard disk 65 Installing an... Replacing the Veriton 69/7900Pro's hard disk 67 Installing an expansion card 68 5 System utilities 69 Adobe Reader 71 NTI CD&DVD-Maker (for models with CD or DVD Burner) 72 PowerDVD (for models with DVD) 74 How do I open and watch a DVD? 74 BIOS utility 75 ...
To replace the side panel 59 Upgrading your computer 60 Installing additional memory 60 To remove a DDR2 DIMM 60 To install a DDR2 DIMM 61 To reconfigure your computer 62 Replacing the Veriton 3900Pro's hard disk 62 Installing an expansion card 65 Replacing the Veriton 5900Pro's hard disk 65 Installing an... Replacing the Veriton 69/7900Pro's hard disk 67 Installing an expansion card 68 5 System utilities 69 Adobe Reader 71 NTI CD&DVD-Maker (for models with CD or DVD Burner) 72 PowerDVD (for models with DVD) 74 How do I open and watch a DVD? 74 BIOS utility 75 ...
Acer Veriton 3900/5900/6900/7900 User's Guide EN
Page 74
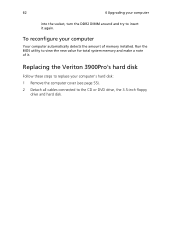
Run the BIOS utility to view the new value for total system memory and make a note of memory installed. Replacing the Veriton 3900Pro's hard disk Follow these steps to replace your computer Your computer automatically detects the amount of it again. To reconfigure your computer's hard disk: 1 Remove the computer cover (see page 55). 2 Detach all cables connected to the CD or DVD drive, the 3.5-inch floppy drive and hard disk. 62 4 Upgrading your computer into the socket, turn the DDR2 DIMM around and try to insert it .
Run the BIOS utility to view the new value for total system memory and make a note of memory installed. Replacing the Veriton 3900Pro's hard disk Follow these steps to replace your computer Your computer automatically detects the amount of it again. To reconfigure your computer's hard disk: 1 Remove the computer cover (see page 55). 2 Detach all cables connected to the CD or DVD drive, the 3.5-inch floppy drive and hard disk. 62 4 Upgrading your computer into the socket, turn the DDR2 DIMM around and try to insert it .

Acer Veriton 3900/5900/6900/7900 User's Guide EN
Page 78
When you removed earlier. 8 Replace the computer cover. 66 4 Upgrading your computer Installing an expansion card To install an expansion card: 1 Remove the computer cover. 2 Locate an empty PCI Express or PCI slot on the ... packaging. 6 Align the card in the empty bracket and then insert it into the slot. Save the lock. 4 Pull out the bracket on the computer, BIOS automatically detects and assigns resources to the computer. Make sure that holds the bracket to the newly installed devices.
When you removed earlier. 8 Replace the computer cover. 66 4 Upgrading your computer Installing an expansion card To install an expansion card: 1 Remove the computer cover. 2 Locate an empty PCI Express or PCI slot on the ... packaging. 6 Align the card in the empty bracket and then insert it into the slot. Save the lock. 4 Pull out the bracket on the computer, BIOS automatically detects and assigns resources to the computer. Make sure that holds the bracket to the newly installed devices.

Acer Veriton 3900/5900/6900/7900 User's Guide EN
Page 80
...bracket to your computer Note: Make sure that the other ends of the disk cables are securely connected to the newly installed devices. 68 4 Upgrading your computer with the empty bracket and then insert it into the slot. Make sure that the card is properly seated. 7 Secure the ..."To replace the side panel" on page 59. See "To replace the side panel" on page 59. When you turn on the computer, BIOS automatically detects and assigns resources to their corresponding connectors on the housing opposite the selected empty slot. 5 Remove the expansion card from its protective packaging...
...bracket to your computer Note: Make sure that the other ends of the disk cables are securely connected to the newly installed devices. 68 4 Upgrading your computer with the empty bracket and then insert it into the slot. Make sure that the card is properly seated. 7 Secure the ..."To replace the side panel" on page 59. See "To replace the side panel" on page 59. When you turn on the computer, BIOS automatically detects and assigns resources to their corresponding connectors on the housing opposite the selected empty slot. 5 Remove the expansion card from its protective packaging...


