

User Manual
Page 1
TABLE OF CONTENTS Special notes on LCD monitors 1 Information for your safety and comfort 2 Unpacking 5 Attaching/Removing the base 6 Screen position adjustment 6 Connecting the power cord 7 Safety precaution 7 Cleaning your monitor 7 Power saving 8 DDC 8 Connector Pin Assignment 9 Standard Timing Table 11 Installation 12 User controls 13 Troubleshooting 19
TABLE OF CONTENTS Special notes on LCD monitors 1 Information for your safety and comfort 2 Unpacking 5 Attaching/Removing the base 6 Screen position adjustment 6 Connecting the power cord 7 Safety precaution 7 Cleaning your monitor 7 Power saving 8 DDC 8 Connector Pin Assignment 9 Standard Timing Table 11 Installation 12 User controls 13 Troubleshooting 19

User Manual
Page 2
... lit all of the previous screen may find slightly uneven brightness on the screen depending on the desktop pattern you use . SPECIAL NOTES ON LCD MONITORS The following symptoms are normal with LCD monitor and do not indicate a problem. EN-1 Turn off the Power Switch for hours.
... lit all of the previous screen may find slightly uneven brightness on the screen depending on the desktop pattern you use . SPECIAL NOTES ON LCD MONITORS The following symptoms are normal with LCD monitor and do not indicate a problem. EN-1 Turn off the Power Switch for hours.
User Manual
Page 4
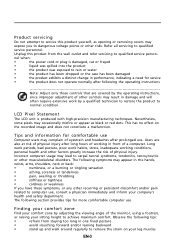
... and headaches after long hours of physical injury. The following the operating instructions Note: Adjust only those controls that are also at risk of the monitor, using a footrest, or raising your leg muscles EN-3 Finding your comfort zone Find your comfort zone by a qualified technician to restore the product to normal...
... and headaches after long hours of physical injury. The following the operating instructions Note: Adjust only those controls that are also at risk of the monitor, using a footrest, or raising your leg muscles EN-3 Finding your comfort zone Find your comfort zone by a qualified technician to restore the product to normal...

User Manual
Page 5
...your shoulders • install the external display, keyboard and mouse properly and within comfort able reach • if you view your monitor more information and help in such a way that the side faces the window or any light source • minimizing room light ...to minimize neck strain Taking care of cardboard extended from drying out. The following websites: Worldwide: http://www.acer-group.com/public/Sustainability/sustainability01.htm http://www.acer-group.com/public/Sustainability/sustainability04.htm EN-4 Eyes • Rest your eyes frequently. • Give your ...
...your shoulders • install the external display, keyboard and mouse properly and within comfort able reach • if you view your monitor more information and help in such a way that the side faces the window or any light source • minimizing room light ...to minimize neck strain Taking care of cardboard extended from drying out. The following websites: Worldwide: http://www.acer-group.com/public/Sustainability/sustainability01.htm http://www.acer-group.com/public/Sustainability/sustainability04.htm EN-4 Eyes • Rest your eyes frequently. • Give your ...

User Manual
Page 6
UNPACKING Please check the following items are present when you unpack the box, and save the packing materials in case you will need to ship or transport the monitor in future. · LCD Monitor · AC Adapter · AC Power Cord · D-Sub Cable (Optional) · DVI Cable (Optional) · HDMI Cable (Optional) · User Manual · Quick Start Guide V185HL/V195HQL V205HL V225WL V235HL LCD monitor P/N:MU.LV200.001 EN-5
UNPACKING Please check the following items are present when you unpack the box, and save the packing materials in case you will need to ship or transport the monitor in future. · LCD Monitor · AC Adapter · AC Power Cord · D-Sub Cable (Optional) · DVI Cable (Optional) · HDMI Cable (Optional) · User Manual · Quick Start Guide V185HL/V195HQL V205HL V225WL V235HL LCD monitor P/N:MU.LV200.001 EN-5

User Manual
Page 7
... on a stable surface -- cated by using both of the monitor as indi- Attaching the Base Note: Remove the monitor and monitor base from its packaging. Carefully place the monitor face-down as shown in the figure below . 5 15 EN-6 The monitor can adjust the tilt of the monitor by arrow below . use a cloth to avoid scratching...
... on a stable surface -- cated by using both of the monitor as indi- Attaching the Base Note: Remove the monitor and monitor base from its packaging. Carefully place the monitor face-down as shown in the figure below . 5 15 EN-6 The monitor can adjust the tilt of the monitor by arrow below . use a cloth to avoid scratching...

User Manual
Page 8
... another end to wipe the screen and cabinet front and sides. No user-adjustment is required. · Plug one end of the monitor. SAFETY PRECAUTION · Avoid placing the monitor, or any other light sources may reflect on the power cord to avoid damage to the cable. · Do not expose the... sure that the power cord you use is the correct type required for the country in which the equipment will be installed. Always put the monitor in either 100/120V AC or 220/240 V AC voltage area. The cord set should have the appropriate safety approvals for your area. · This...
... another end to wipe the screen and cabinet front and sides. No user-adjustment is required. · Plug one end of the monitor. SAFETY PRECAUTION · Avoid placing the monitor, or any other light sources may reflect on the power cord to avoid damage to the cable. · Do not expose the... sure that the power cord you use is the correct type required for the country in which the equipment will be installed. Always put the monitor in either 100/120V AC or 220/240 V AC voltage area. The cord set should have the appropriate safety approvals for your area. · This...

User Manual
Page 9
The DDC (Display Data Channel) is activated. EN-8 DDC To make your installation easier, the monitor is able to ON state is around 3 seconds. The monitor supports DDC2B standard. State ON Power Saving Mode LED Light Blue Amber The power saving states will be kept ...until a control signal has been detected or the keyboard or mouse is a communication protocol through which the monitor automatically informs the host system about its capabilities, for example, supported resolutions and corresponding timing. The recovery time from the display controller,...
The DDC (Display Data Channel) is activated. EN-8 DDC To make your installation easier, the monitor is able to ON state is around 3 seconds. The monitor supports DDC2B standard. State ON Power Saving Mode LED Light Blue Amber The power saving states will be kept ...until a control signal has been detected or the keyboard or mouse is a communication protocol through which the monitor automatically informs the host system about its capabilities, for example, supported resolutions and corresponding timing. The recovery time from the display controller,...

User Manual
Page 10
... NC NC TMDS Clock Shield TMDS Clock+ DDC TMDS Clock- TMDS Data2- 13. 2. TMDS Data2+ 14. 3. DDC Clock 18. 7. NC 20. 9. DESCRIPTION Red Green Blue Monitor Ground DDC-return R-Ground G-Ground B-Ground PIN NO. 9. 10. 11. 12. 13. 14. 15. TMDS Data 2/4 Shield 15. 4. DESCRIPTION +5V Logic Ground...
... NC NC TMDS Clock Shield TMDS Clock+ DDC TMDS Clock- TMDS Data2- 13. 2. TMDS Data2+ 14. 3. DDC Clock 18. 7. NC 20. 9. DESCRIPTION Red Green Blue Monitor Ground DDC-return R-Ground G-Ground B-Ground PIN NO. 9. 10. 11. 12. 13. 14. 15. TMDS Data 2/4 Shield 15. 4. DESCRIPTION +5V Logic Ground...

User Manual
Page 13
...of the 24-pin DVI cable to the back of the adapter to the monitor and the other end to the computer's port. 1-3 HDMI Cable (Only HDMI-Input Model) a. If the monitor still does not function properly, please refer to the troubleshooting section to the computer...stuhreedbiogtithatlhceabmleo(noitnolyr afonrddcuoaml-pinupteurt amreodpeolws).ered-OFF. Connect one end of the monitor and connect the other end to the adapter. b. Make sure both the monitor and computer are powered-OFF. b. INSTALLATION To install the monitor to the computer. 1-2 Cao. Connect the adapter a Connect the...
...of the 24-pin DVI cable to the back of the adapter to the monitor and the other end to the computer's port. 1-3 HDMI Cable (Only HDMI-Input Model) a. If the monitor still does not function properly, please refer to the troubleshooting section to the computer...stuhreedbiogtithatlhceabmleo(noitnolyr afonrddcuoaml-pinupteurt amreodpeolws).ered-OFF. Connect one end of the monitor and connect the other end to the adapter. b. Make sure both the monitor and computer are powered-OFF. b. INSTALLATION To install the monitor to the computer. 1-2 Cao. Connect the adapter a Connect the...

User Manual
Page 14
...the Auto Adjustment function. MENU OSD functions Press this button to indicate currently selected input source. Empowering: Press the Empowering Key to open the Acer eColor Management OSD and access the scenario modes. VGA or DVI or HDMI If either VGA or DVI input is used to appear. Using... the Shortcut Menu Press the function button to open the shortcut menu. It may be connected to your monitor. (a) VGA input (b) DVI input (c) HDMI input As you cycle through the sources you quickly select the most commonly accessed settings. The Auto ...
...the Auto Adjustment function. MENU OSD functions Press this button to indicate currently selected input source. Empowering: Press the Empowering Key to open the Acer eColor Management OSD and access the scenario modes. VGA or DVI or HDMI If either VGA or DVI input is used to appear. Using... the Shortcut Menu Press the function button to open the shortcut menu. It may be connected to your monitor. (a) VGA input (b) DVI input (c) HDMI input As you cycle through the sources you quickly select the most commonly accessed settings. The Auto ...

User Manual
Page 16
..., Auto Config and other image-related qualities. EN-15 For advanced settings, please refer to following content is for adjusting the settings of your LCD Monitor. You can be used to open the OSD. Adjusting the OSD settings Note: The following page: Adjusting the picture quality 1 Press the MENU key to...
..., Auto Config and other image-related qualities. EN-15 For advanced settings, please refer to following content is for adjusting the settings of your LCD Monitor. You can be used to open the OSD. Adjusting the OSD settings Note: The following page: Adjusting the picture quality 1 Press the MENU key to...

User Manual
Page 19
EN-18 Then the basic information of LCD monitor will show up the OSD. 2 Using the / keys, select Information from the OSD. Product information (V185HL/V195HQL) Information 1366 x 768 H:48KHz V:60Hz VGA Input S/N:ETL5309 1326350380B3742 (V205HL) Information 1600 x 900 H:65KHz V:60Hz VGA Input S/N:ETL5309 1326350380B3742 (V225W L) Information 1680 x 1050 H:65KHz V:60Hz VGA Input S/N:ETL5309 1326350380B3742 (V235HL) Information 1920 x 1080 H:65KHz V:60Hz VGA Input S/N:ETL5309 1326350380B3742 1 Press the MENU key to bring up for current input.
EN-18 Then the basic information of LCD monitor will show up the OSD. 2 Using the / keys, select Information from the OSD. Product information (V185HL/V195HQL) Information 1366 x 768 H:48KHz V:60Hz VGA Input S/N:ETL5309 1326350380B3742 (V205HL) Information 1600 x 900 H:65KHz V:60Hz VGA Input S/N:ETL5309 1326350380B3742 (V225W L) Information 1680 x 1050 H:65KHz V:60Hz VGA Input S/N:ETL5309 1326350380B3742 (V235HL) Information 1920 x 1080 H:65KHz V:60Hz VGA Input S/N:ETL5309 1326350380B3742 1 Press the MENU key to bring up for current input.

User Manual
Page 20
... problem. (VGA Mode) Problems Current Status Remedy LED ON · Using OSD, adjust brightness and contrast to maximum or reset to the monitor. TROUBLESHOOTING Before sending your LCD monitor for a few seconds after adjusting the size of computer system is · Using OSD, adjust RESOLUTION, CLOCK, missing, center CLOCK-PHASE... Picture Display is ON. EN-19 LED displays amber color · Check if video signal cable is properly connected at the back of monitor. · Check if the power of the image before changing or disconnecting the signal cable or powering OFF the...
... problem. (VGA Mode) Problems Current Status Remedy LED ON · Using OSD, adjust brightness and contrast to maximum or reset to the monitor. TROUBLESHOOTING Before sending your LCD monitor for a few seconds after adjusting the size of computer system is · Using OSD, adjust RESOLUTION, CLOCK, missing, center CLOCK-PHASE... Picture Display is ON. EN-19 LED displays amber color · Check if video signal cable is properly connected at the back of monitor. · Check if the power of the image before changing or disconnecting the signal cable or powering OFF the...

User Manual
Page 21
No Picture · Check if AC power cord is ON. LED OFF · Check the power switch. EN-20 LED displays amber color · Check if video signal cable is properly connected at the back of monitor. · Check if the power of computer system is properly connected to their default settings. (DVI/HDMI mode) Problems Current Status Remedy LED ON · Using OSD, adjust brightness and contrast to maximum or reset to the monitor.
No Picture · Check if AC power cord is ON. LED OFF · Check the power switch. EN-20 LED displays amber color · Check if video signal cable is properly connected at the back of monitor. · Check if the power of computer system is properly connected to their default settings. (DVI/HDMI mode) Problems Current Status Remedy LED ON · Using OSD, adjust brightness and contrast to maximum or reset to the monitor.

User Manual
Page 22
... framework for the setting of ecodesign requirements for energy-related product. EN55024 -. Acer Incorporated 8F, 88, Sec. 1, Xintai 5th Rd., Xizhi New Taipei City 221, Taiwan Declaration of Conformity We, Acer Incorporated 8F, 88, Sec. 1, Xintai 5th Rd., Xizhi, New Taipei... s.r.l Via Lepetit, 40, 20020 Lainate (MI) Italy Tel: +39-02-939-921 ,Fax: +39-02 9399-2913 www.acer.it Hereby declare that: Product: LCD Monitor Trade Name: Acer Model Number: V185HL/V195HQL,V205HL,V225W L,V235HL SKU Number: V185HL xxxxxx /V195HQL xxxxxx, V205HL xxxxxx,V225W L xxxxxx, V235HL xxxxxx; ("x" ...
... framework for the setting of ecodesign requirements for energy-related product. EN55024 -. Acer Incorporated 8F, 88, Sec. 1, Xintai 5th Rd., Xizhi New Taipei City 221, Taiwan Declaration of Conformity We, Acer Incorporated 8F, 88, Sec. 1, Xintai 5th Rd., Xizhi, New Taipei... s.r.l Via Lepetit, 40, 20020 Lainate (MI) Italy Tel: +39-02-939-921 ,Fax: +39-02 9399-2913 www.acer.it Hereby declare that: Product: LCD Monitor Trade Name: Acer Model Number: V185HL/V195HQL,V205HL,V225W L,V235HL SKU Number: V185HL xxxxxx /V195HQL xxxxxx, V205HL xxxxxx,V225W L xxxxxx, V235HL xxxxxx; ("x" ...

User Manual
Page 23
... local Manufacturer /Importer is subject to the following two conditions: (1) this device may not cause harmful interference, and (2) this declaration: Product: LCD Monitor Model Number: V185HL/V195HQL,V205HL,V225W L,V235HL SKU Number: V185HL xxxxxx /V195HQL xxxxxx, V205HL xxxxxx,V225W L xxxxxx, V235HL xxxxxx; ("x" = 0~9, ...a ~ z, A ~ Z or Blank) Name of Responsible Party: Acer America Corporation Address of the FCC Rules. San Jose, CA 95110 U. Acer America Corporation 333 West San Carlos St., San Jose CA 95110, U. A. A. Tel : 254-298-4000 Fax...
... local Manufacturer /Importer is subject to the following two conditions: (1) this device may not cause harmful interference, and (2) this declaration: Product: LCD Monitor Model Number: V185HL/V195HQL,V205HL,V225W L,V235HL SKU Number: V185HL xxxxxx /V195HQL xxxxxx, V205HL xxxxxx,V225W L xxxxxx, V235HL xxxxxx; ("x" = 0~9, ...a ~ z, A ~ Z or Blank) Name of Responsible Party: Acer America Corporation Address of the FCC Rules. San Jose, CA 95110 U. Acer America Corporation 333 West San Carlos St., San Jose CA 95110, U. A. A. Tel : 254-298-4000 Fax...

User Manual
Page 24
... guidelines set by reducing energy costs and helps protect the environment without sacrificing features or performance. Acer is committed to offer our customers products with the ENERGY STAR mark. What is in Active Off... registered U.S. Environmental Protection Agency. More information refers to http://www.energystar.gov or http://www.energystar.gov/powermangement Acer ENERGY STAR qualified products: •Produce less heat and reduce cooling loads, and warmer climates. •Automatically... improve the quality of inactivity respectively. •Wake the monitor when it is ENERGY STAR?
... guidelines set by reducing energy costs and helps protect the environment without sacrificing features or performance. Acer is committed to offer our customers products with the ENERGY STAR mark. What is in Active Off... registered U.S. Environmental Protection Agency. More information refers to http://www.energystar.gov or http://www.energystar.gov/powermangement Acer ENERGY STAR qualified products: •Produce less heat and reduce cooling loads, and warmer climates. •Automatically... improve the quality of inactivity respectively. •Wake the monitor when it is ENERGY STAR?


