

User Guide
Page 3
... 10 Hot Keys 10 Keyboard Ergonomics 14 Touchpad 15 Touchpad Basics 15 Customizing the Center Button 17 Storage 18 Hard Disk 18 EasyLink™ Combo Drive 18 Connecting and Disconnecting the EasyLink™ Combo Drive. . . . 18 Ejecting Media 19 Playing DVD Movies 20 Ports 21 Left Port 21 Rear Ports 22 Fax/Data...
... 10 Hot Keys 10 Keyboard Ergonomics 14 Touchpad 15 Touchpad Basics 15 Customizing the Center Button 17 Storage 18 Hard Disk 18 EasyLink™ Combo Drive 18 Connecting and Disconnecting the EasyLink™ Combo Drive. . . . 18 Ejecting Media 19 Playing DVD Movies 20 Ports 21 Left Port 21 Rear Ports 22 Fax/Data...
User Guide
Page 23
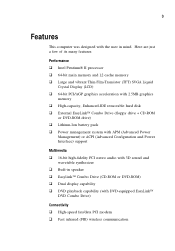
...(LCD) u 64-bit PCI/AGP graphics acceleration with 2.5MB graphics memory u High-capacity, Enhanced-IDE removable hard disk u External EasyLink™ Combo Drive (floppy drive + CD-ROM or DVD-ROM drive) u Lithium-Ion battery pack u Power management system with APM (Advanced Power Management) or ACPI (Advanced Configuration...) support Multimedia u 16-bit high-fidelity PCI stereo audio with 3D sound and wavetable synthesizer u Built-in speaker u EasyLink™ Combo Drive (CD-ROM or DVD-ROM) u Dual display capability u DVD playback capability (with the user in mind. 3 Features This computer was ...
...(LCD) u 64-bit PCI/AGP graphics acceleration with 2.5MB graphics memory u High-capacity, Enhanced-IDE removable hard disk u External EasyLink™ Combo Drive (floppy drive + CD-ROM or DVD-ROM drive) u Lithium-Ion battery pack u Power management system with APM (Advanced Power Management) or ACPI (Advanced Configuration...) support Multimedia u 16-bit high-fidelity PCI stereo audio with 3D sound and wavetable synthesizer u Built-in speaker u EasyLink™ Combo Drive (CD-ROM or DVD-ROM) u Dual display capability u DVD playback capability (with the user in mind. 3 Features This computer was ...

User Guide
Page 27
... 1 Function Power Description Lights when the computer is on. 2 Standby Lights when the computer enters Standby mode. 3 Media Activity Lights when the floppy drive, hard disk or EasyLink™ Combo Drive is active. 4 Battery Charge Lights when the battery is being charged. 5 Caps Lock Lights when Caps Lock is activated. 6 Num Lock Lights...
... 1 Function Power Description Lights when the computer is on. 2 Standby Lights when the computer enters Standby mode. 3 Media Activity Lights when the floppy drive, hard disk or EasyLink™ Combo Drive is active. 4 Battery Charge Lights when the battery is being charged. 5 Caps Lock Lights when Caps Lock is activated. 6 Num Lock Lights...

User Guide
Page 38
...the EasyLink™ Combo Drive To connect the EasyLink™ Combo Drive: 1. 18 Chapter 1 Getting Familiar with your Computer Storage This computer supplies you need more storage space. s High-speed CD-ROM drive or DVD-ROM drive (EasyLink™ DVD Combo Drive) Hard Disk The removable hard disk module can be ...upgraded when you with all-in-one floppy/CD-ROM or floppy /DVD-ROM "combo" drive that connects externally to the computer. The CD...
...the EasyLink™ Combo Drive To connect the EasyLink™ Combo Drive: 1. 18 Chapter 1 Getting Familiar with your Computer Storage This computer supplies you need more storage space. s High-speed CD-ROM drive or DVD-ROM drive (EasyLink™ DVD Combo Drive) Hard Disk The removable hard disk module can be ...upgraded when you with all-in-one floppy/CD-ROM or floppy /DVD-ROM "combo" drive that connects externally to the computer. The CD...
User Guide
Page 62
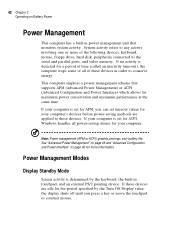
... battery life. System activity refers to conserve energy. If your computer is set for ACPI, Windows handles all of the following devices: keyboard, mouse, floppy drive, hard disk, peripherals connected to the serial and parallel ports, and video memory. Power Management Modes Display Standby Mode Screen activity is detected for the period...
... battery life. System activity refers to conserve energy. If your computer is set for ACPI, Windows handles all of the following devices: keyboard, mouse, floppy drive, hard disk, peripherals connected to the serial and parallel ports, and video memory. Power Management Modes Display Standby Mode Screen activity is detected for the period...

User Guide
Page 81
Insert the memory module diagonally into place. 4. then lift up and remove the memory door 3. The computer automatically detects and reconfigures the total memory size. Remove the screws from the memory door; Hard Disk Upgrade You can upgrade your hard disk with the screw. Replace the memory door and secure it clicks into the slot, then gently press it down until it with a higher capacity drive when you need more storage space. The computer uses a 9.5mm, 2.5-inch Enhanced-IDE hard disk. 61 2.
Insert the memory module diagonally into place. 4. then lift up and remove the memory door 3. The computer automatically detects and reconfigures the total memory size. Remove the screws from the memory door; Hard Disk Upgrade You can upgrade your hard disk with the screw. Replace the memory door and secure it clicks into the slot, then gently press it down until it with a higher capacity drive when you need more storage space. The computer uses a 9.5mm, 2.5-inch Enhanced-IDE hard disk. 61 2.

User Guide
Page 98
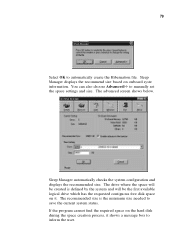
...is checked, the Sleep Manager status appears on the Create button, a dialog box pops up the main program, or simply rest your hard disk and creates the Hibernation file in the dialog box. 78 Chapter 5 Software Item Description Buttons Click to file system alignment. Current ...Setting Displays the drive and size of : Onboard memory (DRAM or dynamic memory), Video RAM (VRAM or video memory), SMRAM (static memory), and Others. The...
...is checked, the Sleep Manager status appears on the Create button, a dialog box pops up the main program, or simply rest your hard disk and creates the Hibernation file in the dialog box. 78 Chapter 5 Software Item Description Buttons Click to file system alignment. Current ...Setting Displays the drive and size of : Onboard memory (DRAM or dynamic memory), Video RAM (VRAM or video memory), SMRAM (static memory), and Others. The...
User Guide
Page 99
... manually set the space settings and size. If the program cannot find the required space on the hard disk during the space creation process, it . The drive where the space will be the first available logical drive which has the requested contiguous free disk space on onboard syste information. The advanced screen shows...
... manually set the space settings and size. If the program cannot find the required space on the hard disk during the space creation process, it . The drive where the space will be the first available logical drive which has the requested contiguous free disk space on onboard syste information. The advanced screen shows...

User Guide
Page 105
... Password prevents unauthorized access to change the booting order. See "System Security" on Apply to set using the BIOS Utility. 85 u Floppy Drive u IDE Hard Drive u CD-ROM/DVD-ROM Drive Simply drag and drop the devices to the Notebook Manager and BIOS Utility. There are two passwords you can set , modify or delete...
... Password prevents unauthorized access to change the booting order. See "System Security" on Apply to set using the BIOS Utility. 85 u Floppy Drive u IDE Hard Drive u CD-ROM/DVD-ROM Drive Simply drag and drop the devices to the Notebook Manager and BIOS Utility. There are two passwords you can set , modify or delete...

User Guide
Page 112
...Serial Number Shows the serial number of the computer. Manufacturer Name Shows the manufacturer of the hard disk. System with Shows the EasyLink™ Combo Drive type, CD-ROM or DVDROM. Hard Disk Drive Shows the size or capacity of the computer. Asset Tag Number Shows the asset number of... the hard disk. Note: "x" may refer to a series of numbers and/or characters or a combination of the ...
...Serial Number Shows the serial number of the computer. Manufacturer Name Shows the manufacturer of the hard disk. System with Shows the EasyLink™ Combo Drive type, CD-ROM or DVDROM. Hard Disk Drive Shows the size or capacity of the computer. Asset Tag Number Shows the asset number of... the hard disk. Note: "x" may refer to a series of numbers and/or characters or a combination of the ...

User Guide
Page 115
... the hard disk, it continues to search for a bootable floppy disk in which the computer starts up from Standby/Hibernation/Sleep mode faster. If not, the computer continues by booting up from . Disabled or Enabled Quiet Boot Hides the POST messages and displays the TravelMate logo startup screen. Enabled or Disabled Boot Drive...
... the hard disk, it continues to search for a bootable floppy disk in which the computer starts up from Standby/Hibernation/Sleep mode faster. If not, the computer continues by booting up from . Disabled or Enabled Quiet Boot Hides the POST messages and displays the TravelMate logo startup screen. Enabled or Disabled Boot Drive...

User Guide
Page 118
Parameter Setu Password Power-on how to set , this password protects the hard disk from unauthorized entry. See the following section for instructions on Password Hard Disk Password Disk Drive Control Description Options When set a password. When Password Check on how to set , this password protects the computer and this BIOS Utility from unauthorized...
Parameter Setu Password Power-on how to set , this password protects the hard disk from unauthorized entry. See the following section for instructions on Password Hard Disk Password Disk Drive Control Description Options When set a password. When Password Check on how to set , this password protects the computer and this BIOS Utility from unauthorized...

User Guide
Page 134
... 0 Extended Type Error Contact your dealer or an authorized or No Controller Present service center. Diskette Drive Controller Error Contact your dealer or an authorized service center. Hard Disk 0 Error Contact your dealer or an authorized service center. then press Esc to exit and ...reconfigure the computer. The following table lists the error messages in the floppy drive (A:), then press Enter to enter the BIOS...
... 0 Extended Type Error Contact your dealer or an authorized or No Controller Present service center. Diskette Drive Controller Error Contact your dealer or an authorized service center. Hard Disk 0 Error Contact your dealer or an authorized service center. then press Esc to exit and ...reconfigure the computer. The following table lists the error messages in the floppy drive (A:), then press Enter to enter the BIOS...

User Guide
Page 139
... processor with 3D sound and built-in wavetable synthesizer u Internal speaker ROM or DVD-ROM drive) Display and Video u 12.1-inch Thin Film Transistor LCD displaying 32-bit true- 119 ... Simultaneous LCD and CRT display u Dual display capability u DVD playback capability (with DVD-equipped EasyLink™ DVD Combo Drive) Audio u 16-bit PCI stereo audio with 256KB L2 cache memory Memory u Main memory expandable to 256MB Synchronous Dynamic...memory banks u 512KB Flash ROM BIOS Data Storage u One 2.5-inch, 9.5mm removable hard disk u One external EasyLink™ Combo Drive (floppy drive + CD-
... processor with 3D sound and built-in wavetable synthesizer u Internal speaker ROM or DVD-ROM drive) Display and Video u 12.1-inch Thin Film Transistor LCD displaying 32-bit true- 119 ... Simultaneous LCD and CRT display u Dual display capability u DVD playback capability (with DVD-equipped EasyLink™ DVD Combo Drive) Audio u 16-bit PCI stereo audio with 256KB L2 cache memory Memory u Main memory expandable to 256MB Synchronous Dynamic...memory banks u 512KB Flash ROM BIOS Data Storage u One 2.5-inch, 9.5mm removable hard disk u One external EasyLink™ Combo Drive (floppy drive + CD-

User Guide
Page 141
... charge/6~7-hour charge-in-use AC Adapter u 45-Watt u Auto sensing 100~240Vac, 50~60Hz Options u 32-/64-/128-MB memory upgrade module u Higher-capacity hard disk drive u EasyLink™ DVD Combo Drive (floppy drive + DVD-ROM drive) u PS/2 Y-cable u Additional AC adapter and battery pack u External battery charger
... charge/6~7-hour charge-in-use AC Adapter u 45-Watt u Auto sensing 100~240Vac, 50~60Hz Options u 32-/64-/128-MB memory upgrade module u Higher-capacity hard disk drive u EasyLink™ DVD Combo Drive (floppy drive + DVD-ROM drive) u PS/2 Y-cable u Additional AC adapter and battery pack u External battery charger
User Guide
Page 144
... PS/2 y-bridge cable 58 USB 57 contrast setting in Notebook Manager 89 D date setting in Setup Utility 93 diagnostics 110 diskette ejecting 19 diskette drive 18 display 5 auto-dim feature 43 computer 5 hot keys 12 opening and closing 6 performance 5 power management 5, 42 setting boot device in ... 89 setting in Notebook Manager 89 simultaneous 5 switching device in BIOS Utility 97 troubleshooting 107 ITW. See frequently-asked questions 105 H hard disk 18 installing 62 power management 43 upgrading 61 help Internet home page xvi online manual xvi online services 112 technical support xvii web...
... PS/2 y-bridge cable 58 USB 57 contrast setting in Notebook Manager 89 D date setting in Setup Utility 93 diagnostics 110 diskette ejecting 19 diskette drive 18 display 5 auto-dim feature 43 computer 5 hot keys 12 opening and closing 6 performance 5 power management 5, 42 setting boot device in ... 89 setting in Notebook Manager 89 simultaneous 5 switching device in BIOS Utility 97 troubleshooting 107 ITW. See frequently-asked questions 105 H hard disk 18 installing 62 power management 43 upgrading 61 help Internet home page xvi online manual xvi online services 112 technical support xvii web...

User Guide
Page 146
... specifications 119 Standby mode 43-44 entering 43 hot key 11 resuming from 44 signals 44 status indicator 7 status indicators 7 storage 18 AcerMedia Drive 18 floppy drive 18 hard disk 18 support information xvii T time setting in Setup Utility 93 touchpad 15 hot key 12 using 15-16 travel international flights 70 local...
... specifications 119 Standby mode 43-44 entering 43 hot key 11 resuming from 44 signals 44 status indicator 7 status indicators 7 storage 18 AcerMedia Drive 18 floppy drive 18 hard disk 18 support information xvii T time setting in Setup Utility 93 touchpad 15 hot key 12 using 15-16 travel international flights 70 local...


