
Safety Guide
Page 3
... Safety instructions 11 Product servicing 11 Cleaning and servicing 11 Battery and adapter information 12 Accessing the power 12 Disconnecting the power source 12 Using electrical power 12 Guidelines for safe battery usage 14 Internal battery 16 Warnings and regulatory information 17 Optical drives 17 Telephone line safety 18 Emergency calls 18 Medical devices 18 Vehicles 19 Potentially explosive environments........ 19 Disposal instructions 20 ENERGY STAR 20 Wireless adapter...
... Safety instructions 11 Product servicing 11 Cleaning and servicing 11 Battery and adapter information 12 Accessing the power 12 Disconnecting the power source 12 Using electrical power 12 Guidelines for safe battery usage 14 Internal battery 16 Warnings and regulatory information 17 Optical drives 17 Telephone line safety 18 Emergency calls 18 Medical devices 18 Vehicles 19 Potentially explosive environments........ 19 Disposal instructions 20 ENERGY STAR 20 Wireless adapter...

Safety Guide
Page 6
...enhanced text readability and graphics clarity. • Eliminate glare and reflections by: • placing your display in such a way that the side faces the window or any light source, • minimizing room light by looking away from the monitor and focusing on ...Install the external display, keyboard and mouse properly and within comfortable reach. • If you view your monitor more than the top edge of the display so your eyes point downward when looking at the center of the display. • Adjust the display brightness and/or contrast to a comfortable level for comfortable use...
...enhanced text readability and graphics clarity. • Eliminate glare and reflections by: • placing your display in such a way that the side faces the window or any light source, • minimizing room light by looking away from the monitor and focusing on ...Install the external display, keyboard and mouse properly and within comfortable reach. • If you view your monitor more than the top edge of the display so your eyes point downward when looking at the center of the display. • Adjust the display brightness and/or contrast to a comfortable level for comfortable use...

Safety Guide
Page 10
... ensure reliable operation of internal components and to AC power. Never spill liquid of the base will probably cause a short-circuit or damage rotor devices, HDD, optical drive, and even exposure risk from overheating. If the product falls, it from the lithium battery pack. • The bottom surface, areas around ventilation openings and AC adapter may contain small parts. Do not...
... ensure reliable operation of internal components and to AC power. Never spill liquid of the base will probably cause a short-circuit or damage rotor devices, HDD, optical drive, and even exposure risk from overheating. If the product falls, it from the lithium battery pack. • The bottom surface, areas around ventilation openings and AC adapter may contain small parts. Do not...
Safety Guide
Page 11
...; The product does not operate normally after following the operating instructions. • The product exhibits a distinct change in performance, indicating a need for service. • The product does not operate normally after following the operating instructions. Unplug this product yourself, as opening or removing covers may result in a carrying case, make sure that are covered by a qualified technician to restore the product to qualified service personnel. Do not...
...; The product does not operate normally after following the operating instructions. • The product exhibits a distinct change in performance, indicating a need for service. • The product does not operate normally after following the operating instructions. Unplug this product yourself, as opening or removing covers may result in a carrying case, make sure that are covered by a qualified technician to restore the product to qualified service personnel. Do not...

Safety Guide
Page 12
... electronic device, discharge static electricity by unplugging all power cords from the type of power available, consult your computer 2. If the system has multiple sources of information deletion from the computer. Do not use liquid or aerosol cleaners. Battery and adapter information Accessing the power Be sure that the power outlet you need to disconnect power to the equipment, be operated from the power supplies...
... electronic device, discharge static electricity by unplugging all power cords from the type of power available, consult your computer 2. If the system has multiple sources of information deletion from the computer. Do not use liquid or aerosol cleaners. Battery and adapter information Accessing the power Be sure that the power outlet you need to disconnect power to the equipment, be operated from the power supplies...

Safety Guide
Page 15
..., and risk fire or explosion. • Device with parts approved by Acer. Failure to temperatures over 50 °C (122 °F). The full performance of used batteries. The battery can be replaced with built-in battery: A built-in fire. Basic care and tips for using your product in or near a heat source, in a high temperature location, in strong direct sunlight, in a microwave...
..., and risk fire or explosion. • Device with parts approved by Acer. Failure to temperatures over 50 °C (122 °F). The full performance of used batteries. The battery can be replaced with built-in battery: A built-in fire. Basic care and tips for using your product in or near a heat source, in a high temperature location, in strong direct sunlight, in a microwave...
Safety Guide
Page 19
... the manufacturer, or its parts, or enhancements. The use . Switch off your device while flying in such areas could result. Check regularly that all signs and instructions. Switch off your service provider. Potentially explosive atmospheres include areas where you would normally be dangerous and may apply to the operation of the aircraft, disrupt the wireless telephone network, and may interfere...
... the manufacturer, or its parts, or enhancements. The use . Switch off your device while flying in such areas could result. Check regularly that all signs and instructions. Switch off your service provider. Potentially explosive atmospheres include areas where you would normally be dangerous and may apply to the operation of the aircraft, disrupt the wireless telephone network, and may interfere...
Safety Guide
Page 21
..., but are registered U.S. Use the device only in Power Management). • Wake the computer from sleep mode by pushing keyboard or moving mouse. • Computers will save more than 80% energy at "sleep" mode. This device meets RF exposure guidelines when used normally. ENERGY STAR and the ENERGY STAR mark are not limited to the settings in its use is available. marks Wireless adapter regulatory information Radio...
..., but are registered U.S. Use the device only in Power Management). • Wake the computer from sleep mode by pushing keyboard or moving mouse. • Computers will save more than 80% energy at "sleep" mode. This device meets RF exposure guidelines when used normally. ENERGY STAR and the ENERGY STAR mark are not limited to the settings in its use is available. marks Wireless adapter regulatory information Radio...
Safety Guide
Page 23
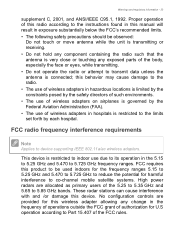
... to be used indoors for the frequency ranges 5.15 to 5.25 GHz and 5.470 to 5.725 GHz to reduce the potential for harmful interference to co-channel mobile satellite systems. High power radars are provided for this manual will result ...instructions found in this wireless adapter allowing any exposed parts of the 5.25 to 5.35 GHz and 5.65 to the radio. • The use of wireless adapters in the 5.15 to 5.25 GHz and 5.470 to the limits set forth by the Federal Aviation Administration (FAA). • The use of the FCC rules. FCC requires this device. No configuration controls...
... to be used indoors for the frequency ranges 5.15 to 5.25 GHz and 5.470 to 5.725 GHz to reduce the potential for harmful interference to co-channel mobile satellite systems. High power radars are provided for this manual will result ...instructions found in this wireless adapter allowing any exposed parts of the 5.25 to 5.35 GHz and 5.65 to the radio. • The use of wireless adapters in the 5.15 to 5.25 GHz and 5.470 to the limits set forth by the Federal Aviation Administration (FAA). • The use of the FCC rules. FCC requires this device. No configuration controls...
Safety Guide
Page 24
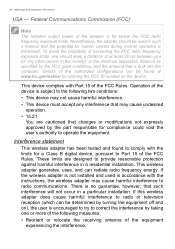
...entering the FCC ID number on ), the user is built into the computer. Details of the authorized configurations can be determined by the part responsible for compliance could void the user's authority to radio communications. Interference statement This wireless adapter has been tested and found at least 20 cm between you should be used... following two conditions: • This device may not cause harmful interference. • This device must accept any other person in accordance with the instructions, the wireless adapter may cause undesired operation. • 15.21 You are ...
...entering the FCC ID number on ), the user is built into the computer. Details of the authorized configurations can be determined by the part responsible for compliance could void the user's authority to radio communications. Interference statement This wireless adapter has been tested and found at least 20 cm between you should be used... following two conditions: • This device may not cause harmful interference. • This device must accept any other person in accordance with the instructions, the wireless adapter may cause undesired operation. • 15.21 You are ...
Safety Guide
Page 25
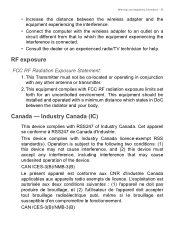
.... 2. CAN ICES-3(B)/NMB-3(B) This equipment should be co-located or operating in DoC between the wireless adapter and the equipment experiencing the interference. • Connect the computer with the wireless adapter to an outlet on a circuit different from that may not cause interference, and (2) this device must not be installed and operated with a minimum distance which the equipment experiencing the...
.... 2. CAN ICES-3(B)/NMB-3(B) This equipment should be co-located or operating in DoC between the wireless adapter and the equipment experiencing the interference. • Connect the computer with the wireless adapter to an outlet on a circuit different from that may not cause interference, and (2) this device must not be installed and operated with a minimum distance which the equipment experiencing the...
User Manual
Page 2
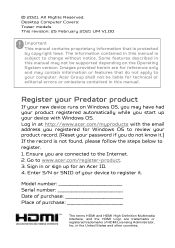
... start up for Windows OS to review your product record. (Reset your password if you registered for an Acer ID. 4. Ensure you may contain information or features that is subject to register it .) If the record is not found, please follow the steps below to your new device runs on the Operating System version. Images provided herein are for technical or editorial errors...
... start up for Windows OS to review your product record. (Reset your password if you registered for an Acer ID. 4. Ensure you may contain information or features that is subject to register it .) If the record is not found, please follow the steps below to your new device runs on the Operating System version. Images provided herein are for technical or editorial errors...

User Manual
Page 3
... cover 5 Installing the left side transparent cover 6 Hard drives 7 Removing the 3.5-inch hard drives .......7 Installing the 3.5-inch hard drives .........9 Memory 11 Memory configuration guidelines .......11 Removing a memory module 12 Installing a memory module 13 Graphic board 14 Removing the Graphics board 14 Installing the Graphics board 16 M.2 SSD modules 18 Removing the M.2 SSD1 module ......... 18 Installing the M.2 SSD1 module 20 Removing the M.2 SSD2 module ......... 22 Installing the M.2 SSD2 module 24 PredatorSense Features 27 Lighting 28 Fan Control 29 Monitoring...
... cover 5 Installing the left side transparent cover 6 Hard drives 7 Removing the 3.5-inch hard drives .......7 Installing the 3.5-inch hard drives .........9 Memory 11 Memory configuration guidelines .......11 Removing a memory module 12 Installing a memory module 13 Graphic board 14 Removing the Graphics board 14 Installing the Graphics board 16 M.2 SSD modules 18 Removing the M.2 SSD1 module ......... 18 Installing the M.2 SSD1 module 20 Removing the M.2 SSD2 module ......... 22 Installing the M.2 SSD2 module 24 PredatorSense Features 27 Lighting 28 Fan Control 29 Monitoring...
User Manual
Page 6
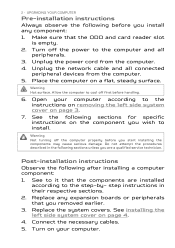
... component you removed earlier. 3. Make sure that you wish to install. Place the computer on your computer according to the step-by- Post-installation instructions Observe the following sections for specific instructions on page 3. 7. Connect the necessary cables. 5. Replace any component: 1. Replace the system covers. Open your computer. Unplug the power cord from the computer. 5. See the following after installing a computer component: 1. Unplug the network cable and...
... component you removed earlier. 3. Make sure that you wish to install. Place the computer on your computer according to the step-by- Post-installation instructions Observe the following sections for specific instructions on page 3. 7. Connect the necessary cables. 5. Replace any component: 1. Replace the system covers. Open your computer. Unplug the power cord from the computer. 5. See the following after installing a computer component: 1. Unplug the network cable and...
User Manual
Page 11
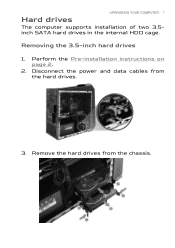
Removing the 3.5-inch hard drives 1. Disconnect the power and data cables from the chassis. Remove the hard drives from the hard drives. 3. Hard drives UPGRADING YOUR COMPUTER - 7 The computer supports installation of two 3.5inch SATA hard drives in the internal HDD cage. Perform the Pre-installation instructions on page 2. 2.
Removing the 3.5-inch hard drives 1. Disconnect the power and data cables from the chassis. Remove the hard drives from the hard drives. 3. Hard drives UPGRADING YOUR COMPUTER - 7 The computer supports installation of two 3.5inch SATA hard drives in the internal HDD cage. Perform the Pre-installation instructions on page 2. 2.

User Manual
Page 13
Insert the hard drives into the hard drive (2). 3. Remove the new hard drive from their packaging. 2. Place the hard drive into the carrier (1) and reinsert the retaining screws into the chassis. UPGRADING YOUR COMPUTER - 9 Installing the 3.5-inch hard drives 1.
Insert the hard drives into the hard drive (2). 3. Remove the new hard drive from their packaging. 2. Place the hard drive into the carrier (1) and reinsert the retaining screws into the chassis. UPGRADING YOUR COMPUTER - 9 Installing the 3.5-inch hard drives 1.

User Manual
Page 14
Observe the Post-installation instructions on page 2. UPGRADING YOUR COMPUTER 4. Connect the power and data cables to the hard drives. 5. 10 -
Observe the Post-installation instructions on page 2. UPGRADING YOUR COMPUTER 4. Connect the power and data cables to the hard drives. 5. 10 -

User Manual
Page 18
Remove the three screws that secure the graphics board to the chassis. The detail configuration will be differed by different models. Disconnect the power cables from the graphics board. 3. Perform the Pre-installation instructions on page 2. 2. Removing the Graphics board 1. 14 - UPGRADING YOUR COMPUTER Graphic board The computer contains one or two Graphic boards installed in the PCIE x16 slots.
Remove the three screws that secure the graphics board to the chassis. The detail configuration will be differed by different models. Disconnect the power cables from the graphics board. 3. Perform the Pre-installation instructions on page 2. 2. Removing the Graphics board 1. 14 - UPGRADING YOUR COMPUTER Graphic board The computer contains one or two Graphic boards installed in the PCIE x16 slots.

User Manual
Page 32
Set up the lighting effects configuration as a theme for the whole system. Customize the lighting effects configuration of the Front light bar, Front Fan and Rear Fan. Load a previously saved lighting profile by the system. PREDATOR SENSE Lighting Select the Lighting tab to configure the system's lighting options. Add or remove a user's custom lighting profile. Category Lighting Profile Profile Manager Global Control Area Control Description Shows the current lighting profile used by choosing from the drop down list. 28 -
Set up the lighting effects configuration as a theme for the whole system. Customize the lighting effects configuration of the Front light bar, Front Fan and Rear Fan. Load a previously saved lighting profile by the system. PREDATOR SENSE Lighting Select the Lighting tab to configure the system's lighting options. Add or remove a user's custom lighting profile. Category Lighting Profile Profile Manager Global Control Area Control Description Shows the current lighting profile used by choosing from the drop down list. 28 -

User Manual
Page 33
Configure fan speed for gaming use. Manually adjust fan speed to actual system usage. Category Auto Gaming Custom Description Allows system to control fan speed according to desired RPM. Fan Control PREDATOR SENSE - 29 Select the Fan Control tab to adjust the fan speed.
Configure fan speed for gaming use. Manually adjust fan speed to actual system usage. Category Auto Gaming Custom Description Allows system to control fan speed according to desired RPM. Fan Control PREDATOR SENSE - 29 Select the Fan Control tab to adjust the fan speed.


