
Lifecycle Ext. Guide
Page 3
... not eligible for self-repair, but is not described in order to replace other components than those listed above. Depending on model, the following key components are eligible for self-repair (if applicable); Battery pack HDD / SSD module DIMM module(s) WLAN module LTE module If a particular key component is not covered by the standard product...
... not eligible for self-repair, but is not described in order to replace other components than those listed above. Depending on model, the following key components are eligible for self-repair (if applicable); Battery pack HDD / SSD module DIMM module(s) WLAN module LTE module If a particular key component is not covered by the standard product...

Lifecycle Ext. Guide
Page 4
... in order to get access to product-specific software and documentation. For more information about the software recovery options, how to perform a software recovery or creating a Factory Default recovery media, please refer to discover the available system BIOS and Drivers for this product. To update the system BIOS: Download the desired system BIOS version from the list of suggested models in the User Manual of the product. System BIOS & Driver Updates 0 Visit http://www.acer.com/support...
... in order to get access to product-specific software and documentation. For more information about the software recovery options, how to perform a software recovery or creating a Factory Default recovery media, please refer to discover the available system BIOS and Drivers for this product. To update the system BIOS: Download the desired system BIOS version from the list of suggested models in the User Manual of the product. System BIOS & Driver Updates 0 Visit http://www.acer.com/support...

Lifecycle Ext. Guide
Page 33
Figure 1-44. Top Assembly (Keyboard) Disassembly Procedures 1-31 NOTE: NOTE: The keyboard is included as part of the top assembly and can no longer be disassembled. In the event that the Right Speaker, Left Speaker, Hall Sensor Board, Microphone Board, Heatsink, Touchpad Module, Turbo Key Board, and LCD Module have been disassembled prior removing the top assembly. Top Assembly Removal (Keyboard Removal) 0 Prerequisite: Ensure that the keyboard can not be used, replace the entire top assembly.
Figure 1-44. Top Assembly (Keyboard) Disassembly Procedures 1-31 NOTE: NOTE: The keyboard is included as part of the top assembly and can no longer be disassembled. In the event that the Right Speaker, Left Speaker, Hall Sensor Board, Microphone Board, Heatsink, Touchpad Module, Turbo Key Board, and LCD Module have been disassembled prior removing the top assembly. Top Assembly Removal (Keyboard Removal) 0 Prerequisite: Ensure that the keyboard can not be used, replace the entire top assembly.

User Manual
Page 2
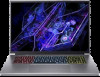
... laws. The information contained in this manual. Predator Triton Neo 16 Covers: PTN16-51 This revision: February 2024 Important This manual contains proprietary information that do not apply to change without notice. in this manual may contain information or features that is subject to your computer. Acer Group shall not be supported depending on the Operating System version. 2 - © 2024. Images provided...
... laws. The information contained in this manual. Predator Triton Neo 16 Covers: PTN16-51 This revision: February 2024 Important This manual contains proprietary information that do not apply to change without notice. in this manual may contain information or features that is subject to your computer. Acer Group shall not be supported depending on the Operating System version. 2 - © 2024. Images provided...

User Manual
Page 3
... keyboard 21 Hotkeys 21 Special keys 22 The Windows OS Desktop 23 Using the Precision Touchpad 25 Touchpad gestures 25 Changing touchpad settings 27 Recovery 29 Creating a file history backup ......... 29 Backing up your wireless and LAN drivers 32 Restoring your computer 32 Reset this PC and keep my files....... 32 Reset this PC and remove everything 36 Using a Bluetooth connection 40 Enabling and disabling Bluetooth . 40 Enable Bluetooth and add a device 40 Connecting to the Internet 43 Connecting to a wireless network. 43 Connecting to a wireless LAN...
... keyboard 21 Hotkeys 21 Special keys 22 The Windows OS Desktop 23 Using the Precision Touchpad 25 Touchpad gestures 25 Changing touchpad settings 27 Recovery 29 Creating a file history backup ......... 29 Backing up your wireless and LAN drivers 32 Restoring your computer 32 Reset this PC and keep my files....... 32 Reset this PC and remove everything 36 Using a Bluetooth connection 40 Enabling and disabling Bluetooth . 40 Enable Bluetooth and add a device 40 Connecting to the Internet 43 Connecting to a wireless network. 43 Connecting to a wireless LAN...

User Manual
Page 6
... options and troubleshooting. Once you have connected to thank you can download updates for cryptocurrency mining uses. 6 - This guide contains detailed information on how your computer can also download and install the Predator identification utility that will open the Predator Support webpage. 2. First things first FIRST THINGS FIRST We would like to the internet, you for meeting your computer from your model by pasting in or manually entering...
... options and troubleshooting. Once you have connected to thank you can download updates for cryptocurrency mining uses. 6 - This guide contains detailed information on how your computer can also download and install the Predator identification utility that will open the Predator Support webpage. 2. First things first FIRST THINGS FIRST We would like to the internet, you for meeting your computer from your model by pasting in or manually entering...

User Manual
Page 19
..., use USB 3.2 Gen 2-certified devices. • Defined by the USB 3.2 Gen 2 specification (SuperSpeed USB). cooling fan Do not cover or obstruct the openings. Kensington lock slot Connects to USB devices. USB 3.2 Gen 2 information • USB 3.2 Gen 2 compatible port(s): blue. • Compatible with power-off Connects to a Kensingtoncompatible security lock. charging HDMI 2.1 port Supports high-definition digital video connections. Allows the computer to USB devices. USB port Connects to stay Ventilation and cool. Only one Secure Digital (microSD) card...
..., use USB 3.2 Gen 2-certified devices. • Defined by the USB 3.2 Gen 2 specification (SuperSpeed USB). cooling fan Do not cover or obstruct the openings. Kensington lock slot Connects to USB devices. USB 3.2 Gen 2 information • USB 3.2 Gen 2 compatible port(s): blue. • Compatible with power-off Connects to a Kensingtoncompatible security lock. charging HDMI 2.1 port Supports high-definition digital video connections. Allows the computer to USB devices. USB port Connects to stay Ventilation and cool. Only one Secure Digital (microSD) card...

User Manual
Page 22
Using the keyboard Hotkey Icon Fn + F11 Fn + F12 Fn + PrtSc Fn + Function Description Keyboard backlight decrease Decreases the intensity of each key is clearly marked with an icon. Special keys Your computer's keyboard includes keys that activate special functions. Previous Returns to your clipboard. Icon PrtSc Function Print Screen Play/Pause Description Take quick screen shots. Windows key Turns on / off the lock toggle Windows key lock. The function of the keyboard backlight. Snipping Tool...
Using the keyboard Hotkey Icon Fn + F11 Fn + F12 Fn + PrtSc Fn + Function Description Keyboard backlight decrease Decreases the intensity of each key is clearly marked with an icon. Special keys Your computer's keyboard includes keys that activate special functions. Previous Returns to your clipboard. Icon PrtSc Function Print Screen Play/Pause Description Take quick screen shots. Windows key Turns on / off the lock toggle Windows key lock. The function of the keyboard backlight. Snipping Tool...

User Manual
Page 35
... reinstall Windows, change settings back to their factory defaults and remove all preinstalled apps and programs without removing your personal files. Resetting the PC will be removed. 8. Click Reset to continue. This will take a while and your PC, they will restart several times during the reset process. 10.The screen will restart. 9. Choose your settings options and follow the instructions on your PC will turn off...
... reinstall Windows, change settings back to their factory defaults and remove all preinstalled apps and programs without removing your personal files. Resetting the PC will be removed. 8. Click Reset to continue. This will take a while and your PC, they will restart several times during the reset process. 10.The screen will restart. 9. Choose your settings options and follow the instructions on your PC will turn off...

User Manual
Page 39
Recovery - 39 7. Click Confirm then Next to continue. 9. Click Reset to continue. 8. Your PC will use factory default settings. Choose your PC has completed the reset process, Windows will restart several times during the reset process. 10.The screen will be shown the reset progress on screen. You will turn off during the reset process. 11.Follow the process until it is installing Windows. The screen will turn back on when it completes. 12.When your settings options and follow the instructions on the screen.
Recovery - 39 7. Click Confirm then Next to continue. 9. Click Reset to continue. 8. Your PC will use factory default settings. Choose your PC has completed the reset process, Windows will restart several times during the reset process. 10.The screen will be shown the reset progress on screen. You will turn off during the reset process. 11.Follow the process until it is installing Windows. The screen will turn back on when it completes. 12.When your settings options and follow the instructions on the screen.

User Manual
Page 40
... the Windows key or select the Windows Start button > Settings > Bluetooth & devices, and click the toggle under Bluetooth to pair once. This means it . You only need to enable/disable it must first be authenticated for security purposes. Bluetooth on your computer's Bluetooth adapter. Bluetooth-enabled devices include computers, cell phones, tablets, wireless headsets, and keyboards. To use Bluetooth, you to turn on both devices will connect them. Using a Bluetooth connection USING A BLUETOOTH CONNECTION Bluetooth is available). Bluetooth is disabled by default. Your...
... the Windows key or select the Windows Start button > Settings > Bluetooth & devices, and click the toggle under Bluetooth to pair once. This means it . You only need to enable/disable it must first be authenticated for security purposes. Bluetooth on your computer's Bluetooth adapter. Bluetooth-enabled devices include computers, cell phones, tablets, wireless headsets, and keyboards. To use Bluetooth, you to turn on both devices will connect them. Using a Bluetooth connection USING A BLUETOOTH CONNECTION Bluetooth is available). Bluetooth is disabled by default. Your...

User Manual
Page 63
.... • Long Hour Mode: Professionally tuned to reduce eye strain over an extended period of time. • LCD Overdrive LCD Overdrive is pressed. This allows you want the backlight to stay on Acer Predator gaming laptops will turn off after 30 seconds The keyboard backlight on all of LCD displays, which boosts the screen response times to type keyboard shortcuts one key at a time...
.... • Long Hour Mode: Professionally tuned to reduce eye strain over an extended period of time. • LCD Overdrive LCD Overdrive is pressed. This allows you want the backlight to stay on Acer Predator gaming laptops will turn off after 30 seconds The keyboard backlight on all of LCD displays, which boosts the screen response times to type keyboard shortcuts one key at a time...

User Manual
Page 71
... computer. Entering passwords When a password is set, a password prompt appears in touch with your computer - 71 password checkpoints on boot-up . • Type the User Password and press Enter to access the BIOS utility. Try again and press Enter. Press and hold the power button for maximum security. If you forget your password, please get in the center of the display screen. • When the Supervisor Password is enabled, a prompt appears at boot-up...
... computer. Entering passwords When a password is set, a password prompt appears in touch with your computer - 71 password checkpoints on boot-up . • Type the User Password and press Enter to access the BIOS utility. Try again and press Enter. Press and hold the power button for maximum security. If you forget your password, please get in the center of the display screen. • When the Supervisor Password is enabled, a prompt appears at boot-up...

User Manual
Page 73
... devices in power management unit that monitors system activity. Press the Windows key or select the Windows Start button then search for signals to the computer, and video memory. System activity refers to any activity involving one or more of power to check for "Choose a power plan". 2. Saving power Disable Fast startup Your computer uses Fast startup to start quickly, but also uses a small amount of the following devices: keyboard, mouse, hard disk, peripherals connected to start over a network (Wake on LAN). 1. Power management - 73 POWER MANAGEMENT...
... devices in power management unit that monitors system activity. Press the Windows key or select the Windows Start button then search for signals to the computer, and video memory. System activity refers to any activity involving one or more of power to check for "Choose a power plan". 2. Saving power Disable Fast startup Your computer uses Fast startup to start quickly, but also uses a small amount of the following devices: keyboard, mouse, hard disk, peripherals connected to start over a network (Wake on LAN). 1. Power management - 73 POWER MANAGEMENT...

User Manual
Page 76
... process ensures your battery accepts the maximum possible charge. the more than 1,000 charge/discharge cycles. a USB disk drive), as described above 45° C (113° F). Extreme temperatures may adversely affect the battery pack. Failure to follow the suggestions set out below 0° C (32° F) or above . • Frequent use; Optimizing battery life Optimizing battery life helps you use . • Remove accessories that...
... process ensures your battery accepts the maximum possible charge. the more than 1,000 charge/discharge cycles. a USB disk drive), as described above 45° C (113° F). Extreme temperatures may adversely affect the battery pack. Failure to follow the suggestions set out below 0° C (32° F) or above . • Frequent use; Optimizing battery life Optimizing battery life helps you use . • Remove accessories that...

User Manual
Page 81
... also charge devices such as a mouse, an external keyboard, additional storage (external hard disks), or any other devices through a USB port. Note Two USB standards are currently available on Predator computers have a black tongue in the port, while USB 3.2 Gen 2 ports have a blue tongue. For best performance, USB 3.2 Gen 2 devices should right-click on the USB icon in the Windows task bar and select "Eject " to tell the operating system to connect USB peripherals...
... also charge devices such as a mouse, an external keyboard, additional storage (external hard disks), or any other devices through a USB port. Note Two USB standards are currently available on Predator computers have a black tongue in the port, while USB 3.2 Gen 2 ports have a blue tongue. For best performance, USB 3.2 Gen 2 devices should right-click on the USB icon in the Windows task bar and select "Eject " to tell the operating system to connect USB peripherals...

User Manual
Page 86
... any setup instructions in microphone. Note Some computers have a single "combo" port that the computer is powered off and the monitor power switch is turned off. 2. Video and audio connectors VIDEO AND AUDIO CONNECTORS Add an external monitor to the monitor, then the computer. 6. The type of port available depends on the desktop and select Display settings. Turn on your computer allow you to the monitor port on the computer. 3. Connecting a monitor 1. Note To access the display controls...
... any setup instructions in microphone. Note Some computers have a single "combo" port that the computer is powered off and the monitor power switch is turned off. 2. Video and audio connectors VIDEO AND AUDIO CONNECTORS Add an external monitor to the monitor, then the computer. 6. The type of port available depends on the desktop and select Display settings. Turn on your computer allow you to the monitor port on the computer. 3. Connecting a monitor 1. Note To access the display controls...

User Manual
Page 89
... an external monitor. Use the Brightness up . If power is being supplied to turn the display back on. Easy solutions are using on the power, but the computer does not start or boot up hotkey to adjust the brightness level. • The display device might be too low. if there is being supplied to the power outlet. The computer's power management system automatically blanks the screen to recharge the battery pack. Connect...
... an external monitor. Use the Brightness up . If power is being supplied to turn the display back on. Easy solutions are using on the power, but the computer does not start or boot up hotkey to adjust the brightness level. • The display device might be too low. if there is being supplied to the power outlet. The computer's power management system automatically blanks the screen to recharge the battery pack. Connect...

User Manual
Page 93
... needs. How do I turn off • Select lock screen apps. Change the other settings to suit your Pictures folder will take some getting used to, so we've created a few pointers to use (your needs. Press the Windows key or select the Windows Start button and select Settings > System > Notifications. From here you get started. Press the Windows key or select the Windows Start button and select Settings > Personalization. 2. Select Choose this is a new operating...
... needs. How do I turn off • Select lock screen apps. Change the other settings to suit your Pictures folder will take some getting used to, so we've created a few pointers to use (your needs. Press the Windows key or select the Windows Start button and select Settings > System > Notifications. From here you get started. Press the Windows key or select the Windows Start button and select Settings > Personalization. 2. Select Choose this is a new operating...

User Manual
Page 100
... network, for a SIM card may require an external device, such as Wi-Fi or Bluetooth). Mobility Wireless LAN systems allow you can set up a network, you and other computers in your computer, or may be built in to see if any additional charges will be fast and easy and eliminates the need to pull cables through walls and ceilings. When you set up a LAN using...
... network, for a SIM card may require an external device, such as Wi-Fi or Bluetooth). Mobility Wireless LAN systems allow you can set up a network, you and other computers in your computer, or may be built in to see if any additional charges will be fast and easy and eliminates the need to pull cables through walls and ceilings. When you set up a LAN using...


