User Manual
Page 3
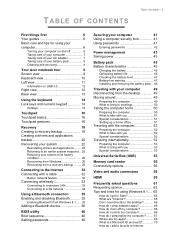
... from Windows 26 Recovering from a recovery backup ......... 29 Connecting to the Internet 32 Connecting with a cable 32 Built-in network feature 32 Connecting wirelessly 33 Connecting to a wireless LAN 33 Connecting to a 3G network 34 Using a Bluetooth connection 35 Enabling and disabling Bluetooth .......... 35 Enabling Bluetooth from Windows 8.1 ...... 35 Adding a Bluetooth device 36 BIOS utility 40 Boot sequence 40 Setting passwords 40 Securing your computer 41 Using a computer security lock 41 Using passwords 41 Entering passwords 42 Power management 43...
... from Windows 26 Recovering from a recovery backup ......... 29 Connecting to the Internet 32 Connecting with a cable 32 Built-in network feature 32 Connecting wirelessly 33 Connecting to a wireless LAN 33 Connecting to a 3G network 34 Using a Bluetooth connection 35 Enabling and disabling Bluetooth .......... 35 Enabling Bluetooth from Windows 8.1 ...... 35 Adding a Bluetooth device 36 BIOS utility 40 Boot sequence 40 Setting passwords 40 Securing your computer 41 Using a computer security lock 41 Using passwords 41 Entering passwords 42 Power management 43...
User Manual
Page 6
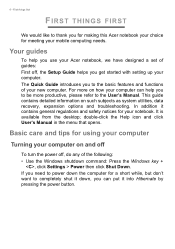
... recovery, expansion options and troubleshooting. In addition it into Hibernate by pressing the power button. double-click the Help icon and click User's Manual in the menu that opens. 6 - Your guides To help you to the User's Manual. The Quick Guide introduces you to be more productive, please refer to the basic features and functions of the following: • Use the Windows shutdown command: Press the Windows key + , click Settings > Power...
... recovery, expansion options and troubleshooting. In addition it into Hibernate by pressing the power button. double-click the Help icon and click User's Manual in the menu that opens. 6 - Your guides To help you to the User's Manual. The Quick Guide introduces you to be more productive, please refer to the basic features and functions of the following: • Use the Windows shutdown command: Press the Windows key + , click Settings > Power...
User Manual
Page 9
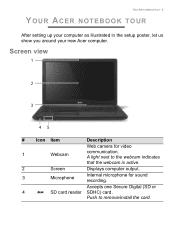
Screen view 1 2 3 45 # Icon Item Description Web camera for sound recording. Accepts one Secure Digital (SD or 4 SD card reader SDHC) card. Push to the webcam indicates that the webcam is active. 2 Screen Displays computer output. 3 Microphone Internal microphone for video 1 Webcam communication. Your Acer notebook tour - 9 YOUR ACER NOTEBOOK TOUR After setting up your computer as illustrated in the setup poster, let us show you around your new Acer computer. A light next to remove/install the card.
Screen view 1 2 3 45 # Icon Item Description Web camera for sound recording. Accepts one Secure Digital (SD or 4 SD card reader SDHC) card. Push to the webcam indicates that the webcam is active. 2 Screen Displays computer output. 3 Microphone Internal microphone for video 1 Webcam communication. Your Acer notebook tour - 9 YOUR ACER NOTEBOOK TOUR After setting up your computer as illustrated in the setup poster, let us show you around your new Acer computer. A light next to remove/install the card.
User Manual
Page 10
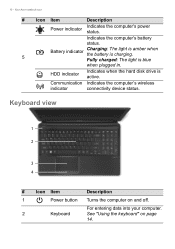
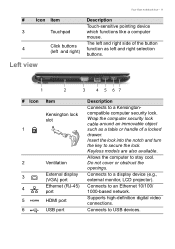
... Indicates the computer's wireless indicator connectivity device status. HDD indicator Indicates when the hard disk drive is blue when plugged in. Keyboard view 1 2 3 4 # Icon Item Description 1 Power button Turns the computer on page 14. 10 - Your Acer notebook tour # Icon Item Description Power indicator Indicates the computer's power status. Fully charged: The light is active. Indicates the computer's battery status. 5 Battery indicator Charging: The light is amber when the battery is charging. For entering data into your computer. 2 Keyboard See "Using...
... Indicates the computer's wireless indicator connectivity device status. HDD indicator Indicates when the hard disk drive is blue when plugged in. Keyboard view 1 2 3 4 # Icon Item Description 1 Power button Turns the computer on page 14. 10 - Your Acer notebook tour # Icon Item Description Power indicator Indicates the computer's power status. Fully charged: The light is active. Indicates the computer's battery status. 5 Battery indicator Charging: The light is amber when the battery is charging. For entering data into your computer. 2 Keyboard See "Using...
User Manual
Page 11
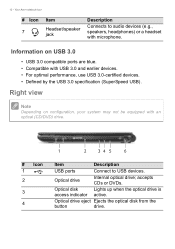
Keyless models are also available. Do not cover or obstruct the openings. Your Acer notebook tour - 11 # Icon Item 3 Touchpad 4 Left view Click buttons (left and right side of the button function as a table or handle of a locked drawer. Connects to secure the lock. Insert the lock into the notch and turn the key to an Ethernet 10/100/ 1000-based network. Connects to a display device (e.g., external monitor, LCD projector). Connects to USB devices. Wrap the...
Keyless models are also available. Do not cover or obstruct the openings. Your Acer notebook tour - 11 # Icon Item 3 Touchpad 4 Left view Click buttons (left and right side of the button function as a table or handle of a locked drawer. Connects to secure the lock. Insert the lock into the notch and turn the key to an Ethernet 10/100/ 1000-based network. Connects to a display device (e.g., external monitor, LCD projector). Connects to USB devices. Wrap the...
User Manual
Page 12
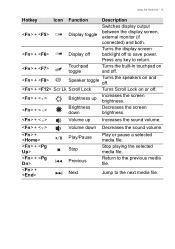
.... • For optimal performance, use USB 3.0-certified devices. • Defined by the USB 3.0 specification (SuperSpeed USB). Optical drive eject Ejects the optical disk from the button drive. Your Acer notebook tour # Icon 7 Item Headset/speaker jack Description Connects to audio devices (e.g., speakers, headphones) or a headset with an optical (CD/DVD) drive. # Icon 1 2 3 4 1 2 34 5 6 Item Description USB ports Connect to USB devices. Optical disk Lights up when the optical drive is access indicator active. Information on configuration, your system may not...
.... • For optimal performance, use USB 3.0-certified devices. • Defined by the USB 3.0 specification (SuperSpeed USB). Optical drive eject Ejects the optical disk from the button drive. Your Acer notebook tour # Icon 7 Item Headset/speaker jack Description Connects to audio devices (e.g., speakers, headphones) or a headset with an optical (CD/DVD) drive. # Icon 1 2 3 4 1 2 34 5 6 Item Description USB ports Connect to USB devices. Optical disk Lights up when the optical drive is access indicator active. Information on configuration, your system may not...
User Manual
Page 15
...Hotkey Icon Function Description + Switches display output Display toggle between the display screen, external monitor (if connected) and both. + Display off Turns the display screen backlight off . + < > Brightness up Increases the screen brightness. + < > Brightness down Decreases the screen brightness. + < > Volume up Increases the sound volume. + < > + + + + Volume down Play/Pause Stop Previous Decreases the sound volume. Stop playing the selected media file. Return to the next media file. Next Jump to the previous media file. Press any key...
...Hotkey Icon Function Description + Switches display output Display toggle between the display screen, external monitor (if connected) and both. + Display off Turns the display screen backlight off . + < > Brightness up Increases the screen brightness. + < > Brightness down Decreases the screen brightness. + < > Volume up Increases the sound volume. + < > + + + + Volume down Play/Pause Stop Previous Decreases the sound volume. Stop playing the selected media file. Return to the next media file. Next Jump to the previous media file. Press any key...
User Manual
Page 22
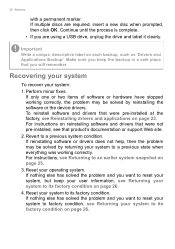
... discs are using a USB drive, unplug the drive and label it clearly. Revert to its factory condition. 22 - For instructions, see that product's documentation or support Web site. 2. Reset your system to an earlier system snapshot on each backup, such as 'Drivers and Applications Backup'. If reinstalling software or drivers does not help, then the problem may be solved by reinstalling the software or the device drivers. Reset your system: 1. Recovery...
... discs are using a USB drive, unplug the drive and label it clearly. Revert to its factory condition. 22 - For instructions, see that product's documentation or support Web site. 2. Reset your system to an earlier system snapshot on each backup, such as 'Drivers and Applications Backup'. If reinstalling software or drivers does not help, then the problem may be solved by reinstalling the software or the device drivers. Reset your system: 1. Recovery...
User Manual
Page 26
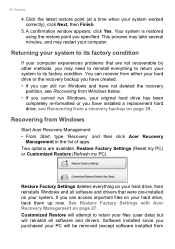
... available, Restore Factory Settings (Reset my PC) or Customized Restore (Refresh my PC). Click the latest restore point (at a time when your system. Returning your files (user data) but will be removed (except software installed from Windows Start Acer Recovery Management: • From Start, type 'Recovery' and then click Acer Recovery Management in the list of apps. Recovering from click Yes. Your system is restored using the restore point you may restart your computer experiences problems that...
... available, Restore Factory Settings (Reset my PC) or Customized Restore (Refresh my PC). Click the latest restore point (at a time when your system. Returning your files (user data) but will be removed (except software installed from Windows Start Acer Recovery Management: • From Start, type 'Recovery' and then click Acer Recovery Management in the list of apps. Recovering from click Yes. Your system is restored using the restore point you may restart your computer experiences problems that...
User Manual
Page 28
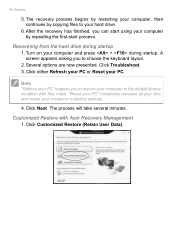
... removes all your files and resets your computer by copying files to the default factory condition with Acer Recovery Management 1. A screen appears asking you can start using your computer to choose the keyboard layout. 2. The process will take several minutes. Several options are now presented. Customized Restore with files intact. After the recovery has finished, you to factory settings. 4. Recovering from the hard drive during startup. Click Troubleshoot. 3. Click Next. Recovery 5. The recovery...
... removes all your files and resets your computer by copying files to the default factory condition with Acer Recovery Management 1. A screen appears asking you can start using your computer to choose the keyboard layout. 2. The process will take several minutes. Several options are now presented. Customized Restore with files intact. After the recovery has finished, you to factory settings. 4. Recovering from the hard drive during startup. Click Troubleshoot. 3. Click Next. Recovery 5. The recovery...
User Manual
Page 29
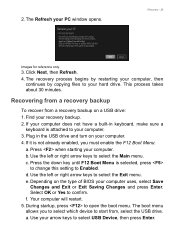
... USB drive and turn on a USB drive: 1. Use your computer. 3. 2. Press the down key until F12 Boot Menu is not already enabled, you to select which device to select USB Device, then press Enter. Click Next, then Refresh. 4. Recovering from a recovery backup To recover from , select the USB drive. Depending on the type of BIOS your computer. 4. If it is selected, press to change this setting to select the Exit menu. During startup, press to confirm. Use...
... USB drive and turn on a USB drive: 1. Use your computer. 3. 2. Press the down key until F12 Boot Menu is not already enabled, you to select which device to select USB Device, then press Enter. Click Next, then Refresh. 4. Recovering from a recovery backup To recover from , select the USB drive. Depending on the type of BIOS your computer. 4. If it is selected, press to change this setting to select the Exit menu. During startup, press to confirm. Use...
User Manual
Page 33
... network management options to a network or Change Wi-Fi settings. From the Start screen, start typing 'wireless' then select Connect to turn on /off . Connecting wirelessly Connecting to the Internet - 33 Connecting to WLAN, you can access the Internet. Once connected to a wireless LAN A wireless LAN (or WLAN) is shared over the network. Warning Using wireless devices while flying in aircraft may turn your wireless network on your network and enter the password if required. You may be switched off before boarding an aircraft and during setup. Otherwise, open Internet...
... network management options to a network or Change Wi-Fi settings. From the Start screen, start typing 'wireless' then select Connect to turn on /off . Connecting wirelessly Connecting to the Internet - 33 Connecting to WLAN, you can access the Internet. Once connected to a wireless LAN A wireless LAN (or WLAN) is shared over the network. Warning Using wireless devices while flying in aircraft may turn your wireless network on your network and enter the password if required. You may be switched off before boarding an aircraft and during setup. Otherwise, open Internet...
User Manual
Page 46
... time. You are advised to temperatures below : • Purchase an extra battery pack. • Use AC power whenever possible, reserving battery for mobile use ; Warning Do not expose battery packs to remove the battery pack from obtaining the maximum battery charge, and will reach the end of battery operation, prolonging the charge/recharge cycle and improving recharging efficiency. Extreme temperatures may adversely affect...
... time. You are advised to temperatures below : • Purchase an extra battery pack. • Use AC power whenever possible, reserving battery for mobile use ; Warning Do not expose battery packs to remove the battery pack from obtaining the maximum battery charge, and will reach the end of battery operation, prolonging the charge/recharge cycle and improving recharging efficiency. Extreme temperatures may adversely affect...
User Manual
Page 55
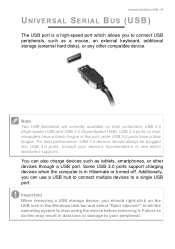
... supports. Additionally, you can also charge devices such as a mouse, an external keyboard, additional storage (external hard disks), or any other devices through a USB port. Failure to do this may result in data loss or damage to a single USB port. Some USB 3.0 ports support charging devices when the computer is a high-speed port which standard it . USB 2.0 ports on Acer computers: USB 2.0 (High-speed USB) and USB 3.0 (SuperSpeed USB). Consult your peripheral. Important When removing a USB storage device, you to connect USB...
... supports. Additionally, you can also charge devices such as a mouse, an external keyboard, additional storage (external hard disks), or any other devices through a USB port. Failure to do this may result in data loss or damage to a single USB port. Some USB 3.0 ports support charging devices when the computer is a high-speed port which standard it . USB 2.0 ports on Acer computers: USB 2.0 (High-speed USB) and USB 3.0 (SuperSpeed USB). Consult your peripheral. Important When removing a USB storage device, you to connect USB...
User Manual
Page 58
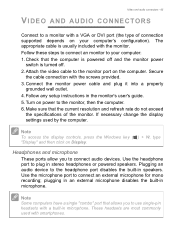
... steps to connect an monitor to your computer's configuration). Connect the monitor power cable and plug it into a properly grounded wall outlet. 4. If necessary change the display settings used with smartphones. Plugging an audio device to the headphone port disables the built-in the monitor's user's guide. 5. Follow any setup instructions in speakers. Headphones and microphone These ports allow you to use single-pin headsets with a built-in microphone. Use the microphone port to connect an external microphone for mono...
... steps to connect an monitor to your computer's configuration). Connect the monitor power cable and plug it into a properly grounded wall outlet. 4. If necessary change the display settings used with smartphones. Plugging an audio device to the headphone port disables the built-in the monitor's user's guide. 5. Follow any setup instructions in speakers. Headphones and microphone These ports allow you to use single-pin headsets with a built-in microphone. Use the microphone port to connect an external microphone for mono...
User Manual
Page 61
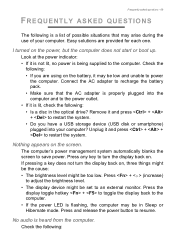
... possible situations that the AC adapter is properly plugged into your computer. Press any key to save power. Press + < > (increase) to restart the system. Check the following : • Is a disc in Sleep or Hibernate mode. Easy solutions are using on the battery, it and press + + to adjust the brightness level. • The display device might be set to restart the system. • Do...
... possible situations that the AC adapter is properly plugged into your computer. Press any key to save power. Press + < > (increase) to restart the system. Check the following : • Is a disc in Sleep or Hibernate mode. Easy solutions are using on the battery, it and press + + to adjust the brightness level. • The display device might be set to restart the system. • Do...

User Manual
Page 65
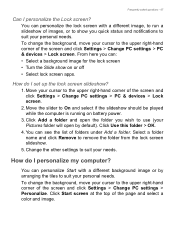
... it will open Start where you to perform useful functions, such as sharing content, turning off your PC or changing settings. How do I go to the desktop. 2. Go to Start. click the Start button on the desktop taskbar; Frequently ask Frequently asked questions - 65 Tips and hints for Start? Charms allow you can , just follow these steps: 1. Press the Windows key; Yes, you...
... it will open Start where you to perform useful functions, such as sharing content, turning off your PC or changing settings. How do I go to the desktop. 2. Go to Start. click the Start button on the desktop taskbar; Frequently ask Frequently asked questions - 65 Tips and hints for Start? Charms allow you can , just follow these steps: 1. Press the Windows key; Yes, you...
User Manual
Page 67
... and click Remove to use (your Pictures folder will open by arranging the tiles to show on battery power. 3. Click Use this folder > OK. 4. Click Start screen at the top of folders under Add a folder. You can personalize Start with a different image, to run a slideshow of the screen and click Settings > Change PC settings > Personalize. Click Add a folder and open the folder you quick status...
... and click Remove to use (your Pictures folder will open by arranging the tiles to show on battery power. 3. Click Use this folder > OK. 4. Click Start screen at the top of folders under Add a folder. You can personalize Start with a different image, to run a slideshow of the screen and click Settings > Change PC settings > Personalize. Click Add a folder and open the folder you quick status...
User Manual
Page 76
... share files, peripheral devices (such as Wi-Fi or Bluetooth). When you and other computers in DSL modem that broadcast data into the surrounding environment. Setting up your Wireless network at home you need to pull cables through walls and ceilings. Installation speed and simplicity Installing a wireless LAN system can share an internet connection with the subscription to a high speed DSL internet connection. Components of...
... share files, peripheral devices (such as Wi-Fi or Bluetooth). When you and other computers in DSL modem that broadcast data into the surrounding environment. Setting up your Wireless network at home you need to pull cables through walls and ceilings. Installation speed and simplicity Installing a wireless LAN system can share an internet connection with the subscription to a high speed DSL internet connection. Components of...
User Manual
Page 81
... "password." It includes a free trial subscription to installing, configuring and updating several different types of the following tips can help make your login name, anything based on a regular basis, at least every 90 days. Strong passwords have become popular as they offer all online activities such as McAfee Internet Security Suite, which monitors all the security software needed for every service you connect to the Internet.
... "password." It includes a free trial subscription to installing, configuring and updating several different types of the following tips can help make your login name, anything based on a regular basis, at least every 90 days. Strong passwords have become popular as they offer all online activities such as McAfee Internet Security Suite, which monitors all the security software needed for every service you connect to the Internet.


