User Manual
Page 3
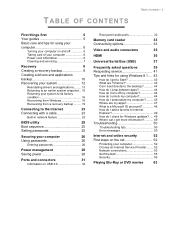
...your system to its factory condition 16 Recovering from Windows 16 Recovering from a recovery backup ......... 19 Connecting to the Internet 23 Connecting with a cable 23 Built-in network feature 23 BIOS utility 25 Boot sequence 25 Setting passwords 25 Securing your computer 26 Using passwords 26 Entering passwords 26 Power management 28 Saving power 28 Ports and connectors 31 Information on USB 3.0 32 Rear panel audio ports 32 Memory card reader 33 Connectivity options 33 Video and audio connectors 35 HDMI 36 Universal Serial Bus (USB) 37 Frequently...
...your system to its factory condition 16 Recovering from Windows 16 Recovering from a recovery backup ......... 19 Connecting to the Internet 23 Connecting with a cable 23 Built-in network feature 23 BIOS utility 25 Boot sequence 25 Setting passwords 25 Securing your computer 26 Using passwords 26 Entering passwords 26 Power management 28 Saving power 28 Ports and connectors 31 Information on USB 3.0 32 Rear panel audio ports 32 Memory card reader 33 Connectivity options 33 Video and audio connectors 35 HDMI 36 Universal Serial Bus (USB) 37 Frequently...
User Manual
Page 5
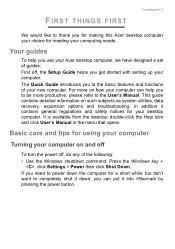
... subjects as system utilities, data recovery, expansion options and troubleshooting. double-click the Help icon and click User's Manual in the menu that opens. This guide contains detailed information on and off To turn the power off , the Setup Guide helps you get started with setting up your computing needs. FIRST THINGS FIRST First things first - 5 We would like to thank you for making this Acer desktop computer your...
... subjects as system utilities, data recovery, expansion options and troubleshooting. double-click the Help icon and click User's Manual in the menu that opens. This guide contains detailed information on and off To turn the power off , the Setup Guide helps you get started with setting up your computing needs. FIRST THINGS FIRST First things first - 5 We would like to thank you for making this Acer desktop computer your...
User Manual
Page 8
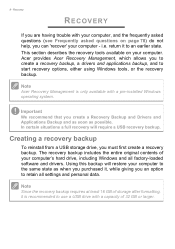
...' your computer's hard drive, including Windows and all settings and personal data. Creating a recovery backup To reinstall from a USB storage drive, you to create a recovery backup, a drivers and applications backup, and to use a USB drive with a pre-installed Windows operating system. Using this backup will require a USB recovery backup. return it is only available with a capacity of 32 GB or larger. Note Acer Recovery Management is recommended to start recovery options, either using Windows tools, or...
...' your computer's hard drive, including Windows and all settings and personal data. Creating a recovery backup To reinstall from a USB storage drive, you to create a recovery backup, a drivers and applications backup, and to use a USB drive with a pre-installed Windows operating system. Using this backup will require a USB recovery backup. return it is only available with a capacity of 32 GB or larger. Note Acer Recovery Management is recommended to start recovery options, either using Windows tools, or...
User Manual
Page 12
... reinstall software and drivers that product's documentation or support Web site. 2. Important Write a unique, descriptive label on page 16. For instructions, see Returning your system to a previous state when everything was working correctly, the problem may be solved by returning your system to its factory condition on page 15. 3. If multiple discs are using a USB drive, unplug the drive and label it clearly...
... reinstall software and drivers that product's documentation or support Web site. 2. Important Write a unique, descriptive label on page 16. For instructions, see Returning your system to a previous state when everything was working correctly, the problem may be solved by returning your system to its factory condition on page 15. 3. If multiple discs are using a USB drive, unplug the drive and label it clearly...
User Manual
Page 15
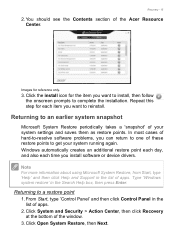
... install software or device drivers. From Start, type 'Control Panel' and then click Control Panel in the list of hard-to-resolve software problems, you want to complete the installation. In most cases of apps. Returning to an earlier system snapshot Microsoft System Restore periodically takes a 'snapshot' of apps. 2. Click Open System Restore, then Next. Note For more information about using Microsoft System Restore, from Start, type 'Help' and then click Help and Support...
... install software or device drivers. From Start, type 'Control Panel' and then click Control Panel in the list of hard-to-resolve software problems, you want to complete the installation. In most cases of apps. Returning to an earlier system snapshot Microsoft System Restore periodically takes a 'snapshot' of apps. 2. Click Open System Restore, then Next. Note For more information about using Microsoft System Restore, from Start, type 'Help' and then click Help and Support...

User Manual
Page 18
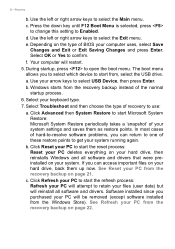
A screen appears asking you to factory settings. 4. "Reset your PC" completely removes all your files and resets your computer, then continues by repeating the first-start using your hard drive. 6. Click Next. The process will take several minutes. Recovering from the hard drive during startup. Recovery 5. The recovery process begins by restarting your computer to choose the keyboard layout. 2. Click Troubleshoot. 3. Note "Refresh your PC" enables you can start process. 18...
A screen appears asking you to factory settings. 4. "Reset your PC" completely removes all your files and resets your computer, then continues by repeating the first-start using your hard drive. 6. Click Next. The process will take several minutes. Recovering from the hard drive during startup. Recovery 5. The recovery process begins by restarting your computer to choose the keyboard layout. 2. Click Troubleshoot. 3. Note "Refresh your PC" enables you can start process. 18...
User Manual
Page 20
... to one of BIOS your files (user data) but will reinstall all software and drivers that were preinstalled on page 21. In most cases of your keyboard type. 7. b. Press the down key until F12 Boot Menu is selected, press to change this setting to open the boot menu. c. Click Refresh your PC to start Microsoft System Restore: Microsoft System Restore periodically takes a 'snapshot' of hard-to-resolve software problems, you can...
... to one of BIOS your files (user data) but will reinstall all software and drivers that were preinstalled on page 21. In most cases of your keyboard type. 7. b. Press the down key until F12 Boot Menu is selected, press to change this setting to open the boot menu. c. Click Refresh your PC to start Microsoft System Restore: Microsoft System Restore periodically takes a 'snapshot' of hard-to-resolve software problems, you can...

User Manual
Page 21
... removed. 6. Click Reset. 7. Click Next. 3. Choose to keep these changes, select No. b. To completely restore your files: a. Just remove my files quickly erases all files on the hard drive and want to Factory Settings, select Yes. 5. Fully clean the drive completely cleans the drive after the recovery. Reset your PC from the recovery backup Important Reset your PC will erase all files before restoring your PC window opens...
... removed. 6. Click Reset. 7. Click Next. 3. Choose to keep these changes, select No. b. To completely restore your files: a. Just remove my files quickly erases all files on the hard drive and want to Factory Settings, select Yes. 5. Fully clean the drive completely cleans the drive after the recovery. Reset your PC from the recovery backup Important Reset your PC will erase all files before restoring your PC window opens...

User Manual
Page 23
... Internet using a cable. usually a phone or cable company -- Connecting to the Internet - 23 CONNECTING TO THE INTERNET Note Information in network feature makes it easy for you 'll be ready to get online. The ISP will install a small box, called a router, that will have to do is set up , all you to connect to Network connections on your router is plug one end of connections, and getting connected...
... Internet using a cable. usually a phone or cable company -- Connecting to the Internet - 23 CONNECTING TO THE INTERNET Note Information in network feature makes it easy for you 'll be ready to get online. The ISP will install a small box, called a router, that will have to do is set up , all you to connect to Network connections on your router is plug one end of connections, and getting connected...
User Manual
Page 25
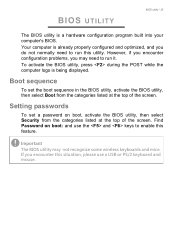
...'s BIOS. BIOS UTILITY BIOS utility - 25 The BIOS utility is being displayed. Find Password on boot, activate the BIOS utility, then select Security from the categories listed at the top of the screen. Important The BIOS utility may need to enable this situation, please use the and keys to run it. Boot sequence To set a password on boot: and use a USB or PS/2 keyboard and mouse. If you encounter this feature. Setting passwords To set the boot sequence in the BIOS utility, activate the BIOS utility, then...
...'s BIOS. BIOS UTILITY BIOS utility - 25 The BIOS utility is being displayed. Find Password on boot, activate the BIOS utility, then select Security from the categories listed at the top of the screen. Important The BIOS utility may need to enable this situation, please use the and keys to run it. Boot sequence To set a password on boot: and use a USB or PS/2 keyboard and mouse. If you encounter this feature. Setting passwords To set the boot sequence in the BIOS utility, activate the BIOS utility, then...

User Manual
Page 28
Open System and Security > Power Options. 3. Saving power Disable Fast startup Your computer uses Fast startup to start . Your computer will take longer to conserve energy. Select Change settings that monitors system activity. Power management POWER MANAGEMENT This computer has a built-in order to start over a network (Wake on LAN). 1. Open the Charms and search for signals to start quickly, but also uses a small amount of power to start from Sleep. Select Choose what the power buttons do. 4. If...
Open System and Security > Power Options. 3. Saving power Disable Fast startup Your computer uses Fast startup to start . Your computer will take longer to conserve energy. Select Change settings that monitors system activity. Power management POWER MANAGEMENT This computer has a built-in order to start over a network (Wake on LAN). 1. Open the Charms and search for signals to start quickly, but also uses a small amount of power to start from Sleep. Select Choose what the power buttons do. 4. If...

User Manual
Page 31
... available on "DP1" only Icon Item Power button Icon Item Optical drive Microphone jack Speaker or headphone jack USB port RCA jack PS/2 keyboard connector External display (VGA) connector RJ-45 Ethernet connector Line-out / speaker-out jack Recovery button Kensington lock slot DP Card reader Backup button Removeable hard drive carrier(s) S/PDIF port PS/2 mouse connector Serial port Line-in jack HDMI port Network / hard disk drive indicators DisplayPort The DisplayPort adapter is available on all models. Note The ports and connectors listed below indicate what the different icons...
... available on "DP1" only Icon Item Power button Icon Item Optical drive Microphone jack Speaker or headphone jack USB port RCA jack PS/2 keyboard connector External display (VGA) connector RJ-45 Ethernet connector Line-out / speaker-out jack Recovery button Kensington lock slot DP Card reader Backup button Removeable hard drive carrier(s) S/PDIF port PS/2 mouse connector Serial port Line-in jack HDMI port Network / hard disk drive indicators DisplayPort The DisplayPort adapter is available on all models. Note The ports and connectors listed below indicate what the different icons...
User Manual
Page 35
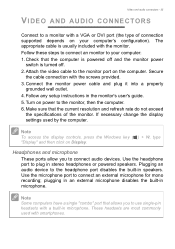
... turned off. 2. Attach the video cable to your computer's configuration). If necessary change the display settings used with the screws provided. 3. Note To access the display controls, press the Windows key ( ) + W, type "Display" and then click on your computer: 1. Note Some computers have a single "combo" port that allows you to connect audio devices. Video and audio connectors - 35 VIDEO AND AUDIO CONNECTORS Connect to a monitor with the monitor. Follow these steps to connect an monitor to the monitor port on power to connect an external...
... turned off. 2. Attach the video cable to your computer's configuration). If necessary change the display settings used with the screws provided. 3. Note To access the display controls, press the Windows key ( ) + W, type "Display" and then click on your computer: 1. Note Some computers have a single "combo" port that allows you to connect audio devices. Video and audio connectors - 35 VIDEO AND AUDIO CONNECTORS Connect to a monitor with the monitor. Follow these steps to connect an monitor to the monitor port on power to connect an external...

User Manual
Page 39
... a disc in Sleep or Hibernate mode. Press + < > (increase) to adjust the brightness level. • The display device might be low and unable to an external monitor. Connect the AC adapter to recharge the battery pack. • Make sure that may be set to power the computer. Remove it and press + + to the computer. If pressing a key does not turn the display back on. No audio is being supplied to...
... a disc in Sleep or Hibernate mode. Press + < > (increase) to adjust the brightness level. • The display device might be low and unable to an external monitor. Connect the AC adapter to recharge the battery pack. • Make sure that may be set to power the computer. Remove it and press + + to the computer. If pressing a key does not turn the display back on. No audio is being supplied to...

User Manual
Page 45
... screen? You can : • Select a background image for the lock screen • Turn the Slide show you wish to use (your Pictures folder will open by arranging the tiles to suit your cursor to remove the folder from the lock screen slideshow. 5. You can see the list of the screen and click Settings > Change PC settings > PC & devices > Lock screen. Move your needs. Click Add a folder and open...
... screen? You can : • Select a background image for the lock screen • Turn the Slide show you wish to use (your Pictures folder will open by arranging the tiles to suit your cursor to remove the folder from the lock screen slideshow. 5. You can see the list of the screen and click Settings > Change PC settings > PC & devices > Lock screen. Move your needs. Click Add a folder and open...
User Manual
Page 49
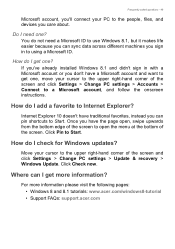
...; Windows 8 and 8.1 tutorials: www.acer.com/windows8-tutorial • Support FAQs: support.acer.com Where can sync data across different machines you care about. Do I add a favorite to Internet Explorer? Click Pin to the upper right-hand corner of the screen and click Settings > Change PC settings > Update & recovery > Windows Update. Frequently asked questions - 49 Microsoft account, you'll connect your PC to the people, files, and devices you...
...; Windows 8 and 8.1 tutorials: www.acer.com/windows8-tutorial • Support FAQs: support.acer.com Where can sync data across different machines you care about. Do I add a favorite to Internet Explorer? Click Pin to the upper right-hand corner of the screen and click Settings > Change PC settings > Update & recovery > Windows Update. Frequently asked questions - 49 Microsoft account, you'll connect your PC to the people, files, and devices you...
User Manual
Page 54
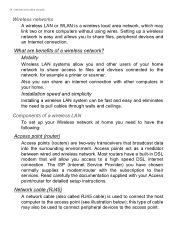
... the need to pull cables through walls and ceilings. Also you need to have the following: Access point (router) Access points (routers) are benefits of a wireless LAN To set up a wireless network is used to connect peripheral devices to the network, for detailed setup instructions. Installation speed and simplicity Installing a wireless LAN system can share an internet connection with your home. 54 - Components of a wireless network? Read carefully the documentation supplied with other users of your Wireless network at...
... the need to pull cables through walls and ceilings. Also you need to have the following: Access point (router) Access points (routers) are benefits of a wireless LAN To set up a wireless network is used to connect peripheral devices to the network, for detailed setup instructions. Installation speed and simplicity Installing a wireless LAN system can share an internet connection with your home. 54 - Components of a wireless network? Read carefully the documentation supplied with other users of your Wireless network at...

User Manual
Page 55
... control what is shared over the network with on HomeGroup. Warning Using wireless devices while flying in aircraft is dedicated to a new level! Switch off a wireless network connection If your computer has wireless access, but does not feature a Communication button, you may be illegal. Access point/router 2. Network cables (RJ45) Turning on/off all devices before boarding an aircraft; Press the Windows key ( ) + W, type "HomeGroup" and then click on -going personalied support. Acer is...
... control what is shared over the network with on HomeGroup. Warning Using wireless devices while flying in aircraft is dedicated to a new level! Switch off a wireless network connection If your computer has wireless access, but does not feature a Communication button, you may be illegal. Access point/router 2. Network cables (RJ45) Turning on/off all devices before boarding an aircraft; Press the Windows key ( ) + W, type "HomeGroup" and then click on -going personalied support. Acer is...

User Manual W10 Non-touch
Page 1
... the equipment, be blocked by unplugging all power cords from overheating. Follow all warnings and instructions marked on a vibrating surface. • Never use it from the power supplies. Turning the product off before removing the power supply unit from lithium battery pack. The openings should never be seriously damaged. • Slots and openings are provided for accessibility Be sure that could be placed near...
... the equipment, be blocked by unplugging all power cords from overheating. Follow all warnings and instructions marked on a vibrating surface. • Never use it from the power supplies. Turning the product off before removing the power supply unit from lithium battery pack. The openings should never be seriously damaged. • Slots and openings are provided for accessibility Be sure that could be placed near...

User Manual W10 Non-touch
Page 8
... cause undesired operation of a call to another device connected to bell tinkle or noise and may not operate. Canada - AVOID EXPOSURE TO BEAM. The CD or DVD drive's classification label (shown below) is located on local power, is a laser product. Digital audio output statement The optical connector contains no guarantee that Telecom lines will always continue to support pulse dialing. 7 Use of applicable...
... cause undesired operation of a call to another device connected to bell tinkle or noise and may not operate. Canada - AVOID EXPOSURE TO BEAM. The CD or DVD drive's classification label (shown below) is located on local power, is a laser product. Digital audio output statement The optical connector contains no guarantee that Telecom lines will always continue to support pulse dialing. 7 Use of applicable...


