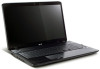
Acer Aspire 8935G Notebook Series Start Guide
Page 2
...and model number are recorded on the label affixed to their respective companies. Aspire 8935 Series Notebook PC Model number Serial number Date of purchase Place of Acer Incorporated. Aspire 8935 Series Quick Guide Original Issue: 03/2009 Changes may be made periodically ...to this manual or supplementary documents and publications. Acer's liability with respect to the information in the applicable product warranty. No part of Acer Incorporated. Other ...
Acer Aspire 8935G Series Service Guide
Page 3
.... Intel is a registered trademark of Intel Corporation. Acer Incorporated makes no representations or warranties, either expressed or implied, with respect to change without the prior written permission of Acer Incorporated. No part of this publication may be reproduced, transmitted, transcribed, ...stored in a retrieval system, or translated into any language or computer language, in the software. Any Acer Incorporated software described in this ...
Acer Aspire 8935G Series Service Guide
Page 5
...it will NOT be noted in the printed Service Guide. add-on your regional Acer office to -date information available on card, modem, or extra memory capability). Please note WHEN ORDERING FRU PARTS, that you with further technical details. 2. This Service Guide provides you should... check the most up-to order FRU parts for Acer's "global" product offering. You MUST use the list provided by your ...
Acer Aspire 8935G Series Service Guide
Page 39
...(s) DVD-RW DVD+RW DVD-RAM BD-ROM ver2.0, UDF2.5 BD-R ver1.0 and ver2.0, UDF2.5 BD-RE ver2.0 and ver3.0, UDF2.5 BD-hybrid (only BD part) Drawer (Solenoid Open), Tact SW (Open), Emergency Release (draw open hole) DC 5 V +/- 5% Chapter 1 29
Acer Aspire 8935G Series Service Guide
Page 43
... Range (°C) Operating Storage (shipping) Specification 422.5 (H) x 248 (V) x 6 (D) mm 40-pin LVDS 262,144 colors 45 45 25 45 0 ~ 50 -20 ~ 60 Card Reader Item Part Name Package Features Interface Power Management Features Specification O2 OZ888GS 64 pins QFN • Fully Compliant with Provisions of IEEE Std 1394-1995 for a High...
Acer Aspire 8935G Series Service Guide
Page 45
... menu, you may need to run Setup. Please also refer to enter setup. Navigating the BIOS Utility There are found in the Item Specific Help part of screen). Please note that system information is a hardware configuration program built into your computer's BIOS (Basic Input/ Output System). In this carefully when making...
Acer Aspire 8935G Series Service Guide
Page 46
... 2530 MHz Toshiba MK5055GSX 294DT06WT WDC WD1600BEVT-22ZCT0 WD-WXE209T27982 HL-DT-ST DVDRAM GT20N V0.2202 Montevina 1718 P8700 @ 2.53GHz T Acer 63623032-6261-3964-6338-00235A495964 F1 Help ESC Exit Select Item F5/F6 Change Values F9 Setup Default Select Menu Enter Select SubMenu F10...Save and Exit NOTE: The screen above is an identifier standard used in software construction, standardized by the Open Software Foundation (OSF) as part of HDD installed on primary IDE master. This field displays the serial number of the Distributed Computing Environment (DCE). 36 Chapter 2 This ...
Acer Aspire 8935G Series Service Guide
Page 64
... the battery pack. Turn off the power to any of the hardware components. Place the system on a flat, stable surface. 4. Main Screw List Screw Quantity Part Number SCREW M3*0.5+3.5I 86.A03V7.006 SCREW M2.0*6-I(ANTI-LOOSE) 86.N1407.001 SCREW M2.5*2-I (NI,NYLOK) 86.TDY07.001 SCREW M2.5*4-I(BNI) 86...
Acer Aspire 8935G Series Service Guide
Page 65
External Module Disassembly Process External Modules Disassembly Flowchart Turn off system and peripherals power Disconnect power and signal cables from system Rem ove Battery Rem ove Dummy Cards Rem ove Lower Door Rem ove ODD Rem ove HDD1 Rem ove HDD2 Rem ove DIMMs Rem ove TV Tuner Screw List Step ODD Module ODD Bracket HDD1 Carrier HDD2 Carrier TV Tuner WLAN Module Screw M2.5*4 M2*3 M3*3 M3*3 M2*3 M2*3 Rem ove WLAN Quantity 1 2 2 2 2 2 Part No. 86.D01V7.001 86.S0207.001 86.A03V7.006 86.A03V7.006 86.S0207.001 86.S0207.001 Chapter 3 55
Acer Aspire 8935G Series Service Guide
Page 81
... Board Remove Finger Print Reader Screw List Step Switch Cover Power Board LCD Module Upper Cover Screw M2.5*6.5 M2.5*4 M2.5*4 M2.5*6.5 M2.5*6.5 M2.5*4 M2*3 Quantity 9 4 3 4 9 5 1 Part No. 86.ARE07.001 86.D01V7.001 86.D01V7.001 86.ARE07.001 86.ARE07.001 86.D01V7.001 86.S0207.001 Chapter 3 71
Acer Aspire 8935G Series Service Guide
Page 82
... Board Mainboard Kensington Lock Bracket Subwoofer Hinge Supports Speaker Module Graphics Card Heatsink Graphics Card Screw M2*3 M2.5*4 M2.5*4 M2.5*4 M2*3 M2.5*4 M2.5*6.5 M2.5*6.5 Quantity 1 1 1 3 1 4 6 6 2 1 Part No. 86.S0207.001 86.D01V7.001 86.D01V7.001 86.D01V7.001 86.S0207.001 86.D01V7.001 86.ARE07.001 86.ARE07.001...
Acer Aspire 8935G Series Service Guide
Page 91
... screws on page 78. 2. Chapter 3 81 Screw Type C A D B E NOTE: Avoid pulling on FFC cables whenever available to the connectors. If the TouchPad is supplied as part of the Upper Cover. Step Upper Cover (red callout) Upper Cover (green callout) Upper Cover (blue callout) Size M2.5*6.5 M2.5*4 M2*3 Quantity 9 5 1 3. NOTE: Use the...
Acer Aspire 8935G Series Service Guide
Page 104
Open the locking latch on the FFC and disconnect it from the TouchPad Board. 3. Open the locking latch on page 93. 2. Removing the TouchPad Board IMPORTANT: The TouchPad is defective, replace the entire Upper Cover. 1. Remove the FFC from the Upper Cover as part of the Upper Cover. If the TouchPad is supplied as shown. 94 Chapter 3 See "Removing the Finger Print Reader Bracket" on the FFC and disconnect it from the TouchPad. 4.
Acer Aspire 8935G Series Service Guide
Page 110
See "Removing the Upper Cover" on the FFC and disconnect it from the USB Board. 100 Chapter 3 Open the locking latch on page 81. 2. If the USB FFC is supplied as part of the Lower Cover. Open the locking latch on the FFC and disconnect it from the Mainboard. 3. Removing the USB Board IMPORTANT: The USB FFC is defective, replace the entire Lower Cover. 1.
Acer Aspire 8935G Series Service Guide
Page 111
Step USB Board Size M2.5*4 Quantity 1 5. Screw Type IMPORTANT: The USB FFC is defective, replace the entire Lower Cover. Chapter 3 101 If the USB FFC is supplied as shown. Remove the single screw securing the USB Board to the Lower Cover. Remove the USB Board from the Lower Cover as part of the Lower Cover. 4.
Acer Aspire 8935G Series Service Guide
Page 125
... Rem ove LCD FPC Cable Rem ove LCD Brackets Screw List Step LCD Bezel LCD Panel LCD Brackets Screw M2.5*4 M2.5*5 M2.5*4 M2*3 M2*3 Quantity 2 2 6 1 8 Part No. 86.N1407.003 86.ARE07.004 86.N1407.003 86.S0207.001 86.S0207.001 Chapter 3 115 The following sections detail the two distinct...
Acer Aspire 8935G Series Service Guide
Page 170
2. Step Power Saving Board Size M2.5*4 Quantity 1 Screw Type Replacing the USB Board IMPORTANT: The USB FFC is defective, replace the entire Lower Cover. 1. If the USB FFC is supplied as shown. 160 Chapter 3 Insert the single securing screw into the Lower Cover as part of the Lower Cover. Insert the USB Board into the board.
Acer Aspire 8935G Series Service Guide
Page 175
Step Finger Print Reader Size M2*3 Quantity 2 Screw Type Chapter 3 165 Take care to align the mounting pins with the holes on the board. 2. Remove the two screws securing the TouchPad Board in place. Replacing the TouchPad Board IMPORTANT: The TouchPad is defective, replace the entire Upper Cover. 1. Insert the board into the Upper Cover. If the TouchPad is supplied as part of the Upper Cover.
Acer Aspire 8935G Series Service Guide
Page 225
... change is made, it will not be noted on your regional Acer office to order FRU parts for RMA (Return Merchandise Authorization). You MUST use the local FRU list provided by your Acer office may have a DIFFERENT part number code from those given in global configurations of customer machines. ... the FRU (Field Replaceable Unit) listing in the FRU list of this chapter whenever ordering for parts to dispose it . Chapter 6 215 For ACER AUTHORIZED SERVICE PROVIDERS, your regional Acer office on how to return it properly, or follow the local government ordinance or regulations on how ...
Acer Aspire 8935G Series Service Guide
Page 227
Description 1 LCD Bezel 2 LCD Bracket_L 3 Antenna_L 4 LCD Cable 5 LCD Module Acer P/N No. LCD Assembly 1 6 2 7 3 8 4 9 5 No. Chapter 6 217 Description 60.PD207.001 6 LCD Panel 33.PD207.002 7 LCD Bracket_R 60.PDA07.003 8 Antenna_R 50.PDA07.002 9 Camera 60.PDA07.003 Acer P/N LK.1840D.003 33.PD207.001 60.PDA07.003 57.PDA07.001 NOTE: Antennas are not supplied separately. The part number given is for the LCD Module which includes the Antennas.