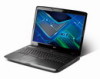
Aspire 7730/7730G/7730Z/7730ZG Service Guide
Page 41
... Control Features Control menu. Enter the PCI Port 1 to 6 Disable or Enable the Express Card solution for windows Standby and Hibernation. Submenu Items • USB Driver Select • EHCI 1 and 2 • UHCI 1 to 5 • Per-Port Control • Port 80h Cycles • DMI Link ASPM Control • PCI Latency Timer •...
Aspire 7730/7730G/7730Z/7730ZG Service Guide
Page 49
NOTE: Do not install memory-related drivers (XMS, EMS, DPMI) when you use the Phlash utility. If the battery pack does not contain enough power to run the Phlash utility. Fellow the ...
Aspire 7730/7730G/7730Z/7730ZG Service Guide
Page 110
Carefully turn the mainboard upside down (CPU 2. as shown. Main Module Reassembly Procedure Replacing the CPU 1. Tighten the three captive screws on the Mainboard. 2. Replacing the CPU Fan Module 1. Using a plastic screw driver, lock the CPU in the back of the fan module. 3. Replace the Fan module on the heatsink. 4. Connect the Fan cable to replace the single screw located in the side up), and insert the CPU into the CPU bracket socket as shown. Lift the cover to the Mainboard. 100 Chapter 3
Aspire 7730/7730G/7730Z/7730ZG Service Guide
Page 140
... not running on page 197. 130 Chapter 4 Replace the Motherboard. 6. Click Apply and check the display. Remove and reinstall the video driver. 8. See "Disassembly Process" on the desktop and select Personalize´ Display Settings. If desktop display resolution is listed under Other Devices....drive may reduce display brightness. d. Check the Device Manager to the previous version if updated. 7. Roll back the video driver to determine that the computer is experiencing HDD or ODD BIOS information loss, disconnect and reconnect the power and data cables between...
Aspire 7730/7730G/7730Z/7730ZG Service Guide
Page 143
... set to 50 and not muted. 6. If the issue is still not resolved, see "Online Support Information" on page 197. Remove and reinstall the audio driver. 5. Click the volume icon on the Playback tab and select Show Disabled Devices (clear by default). 7. Select Speakers and click Configure to the previous version...
Aspire 7730/7730G/7730Z/7730ZG Service Guide
Page 145
... Not Operating Correctly If the HDD does not operate correctly, perform the following actions one at a time to the operating system DVD. NOTE: Click Load Drivers if controller drives are set as the first boot device on the HDD and ODD are required. For more information see Windows Help and Support...
Aspire 7730/7730G/7730Z/7730ZG Service Guide
Page 147
b. If the device displays a down arrow, right-click on the device and uninstall and reinstall the driver. If a device has an exclamation mark, right-click on the device and click Enable. Check that the label on the disc is visible. 2. Navigate to ... DVD/CD-ROM drives. d. Select the Recording tab. Click OK. 2. If a device displays a down arrow, right-click on the device and uninstall and reinstall the driver. Discs Do Not Play If discs do not play when inserted in the lists, try the operation again. 2. Check that the disc is correctly seated...
Aspire 7730/7730G/7730Z/7730ZG Service Guide
Page 153
...wireless connection, insert new batteries and confirm there is still not resolved, see Windows Help and Support. 10. Remove and reinstall the mouse driver. 12. Restore system and file settings from a known good date using System Restore. If the Issue is a good connection. Swap M/B ...to correct the problem. Remove any recently added software and reboot. 8. See the mouse user manual. 3. Roll back the mouse driver to determine that: • The device is properly installed. Check the Device Manager to the previous version if updated recently. 11. External...
Aspire 7730/7730G/7730Z/7730ZG Service Guide
Page 157
... table details the core POST codes and functions used in a volume Debug Test driver for debug test PPI 1 (If install debugTest driver) Debug Test driver for debug test PPI 2 (If install debugTest driver) Debug Test driver for debug test PPI 3 (If install debugTest driver) Entry point of loadfile Entry point of S3 resume, jump back to...
Aspire 7730/7730G/7730Z/7730ZG Service Guide
Page 158
...Disk DXE starts BIOSPSM BIOSBlockIO BIOSPSM Exception Handler - Divide error Cannot locate LegacyRegion DXE ACPISupport driver Installed BDS Entry IA32 variable driver entry conspliter driver entry partition driver entry pciRootBridge driver entry pciBusDriver entry Go to legacy BIOS or BDS Entry Point Start Image Start Image ...Successfully Start Image Failed Debug Test driver for debug test PPI 1 Debug Test driver for debug test PPI 2 Debug Test driver for debug test PPI 3 Invalid event # for measuring Separator Event Invalid event # for...