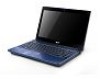
User Manual
Page 3
... dummy cards (only for certain models) Your computer shipped with plastic dummies installed in the slots. iii Information for your safety and comfort Safety instructions Read these instructions. • Increase the volume gradually until you can hear clearly and comfortably. • Do not increase the volume level after your hearing, follow these instructions carefully. Unplug the power cord before removing the power supply...
... dummy cards (only for certain models) Your computer shipped with plastic dummies installed in the slots. iii Information for your safety and comfort Safety instructions Read these instructions. • Increase the volume gradually until you can hear clearly and comfortably. • Do not increase the volume level after your hearing, follow these instructions carefully. Unplug the power cord before removing the power supply...
User Manual
Page 5
... damaged • the product exhibits a distinct change in damage and will often require extensive work by other countries/regions must meet the requirements for service • the product does not operate normally after following the operating instructions Note: Adjust only those controls that country/region. Power cords for safe battery usage This notebook uses a Lithium-ion battery. Failure to follow these guidelines may cause...
... damaged • the product exhibits a distinct change in damage and will often require extensive work by other countries/regions must meet the requirements for service • the product does not operate normally after following the operating instructions Note: Adjust only those controls that country/region. Power cords for safe battery usage This notebook uses a Lithium-ion battery. Failure to follow these guidelines may cause...
User Manual
Page 6
... another battery may damage the battery or the connecting object. Warning! Follow local regulations when disposing of the battery, charging will eventually wear out. vi pierce, open or disassemble the battery. The battery can occur when a metallic object such as they may explode. Replacing the battery pack The notebook uses lithium batteries. When the operation time becomes noticeably shorter than normal, buy a new battery. Wireless devices may not work temporarily...
... another battery may damage the battery or the connecting object. Warning! Follow local regulations when disposing of the battery, charging will eventually wear out. vi pierce, open or disassemble the battery. The battery can occur when a metallic object such as they may explode. Replacing the battery pack The notebook uses lithium batteries. When the operation time becomes noticeably shorter than normal, buy a new battery. Wireless devices may not work temporarily...
User Manual
Page 13
... to "Quick Guide" for using the keyboard, Audio, etc. Such instances are only contained in certain models of the series, but not necessarily in the model you to the basic features and functions of guides: First off To turn on the screen to all models in Portable Document Format (PDF) and comes preloaded on how your computer can help you use Adobe Reader, access the Help and Support menu. Follow...
... to "Quick Guide" for using the keyboard, Audio, etc. Such instances are only contained in certain models of the series, but not necessarily in the model you to the basic features and functions of guides: First off To turn on the screen to all models in Portable Document Format (PDF) and comes preloaded on how your computer can help you use Adobe Reader, access the Help and Support menu. Follow...
User Manual
Page 17
...care of your battery pack xv Cleaning and servicing xv Touchpad 1 Touchpad basics (with fingerprint reader) 1 Touchpad basics (with two-click buttons) 2 Using the keyboard 3 Lock keys and embedded numeric keypad* 3 Windows keys 4 Audio 5 Acer PureZone (only for certain models) 5 Tuba (only for certain models) 5 Using Dolby Home Theater for certain models) 7 Acer GridVista (dual-display compatible) 8 Acer Backup Manager 9 Power management 10 Acer eRecovery Management 11 Burn backup discs 12 Restore 13 Restore Windows from backup discs 14 Acer Arcade Deluxe...
...care of your battery pack xv Cleaning and servicing xv Touchpad 1 Touchpad basics (with fingerprint reader) 1 Touchpad basics (with two-click buttons) 2 Using the keyboard 3 Lock keys and embedded numeric keypad* 3 Windows keys 4 Audio 5 Acer PureZone (only for certain models) 5 Tuba (only for certain models) 5 Using Dolby Home Theater for certain models) 7 Acer GridVista (dual-display compatible) 8 Acer Backup Manager 9 Power management 10 Acer eRecovery Management 11 Burn backup discs 12 Restore 13 Restore Windows from backup discs 14 Acer Arcade Deluxe...
User Manual
Page 19
... models) 36 Installing memory 37 Enjoying TV with Windows Media Center 39 Choose your input type 39 Watching TV using the optional DVB-T (digital TV) antenna (for selected models) 39 To connect the digital antenna 39 Watching TV with an external antenna or cable socket 40 BIOS utility 41 Boot sequence 41 Enable disk-to RF fields (RSS-102) 54 LCD panel ergonomic specifications 54 Low-power license-exempt radio communication devices...
... models) 36 Installing memory 37 Enjoying TV with Windows Media Center 39 Choose your input type 39 Watching TV using the optional DVB-T (digital TV) antenna (for selected models) 39 To connect the digital antenna 39 Watching TV with an external antenna or cable socket 40 BIOS utility 41 Boot sequence 41 Enable disk-to RF fields (RSS-102) 54 LCD panel ergonomic specifications 54 Low-power license-exempt radio communication devices...
User Manual
Page 21
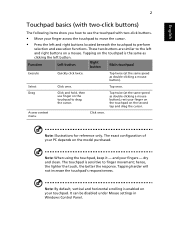
Function Left button Right button Main touchpad Execute Select Drag Access context menu Quickly click twice. Click once. Tap twice (at the same speed as double-clicking a mouse button); rest your PC depends on the second tap and drag the cursor. The exact configuration of your finger on the touchpad on the model purchased. Note: By default, vertical and horizontal scrolling is enabled on the touchpad to...
Function Left button Right button Main touchpad Execute Select Drag Access context menu Quickly click twice. Click once. Tap twice (at the same speed as double-clicking a mouse button); rest your PC depends on the second tap and drag the cursor. The exact configuration of your finger on the touchpad on the model purchased. Note: By default, vertical and horizontal scrolling is enabled on the touchpad to...
User Manual
Page 22
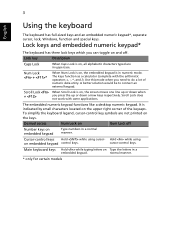
... down when + you can toggle on embedded keypad control keys. The keys function as a calculator (complete with some applications. normal manner. * only for certain models Hold while using cursor- Scroll Lock When Scroll Lock is indicated by small characters located on the upper right corner of numeric data entry. It is on embedded keypad Type numbers in numeric mode. Desired access Num Lock on Num Lock off . cursor-control keys.
... down when + you can toggle on embedded keypad control keys. The keys function as a calculator (complete with some applications. normal manner. * only for certain models Hold while using cursor- Scroll Lock When Scroll Lock is indicated by small characters located on the upper right corner of numeric data entry. It is on embedded keypad Type numbers in numeric mode. Desired access Num Lock on Num Lock off . cursor-control keys.
User Manual
Page 23
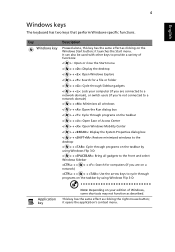
... used with other keys to provide a variety of functions: < > : Open or close the Start menu < > + : Display the desktop < > + : Open Windows Explore < > + : Search for a file or folder < > + : Cycle through Sidebar gadgets < > + : Lock your computer (if you are connected to a network domain), or switch users (if you're not connected to a network domain) < > + : Minimizes all windows < > + : Open the Run dialog box < > + : Cycle through programs on the taskbar < > + : Open Ease of Access Center < > + : Open Windows...
... used with other keys to provide a variety of functions: < > : Open or close the Start menu < > + : Display the desktop < > + : Open Windows Explore < > + : Search for a file or folder < > + : Cycle through Sidebar gadgets < > + : Lock your computer (if you are connected to a network domain), or switch users (if you're not connected to a network domain) < > + : Minimizes all windows < > + : Open the Run dialog box < > + : Cycle through programs on the taskbar < > + : Open Ease of Access Center < > + : Open Windows...
User Manual
Page 28
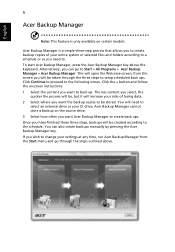
..., backups will need to back up. Acer Backup Manager is only available on the source drive. 3 Select how often you can also create backups manually by pressing the Acer Backup Manager key. Alternatively, you want to . This will be taken through the steps outlined above the keyboard. from the Start menu and go to Start > All Programs > Acer Backup Manager > Acer Backup Manager. Acer Backup Manager cannot store a backup on certain models. Once you will open the Welcome screen; The...
..., backups will need to back up. Acer Backup Manager is only available on the source drive. 3 Select how often you can also create backups manually by pressing the Acer Backup Manager key. Alternatively, you want to . This will be taken through the steps outlined above the keyboard. from the Start menu and go to Start > All Programs > Acer Backup Manager > Acer Backup Manager. Acer Backup Manager cannot store a backup on certain models. Once you will open the Welcome screen; The...
User Manual
Page 29
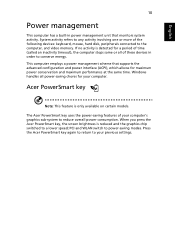
... of these devices in power management unit that supports the advanced configuration and power interface (ACPI), which allows for your computer. This computer employs a power management scheme that monitors system activity. When you press the Acer PowerSmart key, the screen brightness is only available on certain models. Windows handles all of your previous settings. System activity refers to any activity involving one or more of the following devices: keyboard, mouse, hard disk, peripherals connected to...
... of these devices in power management unit that supports the advanced configuration and power interface (ACPI), which allows for your computer. This computer employs a power management scheme that monitors system activity. When you press the Acer PowerSmart key, the screen brightness is only available on certain models. Windows handles all of your previous settings. System activity refers to any activity involving one or more of the following devices: keyboard, mouse, hard disk, peripherals connected to...
User Manual
Page 33
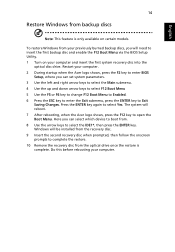
... will need to insert the first backup disc and enable the F12 Boot Menu via the BIOS Setup Utility. 1 Turn on certain models. Windows will be installed from the recovery disc. 9 Insert the second recovery disc when prompted, then follow the onscreen prompts to complete the restore. 10 Remove the recovery disc from the optical drive once the restore is only available on your previously burned backup discs, you will reboot. 7 After rebooting, when the Acer logo shows...
... will need to insert the first backup disc and enable the F12 Boot Menu via the BIOS Setup Utility. 1 Turn on certain models. Windows will be installed from the recovery disc. 9 Insert the second recovery disc when prompted, then follow the onscreen prompts to complete the restore. 10 Remove the recovery disc from the optical drive once the restore is only available on your previously burned backup discs, you will reboot. 7 After rebooting, when the Acer logo shows...
User Manual
Page 34
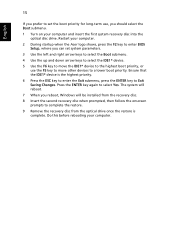
... IDE1* device to the highest boot priority, or use , you should select the Boot submenu. 1 Turn on your computer. 2 During startup when the Acer logo shows, press the F2 key to enter BIOS Setup, where you reboot, Windows will be installed from the recovery disc. 8 Insert the second recovery disc when prompted, then follow the onscreen prompts to complete the restore. 9 Remove the recovery disc from the optical drive once the restore is the...
... IDE1* device to the highest boot priority, or use , you should select the Boot submenu. 1 Turn on your computer. 2 During startup when the Acer logo shows, press the F2 key to enter BIOS Setup, where you reboot, Windows will be installed from the recovery disc. 8 Insert the second recovery disc when prompted, then follow the onscreen prompts to complete the restore. 9 Remove the recovery disc from the optical drive once the restore is the...
User Manual
Page 35
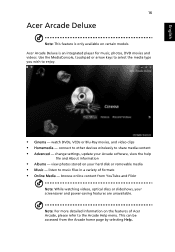
.... change settings, update your hard disk or removable media • Music - Note: For more detailed information on your Arcade software, view the help file and About information • Albums - connect to other devices wirelessly to music files in a variety of Acer Arcade, please refer to enjoy. • Cinema - watch DVDs, VCDs or Blu-Ray movies, and video clips • Homemedia - Use the MediaConsole, touchpad or arrow keys...
.... change settings, update your hard disk or removable media • Music - Note: For more detailed information on your Arcade software, view the help file and About information • Albums - connect to other devices wirelessly to music files in a variety of Acer Arcade, please refer to enjoy. • Cinema - watch DVDs, VCDs or Blu-Ray movies, and video clips • Homemedia - Use the MediaConsole, touchpad or arrow keys...
User Manual
Page 46
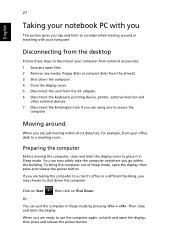
...: 1 Save any open files. 2 Remove any media, floppy disks or compact disks from the drive(s). 3 Shut down the computer: Click on Start then click on Shut Down. To bring the computer out of Sleep mode, open the display; When you are using one to secure the computer. Disconnecting from the AC adapter. 6 Disconnect the keyboard, pointing device, printer, external monitor and other external devices. 7 Disconnect the Kensington lock if you...
...: 1 Save any open files. 2 Remove any media, floppy disks or compact disks from the drive(s). 3 Shut down the computer: Click on Start then click on Shut Down. To bring the computer out of Sleep mode, open the display; When you are using one to secure the computer. Disconnecting from the AC adapter. 6 Disconnect the keyboard, pointing device, printer, external monitor and other external devices. 7 Disconnect the Kensington lock if you...
User Manual
Page 50
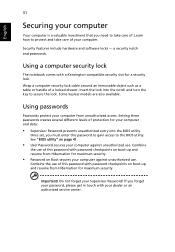
Insert the lock into the BIOS utility. Once set, you must enter this password to gain access to secure the lock. Combine the use of . Security features include hardware and software locks - Setting these passwords creates several different levels of this password with password checkpoints on boot-up and resume from unauthorized access. Important! Some keyless models are also available. English 31 Securing your computer and data: • Supervisor Password prevents unauthorized...
Insert the lock into the BIOS utility. Once set, you must enter this password to gain access to secure the lock. Combine the use of . Security features include hardware and software locks - Setting these passwords creates several different levels of this password with password checkpoints on boot-up and resume from unauthorized access. Important! Some keyless models are also available. English 31 Securing your computer and data: • Supervisor Password prevents unauthorized...
User Manual
Page 51
... access the BIOS utility. English 32 Entering passwords When a password is set, a password prompt appears in the center of the display screen. • When the Supervisor Password is enabled, a prompt appears at boot-up . • Type the User Password and press to use the computer. Try again and press . • When the User Password is set and the password on the computer again, and try again. Then turn on boot parameter is set passwords using the BIOS utility...
... access the BIOS utility. English 32 Entering passwords When a password is set, a password prompt appears in the center of the display screen. • When the Supervisor Password is enabled, a prompt appears at boot-up . • Type the User Password and press to use the computer. Try again and press . • When the User Password is set and the password on the computer again, and try again. Then turn on boot parameter is set passwords using the BIOS utility...
User Manual
Page 52
... use the fax/data modem port, connect a phone cable from the modem port to the computer, read the following section. This modem port is appropriate for certain models) Warning! Please make sure that the cable you are working. Plugging this modem into a digital phone line will damage the modem. For instructions on how to connect different external devices to a telephone jack. Connectivity options Ports allow you to connect peripheral devices...
... use the fax/data modem port, connect a phone cable from the modem port to the computer, read the following section. This modem port is appropriate for certain models) Warning! Please make sure that the cable you are working. Plugging this modem into a digital phone line will damage the modem. For instructions on how to connect different external devices to a telephone jack. Connectivity options Ports allow you to connect peripheral devices...
User Manual
Page 60
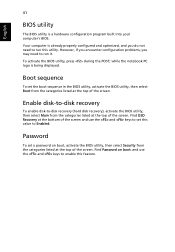
... keys to -disk recovery (hard disk recovery), activate the BIOS utility, then select Main from the categories listed at the bottom of the screen. To activate the BIOS utility, press during the POST; However, if you encounter configuration problems, you do not need to Enabled. Password To set this value to run this feature. while the notebook PC logo is a hardware configuration program built into your computer's BIOS. Boot sequence To set the boot sequence in the BIOS utility, activate...
... keys to -disk recovery (hard disk recovery), activate the BIOS utility, then select Main from the categories listed at the bottom of the screen. To activate the BIOS utility, press during the POST; However, if you encounter configuration problems, you do not need to Enabled. Password To set this value to run this feature. while the notebook PC logo is a hardware configuration program built into your computer's BIOS. Boot sequence To set the boot sequence in the BIOS utility, activate...
User Manual
Page 62
... all option. • The volume level may be muted. Press + < > (increase) to adjust the brightness level. • The display device might be too low. Look at the volume control icon on the taskbar. Connect the AC adapter to recharge the battery pack. • Make sure that may be low and unable to power the computer. Press any key to adjust the volume. You can also use of...
... all option. • The volume level may be muted. Press + < > (increase) to adjust the brightness level. • The display device might be too low. Look at the volume control icon on the taskbar. Connect the AC adapter to recharge the battery pack. • Make sure that may be low and unable to power the computer. Press any key to adjust the volume. You can also use of...


