
Power SV User Guide
Page 6
To reconfigure your computer 16 Upgrading CPU 16 Remove CPU 16 Install and upgrade CPU 17 Troubleshooting 19 Taking Care of your computer 23 Important tips 23 Cleaning and servicing 23 To clean your computer and keyboard 23 To clean your pointing device 24 To clean your optical mouse 24 To clean your monitor 24 When to contact a service technician 24 Asking for technical assistance 24 Remark: All the drawings in the Guide are diagrams. About components's quantity and style, substances shall take precedence.
To reconfigure your computer 16 Upgrading CPU 16 Remove CPU 16 Install and upgrade CPU 17 Troubleshooting 19 Taking Care of your computer 23 Important tips 23 Cleaning and servicing 23 To clean your computer and keyboard 23 To clean your pointing device 24 To clean your optical mouse 24 To clean your monitor 24 When to contact a service technician 24 Asking for technical assistance 24 Remark: All the drawings in the Guide are diagrams. About components's quantity and style, substances shall take precedence.

Power SV User Guide
Page 10
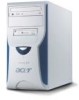
... (optional) • 10Base-T/100Base-TX Ethernet Network support with "wake on LAN" English 4 System Tour System Features Your computer features: Performance • Intel Pentium 4/Celeron CPU • Intel 845GV/ICH4 • System Memory DDR 266/333, 2 DIMM Slots, expandable to 2GB • Power management function • 3.5 inch floppy drive • CD...
... (optional) • 10Base-T/100Base-TX Ethernet Network support with "wake on LAN" English 4 System Tour System Features Your computer features: Performance • Intel Pentium 4/Celeron CPU • Intel 845GV/ICH4 • System Memory DDR 266/333, 2 DIMM Slots, expandable to 2GB • Power management function • 3.5 inch floppy drive • CD...

Power SV User Guide
Page 19
... system according to instruction setup manual. 3 Follow ESD precautions described above before handling any computer components. 4 Remove any components. ESD Guard ESD can damage the CPU, drives, expansion circuit boards and the other components. Warning! If a wrist grounding strap is not properly shut down before installing the components.
... system according to instruction setup manual. 3 Follow ESD precautions described above before handling any computer components. 4 Remove any components. ESD Guard ESD can damage the CPU, drives, expansion circuit boards and the other components. Warning! If a wrist grounding strap is not properly shut down before installing the components.

Power SV User Guide
Page 20
... cover back on the side panel. 4 Slide the panel towards the back of your computer are upgradeable such as the memory, the hard disk, the CPU and the expansion card. Remove the side panel 1 Turn off your computer and unplug all peripheral devices. 2 Place the system on a flat, steady surface. 3 Remove...
... cover back on the side panel. 4 Slide the panel towards the back of your computer are upgradeable such as the memory, the hard disk, the CPU and the expansion card. Remove the side panel 1 Turn off your computer and unplug all peripheral devices. 2 Place the system on a flat, steady surface. 3 Remove...

Power SV User Guide
Page 22
... Remark: The DDR DIMM sockets are slotted to ensure proper installation. To remove the CPU from the socket. Run the BIOS utility to insert it again. Turn the DDR around... DDR DIMM but it does not fit easily into socket, you may have inserted it . Upgrading CPU Remove CPU Remark: Please follow the pre-installation instructions to release the DDR. 2 Gently pull the DDR out from the motherboard...: 1 Find the CPU on both sides of the DDR socket outward to guard against static electricity while installing or removing any...
... Remark: The DDR DIMM sockets are slotted to ensure proper installation. To remove the CPU from the socket. Run the BIOS utility to insert it again. Turn the DDR around... DDR DIMM but it does not fit easily into socket, you may have inserted it . Upgrading CPU Remove CPU Remark: Please follow the pre-installation instructions to release the DDR. 2 Gently pull the DDR out from the motherboard...: 1 Find the CPU on both sides of the DDR socket outward to guard against static electricity while installing or removing any...

Power SV User Guide
Page 23
Install and upgrade CPU To install or upgrade the CPU, complete the following steps: 1 Unlock the socket lever. 2 Install the CPU chip into socket. 3 Return the lever to release the CPU. 5 Gently pull the CPU from the socket. 6 Install and upgrade CPU. English 17 2 Disjoin the connectors attached to the fan and the heat sink. 3 Remove the fan and the heat sink. 4 Unlock the socket lever to locked position.
Install and upgrade CPU To install or upgrade the CPU, complete the following steps: 1 Unlock the socket lever. 2 Install the CPU chip into socket. 3 Return the lever to release the CPU. 5 Gently pull the CPU from the socket. 6 Install and upgrade CPU. English 17 2 Disjoin the connectors attached to the fan and the heat sink. 3 Remove the fan and the heat sink. 4 Unlock the socket lever to locked position.

Power SV User Guide
Page 24
English Warning! 18 Upgrading your computer 4 Attach the fan/heat sink on some boards and/or chassis parts. The CPU and heat sink may be sharp pins and edges on top of the CPU. 5 Attach the fan/heat sink connectors to the connectors with marked with "CPU FAN". Also, there might be hot if the system has been running.
English Warning! 18 Upgrading your computer 4 Attach the fan/heat sink on some boards and/or chassis parts. The CPU and heat sink may be sharp pins and edges on top of the CPU. 5 Attach the fan/heat sink connectors to the connectors with marked with "CPU FAN". Also, there might be hot if the system has been running.

