User Guide
Page 1
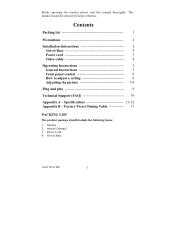
... Timing Table 13 PACKING LIST The product package should be retained for future reference. Swivel Base 41A604-786-2A 英文 1 Contents Packing list 1 Precautions 2 Installation Instructions 3 Swivel Base 3 Power cord 3 Video cable 4 Operating Instructions 5 General Instructions 5 Front panel control 6 How to adjust a setting 6 Adjusting the picture 7-8 Plug and play 9 Technical...
... Timing Table 13 PACKING LIST The product package should be retained for future reference. Swivel Base 41A604-786-2A 英文 1 Contents Packing list 1 Precautions 2 Installation Instructions 3 Swivel Base 3 Power cord 3 Video cable 4 Operating Instructions 5 General Instructions 5 Front panel control 6 How to adjust a setting 6 Adjusting the picture 7-8 Plug and play 9 Technical...

User Guide
Page 2
...near the equipment and shall be used for ventilation. PRECAUTIONS z Do not use the monitor only with UL listed computers which have an electrician install the correct outlet, or use a mounting kit approved by the manufacturer or sold with the monitor. If you mount the monitor on the ... safety feature. If you to protect it will fit only into the slot on an unstable cart, stand, or table. z The wall socket shall be installed near water, e.g. near or over a radiator or heat register. z Do not attempt to power surges. z Unplug the unit during a lightning storm or...
...near the equipment and shall be used for ventilation. PRECAUTIONS z Do not use the monitor only with UL listed computers which have an electrician install the correct outlet, or use a mounting kit approved by the manufacturer or sold with the monitor. If you mount the monitor on the ... safety feature. If you to protect it will fit only into the slot on an unstable cart, stand, or table. z The wall socket shall be installed near water, e.g. near or over a radiator or heat register. z Do not attempt to power surges. z Unplug the unit during a lightning storm or...

User Guide
Page 3
... Removing the Swivel Base Power Cord Power Source: 1. INSTALLATION INSTRUCTIONS Swivel Base To attach the swivel base to either 100/120V AC or 220/240V AC voltage area ( No user adjustment is the correct ...
... Removing the Swivel Base Power Cord Power Source: 1. INSTALLATION INSTRUCTIONS Swivel Base To attach the swivel base to either 100/120V AC or 220/240V AC voltage area ( No user adjustment is the correct ...
User Guide
Page 4
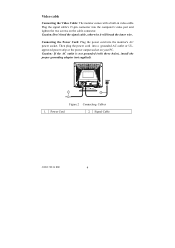
...; 4 Caution:Don't bend the signal cable, otherwise it will break the inner wire. Video cable Connecting the Video Cable: The monitor comes with three holes), install the proper grounding adapter (not supplied). Plug the signal cable's 15-pin connector into the computer's video port and tighten the two screws on your...
...; 4 Caution:Don't bend the signal cable, otherwise it will break the inner wire. Video cable Connecting the Video Cable: The monitor comes with three holes), install the proper grounding adapter (not supplied). Plug the signal cable's 15-pin connector into the computer's video port and tighten the two screws on your...

User Guide
Page 5
The other control knobs are located at front panel of the monitor (See Figure 3). EXIT Notes • Do not install the monitor in a location near heat sources such as radiators or air ducts , or in a place subject to direct sunlight , or excessive dust or mechanical ...
The other control knobs are located at front panel of the monitor (See Figure 3). EXIT Notes • Do not install the monitor in a location near heat sources such as radiators or air ducts , or in a place subject to direct sunlight , or excessive dust or mechanical ...

User Guide
Page 10
... should either turn ON or OFF after hitting the CAPS LOCK key. *Inspect the monitor's video cable and make sure none of the pins are installed *Adjust the Contrast and Brightness Controls. *Move electrical devices that none of the pins are bent. *Make sure computer is operational by hitting the CAPS...
... should either turn ON or OFF after hitting the CAPS LOCK key. *Inspect the monitor's video cable and make sure none of the pins are installed *Adjust the Contrast and Brightness Controls. *Move electrical devices that none of the pins are bent. *Make sure computer is operational by hitting the CAPS...


