User Guide
Page 5
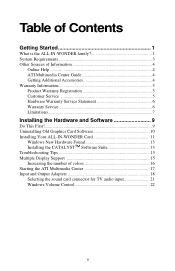
... 5 Product Warranty Registration 5 Customer Service 5 Hardware Warranty Service Statement 6 Warranty Service 6 Limitations 7 Installing the Hardware and Software 9 Do This First 9 Uninstalling Old Graphics Card Software 10 Installing Your ALL-IN-WONDER Card 11 Windows New Hardware Found 13 Installing the CATALYST™ Software Suite 13 Troubleshooting Tips 15 Multiple Display Support 15 Increasing the number of colors 16 Starting the ATI Multimedia Center 17 Input and Output Adapters 18 Selecting the sound card connector for TV audio input 21 Windows Volume Control 22...
... 5 Product Warranty Registration 5 Customer Service 5 Hardware Warranty Service Statement 6 Warranty Service 6 Limitations 7 Installing the Hardware and Software 9 Do This First 9 Uninstalling Old Graphics Card Software 10 Installing Your ALL-IN-WONDER Card 11 Windows New Hardware Found 13 Installing the CATALYST™ Software Suite 13 Troubleshooting Tips 15 Multiple Display Support 15 Increasing the number of colors 16 Starting the ATI Multimedia Center 17 Input and Output Adapters 18 Selecting the sound card connector for TV audio input 21 Windows Volume Control 22...

User Guide
Page 6
... television display enabled 27 Using a monitor vs. using the television display 27 Adjusting the monitor display 28 TV reception tips 28 Viewing text on television 28 Reducing edge distortion 29 Changing display configurations 30 Using games and applications 30 MULTVIEW 31 MULTVIEW audio requirements 32 EAZYLOOK 32 ATI HDTV Component Video Adapter (Optional 33 HDTV Requirements 33 Setting up your ATI HDTV Component Video Adapter 34 Installing your ATI HDTV Component Video Adapter 34 Using your HDTV Component Video Adapter 37 Windows Control Panel Settings 37 Troubleshooting...
... television display enabled 27 Using a monitor vs. using the television display 27 Adjusting the monitor display 28 TV reception tips 28 Viewing text on television 28 Reducing edge distortion 29 Changing display configurations 30 Using games and applications 30 MULTVIEW 31 MULTVIEW audio requirements 32 EAZYLOOK 32 ATI HDTV Component Video Adapter (Optional 33 HDTV Requirements 33 Setting up your ATI HDTV Component Video Adapter 34 Installing your ATI HDTV Component Video Adapter 34 Using your HDTV Component Video Adapter 37 Windows Control Panel Settings 37 Troubleshooting...

User Guide
Page 9
...-Play monitor that supports VESA's Display Channel specifications (DDC1 or DDC2b) is required to take advantage of system memory. • Installation software requires CD-ROM or DVD drive. • DVD playback requires DVD drive. • Sound card supported by Windows® with available line input. • Interactive Program Guide requires internet connection (North America only). • REMOTE WONDER receiver requires available USB port. AGP 8X/4X. * Windows® 98/SE , Windows® Me, Windows® 2000, Windows...
...-Play monitor that supports VESA's Display Channel specifications (DDC1 or DDC2b) is required to take advantage of system memory. • Installation software requires CD-ROM or DVD drive. • DVD playback requires DVD drive. • Sound card supported by Windows® with available line input. • Interactive Program Guide requires internet connection (North America only). • REMOTE WONDER receiver requires available USB port. AGP 8X/4X. * Windows® 98/SE , Windows® Me, Windows® 2000, Windows...
User Guide
Page 10
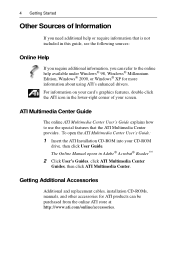
... of your screen. ATI Multimedia Center Guide The online ATI Multimedia Center User's Guide explains how to the online help or require information that the ATI Multimedia Center provides. For information on your CD-ROM drive, then click User Guide. To open the ATI Multimedia Center User's Guide: 1 Insert the ATI Installation CD-ROM into your card's graphics features, double-click the ATI icon in the lower-right corner of Information If you need additional help...
... of your screen. ATI Multimedia Center Guide The online ATI Multimedia Center User's Guide explains how to the online help or require information that the ATI Multimedia Center provides. For information on your CD-ROM drive, then click User Guide. To open the ATI Multimedia Center User's Guide: 1 Insert the ATI Installation CD-ROM into your card's graphics features, double-click the ATI icon in the lower-right corner of Information If you need additional help...
User Guide
Page 12
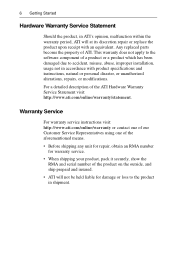
... replaced parts become the property of the ATI Hardware Warranty Service Statement visit: http://www.ati.com/online/warranty/statement. Warranty Service For warranty service instructions visit: http://www.ati.com/online/warranty or contact one of our Customer Service Representatives using one of the aforementioned means. • Before shipping any unit for repair, obtain an RMA number for damage or loss to accident, misuse, abuse, improper installation...
... replaced parts become the property of the ATI Hardware Warranty Service Statement visit: http://www.ati.com/online/warranty/statement. Warranty Service For warranty service instructions visit: http://www.ati.com/online/warranty or contact one of our Customer Service Representatives using one of the aforementioned means. • Before shipping any unit for repair, obtain an RMA number for damage or loss to accident, misuse, abuse, improper installation...

User Guide
Page 20
... drive. See the ATI REMOTE WONDER Installation Guide for installation. 14 Installing the Hardware and Software To install the CATALYST software suite 1 Insert the ATI INSTALLATION CD-ROM into your computer The Express installation option is automatically installed with the CATALYST software suite. Custom installation allows you to step 6. 2 Click Start, then click Run. 3 Type the following: D:\ATISETUP (If D is not your CD-ROM drive, substitute D with the ATI graphics driver. The ATI REMOTE WONDER II™ software...
... drive. See the ATI REMOTE WONDER Installation Guide for installation. 14 Installing the Hardware and Software To install the CATALYST software suite 1 Insert the ATI INSTALLATION CD-ROM into your computer The Express installation option is automatically installed with the CATALYST software suite. Custom installation allows you to step 6. 2 Click Start, then click Run. 3 Type the following: D:\ATISETUP (If D is not your CD-ROM drive, substitute D with the ATI graphics driver. The ATI REMOTE WONDER II™ software...

User Guide
Page 21
... display device and graphics card when you use the Troubleshooting Guide located in the Windows Help or contact your computer manufacturer. Press and hold the CTRL key until the Microsoft Windows Startup Menu appears on the ATI Installation CD for duplicate display adapter and monitor entries if you are plugged in and receiving power. • If necessary, disable any built-in graphics capabilities on your computer's manual...
... display device and graphics card when you use the Troubleshooting Guide located in the Windows Help or contact your computer manufacturer. Press and hold the CTRL key until the Microsoft Windows Startup Menu appears on the ATI Installation CD for duplicate display adapter and monitor entries if you are plugged in and receiving power. • If necessary, disable any built-in graphics capabilities on your computer's manual...
User Guide
Page 22
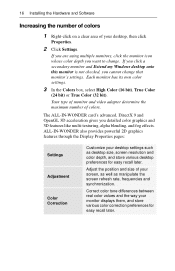
... cannot change . 16 Installing the Hardware and Software Increasing the number of colors 1 Right-click on a clear area of colors. Your type of monitor and video adapter determine the maximum number of your monitor displays them, and store various color correction preferences for easy recall later. Adjust the position and size of your desktop settings such as manipulate the screen refresh rate, frequencies and synchronization. ALL-IN-WONDER also provides powerful 2D graphics...
... cannot change . 16 Installing the Hardware and Software Increasing the number of colors 1 Right-click on a clear area of colors. Your type of monitor and video adapter determine the maximum number of your monitor displays them, and store various color correction preferences for easy recall later. Adjust the position and size of your desktop settings such as manipulate the screen refresh rate, frequencies and synchronization. ALL-IN-WONDER also provides powerful 2D graphics...
User Guide
Page 29
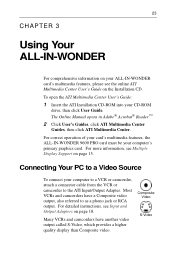
... Center Guides, then click ATI Multimedia Center. For correct operation of your card's multimedia features, the ALL-IN-WONDER 9600 PRO card must be your computer to a VCR or camcorder, attach a connector cable from the VCR or camcorder to as a phono jack or RCA output. To open the ATI Multimedia Center User's Guide: 1 Insert the ATI Installation CD-ROM into your CD-ROM drive, then click User Guide. For detailed instructions, see Multiple Display Support...
... Center Guides, then click ATI Multimedia Center. For correct operation of your card's multimedia features, the ALL-IN-WONDER 9600 PRO card must be your computer to a VCR or camcorder, attach a connector cable from the VCR or camcorder to as a phono jack or RCA output. To open the ATI Multimedia Center User's Guide: 1 Insert the ATI Installation CD-ROM into your CD-ROM drive, then click User Guide. For detailed instructions, see Multiple Display Support...
User Guide
Page 33
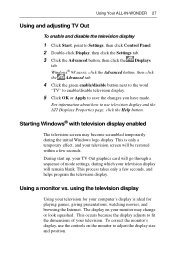
.... The display on the monitor to use television display and the ATI Displays Properties page, click the Help button. For information about how to adjust the display size and position. Windows® 98 users: click the Advanced button, then click the Advanced tab. 4 Click the green enable/disable button next to the word "TV" to enable/disable television display. 5 Click OK or Apply to Settings, then click Control Panel...
.... The display on the monitor to use television display and the ATI Displays Properties page, click the Help button. For information about how to adjust the display size and position. Windows® 98 users: click the Advanced button, then click the Advanced tab. 4 Click the green enable/disable button next to the word "TV" to enable/disable television display. 5 Click OK or Apply to Settings, then click Control Panel...
User Guide
Page 34
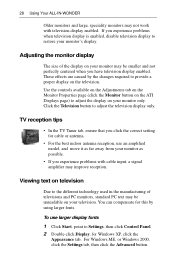
... setting for cable or antenna. • For the best indoor antenna reception, use larger display fonts 1 Click Start, point to Settings, then click Control Panel. 2 Double-click Display, for this by the changes required to provide a proper display on your monitor's display. 28 Using Your ALL-IN-WONDER Older monitors and large, speciality monitors may be smaller and not perfectly centered when you experience problems when television display is enabled, disable television display...
... setting for cable or antenna. • For the best indoor antenna reception, use larger display fonts 1 Click Start, point to Settings, then click Control Panel. 2 Double-click Display, for this by the changes required to provide a proper display on your monitor's display. 28 Using Your ALL-IN-WONDER Older monitors and large, speciality monitors may be smaller and not perfectly centered when you experience problems when television display is enabled, disable television display...
User Guide
Page 37
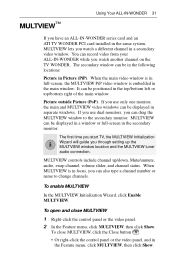
... guide you can be positioned in the main window. When MULTVIEW is embedded in the top/bottom left or top/bottom right of the main window. MULTVIEW™ Using Your ALL-IN-WONDER 31 If you have an ALL-IN-WONDER series card and an ATI TV WONDER PCI card installed in the same system, MULTVIEW lets you watch a different channel in a secondary video window...
... guide you can be positioned in the main window. When MULTVIEW is embedded in the top/bottom left or top/bottom right of the main window. MULTVIEW™ Using Your ALL-IN-WONDER 31 If you have an ALL-IN-WONDER series card and an ATI TV WONDER PCI card installed in the same system, MULTVIEW lets you watch a different channel in a secondary video window...

User Guide
Page 39
TV VGA 2 A/V OUT ATI Output Adapter A/V IN ATI Component Video Adapter HDTV HDTV Requirements Monitor Television A CRT monitor is required to install the ATI HDTV Component Video Adapter, and to connect a standard TV using component video cables. The ATI Output adapter (see page 20) allows you view computer output directly on your PC that accept component input. You must use in i North America only, and is available from the online ATI store at http://www.ati.com/online/accessories. HDTVs or SDTVs that is ideal...
TV VGA 2 A/V OUT ATI Output Adapter A/V IN ATI Component Video Adapter HDTV HDTV Requirements Monitor Television A CRT monitor is required to install the ATI HDTV Component Video Adapter, and to connect a standard TV using component video cables. The ATI Output adapter (see page 20) allows you view computer output directly on your PC that accept component input. You must use in i North America only, and is available from the online ATI store at http://www.ati.com/online/accessories. HDTVs or SDTVs that is ideal...
User Guide
Page 40
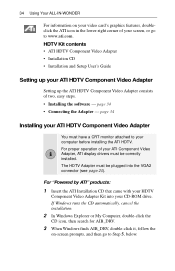
... your video card's graphics features, doubleclick the ATI icon in the lower-right corner of your screen, or go to Step 5, below. 34 Using Your ALL-IN-WONDER For information on -screen prompts, and then go to www.ati.com. HDTV Kit contents • ATI HDTV Component Video Adapter • Installation CD • Installation and Setup User's Guide Setting up your ATI HDTV Component Video Adapter Setting up the ATI HDTV Component Video Adapter consists of your ATI Component Video i Adapter, ATI display drivers must...
... your video card's graphics features, doubleclick the ATI icon in the lower-right corner of your screen, or go to Step 5, below. 34 Using Your ALL-IN-WONDER For information on -screen prompts, and then go to www.ati.com. HDTV Kit contents • ATI HDTV Component Video Adapter • Installation CD • Installation and Setup User's Guide Setting up your ATI HDTV Component Video Adapter Setting up the ATI HDTV Component Video Adapter consists of your ATI Component Video i Adapter, ATI display drivers must...
User Guide
Page 41
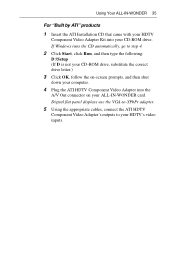
... panel displays use the VGA-to-YPbPr adapter. 5 Using the appropriate cables, connect the ATI HDTV Component Video Adapter's outputs to step 4. 2 Click Start, click Run, and then type the following: D:\Setup (If D is not your CD-ROM drive, substitute the correct drive letter.) 3 Click OK, follow the on your ALL-IN-WONDER card. Using Your ALL-IN-WONDER 35 For "Built by ATI" products 1 Insert the ATI Installation CD that came with your HDTV Component Video Adapter...
... panel displays use the VGA-to-YPbPr adapter. 5 Using the appropriate cables, connect the ATI HDTV Component Video Adapter's outputs to step 4. 2 Click Start, click Run, and then type the following: D:\Setup (If D is not your CD-ROM drive, substitute the correct drive letter.) 3 Click OK, follow the on your ALL-IN-WONDER card. Using Your ALL-IN-WONDER 35 For "Built by ATI" products 1 Insert the ATI Installation CD that came with your HDTV Component Video Adapter...
User Guide
Page 44
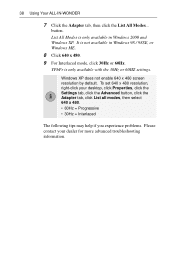
.... It is only available in Windows 98 / 98SE, or Windows ME. 8 Click 640 x 480. 9 For Interlaced mode, click 30Hz or 60Hz. 38 Using Your ALL-IN-WONDER 7 Click the Adapter tab, then click the List All Modes... button. Windows XP does not enable 640 x 480 screen resolution by default. To set 640 x 480 resolution, right-click your desktop, click Properties, click the Settings tab, click the Advanced...
.... It is only available in Windows 98 / 98SE, or Windows ME. 8 Click 640 x 480. 9 For Interlaced mode, click 30Hz or 60Hz. 38 Using Your ALL-IN-WONDER 7 Click the Adapter tab, then click the List All Modes... button. Windows XP does not enable 640 x 480 screen resolution by default. To set 640 x 480 resolution, right-click your desktop, click Properties, click the Settings tab, click the Advanced...

User Guide
Page 45
... display anything until Windows starts; I can't see the entire display If your computer with the CRT monitor connected. Troubleshooting tips Using Your ALL-IN-WONDER 39 Problem Possible Solution The colors on my TV display are correct (Y=Green, Pb=Blue, Pr=Red). My CRT display is Your system is tilted Consult your HDTV are not correct Ensure that the drivers in the ATI HDTV Component Video Adapter Kit have been installed...
... display anything until Windows starts; I can't see the entire display If your computer with the CRT monitor connected. Troubleshooting tips Using Your ALL-IN-WONDER 39 Problem Possible Solution The colors on my TV display are correct (Y=Green, Pb=Blue, Pr=Red). My CRT display is Your system is tilted Consult your HDTV are not correct Ensure that the drivers in the ATI HDTV Component Video Adapter Kit have been installed...
User Guide
Page 48
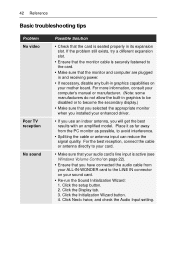
... that the monitor and computer are plugged in and receiving power. • If necessary, disable any built-in graphics capabilities on your sound card. • Re-run the Sound Initialization Wizard: 1. For the best reception, connect the cable or antenna directly to your card. • Make sure that your audio card's line input is active (see Windows Volume Control on your mother board. Click the setup button...
... that the monitor and computer are plugged in and receiving power. • If necessary, disable any built-in graphics capabilities on your sound card. • Re-run the Sound Initialization Wizard: 1. For the best reception, connect the cable or antenna directly to your card. • Make sure that your audio card's line input is active (see Windows Volume Control on your mother board. Click the setup button...

User Guide
Page 61
... and output adapters 18 Installing your card 11 Internal audio/video input header 50 L LaunchPad 17 M Monitor adjusting display 28 using a monitor vs. Index A Adapters input and output 18 ATI Multimedia Center uninstalling 51 User's Guide 4 Audio connectors CD 49 Audio troubleshooting 44 C CATALYST software suite installing 13 CD audio connectors 49 Color depth increasing 16 Colors increasing number of 16 Compliance information CE 53 Industry Canada 53 Low Voltage Directive for TV- TV display 27 Multimedia Center starting 17 Multiple display support 15 MULTVIEW 31 audio requirements...
... and output adapters 18 Installing your card 11 Internal audio/video input header 50 L LaunchPad 17 M Monitor adjusting display 28 using a monitor vs. Index A Adapters input and output 18 ATI Multimedia Center uninstalling 51 User's Guide 4 Audio connectors CD 49 Audio troubleshooting 44 C CATALYST software suite installing 13 CD audio connectors 49 Color depth increasing 16 Colors increasing number of 16 Compliance information CE 53 Industry Canada 53 Low Voltage Directive for TV- TV display 27 Multimedia Center starting 17 Multiple display support 15 MULTVIEW 31 audio requirements...

User Guide
Page 62
... System requirements 3 T Troubleshooting 43 audio and video 44 basic 42 Troubleshooting tips 15, 41 TV attaching to your card 24 changing display configurations 30 displaying PC output on 20 MULTVIEW 31 reception tips 28 reducing edge distortion 29 selecting sound card connector for TV audio input 21 using games and applications 30 viewing text on 28 TV Out enabling, using, adjusting 27 TV WONDER 31 U Uninstalling old graphics card software 10 Using your HDTV Component Video Adapter 37 V Video composite video, S-Video...
... System requirements 3 T Troubleshooting 43 audio and video 44 basic 42 Troubleshooting tips 15, 41 TV attaching to your card 24 changing display configurations 30 displaying PC output on 20 MULTVIEW 31 reception tips 28 reducing edge distortion 29 selecting sound card connector for TV audio input 21 using games and applications 30 viewing text on 28 TV Out enabling, using, adjusting 27 TV WONDER 31 U Uninstalling old graphics card software 10 Using your HDTV Component Video Adapter 37 V Video composite video, S-Video...


