
Getting Started Guide
Page 2
... been taken in connection with the furnishing, performance, or use of ATI hardware, software or other limited viewing uses only unless otherwise authorized by Macrovision Corporation. ATI's documentation contains helpful installation/configuration tips and other rights owners. Documentation Updates ATI is prohibited. To maximize the value of this documentation, for any form, without further notice to a product or system described herein to make changes without the express written permission...
... been taken in connection with the furnishing, performance, or use of ATI hardware, software or other limited viewing uses only unless otherwise authorized by Macrovision Corporation. ATI's documentation contains helpful installation/configuration tips and other rights owners. Documentation Updates ATI is prohibited. To maximize the value of this documentation, for any form, without further notice to a product or system described herein to make changes without the express written permission...

Getting Started Guide
Page 3
... it from touching such power lines or circuits, as practical. The safety and operating instructions should not be fatal. • Note to provide continuous bonding between the option card and the PC chassis. • Outdoor Antenna Grounding - All warnings on the product and the operating instructions should be sure that have Installation Instructions detailing user installation of time, unplug...
... it from touching such power lines or circuits, as practical. The safety and operating instructions should not be fatal. • Note to provide continuous bonding between the option card and the PC chassis. • Outdoor Antenna Grounding - All warnings on the product and the operating instructions should be sure that have Installation Instructions detailing user installation of time, unplug...
Getting Started Guide
Page 5
... 1 HDTV WONDER™ Features 3 System Requirements 4 Other Sources of Information 4 Installing the HDTV WONDER™Card 5 HDTV WONDER™ External Connectors 7 Attaching the Antenna 8 ATI Input Adapter 9 Installing the Software 10 Starting the ATI Multimedia Center 10 Using Your HDTV WONDER™ 11 Special Features 11 Setting up DTV 12 Feature Menu 14 Keyboard Shortcuts 16 Display Settings 18 Video Settings 20 Channel List 20 Audio Settings 23 Schedule Settings 24 Closed Captioning 24 HOTWORDS™ 26 TV...
... 1 HDTV WONDER™ Features 3 System Requirements 4 Other Sources of Information 4 Installing the HDTV WONDER™Card 5 HDTV WONDER™ External Connectors 7 Attaching the Antenna 8 ATI Input Adapter 9 Installing the Software 10 Starting the ATI Multimedia Center 10 Using Your HDTV WONDER™ 11 Special Features 11 Setting up DTV 12 Feature Menu 14 Keyboard Shortcuts 16 Display Settings 18 Video Settings 20 Channel List 20 Audio Settings 23 Schedule Settings 24 Closed Captioning 24 HOTWORDS™ 26 TV...
Getting Started Guide
Page 7
... video in full-screen or in your ATI multimedia card. HDTV Video Benefits. Highdefinition formats - 720p (1280x760, progressive) or 1080i (1920x1080, interlaced) - offer a picture better than analog, Standard Definition or Enhanced Definition TV. Record your graphics card for registering your card's serial numbers The 102 part number (P/N) and the serial number (S/N) printed on the services provided in a window. A possible arrangement of the serial number and 102 part number X Serial number Y 102 part number With HDTV WONDER...
... video in full-screen or in your ATI multimedia card. HDTV Video Benefits. Highdefinition formats - 720p (1280x760, progressive) or 1080i (1920x1080, interlaced) - offer a picture better than analog, Standard Definition or Enhanced Definition TV. Record your graphics card for registering your card's serial numbers The 102 part number (P/N) and the serial number (S/N) printed on the services provided in a window. A possible arrangement of the serial number and 102 part number X Serial number Y 102 part number With HDTV WONDER...
Getting Started Guide
Page 9
..., and record analog TV from an antenna or cable feed on your favorite TV show as wallpaper. Schedule and record TV shows to your PC. Channel Preview - Video inputs for parental control. Digital VCR - Scheduled Viewing - HDTV WONDER™ Features 3 HDTV WONDER™ Features DTV Tuner - Analog TV Tuner - Closed Captioning support including Transcript Creation and Hot Words™ that alert you when the ATI Multimedia Center software receives information...
..., and record analog TV from an antenna or cable feed on your favorite TV show as wallpaper. Schedule and record TV shows to your PC. Channel Preview - Video inputs for parental control. Digital VCR - Scheduled Viewing - HDTV WONDER™ Features 3 HDTV WONDER™ Features DTV Tuner - Analog TV Tuner - Closed Captioning support including Transcript Creation and Hot Words™ that alert you when the ATI Multimedia Center software receives information...
Getting Started Guide
Page 10
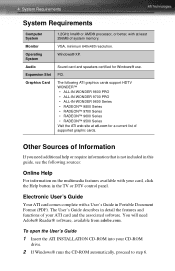
... Monitor Operating System Audio Expansion Slot Graphics Card 1.2GHz Intel® or AMD® processor, or better, with at ati.com for Windows® use. PCI. Electronic User's Guide Your ATI card comes complete with a User's Guide in detail the features and functions of your ATI card and the associated software. Windows® XP. VGA, minimum 640x480 resolution. You will need additional help or require information that is not included in the TV or DTV control panel...
... Monitor Operating System Audio Expansion Slot Graphics Card 1.2GHz Intel® or AMD® processor, or better, with at ati.com for Windows® use. PCI. Electronic User's Guide Your ATI card comes complete with a User's Guide in detail the features and functions of your ATI card and the associated software. Windows® XP. VGA, minimum 640x480 resolution. You will need additional help or require information that is not included in the TV or DTV control panel...
Getting Started Guide
Page 11
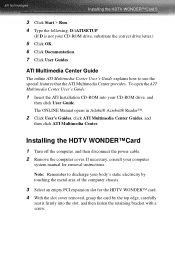
... removal instructions. Installing the HDTV WONDER™Card 1 Turn off the computer, and then disconnect the power cable. 2 Remove the computer cover. Note: Remember to use the special features that the ATI Multimedia Center provides. The ONLINE Manual opens in Adobe® Acrobat® Reader™. 2 Click User's Guides, click ATI Multimedia Center Guides, and then click ATI Multimedia Center. If necessary, consult your computer system manual for the HDTV WONDER™ card...
... removal instructions. Installing the HDTV WONDER™Card 1 Turn off the computer, and then disconnect the power cable. 2 Remove the computer cover. Note: Remember to use the special features that the ATI Multimedia Center provides. The ONLINE Manual opens in Adobe® Acrobat® Reader™. 2 Click User's Guides, click ATI Multimedia Center Guides, and then click ATI Multimedia Center. If necessary, consult your computer system manual for the HDTV WONDER™ card...
Getting Started Guide
Page 12
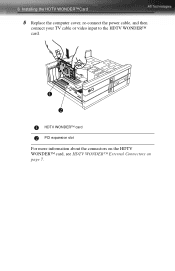
X Y X HDTV WONDER™ card Y PCI expansion slot For more information about the connectors on the HDTV WONDER™ card, see HDTV WONDER™ External Connectors on page 7. 6 Installing the HDTV WONDER™Card 5 Replace the computer cover, re-connect the power cable, and then connect your TV cable or video input to the HDTV WONDER™ card.
X Y X HDTV WONDER™ card Y PCI expansion slot For more information about the connectors on the HDTV WONDER™ card, see HDTV WONDER™ External Connectors on page 7. 6 Installing the HDTV WONDER™Card 5 Replace the computer cover, re-connect the power cable, and then connect your TV cable or video input to the HDTV WONDER™ card.
Getting Started Guide
Page 16
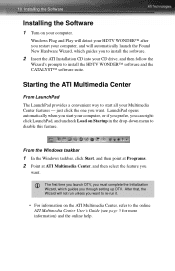
... to install the HDTV WONDER™ software and the CATALYST™ software suite. LaunchPad opens automatically when you start all your computer. L The first time you launch DTV, you must complete the Initialization Wizard, which guides you want . After that, the Wizard will automatically launch the Found New Hardware Wizard, which guides you want . From the Windows taskbar 1 In the Windows taskbar...
... to install the HDTV WONDER™ software and the CATALYST™ software suite. LaunchPad opens automatically when you start all your computer. L The first time you launch DTV, you must complete the Initialization Wizard, which guides you want . After that, the Wizard will automatically launch the Found New Hardware Wizard, which guides you want . From the Windows taskbar 1 In the Windows taskbar...

Getting Started Guide
Page 17
... can also start TV, click the TV button * Only with supported ATI products. in the LaunchPad. • To start HDTV WONDER™ from other Multimedia Center features installed on these features, refer to the ATI Multimedia Center User's Guide. To start DTV, click the DTV button in the LaunchPad. When you have more . Click the ATI logo in the feature's control panel or display panel, and then click...
... can also start TV, click the TV button * Only with supported ATI products. in the LaunchPad. • To start HDTV WONDER™ from other Multimedia Center features installed on these features, refer to the ATI Multimedia Center User's Guide. To start DTV, click the DTV button in the LaunchPad. When you have more . Click the ATI logo in the feature's control panel or display panel, and then click...

Getting Started Guide
Page 18
..., Parental Control, Sound, and TV-ONDEMAND™ . Sizing the display You can launch the Wizard manually in full-screen Press CTRL + F or ALT + F to save desktop space. To change settings. Running the Initialization Wizard 1 Click the Setup button , and then click the Display tab. 2 Click the Initialization Wizard button, and then follow the Wizard's instructions. To display DTV in order to change this, see Display Settings on...
..., Parental Control, Sound, and TV-ONDEMAND™ . Sizing the display You can launch the Wizard manually in full-screen Press CTRL + F or ALT + F to save desktop space. To change settings. Running the Initialization Wizard 1 Click the Setup button , and then click the Display tab. 2 Click the Initialization Wizard button, and then follow the Wizard's instructions. To display DTV in order to change this, see Display Settings on...

Getting Started Guide
Page 20
Minimizing DTV replaces your display resolution is the placement of a fullmotion video window on the display screen). only available if your desktop pattern with supported ATI products Video Desktop Minimize DTV Display Size Opens the DTV setup page. Displays DTV on top of any other windows, allowing you choose; If your computer uses a RADEON™ or later video card, THRUVIEW™ Desktop and THRUVIEW™ Window are available: THRUVIEW™ Window: The current panel appears as...
Minimizing DTV replaces your display resolution is the placement of a fullmotion video window on the display screen). only available if your desktop pattern with supported ATI products Video Desktop Minimize DTV Display Size Opens the DTV setup page. Displays DTV on top of any other windows, allowing you choose; If your computer uses a RADEON™ or later video card, THRUVIEW™ Desktop and THRUVIEW™ Window are available: THRUVIEW™ Window: The current panel appears as...

Getting Started Guide
Page 24
...; video fills the screen. 4:3, 16:9 Maintains a fixed-size display with black bars on page 12. If the aspect ratio of the image. only available if your display resolution is different from the display, video may appear elongated or flattened. 18 Display Settings Display Settings The Display settings page lets you control how video is displayed in the DTV control panel, and then click the Display tab. To open the Display settings...
...; video fills the screen. 4:3, 16:9 Maintains a fixed-size display with black bars on page 12. If the aspect ratio of the image. only available if your display resolution is different from the display, video may appear elongated or flattened. 18 Display Settings Display Settings The Display settings page lets you control how video is displayed in the DTV control panel, and then click the Display tab. To open the Display settings...

Getting Started Guide
Page 29
... Setup button in 2-channel stereo. Dolby® Pro Logic® Play audio using Dolby Pro Logic. 1st Choice Enter your first language choice. 2nd Choice Enter your second language choice. Pass through to audio device The audio decoder "passes-through" non-PCM multichannel audio to 2, 4, or 6 speakers. Stereo Play audio in the DTV control panel, and then click the Audio tab. Setting Multi-channel Audio...
... Setup button in 2-channel stereo. Dolby® Pro Logic® Play audio using Dolby Pro Logic. 1st Choice Enter your first language choice. 2nd Choice Enter your second language choice. Pass through to audio device The audio decoder "passes-through" non-PCM multichannel audio to 2, 4, or 6 speakers. Stereo Play audio in the DTV control panel, and then click the Audio tab. Setting Multi-channel Audio...
Getting Started Guide
Page 45
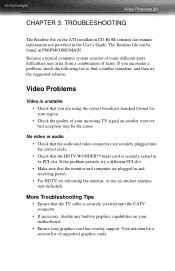
... audio • Check that the audio and video connectors are securely plugged into the correct jacks. • Check that the TV cable is securely seated in its PCI slot. More Troubleshooting Tips • Ensure that the HDTV WONDER™ tuner card is securely screwed onto the CATV connector • If necessary, disable any built-in and receiving power. • For HDTV, try the suggested solution. Video Problems Video...
... audio • Check that the audio and video connectors are securely plugged into the correct jacks. • Check that the TV cable is securely seated in its PCI slot. More Troubleshooting Tips • Ensure that the HDTV WONDER™ tuner card is securely screwed onto the CATV connector • If necessary, disable any built-in and receiving power. • For HDTV, try the suggested solution. Video Problems Video...

Getting Started Guide
Page 48
... your product contains a defect, and whether your reseller will choose the method that customers will review the expense associated with refunds, returns, or exchange specific inquiries. Mail: ATI TECHNOLOGIES INC. 42 Customer Care Europe and Other Regions English, German, and French support available Monday to limit support options for any expense incurred accessing Customer Care. Attention: Customer Service...
... your product contains a defect, and whether your reseller will choose the method that customers will review the expense associated with refunds, returns, or exchange specific inquiries. Mail: ATI TECHNOLOGIES INC. 42 Customer Care Europe and Other Regions English, German, and French support available Monday to limit support options for any expense incurred accessing Customer Care. Attention: Customer Service...

Getting Started Guide
Page 49
... product specifications and instructions, natural or personal disaster, or unauthorized alterations, repairs, or modifications. • Proof of purchase may be required, if doubt exists regarding warranty eligibility. warrants to the original purchaser of the hardware that the product is in good working condition, according to be under warranty. Any replaced parts become the property of purchase when required. Warranty Information Hardware Warranty Service Statement ATI Technologies...
... product specifications and instructions, natural or personal disaster, or unauthorized alterations, repairs, or modifications. • Proof of purchase may be required, if doubt exists regarding warranty eligibility. warrants to the original purchaser of the hardware that the product is in good working condition, according to be under warranty. Any replaced parts become the property of purchase when required. Warranty Information Hardware Warranty Service Statement ATI Technologies...

Getting Started Guide
Page 53
... interference will not occur in a residential installation. Changes or modifications to radio communications. However, there is encouraged to try to correct the interference by the party responsible for help. The use of shielded cables for connection of the monitor to the graphics card is connected. • Consult the dealer or an experienced radio/TV technician for compliance could void the...
... interference will not occur in a residential installation. Changes or modifications to radio communications. However, there is encouraged to try to correct the interference by the party responsible for help. The use of shielded cables for connection of the monitor to the graphics card is connected. • Consult the dealer or an experienced radio/TV technician for compliance could void the...
Getting Started Guide
Page 57
51 Index A Antenna attaching 8 ATI Multimedia Center User's Guide 5 Audio settings 23 Autoscan 21 C Channel List 20 Channel Lockout 30 Wizard 30 Closed Captioning 24 Settings 25 Compliance information CE 48 FCC 47 Industry Canada 47 Low Voltage Directive for TV-tuner-equipped products 48 Customer Care 41 D Display settings 18 E Electronic Program Guide 35 Electronic User's Guide 4 F Feature menu 14 H HDTV WONDER Features 3 HOTWORDS 26 I Information 47 Initialization Wizard 12 Input adapter 9 Installing HDTV WONDER card 5, 7 software 10 K Keyboard shortcuts 16 L LaunchPad 10
51 Index A Antenna attaching 8 ATI Multimedia Center User's Guide 5 Audio settings 23 Autoscan 21 C Channel List 20 Channel Lockout 30 Wizard 30 Closed Captioning 24 Settings 25 Compliance information CE 48 FCC 47 Industry Canada 47 Low Voltage Directive for TV-tuner-equipped products 48 Customer Care 41 D Display settings 18 E Electronic Program Guide 35 Electronic User's Guide 4 F Feature menu 14 H HDTV WONDER Features 3 HOTWORDS 26 I Information 47 Initialization Wizard 12 Input adapter 9 Installing HDTV WONDER card 5, 7 software 10 K Keyboard shortcuts 16 L LaunchPad 10
Getting Started Guide
Page 58
... Record 34 Online Help 4 P Parental Control 31 Product registration 41 Customer Care 41 R Recording video 32 S Schedule settings 24 Setting up DTV 12 Sizing display 12 Special features 11 Stills Gallery 36 settings 37 System requirements HDTV 4 T Troubleshooting video problems 39 TV Magazine 28 TV-ON-DEMAND 33 history 34 moving within recorded video, Jog Shuttle 33 skipping backwards and forwards in recorded video 33 starting 33 V Video settings 20 W Warranty information 43 Hardware...
... Record 34 Online Help 4 P Parental Control 31 Product registration 41 Customer Care 41 R Recording video 32 S Schedule settings 24 Setting up DTV 12 Sizing display 12 Special features 11 Stills Gallery 36 settings 37 System requirements HDTV 4 T Troubleshooting video problems 39 TV Magazine 28 TV-ON-DEMAND 33 history 34 moving within recorded video, Jog Shuttle 33 skipping backwards and forwards in recorded video 33 starting 33 V Video settings 20 W Warranty information 43 Hardware...


