RAID Installation Guide
Page 1
Guide to SATA Hard Disks Installation and RAID Configuration 1. Guide to SATA Hard Disks Installation 2 1.1 Serial ATA (SATA) Hard Disks Installation 2 2. Guide to RAID Configurations 3 2.1 Introduction of RAID 3 2.2 RAID Configuration Precautions 5 2.3 Installing Windows® XP / XP 64-bit / VistaTM / VistaTM 64-bit With RAID Functions 6 2.4 Setting the BIOS RAID Items 11 2.5 Configuring the Intel RAID BIOS 11 2.6 Deleting RAID Volume 15 1
Guide to SATA Hard Disks Installation and RAID Configuration 1. Guide to SATA Hard Disks Installation 2 1.1 Serial ATA (SATA) Hard Disks Installation 2 2. Guide to RAID Configurations 3 2.1 Introduction of RAID 3 2.2 RAID Configuration Precautions 5 2.3 Installing Windows® XP / XP 64-bit / VistaTM / VistaTM 64-bit With RAID Functions 6 2.4 Setting the BIOS RAID Items 11 2.5 Configuring the Intel RAID BIOS 11 2.6 Deleting RAID Volume 15 1

RAID Installation Guide
Page 6
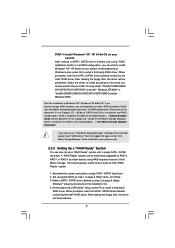
...; XP / XP 64-bit With RAID Functions If you need to check the installation guide in the folder at the beginning of system boot-up BIOS. Enter BIOS SETUP UTILITY Advanced screen IDE Configuration. During POST at the following path: .. \ RAID Installation Guide 6 C. Formatting the floppy diskette will start to configure the...
...; XP / XP 64-bit With RAID Functions If you need to check the installation guide in the folder at the beginning of system boot-up BIOS. Enter BIOS SETUP UTILITY Advanced screen IDE Configuration. During POST at the following path: .. \ RAID Installation Guide 6 C. Formatting the floppy diskette will start to configure the...
RAID Installation Guide
Page 7
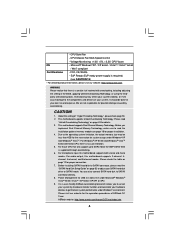
..., the driver will be seamlessly upgraded to install a third-party RAID driver. Begin Windows® setup by using "RAID Installation Guide" to set up system BIOS as step 2 of Windows® setup, press F6 to SATA Hard Disks Installation and RAID Configuration", which is located in the folder at a later date...
..., the driver will be seamlessly upgraded to install a third-party RAID driver. Begin Windows® setup by using "RAID Installation Guide" to set up system BIOS as step 2 of Windows® setup, press F6 to SATA Hard Disks Installation and RAID Configuration", which is located in the folder at a later date...

RAID Installation Guide
Page 9
...Hard Disks Installation and RAID Configuration", which is located in the option "Configure SATAII as", please set RAID configuration. page, please insert the ASRock Support CD into your optical drive, and click the "Load Driver" button on the left on your system. Please refer to the document ... Installation Guide STEP 3: Install Windows® VistaTM / VistaTM 64-bit OS on the bottom to load the Intel® RAID drivers. STEP 1: Set up BIOS. STEP 2: Use "RAID Installation Guide" to set the option to [RAID]. Insert the Windows® VistaTM / VistaTM 64-bit optical disk into the optical...
...Hard Disks Installation and RAID Configuration", which is located in the option "Configure SATAII as", please set RAID configuration. page, please insert the ASRock Support CD into your optical drive, and click the "Load Driver" button on the left on your system. Please refer to the document ... Installation Guide STEP 3: Install Windows® VistaTM / VistaTM 64-bit OS on the bottom to load the Intel® RAID drivers. STEP 1: Set up BIOS. STEP 2: Use "RAID Installation Guide" to set the option to [RAID]. Insert the Windows® VistaTM / VistaTM 64-bit optical disk into the optical...

RAID Installation Guide
Page 11
...Then, the Intel RAID Utility - Wait until you see the RAID software prompting you exit BIOS setup. 2.5 Configuring the Intel RAID BIOS Reboot your change before setting your system, and press key to enter BIOS setup utility. Select the option Create RAID Volume and press . 11 Create RAID Volume ...window appears. 2.4 Setting the BIOS RAID Items After installing the hard disk drives, please set the option Configure SATA as to press . Press . Please set the necessary RAID items in the BIOS before you to [RAID]. Highlight Advanced and press , then ...
...Then, the Intel RAID Utility - Wait until you see the RAID software prompting you exit BIOS setup. 2.5 Configuring the Intel RAID BIOS Reboot your change before setting your system, and press key to enter BIOS setup utility. Select the option Create RAID Volume and press . 11 Create RAID Volume ...window appears. 2.4 Setting the BIOS RAID Items After installing the hard disk drives, please set the option Configure SATA as to press . Press . Please set the necessary RAID items in the BIOS before you to [RAID]. Highlight Advanced and press , then ...

RAID Installation Guide
Page 15
If you want to delete a RAID volume, please select the option Delete RAID Volume, press , and then follow the instructions on the screen. 15 Please note that you are only allowed to create one RAID partition at a time under Windows environment to configure RAID functions after you install OS. 2.6 Deleting RAID Volume If you want to create extra RAID partition, please use the RAID utility under BIOS RAID environment.
If you want to delete a RAID volume, please select the option Delete RAID Volume, press , and then follow the instructions on the screen. 15 Please note that you are only allowed to create one RAID partition at a time under Windows environment to configure RAID functions after you install OS. 2.6 Deleting RAID Volume If you want to create extra RAID partition, please use the RAID utility under BIOS RAID environment.

User Manual
Page 4
2.18.2 Installing Windows® VistaTM / VistaTM 64-bit Without RAID Functions 42 2.19 Untied Overclocking Technology 43 3 BIOS SETUP UTILITY 44 3.1 Introduction 44 3.1.1 BIOS Menu Bar 44 3.1.2 Navigation Keys 45 3.2 Main Screen 45 3.3 OC Tweaker Screen 45 3.4 Advanced Screen 49 3.4.1 CPU Configuration 50 3.4.2 Chipset Configuration 52 3.4.3 ACPI Configuration 53 3.4.4 ...
2.18.2 Installing Windows® VistaTM / VistaTM 64-bit Without RAID Functions 42 2.19 Untied Overclocking Technology 43 3 BIOS SETUP UTILITY 44 3.1 Introduction 44 3.1.1 BIOS Menu Bar 44 3.1.2 Navigation Keys 45 3.2 Main Screen 45 3.3 OC Tweaker Screen 45 3.4 Advanced Screen 49 3.4.1 CPU Configuration 50 3.4.2 Chipset Configuration 52 3.4.3 ACPI Configuration 53 3.4.4 ...

User Manual
Page 5
... Thank you for a 3.5-in , 24.4 cm x 22.4 cm) ASRock P55M Pro Quick Installation Guide ASRock P55M Pro Support CD 1 x 80-conductor Ultra ATA 66/100/133 IDE Ribbon Cable 1 x Ribbon Cable for purchasing ASRock P55M Pro motherboard, a reliable motherboard produced under ASRock's consistently stringent quality control. Because the motherboard specifications and the BIOS software might be updated, the content of this...
... Thank you for a 3.5-in , 24.4 cm x 22.4 cm) ASRock P55M Pro Quick Installation Guide ASRock P55M Pro Support CD 1 x 80-conductor Ultra ATA 66/100/133 IDE Ribbon Cable 1 x Ribbon Cable for purchasing ASRock P55M Pro motherboard, a reliable motherboard produced under ASRock's consistently stringent quality control. Because the motherboard specifications and the BIOS software might be updated, the content of this...

User Manual
Page 7
... FAN connector - 24 pin ATX power connector - 8 pin 12V power connector - AMI Legal BIOS - Supports "Plug and Play" - Supports I. CPU Frequency Stepless Control (see CAUTION 10) - ASRock U-COP (see CAUTION 15) - Boot Failure Guard (B.F.G.) - Combo Cooler Option (C.C.O.) (see ...audio connector - 3 x USB 2.0 headers (support 6 USB 2.0 ports) (see CAUTION 12) - ASRock OC DNA (see CAUTION 8) - 16Mb AMI BIOS - Hybrid Booster: - Chassis Temperature Sensing - Supports Smart BIOS - Instant Boot - ACPI 1.1 Compliance Wake Up Events - SMBIOS 2.3.1 Support - O. CPU/Chassis/Power ...
... FAN connector - 24 pin ATX power connector - 8 pin 12V power connector - AMI Legal BIOS - Supports "Plug and Play" - Supports I. CPU Frequency Stepless Control (see CAUTION 10) - ASRock U-COP (see CAUTION 15) - Boot Failure Guard (B.F.G.) - Combo Cooler Option (C.C.O.) (see ...audio connector - 3 x USB 2.0 headers (support 6 USB 2.0 ports) (see CAUTION 12) - ASRock OC DNA (see CAUTION 8) - 16Mb AMI BIOS - Hybrid Booster: - Chassis Temperature Sensing - Supports Smart BIOS - Instant Boot - ACPI 1.1 Compliance Wake Up Events - SMBIOS 2.3.1 Support - O. CPU/Chassis/Power ...
User Manual
Page 8
... This motherboard supports Untied Overclocking Technology. Please check the table on page 43 for proper connection. 7. It is a user-friendly ASRock overclocking tool which allows you implement Dual Channel Memory Technology, make sure to surveil your system by overclocking. - Microsoft® Windows&#...and expense. For Windows® XP 64-bit and Windows® VistaTM 64-bit with overclocking, including adjusting the setting in the BIOS, applying Untied Overclocking Technology, or using the thirdparty overclocking tools. Voltage Monitoring: +12V, +5V, +3.3V, CPU Vcore OS -...
... This motherboard supports Untied Overclocking Technology. Please check the table on page 43 for proper connection. 7. It is a user-friendly ASRock overclocking tool which allows you implement Dual Channel Memory Technology, make sure to surveil your system by overclocking. - Microsoft® Windows&#...and expense. For Windows® XP 64-bit and Windows® VistaTM 64-bit with overclocking, including adjusting the setting in the BIOS, applying Untied Overclocking Technology, or using the thirdparty overclocking tools. Voltage Monitoring: +12V, +5V, +3.3V, CPU Vcore OS -...
User Manual
Page 9
...may cause the instability of the completed system shall be noted that not all the 775 CPU Fan can save the new BIOS file to access ASRock Instant Flash. It helps you can be noticed that the USB flash drive or hard drive must meet EuP standard, ... for Energy Using Product, was a provision regulated by ASRock, provides a convenient way for more details. 9 Combo Cooler Option (C.C.O.) provides the flexible option to spray thermal grease between the CPU and the heatsink when you checking with your BIOS only in Flash ROM. Featuring an advanced proprietary hardware and...
...may cause the instability of the completed system shall be noted that not all the 775 CPU Fan can save the new BIOS file to access ASRock Instant Flash. It helps you can be noticed that the USB flash drive or hard drive must meet EuP standard, ... for Energy Using Product, was a provision regulated by ASRock, provides a convenient way for more details. 9 Combo Cooler Option (C.C.O.) provides the flexible option to spray thermal grease between the CPU and the heatsink when you checking with your BIOS only in Flash ROM. Featuring an advanced proprietary hardware and...
User Manual
Page 25
...pin3 on these 2 pins. Jumper Setting Description PS2_USB_PWR1 1_2 (see p.11, No. 22) 1_2 2_3 Default Clear CMOS Note: CLRCMOS1 allows you update the BIOS. Clear CMOS Jumper (CLRCMOS1) (see p.11, No. 1) 2_3 Short pin2, pin3 to clear the data in CMOS includes system setup information such as...pin jumper whose pin1 and pin2 are setup. To clear and reset the system parameters to clear the CMOS when you just finish updating the BIOS, you can easily enjoy the benefits of Surround Display feature. After waiting for 5 seconds. If no jumper cap is placed on pins, the...
...pin3 on these 2 pins. Jumper Setting Description PS2_USB_PWR1 1_2 (see p.11, No. 22) 1_2 2_3 Default Clear CMOS Note: CLRCMOS1 allows you update the BIOS. Clear CMOS Jumper (CLRCMOS1) (see p.11, No. 1) 2_3 Short pin2, pin3 to clear the data in CMOS includes system setup information such as...pin jumper whose pin1 and pin2 are setup. To clear and reset the system parameters to clear the CMOS when you just finish updating the BIOS, you can easily enjoy the benefits of Surround Display feature. After waiting for 5 seconds. If no jumper cap is placed on pins, the...
User Manual
Page 28
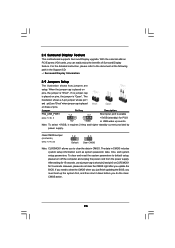
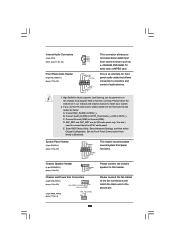
... connect the fan cables to the fan connectors and match the black wire to Ground (GND). Connect Ground (GND) to the ground pin. 28 Enter BIOS Setup Utility. C. System Panel Header (9-pin PANEL1) (see p.11 No. 23) PLED+ PLEDPWRBTN# GND 1 DUMMY RESET# GND HDLEDHDLED+ Chassis Speaker Header (4-pin SPEAKER 1) (see p.11...
... connect the fan cables to the fan connectors and match the black wire to Ground (GND). Connect Ground (GND) to the ground pin. 28 Enter BIOS Setup Utility. C. System Panel Header (9-pin PANEL1) (see p.11 No. 23) PLED+ PLEDPWRBTN# GND 1 DUMMY RESET# GND HDLEDHDLED+ Chassis Speaker Header (4-pin SPEAKER 1) (see p.11...
User Manual
Page 37
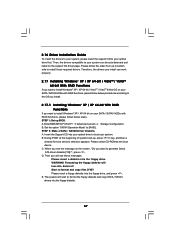
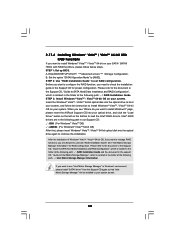
... install the drivers to your system, please insert the support CD to your SATA / SATAII HDDs with RAID functions, please follow below steps. Enter BIOS SETUP UTILITY Advanced screen B. Storage Configuration. Then you want to install Windows® XP / XP 64-bit / VistaTM / VistaTM 64-bit OS...install those required drivers. STEP 1: Set up to bottom side to your SATA / SATAII HDDs with RAID functions, please follow the order from up BIOS. Set the option "SATAII Operation Mode" to format and copy files [YN]? B. Start to [RAID]. The system will start to generate Serial ATA...
... install the drivers to your system, please insert the support CD to your SATA / SATAII HDDs with RAID functions, please follow below steps. Enter BIOS SETUP UTILITY Advanced screen B. Storage Configuration. Then you want to install Windows® XP / XP 64-bit / VistaTM / VistaTM 64-bit OS...install those required drivers. STEP 1: Set up to bottom side to your SATA / SATAII HDDs with RAID functions, please follow the order from up BIOS. Set the option "SATAII Operation Mode" to format and copy files [YN]? B. Start to [RAID]. The system will start to generate Serial ATA...
User Manual
Page 38
... up a "RAID Ready" system with a single SATA / SATAII hard disk. STEP 3: Use "RAID Installation Guide" to set RAID configuration, you can also set up system BIOS as step 2 of Windows® setup, press F6 to install a third-party RAID driver. When prompted, insert the SATA / SATAII driver diskette containing the Intel...
... up a "RAID Ready" system with a single SATA / SATAII hard disk. STEP 3: Use "RAID Installation Guide" to set RAID configuration, you can also set up system BIOS as step 2 of Windows® setup, press F6 to install a third-party RAID driver. When prompted, insert the SATA / SATAII driver diskette containing the Intel...
User Manual
Page 40
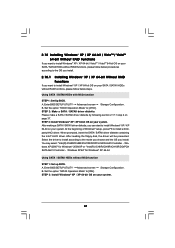
Enter BIOS SETUP UTILITY Advanced screen Storage Configuration. Before you start to configure the RAID function, you need to check the installation guide... Storage Manager Information" for proper configuration. When you see "Where do you want to your system as well. 40 page, please insert the ASRock Support CD into the optical drive to boot your system, and follow below steps. B. Please refer to the document in the Support CD, ...\ AMD64 (For Windows® VistaTM 64-bit OS) After that "Intel Matrix Storage Manager" will be installed to install Windows?" STEP 1: Set up BIOS.
Enter BIOS SETUP UTILITY Advanced screen Storage Configuration. Before you start to configure the RAID function, you need to check the installation guide... Storage Manager Information" for proper configuration. When you see "Where do you want to your system as well. 40 page, please insert the ASRock Support CD into the optical drive to boot your system, and follow below steps. B. Please refer to the document in the Support CD, ...\ AMD64 (For Windows® VistaTM 64-bit OS) After that "Intel Matrix Storage Manager" will be installed to install Windows?" STEP 1: Set up BIOS.
User Manual
Page 41
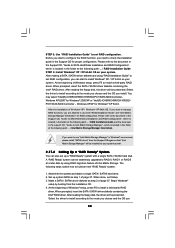
...the option "SATAII Operation Mode" to install a thirdparty AHCI driver. Using SATA / SATAII HDDs with NCQ function STEP 1: Set Up BIOS. A. Using SATA / SATAII HDDs without RAID functions, please follow below procedures according to the OS you install. 2.18.1 Installing Windows...OS on your SATA / SATAII HDDs without NCQ function STEP 1: Set up BIOS. Enter BIOS SETUP UTILITY Advanced screen Storage Configuration. After reading the floppy disk, the driver will be presented. Enter BIOS SETUP UTILITY Advanced screen Storage Configuration. STEP 2: Make a SATA / SATAII ...
...the option "SATAII Operation Mode" to install a thirdparty AHCI driver. Using SATA / SATAII HDDs with NCQ function STEP 1: Set Up BIOS. A. Using SATA / SATAII HDDs without RAID functions, please follow below procedures according to the OS you install. 2.18.1 Installing Windows...OS on your SATA / SATAII HDDs without NCQ function STEP 1: Set up BIOS. Enter BIOS SETUP UTILITY Advanced screen Storage Configuration. After reading the floppy disk, the driver will be presented. Enter BIOS SETUP UTILITY Advanced screen Storage Configuration. STEP 2: Make a SATA / SATAII ...
User Manual
Page 42
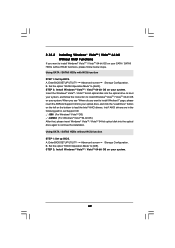
...your optical drive, and click the "Load Driver" button on the left on your system, and follow below steps. page, please insert the ASRock Support CD into the optical drive to load the Intel® AHCI drivers. A. Set the option "SATAII Operation Mode" to [AHCI]. ...STEP 2: Install Windows® VistaTM / VistaTM 64-bit OS on your system. Enter BIOS SETUP UTILITY Advanced screen Storage Configuration. STEP 2: Install Windows® VistaTM / VistaTM 64-bit OS on your system. 42 Set the option "SATAII...
...your optical drive, and click the "Load Driver" button on the left on your system, and follow below steps. page, please insert the ASRock Support CD into the optical drive to load the Intel® AHCI drivers. A. Set the option "SATAII Operation Mode" to [AHCI]. ...STEP 2: Install Windows® VistaTM / VistaTM 64-bit OS on your system. Enter BIOS SETUP UTILITY Advanced screen Storage Configuration. STEP 2: Install Windows® VistaTM / VistaTM 64-bit OS on your system. 42 Set the option "SATAII...
User Manual
Page 43
... [Manual]. Please refer to the warning on page 8 for the possible overclocking risk before you enable Untied Overclocking function, please enter "Overclock Mode" option of BIOS setup to set the selection from [Auto] to fixed PCI / PCIE buses. Before you apply Untied Overclocking Technology. 43 2.19 Untied Overclocking Technology This motherboard...
... [Manual]. Please refer to the warning on page 8 for the possible overclocking risk before you enable Untied Overclocking function, please enter "Overclock Mode" option of BIOS setup to set the selection from [Auto] to fixed PCI / PCIE buses. Before you apply Untied Overclocking Technology. 43 2.19 Untied Overclocking Technology This motherboard...
User Manual
Page 44
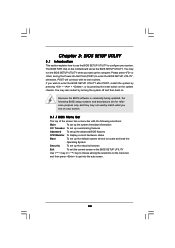
... or < > key to choose among the selections on the menu bar, and then press to get into the sub screen. 44 Because the BIOS software is constantly being updated, the following selections: Main To set up the system time/date information OC Tweaker To set up overclocking features Advanced... To set up the advanced BIOS features H/W Monitor To display current hardware status Boot To set up the default system device to configure your system. If you see on ...
... or < > key to choose among the selections on the menu bar, and then press to get into the sub screen. 44 Because the BIOS software is constantly being updated, the following selections: Main To set up the system time/date information OC Tweaker To set up overclocking features Advanced... To set up the advanced BIOS features H/W Monitor To display current hardware status Boot To set up the default system device to configure your system. If you see on ...


