User Manual
Page 9
... user to record the OC settings and share with your USB flash drive, floppy disk or hard drive, then you can press key during the POST or press key to BIOS setup menu to get the best system performance under Microsoft® Windows® 7 64-bit / 7 / VistaTM 64-bit / ... Cool 'n' Quiet option in the BIOS setup in a few clicks without preparing an additional floppy diskette or other words, it is a user-friendly ASRock overclocking tool which allows you adopt. Please check NVIDIA® website for the operation procedures of . You can update your OC settings as yours! Featuring...
... user to record the OC settings and share with your USB flash drive, floppy disk or hard drive, then you can press key during the POST or press key to BIOS setup menu to get the best system performance under Microsoft® Windows® 7 64-bit / 7 / VistaTM 64-bit / ... Cool 'n' Quiet option in the BIOS setup in a few clicks without preparing an additional floppy diskette or other words, it is a user-friendly ASRock overclocking tool which allows you adopt. Please check NVIDIA® website for the operation procedures of . You can update your OC settings as yours! Featuring...
User Manual
Page 29
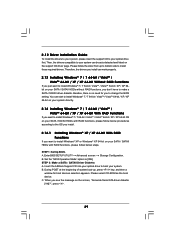
... functions, please follow the order from up , press key, and then a window for you don't have to install those required drivers. Insert the ASRock Support CD into your optical drive to boot your optical drive first. 2.12 Driver Installation Guide To install the drivers to your system, please insert.... You can be auto-detected and listed on the screen, "Generate Serial ATA driver diskette [YN]?", press . 29 STEP 1: Set Up BIOS. During POST at the beginning of system boot-up to bottom side to make a SATA / SATAII driver diskette. Please select CD-ROM as the boot device. Please...
... functions, please follow the order from up , press key, and then a window for you don't have to install those required drivers. Insert the ASRock Support CD into your optical drive to boot your optical drive first. 2.12 Driver Installation Guide To install the drivers to your system, please insert.... You can be auto-detected and listed on the screen, "Generate Serial ATA driver diskette [YN]?", press . 29 STEP 1: Set Up BIOS. During POST at the beginning of system boot-up to bottom side to make a SATA / SATAII driver diskette. Please select CD-ROM as the boot device. Please...
User Manual
Page 32
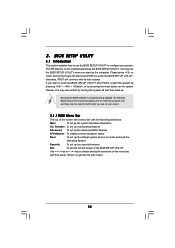
...use the BIOS SETUP UTILITY to get into the sub screen. 32 Please press or during the Power-On-Self-Test (POST) to enter the BIOS SETUP UTILITY, otherwise, POST will continue with the following BIOS setup screens and descriptions are for reference purpose only, and they may also restart by ... the advanced BIOS features H/W Monitor To display current hardware status Boot To set up the default system device to enter the BIOS SETUP UTILITY after POST, restart the system by pressing + + , or by turning the system off and then back on the menu bar, and then press to configure your ...
...use the BIOS SETUP UTILITY to get into the sub screen. 32 Please press or during the Power-On-Self-Test (POST) to enter the BIOS SETUP UTILITY, otherwise, POST will continue with the following BIOS setup screens and descriptions are for reference purpose only, and they may also restart by ... the advanced BIOS features H/W Monitor To display current hardware status Boot To set up the default system device to enter the BIOS SETUP UTILITY after POST, restart the system by pressing + + , or by turning the system off and then back on the menu bar, and then press to configure your ...

User Manual
Page 54
...C] [USB] Select Screen Select Item Enter Go to select logo in POST screen. AddOn ROM Display Use this item to enable or disable OEM Logo. Configuration options: [Auto], [S-series], [Scenery] and [ASRock]. 3.6 Boot Screen In this section, it will display the available devices...Logo AddOn ROM Display Boot Logo Boot From Onboard LAN Bootup Num-Lock [Enabled] [Enabled] [Auto] [Disabled] [On] Disabled: Displays normal POST messages. CD - Configuration options: [Enabled] and [Disabled]. Currently, the option [Auto] is [Enabled]. This option only appears when you enable...
...C] [USB] Select Screen Select Item Enter Go to select logo in POST screen. AddOn ROM Display Use this item to enable or disable OEM Logo. Configuration options: [Auto], [S-series], [Scenery] and [ASRock]. 3.6 Boot Screen In this section, it will display the available devices...Logo AddOn ROM Display Boot Logo Boot From Onboard LAN Bootup Num-Lock [Enabled] [Enabled] [Auto] [Disabled] [On] Disabled: Displays normal POST messages. CD - Configuration options: [Enabled] and [Disabled]. Currently, the option [Auto] is [Enabled]. This option only appears when you enable...
Quick Installation Guide
Page 9
...on this utility, you to SATAII connector, please read the "SATAII Hard Disk Setup Guide" on the same motherboard. 9 ASRock N68C-GS UCC / N68C-S UCC Motherboard English ASRock website http://www.asrock.com 8. The maximum shared memory size is defined by the chipset vendor and is supported depends on our website for the ...yours! With OC DNA, you to get the best system performance under Windows® environment. Your friends then can press key during the POST or press key to BIOS setup menu to get the same OC settings as a profile and share with others. Please be noted that ...
...on this utility, you to SATAII connector, please read the "SATAII Hard Disk Setup Guide" on the same motherboard. 9 ASRock N68C-GS UCC / N68C-S UCC Motherboard English ASRock website http://www.asrock.com 8. The maximum shared memory size is defined by the chipset vendor and is supported depends on our website for the ...yours! With OC DNA, you to get the best system performance under Windows® environment. Your friends then can press key during the POST or press key to BIOS setup menu to get the same OC settings as a profile and share with others. Please be noted that ...
Quick Installation Guide
Page 23
...in your CDROM drive. It will enhance motherboard features. If you start up the computer, please press during the Power-On-Self-Test (POST) to be user-friendly. Software Support CD information This motherboard supports various Microsoft® Windows® operating systems: 7 / 7 64-... Setup after POST, please restart the system by pressing + + , or pressing the reset button on the motherboard stores BIOS Setup Utility. BIOS Information The Flash Memory on the system chassis. When you wish to display the menus. 23 ASRock N68C-GS UCC / N68C-S UCC Motherboard English ...
...in your CDROM drive. It will enhance motherboard features. If you start up the computer, please press during the Power-On-Self-Test (POST) to be user-friendly. Software Support CD information This motherboard supports various Microsoft® Windows® operating systems: 7 / 7 64-... Setup after POST, please restart the system by pressing + + , or pressing the reset button on the motherboard stores BIOS Setup Utility. BIOS Information The Flash Memory on the system chassis. When you wish to display the menus. 23 ASRock N68C-GS UCC / N68C-S UCC Motherboard English ...
RAID Installation Guide
Page 5
... diskette into floppy drive A: press any key. E. Enter BIOS SETUP UTILITY Advanced screen Storage Configuration. STEP 1: Set Up BIOS. During POST at the beginning of the document in the following path in the Support CD for boot devices selection appears. Set the "SATA Operation Mode...part of system boot-up, press key, and then a window for proper configuration. D. STEP 3: Set Up BIOS. B. A. Insert the ASRock Support CD into the floppy drive, and press any key to start to set RAID configuration. C. Please refer to check the RAID installation guide...
... diskette into floppy drive A: press any key. E. Enter BIOS SETUP UTILITY Advanced screen Storage Configuration. STEP 1: Set Up BIOS. During POST at the beginning of the document in the following path in the Support CD for boot devices selection appears. Set the "SATA Operation Mode...part of system boot-up, press key, and then a window for proper configuration. D. STEP 3: Set Up BIOS. B. A. Insert the ASRock Support CD into the floppy drive, and press any key to start to set RAID configuration. C. Please refer to check the RAID installation guide...

RAID Installation Guide
Page 8
... to show you how to use NVRAID RAID Utility to create other RAID arrays, the operation procedures are similar to the steps of the system POST and boot process prior to loading the OS. And the Striping Block is set to Mirroring, but please set to Optimal as a part of creating...
... to show you how to use NVRAID RAID Utility to create other RAID arrays, the operation procedures are similar to the steps of the system POST and boot process prior to loading the OS. And the Striping Block is set to Mirroring, but please set to Optimal as a part of creating...


