User Manual
Page 4
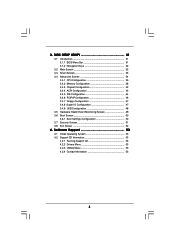
... 53 4.1 Install Operating System 53 4.2 Support CD Information 53 4.2.1 Running Support CD 53 4.2.2 Drivers Menu 53 4.2.3 Utilities Menu 53 4.2.4 Contact Information 53 4 BIOS SETUP UTILITY 31 3.1 Introduction 31 3.1.1 BIOS Menu Bar 31 3.1.2 Navigation Keys 32 3.2 Main Screen 32 3.3 Smart Screen 33 3.4 Advanced Screen 34 3.4.1 CPU Configuration 35 3.4.2 Memory Configuration 38 3.4.3 Chipset Configuration...
... 53 4.1 Install Operating System 53 4.2 Support CD Information 53 4.2.1 Running Support CD 53 4.2.2 Drivers Menu 53 4.2.3 Utilities Menu 53 4.2.4 Contact Information 53 4 BIOS SETUP UTILITY 31 3.1 Introduction 31 3.1.1 BIOS Menu Bar 31 3.1.2 Navigation Keys 32 3.2 Main Screen 32 3.3 Smart Screen 33 3.4 Advanced Screen 34 3.4.1 CPU Configuration 35 3.4.2 Memory Configuration 38 3.4.3 Chipset Configuration...
User Manual
Page 5
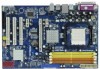
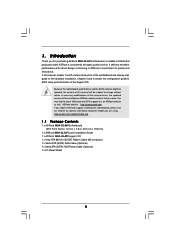
... Contents 1 x ASRock M3A-GLAN Motherboard (ATX Form Factor: 12.0-in x 7.8-in, 30.5 cm x 19.8 cm) 1 x ASRock M3A-GLAN Quick Installation Guide 1 x ASRock M3A-GLAN Support CD 1 x Ultra ATA 66/100/133 IDE Ribbon Cable (80-conductor) 1 x Serial ATA (SATA) Data Cable (Optional) 1 x Serial ATA (SATA) HDD Power Cable (Optional) 1 x I/O Panel Shield 5 Chapter 3 and 4 contain the configuration guide to BIOS setup...
... Contents 1 x ASRock M3A-GLAN Motherboard (ATX Form Factor: 12.0-in x 7.8-in, 30.5 cm x 19.8 cm) 1 x ASRock M3A-GLAN Quick Installation Guide 1 x ASRock M3A-GLAN Support CD 1 x Ultra ATA 66/100/133 IDE Ribbon Cable (80-conductor) 1 x Serial ATA (SATA) Data Cable (Optional) 1 x Serial ATA (SATA) HDD Power Cable (Optional) 1 x I/O Panel Shield 5 Chapter 3 and 4 contain the configuration guide to BIOS setup...
User Manual
Page 7
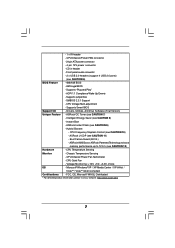
...BIOS - Supports jumperfree - Drivers, Utilities, AntiVirus Software (Trial Version) Unique Feature - CPU Frequency Stepless Control (see CAUTION 7) - CPU Quiet Fan - Voltage Monitoring: +12V, +5V, +3.3V, Vcore OS - ACPI 1.1 Compliance Wake Up Events - ASRock OC Tuner (see CAUTION 10) - Intelligent Energy Saver (see CAUTION 9) - ASRock...64-bit / VistaTM / VistaTM 64-bit compliant Certifications - CPU Temperature Sensing Monitor - ASRock AM2 Boost: ASRock Patented Technology to boost memory performance up to 12.5% (see CAUTION 11) - Instant Boot...
...BIOS - Supports jumperfree - Drivers, Utilities, AntiVirus Software (Trial Version) Unique Feature - CPU Frequency Stepless Control (see CAUTION 7) - CPU Quiet Fan - Voltage Monitoring: +12V, +5V, +3.3V, Vcore OS - ACPI 1.1 Compliance Wake Up Events - ASRock OC Tuner (see CAUTION 10) - Intelligent Energy Saver (see CAUTION 9) - ASRock...64-bit / VistaTM / VistaTM 64-bit compliant Certifications - CPU Temperature Sensing Monitor - ASRock AM2 Boost: ASRock Patented Technology to boost memory performance up to 12.5% (see CAUTION 11) - Instant Boot...

User Manual
Page 8
...to read the installation guide of ASRock OC Tuner. WARNING Please realize that delivers unparalleled power savings. ASRock website http://www.asrock.com 4. To use Intelligent Energy Saver function, please enable Cool 'n' Quiet option in the BIOS setup in the BIOS, applying Untied Overclocking Technology, ...or using the thirdparty overclocking tools. ASRock website: http://www.asrock.com 8 Please read the "SATAII Hard Disk Setup Guide" on the ...
...to read the installation guide of ASRock OC Tuner. WARNING Please realize that delivers unparalleled power savings. ASRock website http://www.asrock.com 4. To use Intelligent Energy Saver function, please enable Cool 'n' Quiet option in the BIOS setup in the BIOS, applying Untied Overclocking Technology, ...or using the thirdparty overclocking tools. ASRock website: http://www.asrock.com 8 Please read the "SATAII Hard Disk Setup Guide" on the ...

User Manual
Page 9
...drive, then you adopt. However, we can press key during the POST or press key to BIOS setup menu to perform over-clocking. ASRock Instant Flash is not recommended to access ASRock Instant Flash. Before you resume the system, please check if the CPU fan on the AM2... CPU you can update your system. 9 To improve heat dissipation, remember to disable this function will automatically shutdown. This motherboard supports ASRock AM2 Boost overclocking technology. With this function in Flash ROM. Enabling this function for all CPU/DRAM configurations. If your system. While ...
...drive, then you adopt. However, we can press key during the POST or press key to BIOS setup menu to perform over-clocking. ASRock Instant Flash is not recommended to access ASRock Instant Flash. Before you resume the system, please check if the CPU fan on the AM2... CPU you can update your system. 9 To improve heat dissipation, remember to disable this function will automatically shutdown. This motherboard supports ASRock AM2 Boost overclocking technology. With this function in Flash ROM. Enabling this function for all CPU/DRAM configurations. If your system. While ...

User Manual
Page 17
... clear-CMOS action. 17 The illustration shows a 3-pin jumper whose pin1 and pin2 are setup. Note: To select +5VSB, it down before you update the BIOS. After waiting for 15 seconds, use a jumper cap to enable (see p.10, No. 24) 1_2 2_3 Default Clear CMOS Note: CLRCMOS1 allows you to clear... from the power supply. The data in CMOS. To clear and reset the system parameters to clear the CMOS when you just finish updating the BIOS, you must boot up events. 2.5 Jumpers Setup The illustration shows how jumpers are "Short" when jumper cap is placed on pins, the jumper is "Short...
... clear-CMOS action. 17 The illustration shows a 3-pin jumper whose pin1 and pin2 are setup. Note: To select +5VSB, it down before you update the BIOS. After waiting for 15 seconds, use a jumper cap to enable (see p.10, No. 24) 1_2 2_3 Default Clear CMOS Note: CLRCMOS1 allows you to clear... from the power supply. The data in CMOS. To clear and reset the system parameters to clear the CMOS when you just finish updating the BIOS, you must boot up events. 2.5 Jumpers Setup The illustration shows how jumpers are "Short" when jumper cap is placed on pins, the jumper is "Short...

User Manual
Page 19
... CD1) (CD1: see p.10, No. 22) GND PRESENCE# MIC_RET OUT_RET 1 OUT2_L J_SENSE OUT2_R MIC2_R MIC2_L This is an interface for AC'97 audio panel. Enter BIOS Setup Utility. E. High Definition Audio supports Jack Sensing, but the panel wire on the chassis must support HDA to receive stereo audio input from [Auto...
... CD1) (CD1: see p.10, No. 22) GND PRESENCE# MIC_RET OUT_RET 1 OUT2_L J_SENSE OUT2_R MIC2_R MIC2_L This is an interface for AC'97 audio panel. Enter BIOS Setup Utility. E. High Definition Audio supports Jack Sensing, but the panel wire on the chassis must support HDA to receive stereo audio input from [Auto...
User Manual
Page 26
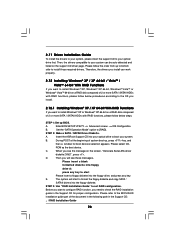
... SATA / SATAII drivers into the floppy diskette. STEP 2: Make a SATA / SATAII Driver Diskette. Please select CD- Please refer to the BIOS RAID installation guide part of 2 or more SATA / SATAII HDDs with RAID functions, please follow below procedures according to the OS you install....message on a RAID disk composed of 2 or more SATA / SATAII HDDs with RAID functions, please follow the order from up BIOS. C. Insert the ASRock Support CD into your optical drive to configure RAID function, you see these messages, Please insert a blank formatted diskette into the ...
... SATA / SATAII drivers into the floppy diskette. STEP 2: Make a SATA / SATAII Driver Diskette. Please select CD- Please refer to the BIOS RAID installation guide part of 2 or more SATA / SATAII HDDs with RAID functions, please follow below procedures according to the OS you install....message on a RAID disk composed of 2 or more SATA / SATAII HDDs with RAID functions, please follow the order from up BIOS. C. Insert the ASRock Support CD into your optical drive to configure RAID function, you see these messages, Please insert a blank formatted diskette into the ...
User Manual
Page 27
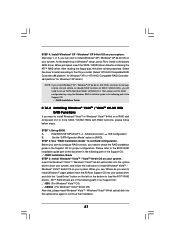
... you can start to configure RAID function, you need to set RAID configuration. At the beginning of Windows® setup, press F6 to [RAID]. Enter BIOS SETUP UTILITY Advanced screen IDE Configuration. A. STEP 2: Use "RAID Installation Guide" to [RAID] first. ATITM RAID drivers are in the following path in...Where do you want to install Windows® VistaTM / Windows® VistaTM 64-bit OS on your system. B. page, please insert the ASRock Support CD into the optical drive again to install Windows® XP / Windows® XP 64-bit OS on your system. If you ...
... you can start to configure RAID function, you need to set RAID configuration. At the beginning of Windows® setup, press F6 to [RAID]. Enter BIOS SETUP UTILITY Advanced screen IDE Configuration. A. STEP 2: Use "RAID Installation Guide" to [RAID] first. ATITM RAID drivers are in the following path in...Where do you want to install Windows® VistaTM / Windows® VistaTM 64-bit OS on your system. B. page, please insert the ASRock Support CD into the optical drive again to install Windows® XP / Windows® XP 64-bit OS on your system. If you ...
User Manual
Page 28
... in the Support CD: .. \ RAID Installation Guide NOTE2. Make a SATA / SATAII driver diskette by using the Windows RAID installation guide in BIOS first. Currently, if you install Windows® VistaTM / Windows® VistaTM 64-bit on IDE HDDs and there are no SATA / SATAII device...RAID Installation Guide 28 Set the "SATA Operation Mode" option to install Windows® XP / XP 64-bit on page 26. STEP 3: Enter BIOS RAID utility (FastBuild Utility) to use RAID functions. Restart your SATA / SATAII HDDs without RAID functions, please follow below steps. If you don't ...
... in the Support CD: .. \ RAID Installation Guide NOTE2. Make a SATA / SATAII driver diskette by using the Windows RAID installation guide in BIOS first. Currently, if you install Windows® VistaTM / Windows® VistaTM 64-bit on IDE HDDs and there are no SATA / SATAII device...RAID Installation Guide 28 Set the "SATA Operation Mode" option to install Windows® XP / XP 64-bit on page 26. STEP 3: Enter BIOS RAID utility (FastBuild Utility) to use RAID functions. Restart your SATA / SATAII HDDs without RAID functions, please follow below steps. If you don't ...

User Manual
Page 29
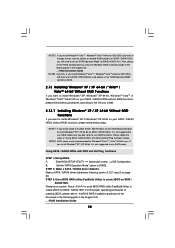
... press F6 to the OS you want to install Windows® VistaTM or Windows® VistaTM 64-bit on your system. B. Enter BIOS SETUP UTILITY Advanced screen IDE Configuration. After reading the floppy disk, the driver will be presented. Select the driver to install according to install... a third-party RAID driver. A. STEP 2: Install Windows® VistaTM / VistaTM 64-bit OS on your system. page, please insert the ASRock Support CD into the optical drive to boot your system, and follow below steps. When prompted, insert the SATA / SATAII driver diskette containing the...
... press F6 to the OS you want to install Windows® VistaTM or Windows® VistaTM 64-bit on your system. B. Enter BIOS SETUP UTILITY Advanced screen IDE Configuration. After reading the floppy disk, the driver will be presented. Select the driver to install according to install... a third-party RAID driver. A. STEP 2: Install Windows® VistaTM / VistaTM 64-bit OS on your system. page, please insert the ASRock Support CD into the optical drive to boot your system, and follow below steps. When prompted, insert the SATA / SATAII driver diskette containing the...

User Manual
Page 30
A. Enter BIOS SETUP UTILITY Advanced screen IDE Configuration. Set the "SATA Operation Mode" option to the warning on your system. 2.14 Untied Overclocking Technology This motherboard supports ...® VistaTM / VistaTM 64-bit OS on page 8 for the possible overclocking risk before you enable Untied Overclocking function, please enter "Overclock Mode" option of BIOS setup to set the selection from [Auto] to fixed PCI / PCIE buses. B. Using SATA / SATAII HDDs without NCQ and Hot Plug functions STEP 1: Set up...
A. Enter BIOS SETUP UTILITY Advanced screen IDE Configuration. Set the "SATA Operation Mode" option to the warning on your system. 2.14 Untied Overclocking Technology This motherboard supports ...® VistaTM / VistaTM 64-bit OS on page 8 for the possible overclocking risk before you enable Untied Overclocking function, please enter "Overclock Mode" option of BIOS setup to set the selection from [Auto] to fixed PCI / PCIE buses. B. Using SATA / SATAII HDDs without NCQ and Hot Plug functions STEP 1: Set up...

User Manual
Page 31
... set up the computer. If you wish to locate and load the Operating System Security To set up the default system device to enter the BIOS SETUP UTILITY after POST, restart the system by pressing + + , or by turning the system off and then back on the menu bar, and then... press to choose among the selections on . 3. Because the BIOS software is constantly being updated, the following BIOS setup screens and descriptions are for reference purpose only, and they may not exactly match what you start up the security features...
... set up the computer. If you wish to locate and load the Operating System Security To set up the default system device to enter the BIOS SETUP UTILITY after POST, restart the system by pressing + + , or by turning the system off and then back on the menu bar, and then... press to choose among the selections on . 3. Because the BIOS software is constantly being updated, the following BIOS setup screens and descriptions are for reference purpose only, and they may not exactly match what you start up the security features...

User Manual
Page 32
...32 3.1.2 Navigation Keys Please check the following table for all the settings To save changes and exit the BIOS SETUP UTILITY To jump to the Exit Screen or exit the current screen 3.2 Main Screen When you enter the BIOS SETUP UTILITY, the Main screen will appear and display the system overview... UTILITY Main Smart Advanced H/W Monitor Boot Security Exit System Overview System Time System Date [17:00:09] [Thu 05/21/2009] BIOS Version : M3A-GLAN P1.0 Processor Type : AMD Athlon(tm) 64 X2 Dual Core Processor 4000+ (64bit) Processor Speed : 2000MHz Microcode Update : 40F32/62 L1 Cache Size : ...
...32 3.1.2 Navigation Keys Please check the following table for all the settings To save changes and exit the BIOS SETUP UTILITY To jump to the Exit Screen or exit the current screen 3.2 Main Screen When you enter the BIOS SETUP UTILITY, the Main screen will appear and display the system overview... UTILITY Main Smart Advanced H/W Monitor Boot Security Exit System Overview System Time System Date [17:00:09] [Thu 05/21/2009] BIOS Version : M3A-GLAN P1.0 Processor Type : AMD Athlon(tm) 64 X2 Dual Core Processor 4000+ (64bit) Processor Speed : 2000MHz Microcode Update : 40F32/62 L1 Cache Size : ...

User Manual
Page 33
.../SATA) Load Performance Setup AHCI Mode Load Performance Setup RAID Mode Load Power Saving Setup Default EZ Overclocking Load Optimized CPU OC Setting [Press Enter] BIOS Update Utility ASRock Instant Flash Exit system setup after loading, please resume optimal default settings. F6 key can be done at your CPU and motherboard. Load...
.../SATA) Load Performance Setup AHCI Mode Load Performance Setup RAID Mode Load Power Saving Setup Default EZ Overclocking Load Optimized CPU OC Setting [Press Enter] BIOS Update Utility ASRock Instant Flash Exit system setup after loading, please resume optimal default settings. F6 key can be done at your CPU and motherboard. Load...

User Manual
Page 34
...Item Enter Go to malfunction. Setting wrong values in Flash ROM. This convenient BIOS update tool allows you execute ASRock Instant Flash utility, the utility will show the BIOS files and their respective information. Options for the following items: CPU Configuration, Memory...Configuration, PCIPnP Configuration, Floppy Configuration, SuperIO Configuration, and USB Configuration. ASRock Instant Flash ASRock Instant Flash is a BIOS flash utility embedded in this tool and save the new BIOS file to your BIOS only in a few clicks without entering operating systems first like MS-DOS...
...Item Enter Go to malfunction. Setting wrong values in Flash ROM. This convenient BIOS update tool allows you execute ASRock Instant Flash utility, the utility will show the BIOS files and their respective information. Options for the following items: CPU Configuration, Memory...Configuration, PCIPnP Configuration, Floppy Configuration, SuperIO Configuration, and USB Configuration. ASRock Instant Flash ASRock Instant Flash is a BIOS flash utility embedded in this tool and save the new BIOS file to your BIOS only in a few clicks without entering operating systems first like MS-DOS...

User Manual
Page 35
... Spectrum This item should always be [Auto] for details. Configuration options: [Auto], [Enabled] and [Disabled]. If you will enable ASRock AM2 Boost function, which will improve the memory performance. Configuration options: [Enabled] and [Disabled]. 35 The default value is [Enabled...Sync.], [CPU, PCIE, Async.] and [Optimized]. Overclock Mode Use this option to [Disable] if above issue occurs. 3.4.1 CPU Configuration BIOS SETUP UTILITY Advanced CPU Configuration AM2 Boost Overclock Mode CPU Frequency (MHz) PCIE Frequency (MHz) Spread Spectrum Boot Failure Guard Cool' n' ...
... Spectrum This item should always be [Auto] for details. Configuration options: [Auto], [Enabled] and [Disabled]. If you will enable ASRock AM2 Boost function, which will improve the memory performance. Configuration options: [Enabled] and [Disabled]. 35 The default value is [Enabled...Sync.], [CPU, PCIE, Async.] and [Optimized]. Overclock Mode Use this option to [Disable] if above issue occurs. 3.4.1 CPU Configuration BIOS SETUP UTILITY Advanced CPU Configuration AM2 Boost Overclock Mode CPU Frequency (MHz) PCIE Frequency (MHz) Spread Spectrum Boot Failure Guard Cool' n' ...

User Manual
Page 36
...], [BSP Only] and [All Cores]. otherwise, it is set based on this item. 36 Multiplier/Voltage Change This item is recommended to [Auto] by default. BIOS SETUP UTILITY Advanced CPU Configuration AM2 Boost Overclock Mode CPU Frequency (MHz) PCIE Frequency (MHz) Spread Spectrum Boot Failure Guard Cool' n' Quiet Secure Virtual Machine...
...], [BSP Only] and [All Cores]. otherwise, it is set based on this item. 36 Multiplier/Voltage Change This item is recommended to [Auto] by default. BIOS SETUP UTILITY Advanced CPU Configuration AM2 Boost Overclock Mode CPU Frequency (MHz) PCIE Frequency (MHz) Spread Spectrum Boot Failure Guard Cool' n' Quiet Secure Virtual Machine...

User Manual
Page 38
... CPU. Channel Interleaving This option appears only when you to enable or disable DDR power down mode. The default value is [Auto]. 38 3.4.2 Memory Configuration BIOS SETUP UTILITY Advanced Memory Configuration Memory Clock Flexibility Option Memory Controller Mode Power Down Enable Bank Interleaving Channel Interleaving Timing : 6-6-6-18 CAS Latency (CL) TRCD...
... CPU. Channel Interleaving This option appears only when you to enable or disable DDR power down mode. The default value is [Auto]. 38 3.4.2 Memory Configuration BIOS SETUP UTILITY Advanced Memory Configuration Memory Clock Flexibility Option Memory Controller Mode Power Down Enable Bank Interleaving Channel Interleaving Timing : 6-6-6-18 CAS Latency (CL) TRCD...

User Manual
Page 42
3.4.3 Chipset Configuration Advanced Chipset Settings BIOS SETUP UTILITY Onboard HD Audio Front Panel OnBoard Lan Primary Graphics Adapter [Auto] [Enabled] [Enabled] [PCI] DRAM Voltage NB Voltage PCIE Voltage [Auto] [Auto] [Auto] ...
3.4.3 Chipset Configuration Advanced Chipset Settings BIOS SETUP UTILITY Onboard HD Audio Front Panel OnBoard Lan Primary Graphics Adapter [Auto] [Enabled] [Enabled] [PCI] DRAM Voltage NB Voltage PCIE Voltage [Auto] [Auto] [Auto] ...


