User Manual
Page 3
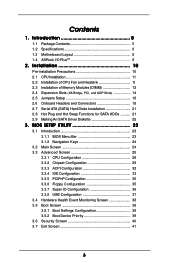
... Onboard Headers and Connectors 18 2.7 Serial ATA (SATA) Hard Disks Installation 21 2.8 Hot Plug and Hot Swap Functions for SATA HDDs .......... 21 2.9 Making An SATA Driver Diskette 22 3 . BIOS SETUP UTILITY 23 3.1 Introduction 23 3.1.1 BIOS Menu Bar 23 3.1.2 Navigation Keys 24 3.2 Main Screen 24 3.3 Advanced Screen 25 3.3.1 CPU ... 38 3.5.1 Boot Settings Configuration 39 3.5.2 Boot Device Priority 39 3.6 Security Screen 40 3.7 Exit Screen 41 3 Introduction 5 1.1 Package Contents 5 1.2 Specifications 6 1.3 Motherboard Layout 8 1.4 ASRock I/O Plus 9 TM ...2 . Contents 1 .
... Onboard Headers and Connectors 18 2.7 Serial ATA (SATA) Hard Disks Installation 21 2.8 Hot Plug and Hot Swap Functions for SATA HDDs .......... 21 2.9 Making An SATA Driver Diskette 22 3 . BIOS SETUP UTILITY 23 3.1 Introduction 23 3.1.1 BIOS Menu Bar 23 3.1.2 Navigation Keys 24 3.2 Main Screen 24 3.3 Advanced Screen 25 3.3.1 CPU ... 38 3.5.1 Boot Settings Configuration 39 3.5.2 Boot Device Priority 39 3.6 Security Screen 40 3.7 Exit Screen 41 3 Introduction 5 1.1 Package Contents 5 1.2 Specifications 6 1.3 Motherboard Layout 8 1.4 ASRock I/O Plus 9 TM ...2 . Contents 1 .

User Manual
Page 4
4 . Software Support 42 4.1 Install Operating System 42 4.2 Support CD Information 42 4.2.1 Running Support CD 42 4.2.2 Drivers Menu 42 4.2.3 Utilities Menu 42 4.2.4 Contact Information 42 4
4 . Software Support 42 4.1 Install Operating System 42 4.2 Support CD Information 42 4.2.1 Running Support CD 42 4.2.2 Drivers Menu 42 4.2.3 Utilities Menu 42 4.2.4 Contact Information 42 4

User Manual
Page 22
STEP 1: Insert the ASRock Support CD into your optical drive to boot your system. (Do NOT insert any floppy diskette ... CDROM as the boot device. Start to VIA RAID Tool", which is located in it! Once you have the SATA driver diskette ready, you may start to install Windows 2000 / Windows XP on your system directly without setting the RAID configuration ... of system boot-up, press key, and then a window for proper configuration. Before you start to make an SATA driver diskette before you start to use "VT8237 SATA RAID BIOS" to set the RAID configuration by using "VIA RAID Tool"...
STEP 1: Insert the ASRock Support CD into your optical drive to boot your system. (Do NOT insert any floppy diskette ... CDROM as the boot device. Start to VIA RAID Tool", which is located in it! Once you have the SATA driver diskette ready, you may start to install Windows 2000 / Windows XP on your system directly without setting the RAID configuration ... of system boot-up, press key, and then a window for proper configuration. Before you start to make an SATA driver diskette before you start to use "VT8237 SATA RAID BIOS" to set the RAID configuration by using "VIA RAID Tool"...

User Manual
Page 42
... information. 4.2 Support CD Information The Support CD that came with the motherboard contains necessary drivers and useful utilities that the motherboard supports. or you need to contact ASRock or want to activate the devices. 4.2.3 Utilities Menu The Utilities Menu shows the applications ...and hardware options vary, use the setup procedures in your OS documentation for more about ASRock, welcome to display the menus. 4.2.2 Drivers Menu The Drivers Menu shows the available devices drivers if the system detects installed devices. Refer to your computer. Software Support 4.1 Install...
... information. 4.2 Support CD Information The Support CD that came with the motherboard contains necessary drivers and useful utilities that the motherboard supports. or you need to contact ASRock or want to activate the devices. 4.2.3 Utilities Menu The Utilities Menu shows the applications ...and hardware options vary, use the setup procedures in your OS documentation for more about ASRock, welcome to display the menus. 4.2.2 Drivers Menu The Drivers Menu shows the available devices drivers if the system detects installed devices. Refer to your computer. Software Support 4.1 Install...


