RAID Installation Guide
Page 2
... tolerance. AMD BIOS RAID Installation Guide AMD BIOS RAID Installation Guide is called data striping that copies and maintains an identical image of the "User Manual" in our support CD, then you make a SATA driver diskette, press or to enter BIOS setup to the entire system since it does not provide...
... tolerance. AMD BIOS RAID Installation Guide AMD BIOS RAID Installation Guide is called data striping that copies and maintains an identical image of the "User Manual" in our support CD, then you make a SATA driver diskette, press or to enter BIOS setup to the entire system since it does not provide...
RAID Installation Guide
Page 11
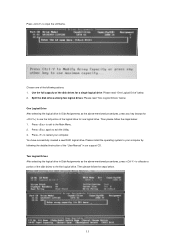
... Logical Drives" below . 2. Press again to use the full portion of the logical drive for one of the following the detailed instruction of the "User Manual" in Disk Assignments as the above -mentioned procedures, press to allocate a portion of the disk drives for ) to exit the Utility. 3. Split the disk drives...
... Logical Drives" below . 2. Press again to use the full portion of the logical drive for one of the following the detailed instruction of the "User Manual" in Disk Assignments as the above -mentioned procedures, press to allocate a portion of the disk drives for ) to exit the Utility. 3. Split the disk drives...

RAID Installation Guide
Page 12
... desired capacity for the first logical drive and press . Please install the operating system to your computer by following the detailed instruction of the "User Manual" in our support CD. 1.4.2 Configuring Legacy RAID ROM For AMD A88X Chipset When the appropriate prompt appears during POST, press to delete the existing disk...
... desired capacity for the first logical drive and press . Please install the operating system to your computer by following the detailed instruction of the "User Manual" in our support CD. 1.4.2 Configuring Legacy RAID ROM For AMD A88X Chipset When the appropriate prompt appears during POST, press to delete the existing disk...
RAID Installation Guide
Page 18
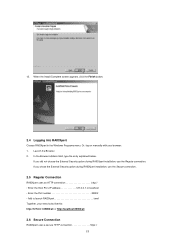
12. Or, log on manually with your entry looks like this: http://127.0.0.1:25902/ati or http://localhost:25902/ati 2.6 Secure Connection RAIDXpert uses a secure HTTP connection https:// 18 If ...
12. Or, log on manually with your entry looks like this: http://127.0.0.1:25902/ati or http://localhost:25902/ati 2.6 Secure Connection RAIDXpert uses a secure HTTP connection https:// 18 If ...
User Manual
Page 6
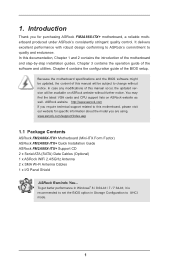
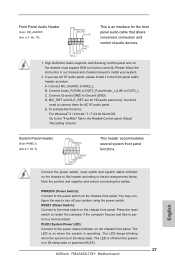
... software might be updated, the content of this manual will be subject to this documentation, Chapter 1 and 2 contains the introduction of the motherboard and step-by-step installation guides. www.asrock.com/support/index.asp 1.1 Package Contents ASRock FM2A88X-ITX+ Motherboard (Mini-ITX Form Factor) ASRock FM2A88X-ITX+ Quick Installation Guide ASRock FM2A88X-ITX+ Support CD 2 x Serial ATA (SATA) Data Cables (Optional...
... software might be updated, the content of this manual will be subject to this documentation, Chapter 1 and 2 contains the introduction of the motherboard and step-by-step installation guides. www.asrock.com/support/index.asp 1.1 Package Contents ASRock FM2A88X-ITX+ Motherboard (Mini-ITX Form Factor) ASRock FM2A88X-ITX+ Quick Installation Guide ASRock FM2A88X-ITX+ Support CD 2 x Serial ATA (SATA) Data Cables (Optional...
User Manual
Page 24
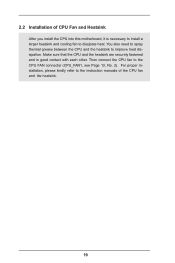
Make sure that the CPU and the heatsink are securely fastened and in good contact with each other. You also need to spray thermal grease between the CPU and the heatsink to the instruction manuals of CPU Fan and Heatsink After you install the CPU into this motherboard, it is necessary to install a larger heatsink and cooling fan to the CPU FAN connector (CPU_FAN1, see Page 13, No. 2). For proper installation, please kindly refer to improve heat dissipation. 2.2 Installation of the CPU fan and the heatsink. 19 Then connect the CPU fan to dissipate heat.
Make sure that the CPU and the heatsink are securely fastened and in good contact with each other. You also need to spray thermal grease between the CPU and the heatsink to the instruction manuals of CPU Fan and Heatsink After you install the CPU into this motherboard, it is necessary to install a larger heatsink and cooling fan to the CPU FAN connector (CPU_FAN1, see Page 13, No. 2). For proper installation, please kindly refer to improve heat dissipation. 2.2 Installation of the CPU fan and the heatsink. 19 Then connect the CPU fan to dissipate heat.
User Manual
Page 30
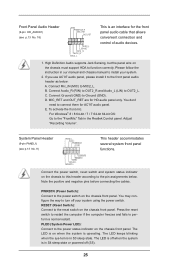
...-bit 64-bit OS: Go to the reset switch on the chassis front panel. RESET (Reset Switch): Connect to the "FrontMic" Tab in our manual and chassis manual to connect them for AC'97 audio panel. PLED (System Power LED): Connect to Ground (GND). The LED is on the chassis to this...
...-bit 64-bit OS: Go to the reset switch on the chassis front panel. RESET (Reset Switch): Connect to the "FrontMic" Tab in our manual and chassis manual to connect them for AC'97 audio panel. PLED (System Power LED): Connect to Ground (GND). The LED is on the chassis to this...
User Manual
Page 55
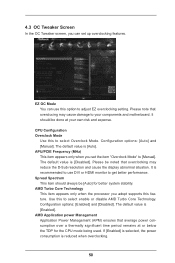
...adjust EZ overclocking setting. Configuration options: [Enabled] and [Disabled]. The default value is [Disabled]. Configuration options: [Auto] and [Manual]. The default value is [Enabled]. AMD Turbo Core Technology This item appears only when the processor you can use DVI or HDMI monitor to... [Manual]. AMD Application power Management Application Power Management (APM) ensures that overclocking may cause damage to select Overclock Mode. 4.3 OC ...
...adjust EZ overclocking setting. Configuration options: [Enabled] and [Disabled]. The default value is [Disabled]. Configuration options: [Auto] and [Manual]. The default value is [Enabled]. AMD Turbo Core Technology This item appears only when the processor you can use DVI or HDMI monitor to... [Manual]. AMD Application power Management Application Power Management (APM) ensures that overclocking may cause damage to select Overclock Mode. 4.3 OC ...
User Manual
Page 56
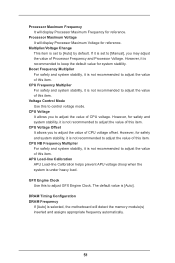
... It will display Processor Maximum Voltage for reference. Voltage Control Mode Use this item. However, for safety and system stability, it is not recommended to [Manual], you to adjust the value of this item. Multiplier/Voltage Change This item is not recommended to adjust the value of this item. Boost Frequency...
... It will display Processor Maximum Voltage for reference. Voltage Control Mode Use this item. However, for safety and system stability, it is not recommended to [Manual], you to adjust the value of this item. Multiplier/Voltage Change This item is not recommended to adjust the value of this item. Boost Frequency...
Quick Installation Guide
Page 7
... notice. More detailed information of this manual will be found in the user manual presented in our support CD for details. 7 ASRock FM2A88X-ITX+ Motherboard English Introduction Thank you for ...Manual" in the Support CD. In case any modifications of the motherboard can be available on ASRock website as well. You may find the latest VGA cards and CPU support lists on ASRock website without notice. www.asrock.com/support/index.asp 1.1 Package Contents ASRock FM2A88X-ITX+ Motherboard (Mini-ITX Form Factor) ASRock FM2A88X-ITX+ Quick Installation Guide ASRock FM2A88X-ITX...
... notice. More detailed information of this manual will be found in the user manual presented in our support CD for details. 7 ASRock FM2A88X-ITX+ Motherboard English Introduction Thank you for ...Manual" in the Support CD. In case any modifications of the motherboard can be available on ASRock website as well. You may find the latest VGA cards and CPU support lists on ASRock website without notice. www.asrock.com/support/index.asp 1.1 Package Contents ASRock FM2A88X-ITX+ Motherboard (Mini-ITX Form Factor) ASRock FM2A88X-ITX+ Quick Installation Guide ASRock FM2A88X-ITX...

Quick Installation Guide
Page 21
... securely fastened and in good contact with each other. You also need to spray thermal grease between the CPU and the heatsink to the instruction manuals of CPU Fan and Heatsink After you install the CPU into this motherboard, it is necessary to install a larger heatsink and cooling fan to the... installation, please kindly refer to improve heat dissipation. Then connect the CPU fan to dissipate heat. 2.2 Installation of the CPU fan and the heatsink. 21 ASRock FM2A88X-ITX+ Motherboard English
... securely fastened and in good contact with each other. You also need to spray thermal grease between the CPU and the heatsink to the instruction manuals of CPU Fan and Heatsink After you install the CPU into this motherboard, it is necessary to install a larger heatsink and cooling fan to the... installation, please kindly refer to improve heat dissipation. Then connect the CPU fan to dissipate heat. 2.2 Installation of the CPU fan and the heatsink. 21 ASRock FM2A88X-ITX+ Motherboard English
Quick Installation Guide
Page 27
Please follow the instruction in our manual and chassis manual to install your system using the power switch. D. PWRBTN (Power Switch): Connect to the power status indicator on the chassis front panel. PLED (System Power ... connect them for HD audio panel only. Adjust "Recording Volume". If you use AC'97 audio panel, please install it to turn off (S5). 27 ASRock FM2A88X-ITX+ Motherboard
Please follow the instruction in our manual and chassis manual to install your system using the power switch. D. PWRBTN (Power Switch): Connect to the power status indicator on the chassis front panel. PLED (System Power ... connect them for HD audio panel only. Adjust "Recording Volume". If you use AC'97 audio panel, please install it to turn off (S5). 27 ASRock FM2A88X-ITX+ Motherboard
Quick Installation Guide
Page 30
... to enter BIOS Setup utility; It is a menu-driven program, which allows you to display the menus. 30 ASRock FM2A88X-ITX+ Motherboard English For the detailed information about BIOS Setup, please refer to the User Manual (PDF file) contained in the Support CD to scroll through its test routines. The Support CD that came...
... to enter BIOS Setup utility; It is a menu-driven program, which allows you to display the menus. 30 ASRock FM2A88X-ITX+ Motherboard English For the detailed information about BIOS Setup, please refer to the User Manual (PDF file) contained in the Support CD to scroll through its test routines. The Support CD that came...
