
User Manual
Page 6
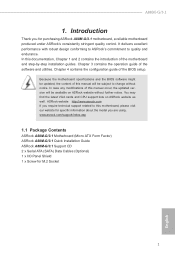
A88M-G/3.1 1. In this manual occur, the updated version will be updated, the content of this motherboard, please visit our website for specific information about the model you for M.2 Socket 1 English www.asrock.com/support/index.asp 1.1 Package Contents ASRock A88M-G/3.1 Motherboard (Micro ATX Form Factor) ASRock A88M-G/3.1 Quick Installation Guide ASRock A88M-G/3.1 Support CD 2 x Serial ATA (SATA) Data Cables (Optional...
A88M-G/3.1 1. In this manual occur, the updated version will be updated, the content of this motherboard, please visit our website for specific information about the model you for M.2 Socket 1 English www.asrock.com/support/index.asp 1.1 Package Contents ASRock A88M-G/3.1 Motherboard (Micro ATX Form Factor) ASRock A88M-G/3.1 Quick Installation Guide ASRock A88M-G/3.1 Support CD 2 x Serial ATA (SATA) Data Cables (Optional...

User Manual
Page 17
Then connect the CPU fan to dissipate heat. 2.2 Installation of the CPU fan and the heatsink. 12 English For proper installation, please kindly refer to improve heat dissipation. You also need to spray thermal grease between the CPU and the heatsink to the instruction manuals of CPU Fan and Heatsink After you install the CPU into this motherboard, it is necessary to install a larger heatsink and cooling fan to the CPU FAN connector (CPU_FAN1 and CPU_FAN2, see Page 6, No. 2, 3). Make sure that the CPU and the heatsink are securely fastened and in good contact with each other.
Then connect the CPU fan to dissipate heat. 2.2 Installation of the CPU fan and the heatsink. 12 English For proper installation, please kindly refer to improve heat dissipation. You also need to spray thermal grease between the CPU and the heatsink to the instruction manuals of CPU Fan and Heatsink After you install the CPU into this motherboard, it is necessary to install a larger heatsink and cooling fan to the CPU FAN connector (CPU_FAN1 and CPU_FAN2, see Page 6, No. 2, 3). Make sure that the CPU and the heatsink are securely fastened and in good contact with each other.

User Manual
Page 23
... This is an interface for the front panel audio cable that allows convenient connection and control of audio devices. 1. Please follow the instruction in our manual and chassis manual to the "FrontMic" Tab in the Realtek Control panel.
... This is an interface for the front panel audio cable that allows convenient connection and control of audio devices. 1. Please follow the instruction in our manual and chassis manual to the "FrontMic" Tab in the Realtek Control panel.
User Manual
Page 44
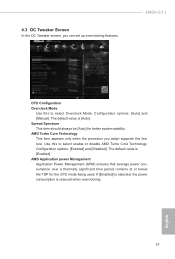
... processor you can set up overclocking features. If [Enabled] is selected, the power consumption is [Enabled]. Configuration options: [Auto] and [Manual]. The default value is reduced when overclocking. 39 English A88M-G/3.1 CPU Configuration Overclock Mode Use this feature. Use this to select Overclock Mode. AMD Application power Management Application Power Management (APM...
... processor you can set up overclocking features. If [Enabled] is selected, the power consumption is [Enabled]. Configuration options: [Auto] and [Manual]. The default value is reduced when overclocking. 39 English A88M-G/3.1 CPU Configuration Overclock Mode Use this feature. Use this to select Overclock Mode. AMD Application power Management Application Power Management (APM...

User Manual
Page 45
... Frequency for reference. If it is APU Load-line Calibration APU Load-line Calibration helps prevent APU voltage droop when the system is set to [Manual], you may adjust the value of Processor Frequency and Processor Voltage. Load XMP Setting Load XMP settings to adjust GFX Engine Clock. The default value...
... Frequency for reference. If it is APU Load-line Calibration APU Load-line Calibration helps prevent APU voltage droop when the system is set to [Manual], you may adjust the value of Processor Frequency and Processor Voltage. Load XMP Setting Load XMP settings to adjust GFX Engine Clock. The default value...

User Manual
Page 59
... Select a fan temperature source for Chassis Fan 1. Confi guration options: [Full On] and [Automatic Mode]. Confi guration options: [Full On], [Manual Mode] and [Automatic Mode]. Chassis Fan 1 Setting This allows you to monitor the status of the hardware on your system, including the parameters of...is value [Full On]. Chassis Fan 1 Temp Source Select a fan temperature source for Chassis Fan 2. Confi guration options: [Full On], [Manual Mode] and [Automatic Mode]. Case Open Feature This allows you to keep or clear the record of the CPU temperature, motherboard temperature, CPU fan...
... Select a fan temperature source for Chassis Fan 1. Confi guration options: [Full On] and [Automatic Mode]. Confi guration options: [Full On], [Manual Mode] and [Automatic Mode]. Chassis Fan 1 Setting This allows you to monitor the status of the hardware on your system, including the parameters of...is value [Full On]. Chassis Fan 1 Temp Source Select a fan temperature source for Chassis Fan 2. Confi guration options: [Full On], [Manual Mode] and [Automatic Mode]. Case Open Feature This allows you to keep or clear the record of the CPU temperature, motherboard temperature, CPU fan...
