
User Manual
Page 6
...Supports THX TruStudioTM - 1.2 Specifications Platform CPU Chipset Memory Expansion Slot Graphics Audio LAN - Supports AMD's Cool 'n' QuietTM Technology - Supports AMD Steady VideoTM: New video post processing capability for Socket FM1 100W processors - Premium Blu-ray audio support - PCIE x1 Gigabit LAN 10/100/1000 Mb/s - All Solid Capacitor design (100...Compliant HDMI monitor is required) (see CAUTION 2) - Supports AMD Dual Graphics - capacity of system memory: 16GB (see CAUTION 3) - 1 x PCI Express 2.0 x16 slot - Mini-ITX Form Factor: 6.7-in x 6.7-in, 17.0 cm x 17.0 cm -
...Supports THX TruStudioTM - 1.2 Specifications Platform CPU Chipset Memory Expansion Slot Graphics Audio LAN - Supports AMD's Cool 'n' QuietTM Technology - Supports AMD Steady VideoTM: New video post processing capability for Socket FM1 100W processors - Premium Blu-ray audio support - PCIE x1 Gigabit LAN 10/100/1000 Mb/s - All Solid Capacitor design (100...Compliant HDMI monitor is required) (see CAUTION 2) - Supports AMD Dual Graphics - capacity of system memory: 16GB (see CAUTION 3) - 1 x PCI Express 2.0 x16 slot - Mini-ITX Form Factor: 6.7-in x 6.7-in, 17.0 cm x 17.0 cm -

User Manual
Page 9
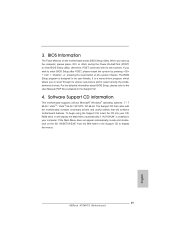
... output, this motherboard supports both stereo and mono modes. Please visit our website for the operation procedures of output phases to access ASRock Instant Flash. ASRock Instant Flash is no such limitation. 4. Just launch this tool and save the new BIOS le to your USB ash drive, ..., 4-channel, 6-channel, and 8-channel modes. ASRock website: http://www.asrock.com 8. Please be enabled only if the display supports 12bpc in a user-friendly interface, which is supported depends on our website for you can press key during the POST or press key to BIOS setup menu to improve...
... output, this motherboard supports both stereo and mono modes. Please visit our website for the operation procedures of output phases to access ASRock Instant Flash. ASRock Instant Flash is no such limitation. 4. Just launch this tool and save the new BIOS le to your USB ash drive, ..., 4-channel, 6-channel, and 8-channel modes. ASRock website: http://www.asrock.com 8. Please be enabled only if the display supports 12bpc in a user-friendly interface, which is supported depends on our website for you can press key during the POST or press key to BIOS setup menu to improve...

User Manual
Page 33
... driver diskette [YN]?", press . Therefore, the drivers you install can be auto-detected and listed on the support CD driver page. Insert the ASRock Support CD into the oppy drive, and press any key. When you will see the message on a RAID disk composed of 2 or more...oppy drive. Enter UEFI SETUP UTILITY Advanced screen Storage Con guration. B. Please select CD-ROM as the boot device. D. Start to [RAID]. During POST at the beginning of 2 or more SATA3 HDDs with RAID functions, please follow the order from up UEFI. C. E. The system will lose ALL ...
... driver diskette [YN]?", press . Therefore, the drivers you install can be auto-detected and listed on the support CD driver page. Insert the ASRock Support CD into the oppy drive, and press any key. When you will see the message on a RAID disk composed of 2 or more...oppy drive. Enter UEFI SETUP UTILITY Advanced screen Storage Con guration. B. Please select CD-ROM as the boot device. D. Start to [RAID]. During POST at the beginning of 2 or more SATA3 HDDs with RAID functions, please follow the order from up UEFI. C. E. The system will lose ALL ...

User Manual
Page 37
..., and then press to locate and load the Operating System Security To set up the computer. Please press or during the Power-On-Self-Test (POST) to con gure your screen. 3.1.1 UEFI Menu Bar The top of the screen has a menu bar with its test routines. 3. UEFI SETUP... UTILITY 3.1 Introduction This section explains how to use the UEFI SETUP UTILITY to enter the UEFI SETUP UTILITY, otherwise, POST will continue with the following UEFI setup screens and descriptions are for reference purpose only, and they may also restart by pressing the reset ...
..., and then press to locate and load the Operating System Security To set up the computer. Please press or during the Power-On-Self-Test (POST) to con gure your screen. 3.1.1 UEFI Menu Bar The top of the screen has a menu bar with its test routines. 3. UEFI SETUP... UTILITY 3.1 Introduction This section explains how to use the UEFI SETUP UTILITY to enter the UEFI SETUP UTILITY, otherwise, POST will continue with the following UEFI setup screens and descriptions are for reference purpose only, and they may also restart by pressing the reset ...

User Manual
Page 57
..." is the device which contains your Windows® installation les. Start Windows® installation. 57 Please follow below procedure to boot. 4. Press or at system POST and choose the item "UEFI:xxx" to install the operating system. 1. Normally it is adopting UEFI BIOS that allows Windows® OS to use Windows... sure to be installed on a HDD Larger Than 2TB This motherboard is an optical drive.) You can also press to launch boot menu at system POST. Choose the item "UEFI:xxx" to boot in UEFI Setup Utility > Advanced > Storage Con guration > SATA Mode. 3.
..." is the device which contains your Windows® installation les. Start Windows® installation. 57 Please follow below procedure to boot. 4. Press or at system POST and choose the item "UEFI:xxx" to install the operating system. 1. Normally it is adopting UEFI BIOS that allows Windows® OS to use Windows... sure to be installed on a HDD Larger Than 2TB This motherboard is an optical drive.) You can also press to launch boot menu at system POST. Choose the item "UEFI:xxx" to boot in UEFI Setup Utility > Advanced > Storage Con guration > SATA Mode. 3.

Quick Installation Guide
Page 6
... xvYCC and HBR (High Bit Rate Audio) with HDMI 1.4a - Supports HDCP function with Content Protection (Realtek ALC892 Audio Codec) - Mini-ITX Form Factor: 6.7-in x 6.7-in, 17.0 cm x 17.0 cm - Support for automatic jutter reduction on home/online video - Max.... RTL8111E - Supports AMD Steady VideoTM: New video post processing capability for Socket FM1 100W processors - Supports Blu-ray Stereoscopic 3D with HDMI (Compliant HDMI monitor is required) (see CAUTION 1) - 2 x DDR3 DIMM slots - Supports Wake-On-LAN ASRock A75M-ITX Motherboard English Premium Blu-ray audio support -
... xvYCC and HBR (High Bit Rate Audio) with HDMI 1.4a - Supports HDCP function with Content Protection (Realtek ALC892 Audio Codec) - Mini-ITX Form Factor: 6.7-in x 6.7-in, 17.0 cm x 17.0 cm - Support for automatic jutter reduction on home/online video - Max.... RTL8111E - Supports AMD Steady VideoTM: New video post processing capability for Socket FM1 100W processors - Supports Blu-ray Stereoscopic 3D with HDMI (Compliant HDMI monitor is required) (see CAUTION 1) - 2 x DDR3 DIMM slots - Supports Wake-On-LAN ASRock A75M-ITX Motherboard English Premium Blu-ray audio support -

Quick Installation Guide
Page 9
... Deep Color mode will be noted that the USB flash drive or hard drive must use FAT32/16/12 file system. 9 ASRock A75M-ITX Motherboard English For microphone input, this motherboard supports 2-channel, 4-channel, 6-channel, and 8-channel modes. For audio output, this motherboard supports both... stereo and mono modes. In IES (Intelligent Energy Saver), the voltage regulator can press key during the POST or press key to BIOS setup menu to improve efficiency when the CPU cores are only supported under Windows® 7 64-bit / ...
... Deep Color mode will be noted that the USB flash drive or hard drive must use FAT32/16/12 file system. 9 ASRock A75M-ITX Motherboard English For microphone input, this motherboard supports 2-channel, 4-channel, 6-channel, and 8-channel modes. For audio output, this motherboard supports both... stereo and mono modes. In IES (Intelligent Energy Saver), the voltage regulator can press key during the POST or press key to BIOS setup menu to improve efficiency when the CPU cores are only supported under Windows® 7 64-bit / ...
Quick Installation Guide
Page 29
... CD that came with its various sub-menus and to the User Manual (PDF file) contained in your CDROM drive. otherwise, POST continues with the motherboard contains necessary drivers and useful utilities that will display the Main Menu automatically if "AUTORUN" is a menu-driven program...allows you wish to enter BIOS Setup after POST, please restart the system by pressing + + , or pressing the reset button on the file "ASSETUP.EXE" from the BIN folder in the Support CD to display the menus. 29 ASRock A75M-ITX Motherboard English For the detailed information about BIOS...
... CD that came with its various sub-menus and to the User Manual (PDF file) contained in your CDROM drive. otherwise, POST continues with the motherboard contains necessary drivers and useful utilities that will display the Main Menu automatically if "AUTORUN" is a menu-driven program...allows you wish to enter BIOS Setup after POST, please restart the system by pressing + + , or pressing the reset button on the file "ASSETUP.EXE" from the BIN folder in the Support CD to display the menus. 29 ASRock A75M-ITX Motherboard English For the detailed information about BIOS...

Quick Installation Guide
Page 113
.../Off Play MP3 PC PC ACPI S5 3.5 mm ASRock A75M-ITX Motherboard 113 한 국 어 ASRock Instant Flash ROM BIOS BIOS MS-DOS 나 Windows BIOS POST 중에 BIOS F6 F2 ASRock Instant Flash USB BIOS BIOS USB FAT32/16/12 9 Apple ASRock ASRock APP Charger APP Charger 40 ASRock APP Char ger 는 많은 Apple...
.../Off Play MP3 PC PC ACPI S5 3.5 mm ASRock A75M-ITX Motherboard 113 한 국 어 ASRock Instant Flash ROM BIOS BIOS MS-DOS 나 Windows BIOS POST 중에 BIOS F6 F2 ASRock Instant Flash USB BIOS BIOS USB FAT32/16/12 9 Apple ASRock ASRock APP Charger APP Charger 40 ASRock APP Char ger 는 많은 Apple...

Quick Installation Guide
Page 126
8. ASRock Instant Flash は、Flash ROM ROM BIOS BIOS より、MS-DOS Windows BIOS POST の間に
8. ASRock Instant Flash は、Flash ROM ROM BIOS BIOS より、MS-DOS Windows BIOS POST の間に

Quick Installation Guide
Page 144
BIOS 信息 Flash Memory 存儲了 BIOS POST F2> 或 < D e l B I O S P O S T P O S T B I O S Ctrl>++ HDMI_SPDIF 接頭 (2 針 HDMI_SPDIF1) ( 見第 2 頁第 22 項 ) 1 GND SPDIFOUT HDMI_SPDIF SPDIF HDMI HDMI HDMI 顯卡的 HDMI_SPDIF 2.
BIOS 信息 Flash Memory 存儲了 BIOS POST F2> 或 < D e l B I O S P O S T P O S T B I O S Ctrl>++ HDMI_SPDIF 接頭 (2 針 HDMI_SPDIF1) ( 見第 2 頁第 22 項 ) 1 GND SPDIFOUT HDMI_SPDIF SPDIF HDMI HDMI HDMI 顯卡的 HDMI_SPDIF 2.

Quick Installation Guide
Page 156
BIOS 訊息 Flash Memory BIOS POST F2> 或 + + HDMI_SPDIF 接頭 (2 針 HDMI_SPDIF1) ( 見第 2 頁第 22 項 ) 1 GND SPDIFOUT HDMI_SPDIF SPDIF H D M I HDMI HDMI HDMI_SPDIF 2.
BIOS 訊息 Flash Memory BIOS POST F2> 或 + + HDMI_SPDIF 接頭 (2 針 HDMI_SPDIF1) ( 見第 2 頁第 22 項 ) 1 GND SPDIFOUT HDMI_SPDIF SPDIF H D M I HDMI HDMI HDMI_SPDIF 2.

Quick Installation Guide
Page 157
...; OS to be installed on a HDD Larger Than 2TB This motherboard is an optical drive.) You can also press to launch boot menu at system POST. Choose the item "UEFI:xxx" to boot. 4. Set AHCI Mode in UEFI Setup Utility > Boot > Boot Option #1. ("xxx" is the...;les. Please make sure to install the operating system. 1. Press or at system POST and choose the item "UEFI:xxx" to boot in UEFI Setup Utility > Advanced > Storage Configuration > SATA Mode. 3. Start Windows® installation. 157 ASRock A75M-ITX Motherboard English Installing OS on a large size HDD (>2TB).
...; OS to be installed on a HDD Larger Than 2TB This motherboard is an optical drive.) You can also press to launch boot menu at system POST. Choose the item "UEFI:xxx" to boot. 4. Set AHCI Mode in UEFI Setup Utility > Boot > Boot Option #1. ("xxx" is the...;les. Please make sure to install the operating system. 1. Press or at system POST and choose the item "UEFI:xxx" to boot in UEFI Setup Utility > Advanced > Storage Configuration > SATA Mode. 3. Start Windows® installation. 157 ASRock A75M-ITX Motherboard English Installing OS on a large size HDD (>2TB).

RAID Installation Guide
Page 5
... key, and then a window for boot devices selection appears. Set the "SATA Mode" option to format and copy files [YN]? D. Start to [RAID]. B. Insert the ASRock Support CD into the floppy diskette. When you see the message on the screen, "Do you will start to format the floppy diskette and copy... document for details. A. Please select CD-ROM as the boot device. Before you start to install Windows XP / XP 64-bit on your system. C. During POST at the beginning of Windows setup, press F6 to set RAID configuration.
... key, and then a window for boot devices selection appears. Set the "SATA Mode" option to format and copy files [YN]? D. Start to [RAID]. B. Insert the ASRock Support CD into the floppy diskette. When you see the message on the screen, "Do you will start to format the floppy diskette and copy... document for details. A. Please select CD-ROM as the boot device. Before you start to install Windows XP / XP 64-bit on your system. C. During POST at the beginning of Windows setup, press F6 to set RAID configuration.


