RAID Installation Guide
Page 2
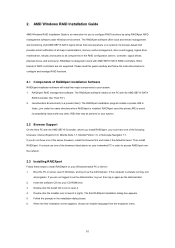
.... It will improve data access and storage since the disk array management software will direct all applications to the next drive automatically. As independent physical drives, JBOD does not offer the performance or security advantages of disk mirroring (RAID 1). When one logical unit. RAID 10 (Stripe Mirroring) RAID 0 drives can start to use the onboard FastBuild BIOS utility to configure RAID. 1.1 Introduction to set . The controller combines the performance of...
.... It will improve data access and storage since the disk array management software will direct all applications to the next drive automatically. As independent physical drives, JBOD does not offer the performance or security advantages of disk mirroring (RAID 1). When one logical unit. RAID 10 (Stripe Mirroring) RAID 0 drives can start to use the onboard FastBuild BIOS utility to configure RAID. 1.1 Introduction to set . The controller combines the performance of...
RAID Installation Guide
Page 4
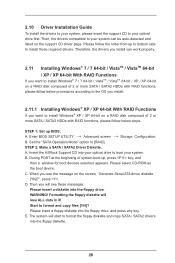
... you install Windows XP / Windows XP 64-bit on IDE HDDs and want to the BIOS RAID installation guide part in this RAID installation guide for Windows XP 64-bit.) NOTE. B. Insert the ASRock Support CD into the floppy drive, and press any key. If you install. (Select "AMD AHCI Compatible RAID Controller-x86 platform" for Windows XP, or "AMD AHCI Compatible RAID Controller-x64 platform" for proper configuration. 1.3.1 Installing Windows XP / XP 64-bit With RAID Functions If you will be presented. Enter BIOS SETUP UTILITY → Advanced screen →Storage Configuration. Then...
... you install Windows XP / Windows XP 64-bit on IDE HDDs and want to the BIOS RAID installation guide part in this RAID installation guide for Windows XP 64-bit.) NOTE. B. Insert the ASRock Support CD into the floppy drive, and press any key. If you install. (Select "AMD AHCI Compatible RAID Controller-x86 platform" for Windows XP, or "AMD AHCI Compatible RAID Controller-x64 platform" for proper configuration. 1.3.1 Installing Windows XP / XP 64-bit With RAID Functions If you will be presented. Enter BIOS SETUP UTILITY → Advanced screen →Storage Configuration. Then...
RAID Installation Guide
Page 5
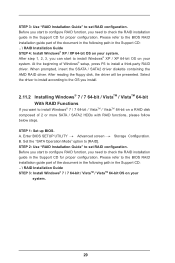
... insert the ASRock Support CD into the optical drive to boot your optical drive, and click the "Load Driver" button on the left on the bottom to load the AMD RAID drivers. Enter BIOS SETUP UTILITY → Advanced screen →Storage Configuration. Insert the Windows 7 / 7 64-bit / Vista / Vista 64-bit optical disk into your system, and follow below steps. AMD RAID drivers are no SATA / SATAII device used, please set up BIOS. If you install Windows 7 / 7 64-bit / Vista / Vista 64-bit on IDE HDDs and...
... insert the ASRock Support CD into the optical drive to boot your optical drive, and click the "Load Driver" button on the left on the bottom to load the AMD RAID drivers. Enter BIOS SETUP UTILITY → Advanced screen →Storage Configuration. Insert the Windows 7 / 7 64-bit / Vista / Vista 64-bit optical disk into your system, and follow below steps. AMD RAID drivers are no SATA / SATAII device used, please set up BIOS. If you install Windows 7 / 7 64-bit / Vista / Vista 64-bit on IDE HDDs and...
RAID Installation Guide
Page 10
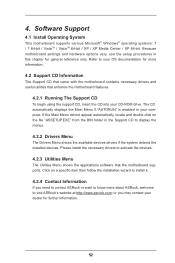
The RAIDXpert software offers local and remote management and monitoring of all major events/alarms, memory cache management, drive event logging, logical drive maintenance, rebuild, and access to work with AMD SB710 SATA RAID controllers. Its browser-based GUI provides email notification of the browsers listed above browsers, install the browser first and make it (right). RAIDXpert is an instruction for you to install RAIDXpert on...
The RAIDXpert software offers local and remote management and monitoring of all major events/alarms, memory cache management, drive event logging, logical drive maintenance, rebuild, and access to work with AMD SB710 SATA RAID controllers. Its browser-based GUI provides email notification of the browsers listed above browsers, install the browser first and make it (right). RAIDXpert is an instruction for you to install RAIDXpert on...

User Manual
Page 7
...CPU Temperature Sensing Monitor - Front panel audio connector - 3 x USB 2.0 headers (support 6 USB 2.0 ports) BIOS Feature - 8Mb AMI Legal BIOS - ACPI 1.1 Compliance Wake Up Events - Drivers, Utilities, AntiVirus Software (Trial Version), AMD OverDriveTM Utility, CyberLink MediaEspresso 6.5 Trial, ASRock MAGIX Multimedia Suite - Supports "Plug and Play" - CPU, VCCM, NB Voltage Multi-adjustment Support CD - Voltage Monitoring: +12V, +5V, +3.3V, Vcore OS - Microsoft® Windows® 7 / 7 64-bit / VistaTM / VistaTM 64-bit / XP / XP Media Center / XP 64-bit...
...CPU Temperature Sensing Monitor - Front panel audio connector - 3 x USB 2.0 headers (support 6 USB 2.0 ports) BIOS Feature - 8Mb AMI Legal BIOS - ACPI 1.1 Compliance Wake Up Events - Drivers, Utilities, AntiVirus Software (Trial Version), AMD OverDriveTM Utility, CyberLink MediaEspresso 6.5 Trial, ASRock MAGIX Multimedia Suite - Supports "Plug and Play" - CPU, VCCM, NB Voltage Multi-adjustment Support CD - Voltage Monitoring: +12V, +5V, +3.3V, Vcore OS - Microsoft® Windows® 7 / 7 64-bit / VistaTM / VistaTM 64-bit / XP / XP Media Center / XP 64-bit...

User Manual
Page 9
... USB flash drive or hard drive must use Intelligent Energy Saver function, please enable Cool 'n' Quiet option in the BIOS setup in Flash ROM. ASRock Instant Flash ASRock Instant Flash is a BIOS flash utility embedded in advance. ASRock Instant Boot ASRock Instant Boot allows you to turn on your BIOS only in Windows® to improve efficiency when the CPU cores are idle. 1.3 Unique Features ASRock OC Tuner ASRock OC Tuner is a user-friendly overclocking tool which normally enable the Sleep/Standby and Hibernation modes...
... USB flash drive or hard drive must use Intelligent Energy Saver function, please enable Cool 'n' Quiet option in the BIOS setup in Flash ROM. ASRock Instant Flash ASRock Instant Flash is a BIOS flash utility embedded in advance. ASRock Instant Boot ASRock Instant Boot allows you to turn on your BIOS only in Windows® to improve efficiency when the CPU cores are idle. 1.3 Unique Features ASRock OC Tuner ASRock OC Tuner is a user-friendly overclocking tool which normally enable the Sleep/Standby and Hibernation modes...

User Manual
Page 12
... (PORT 1)) 18 SATA2 Connector (SATA2_1 (PORT 1)) 19 USB 2.0 Header (USB6_7) 20 USB 2.0 Header (USB4_5) 21 USB 2.0 Header (USB8_9) 22 System Panel Header (PANEL1) 23 Power LED Header (PLED1) 24 Chassis Speaker Header (SPEAKER 1) 25 Floppy Connector (FLOPPY1) 26 Internal Audio Connector: CD1 27 Front Panel Audio Header (HD_AUDIO1) 28 HDMI_SPDIF Header (HDMI_SPDIF1) 29 Infrared Module Header (IR1) 30 PCI Slots (PCI1-2) 31 PCI Express 2.0 x1 Slot (PCIE4) 32 PCI Express 2.0 x16 Slot (PCIE3) 33 PCI Express 2.0 x1 Slot (PCIE2) 34 IDE1 Connector (IDE1) 35 PCI Express 2.0 x1 Slot (PCIE1) 36 Clear CMOS...
... (PORT 1)) 18 SATA2 Connector (SATA2_1 (PORT 1)) 19 USB 2.0 Header (USB6_7) 20 USB 2.0 Header (USB4_5) 21 USB 2.0 Header (USB8_9) 22 System Panel Header (PANEL1) 23 Power LED Header (PLED1) 24 Chassis Speaker Header (SPEAKER 1) 25 Floppy Connector (FLOPPY1) 26 Internal Audio Connector: CD1 27 Front Panel Audio Header (HD_AUDIO1) 28 HDMI_SPDIF Header (HDMI_SPDIF1) 29 Infrared Module Header (IR1) 30 PCI Slots (PCI1-2) 31 PCI Express 2.0 x1 Slot (PCIE4) 32 PCI Express 2.0 x16 Slot (PCIE3) 33 PCI Express 2.0 x1 Slot (PCIE2) 34 IDE1 Connector (IDE1) 35 PCI Express 2.0 x1 Slot (PCIE1) 36 Clear CMOS...
User Manual
Page 28
... install Windows® 7 / 7 64-bit / VistaTM / VistaTM 64-bit / XP / XP 64-bit on a RAID disk composed of 2 or more SATA / SATA2 HDDs with RAID functions, please follow below steps. Enter BIOS SETUP UTILITY Advanced screen Storage Configuration. STEP 2: Make a SATA / SATA2 Driver Diskette. D. STEP 1: Set up to bottom side to your optical drive first. A. Insert the ASRock Support CD into the floppy drive, and press any key. During POST at the beginning of 2 or more SATA / SATA2 HDDs...
... install Windows® 7 / 7 64-bit / VistaTM / VistaTM 64-bit / XP / XP 64-bit on a RAID disk composed of 2 or more SATA / SATA2 HDDs with RAID functions, please follow below steps. Enter BIOS SETUP UTILITY Advanced screen Storage Configuration. STEP 2: Make a SATA / SATA2 Driver Diskette. D. STEP 1: Set up to bottom side to your optical drive first. A. Insert the ASRock Support CD into the floppy drive, and press any key. During POST at the beginning of 2 or more SATA / SATA2 HDDs...
User Manual
Page 29
... RAID installation guide in the Support CD: .. \ RAID Installation Guide STEP 4: Install Windows® XP / XP 64-bit OS on your system. 29 After reading the floppy disk, the driver will be presented. STEP 1: Set up BIOS. Enter BIOS SETUP UTILITY Advanced screen Storage Configuration. Please refer to the BIOS RAID installation guide part of Windows® setup, press F6 to set RAID configuration. STEP 2: Use "RAID Installation Guide" to install a third-party RAID driver. Select the driver to install according to the OS you install. 2.11.2 Installing Windows® 7 / 7 64-bit...
... RAID installation guide in the Support CD: .. \ RAID Installation Guide STEP 4: Install Windows® XP / XP 64-bit OS on your system. 29 After reading the floppy disk, the driver will be presented. STEP 1: Set up BIOS. Enter BIOS SETUP UTILITY Advanced screen Storage Configuration. Please refer to the BIOS RAID installation guide part of Windows® setup, press F6 to set RAID configuration. STEP 2: Use "RAID Installation Guide" to install a third-party RAID driver. Select the driver to install according to the OS you install. 2.11.2 Installing Windows® 7 / 7 64-bit...

User Manual
Page 34
... CPU and motherboard. CPU Frequency (MHz) Use this item to configure Boot Failure Guard Count. Boot Failure Guard Count Use this option to adjust CPU frequency. BIOS SETUP UTILITY Main OC Tweaker Advanced H/W Monitor Boot Security Exit EZ Overclocking Load Optimized CPU OC Setting CPU Configuration Overclock Mode CPU Frequency (MHz) PCIE Frequency (MHz) Spread Spectrum Boot Failure Guard Boot Failure Guard Count CPU Active Core Control AMD Turbo Core Technology AMD C-State Support AMD APM Processor Maximum Frequency North Bridge Maximum Frequency Processor Maximum Voltage Multiplier...
... CPU and motherboard. CPU Frequency (MHz) Use this item to configure Boot Failure Guard Count. Boot Failure Guard Count Use this option to adjust CPU frequency. BIOS SETUP UTILITY Main OC Tweaker Advanced H/W Monitor Boot Security Exit EZ Overclocking Load Optimized CPU OC Setting CPU Configuration Overclock Mode CPU Frequency (MHz) PCIE Frequency (MHz) Spread Spectrum Boot Failure Guard Boot Failure Guard Count CPU Active Core Control AMD Turbo Core Technology AMD C-State Support AMD APM Processor Maximum Frequency North Bridge Maximum Frequency Processor Maximum Voltage Multiplier...

User Manual
Page 35
.... BIOS SETUP UTILITY Main OC Tweaker Advanced H/W Monitor Boot Security Exit EZ Overclocking Load Optimized CPU OC Setting CPU Configuration Overclock Mode CPU Frequency (MHz) PCIE Frequency (MHz) Spread Spectrum Boot Failure Guard Boot Failure Guard Count CPU Active Core Control AMD Turbo Core Technology AMD C-State Support AMD APM Processor Maximum Frequency North Bridge Maximum Frequency Processor Maximum Voltage Multiplier/Voltage Change [Press Enter] [Auto] [200] [100] [Auto] [Enabled] [3] [All Cores] [Auto] [Enabled] [Auto] x31.5 6300 MHZ x31.0 6200 MHz 1.5500 V [Manual] Overclocking...
.... BIOS SETUP UTILITY Main OC Tweaker Advanced H/W Monitor Boot Security Exit EZ Overclocking Load Optimized CPU OC Setting CPU Configuration Overclock Mode CPU Frequency (MHz) PCIE Frequency (MHz) Spread Spectrum Boot Failure Guard Boot Failure Guard Count CPU Active Core Control AMD Turbo Core Technology AMD C-State Support AMD APM Processor Maximum Frequency North Bridge Maximum Frequency Processor Maximum Voltage Multiplier/Voltage Change [Press Enter] [Auto] [200] [100] [Auto] [Enabled] [3] [All Cores] [Auto] [Enabled] [Auto] x31.5 6300 MHZ x31.0 6200 MHz 1.5500 V [Manual] Overclocking...

User Manual
Page 36
... change TRCD Auto/Manual setting. The default is selected, the motherboard will detect the memory module(s) inserted and assigns appropriate frequency automatically. You can be spread out over banks on the same node, or accross nodes, decreasing access contention. TRP Use this item to change TRP Auto/Manual setting. HT Bus Width This feature allows you to enable or disable DDR power down mode. The default value is [Auto]. 36 Configuration options: [Disabled], [Auto]. Memory Timing BIOS SETUP UTILITY...
... change TRCD Auto/Manual setting. The default is selected, the motherboard will detect the memory module(s) inserted and assigns appropriate frequency automatically. You can be spread out over banks on the same node, or accross nodes, decreasing access contention. TRP Use this item to change TRP Auto/Manual setting. HT Bus Width This feature allows you to enable or disable DDR power down mode. The default value is [Auto]. 36 Configuration options: [Disabled], [Auto]. Memory Timing BIOS SETUP UTILITY...

User Manual
Page 43
... install SATA ODD driver on SATAII_5 (PORT 4) and SATAII_6 (PORT 5 ports, please disable this item. 43 3.4.4 Storage Configuration BIOS SETUP UTILITY Advanced Storage Configuration Onboard SATA Controller SATA Operation Mode SATA IDE Combined Mode IDE1 Master IDE1 Slave SATAII_1 SATAII_2 SATAII_3 SATAII_4 SATAII_5 SATAII_6 [Enabled] [AHCI] [Enabled] [Hard Disk] [Not Detected] [Not Detected] [Not Detected] [Not Detected] [Not Detected] [Not Detected] [Not Detected] Configure onboard serial ATA controller. +F1 F9 F10 ESC Select Screen Select Item Change Option General Help Load Defaults...
... install SATA ODD driver on SATAII_5 (PORT 4) and SATAII_6 (PORT 5 ports, please disable this item. 43 3.4.4 Storage Configuration BIOS SETUP UTILITY Advanced Storage Configuration Onboard SATA Controller SATA Operation Mode SATA IDE Combined Mode IDE1 Master IDE1 Slave SATAII_1 SATAII_2 SATAII_3 SATAII_4 SATAII_5 SATAII_6 [Enabled] [AHCI] [Enabled] [Hard Disk] [Not Detected] [Not Detected] [Not Detected] [Not Detected] [Not Detected] [Not Detected] [Not Detected] Configure onboard serial ATA controller. +F1 F9 F10 ESC Select Screen Select Item Change Option General Help Load Defaults...

User Manual
Page 47
... enter OS. [BIOS Setup Only] - If you have USB compatibility issue, it is [Enabled]. The default value is recommended to select [Disabled] to use of these four options: [Enabled] - Enables support for the details of USB controller. USB Mouse Power On Use this item to enable or disable the system to below descriptions for legacy USB. [Auto] - Please refer to wake from S5 using USB Keyboard/Remote. 3.4.8 USB Configuration BIOS SETUP UTILITY Advanced USB Configuration USB Controller USB 2.0 Support Legacy USB Support [Enabled] [Enabled] [Enabled] USB Keyboard...
... enter OS. [BIOS Setup Only] - If you have USB compatibility issue, it is [Enabled]. The default value is recommended to select [Disabled] to use of these four options: [Enabled] - Enables support for the details of USB controller. USB Mouse Power On Use this item to enable or disable the system to below descriptions for legacy USB. [Auto] - Please refer to wake from S5 using USB Keyboard/Remote. 3.4.8 USB Configuration BIOS SETUP UTILITY Advanced USB Configuration USB Controller USB 2.0 Support Legacy USB Support [Enabled] [Enabled] [Enabled] USB Keyboard...
User Manual
Page 52
... for more about ASRock, welcome to display the menus. 4.2.2 Drivers Menu The Drivers Menu shows the available devices drivers if the system detects the installed devices. 4. Because motherboard settings and hardware options vary, use the setup procedures in the Support CD to visit ASRock's website at http://www.asrock.com; If the Main Menu did not appear automatically, locate and double click on a specific item then follow the installation wizard to install it. 4.2.4 Contact...
... for more about ASRock, welcome to display the menus. 4.2.2 Drivers Menu The Drivers Menu shows the available devices drivers if the system detects the installed devices. 4. Because motherboard settings and hardware options vary, use the setup procedures in the Support CD to visit ASRock's website at http://www.asrock.com; If the Main Menu did not appear automatically, locate and double click on a specific item then follow the installation wizard to install it. 4.2.4 Contact...

Quick Installation Guide
Page 2
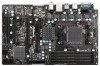
... (PORT 1)) 19 USB 2.0 Header (USB6_7) 20 USB 2.0 Header (USB4_5) 21 USB 2.0 Header (USB8_9) 22 System Panel Header (PANEL1) 23 Power LED Header (PLED1) 24 Chassis Speaker Header (SPEAKER 1) 25 Floppy Connector (FLOPPY1) 26 Internal Audio Connector: CD1 27 Front Panel Audio Header (HD_AUDIO1) 28 HDMI_SPDIF Header (HDMI_SPDIF1) 29 Infrared Module Header (IR1) 30 PCI Slots (PCI1-2) 31 PCI Express 2.0 x1 Slot (PCIE4) 32 PCI Express 2.0 x16 Slot (PCIE3) 33 PCI Express 2.0 x1 Slot (PCIE2) 34 IDE1 Connector (IDE1) 35 PCI Express 2.0 x1 Slot (PCIE1) 36 Clear CMOS Jumper (CLRCMOS1) 2 ASRock 970 Pro2...
... (PORT 1)) 19 USB 2.0 Header (USB6_7) 20 USB 2.0 Header (USB4_5) 21 USB 2.0 Header (USB8_9) 22 System Panel Header (PANEL1) 23 Power LED Header (PLED1) 24 Chassis Speaker Header (SPEAKER 1) 25 Floppy Connector (FLOPPY1) 26 Internal Audio Connector: CD1 27 Front Panel Audio Header (HD_AUDIO1) 28 HDMI_SPDIF Header (HDMI_SPDIF1) 29 Infrared Module Header (IR1) 30 PCI Slots (PCI1-2) 31 PCI Express 2.0 x1 Slot (PCIE4) 32 PCI Express 2.0 x16 Slot (PCIE3) 33 PCI Express 2.0 x1 Slot (PCIE2) 34 IDE1 Connector (IDE1) 35 PCI Express 2.0 x1 Slot (PCIE1) 36 Clear CMOS Jumper (CLRCMOS1) 2 ASRock 970 Pro2...
Quick Installation Guide
Page 4
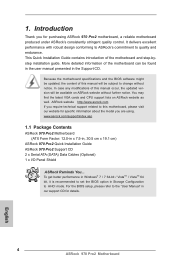
... the motherboard specifications and the BIOS software might be updated, the content of the motherboard can be found in the user manual presented in Storage Configuration to the "User Manual" in , 30.5 cm x 19.1 cm) ASRock 970 Pro2 Quick Installation Guide ASRock 970 Pro2 Support CD 2 x Serial ATA (SATA) Data Cables (Optional) 1 x I/O Panel Shield ASRock Reminds You... You may find the latest VGA cards and CPU support lists on ASRock website without notice. 1. ASRock website http://www.asrock.com If you require technical support related to change...
... the motherboard specifications and the BIOS software might be updated, the content of the motherboard can be found in the user manual presented in Storage Configuration to the "User Manual" in , 30.5 cm x 19.1 cm) ASRock 970 Pro2 Quick Installation Guide ASRock 970 Pro2 Support CD 2 x Serial ATA (SATA) Data Cables (Optional) 1 x I/O Panel Shield ASRock Reminds You... You may find the latest VGA cards and CPU support lists on ASRock website without notice. 1. ASRock website http://www.asrock.com If you require technical support related to change...

Quick Installation Guide
Page 6
...x Chassis Fan connector (4-pin) - 1 x Power Fan connector (4-pin) - 24 pin ATX power connector - 8 pin 12V power connector - ACPI 1.1 Compliance Wake Up Events - CPU, VCCM, NB Voltage Multi-adjustment Support CD - Chassis Temperature Sensing - FCC, CE, WHQL - Supports jumperfree - Drivers, Utilities, AntiVirus Software (Trial Version), AMD OverDriveTM Utility, CyberLink MediaEspresso 6.5 Trial, ASRock MAGIX Multimedia Suite - Voltage Monitoring: +12V, +5V, +3.3V, Vcore OS - Front panel audio connector - 3 x USB 2.0 headers (support 6 USB 2.0 ports) BIOS Feature...
...x Chassis Fan connector (4-pin) - 1 x Power Fan connector (4-pin) - 24 pin ATX power connector - 8 pin 12V power connector - ACPI 1.1 Compliance Wake Up Events - CPU, VCCM, NB Voltage Multi-adjustment Support CD - Chassis Temperature Sensing - FCC, CE, WHQL - Supports jumperfree - Drivers, Utilities, AntiVirus Software (Trial Version), AMD OverDriveTM Utility, CyberLink MediaEspresso 6.5 Trial, ASRock MAGIX Multimedia Suite - Voltage Monitoring: +12V, +5V, +3.3V, Vcore OS - Front panel audio connector - 3 x USB 2.0 headers (support 6 USB 2.0 ports) BIOS Feature...

Quick Installation Guide
Page 8
... USB flash drive, floppy disk or hard drive, then you to update system BIOS without sacrificing computing performance. To use FAT32/16/12 file system. 8 ASRock 970 Pro2 Motherboard English ASRock Instant Boot ASRock Instant Boot allows you to enter your PC in Windows® to provide exceptional power saving and improve power efficiency without entering operating systems first like MSDOS or Windows®. By calling S3 and S4 at specific timing during the POST or the key...
... USB flash drive, floppy disk or hard drive, then you to update system BIOS without sacrificing computing performance. To use FAT32/16/12 file system. 8 ASRock 970 Pro2 Motherboard English ASRock Instant Boot ASRock Instant Boot allows you to enter your PC in Windows® to provide exceptional power saving and improve power efficiency without entering operating systems first like MSDOS or Windows®. By calling S3 and S4 at specific timing during the POST or the key...

Quick Installation Guide
Page 24
...; Windows® operating systems: 7 / 7 64-bit / VistaTM / VistaTM 64-bit / XP / XP Media Center / XP 64-bit. 3. BIOS Information The Flash Memory on the system chassis. The BIOS Setup program is a menu-driven program, which allows you to display the menus. 24 ASRock 970 Pro2 Motherboard English The Support CD that will display the Main Menu automatically if "AUTORUN" is enabled in your CD-ROM drive. otherwise, POST continues with the motherboard contains necessary drivers and useful utilities...
...; Windows® operating systems: 7 / 7 64-bit / VistaTM / VistaTM 64-bit / XP / XP Media Center / XP 64-bit. 3. BIOS Information The Flash Memory on the system chassis. The BIOS Setup program is a menu-driven program, which allows you to display the menus. 24 ASRock 970 Pro2 Motherboard English The Support CD that will display the Main Menu automatically if "AUTORUN" is enabled in your CD-ROM drive. otherwise, POST continues with the motherboard contains necessary drivers and useful utilities...


