
Operation Guide
Page 3
...unplug appliance from touching hot parts. 5. Keep all instructions before cleaning and servicing and when not in water or other replacement lamps, outdoor operation or different voltages has not been tested and could result in death or serious injury. WARNING - Cords ...9. Never look directly into the projector lens when the lamp is on . The metal halide lamp produces a strong light which , if not avoided, could damage your 3M MP8640 Multimedia Projector. © 3M 1997 3M™ Multimedia Projector MP8640 3 The 3M™ Multimedia Projector 8640 was designed, built and ...
...unplug appliance from touching hot parts. 5. Keep all instructions before cleaning and servicing and when not in water or other replacement lamps, outdoor operation or different voltages has not been tested and could result in death or serious injury. WARNING - Cords ...9. Never look directly into the projector lens when the lamp is on . The metal halide lamp produces a strong light which , if not avoided, could damage your 3M MP8640 Multimedia Projector. © 3M 1997 3M™ Multimedia Projector MP8640 3 The 3M™ Multimedia Projector 8640 was designed, built and ...
Operation Guide
Page 24
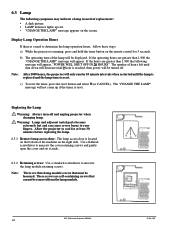
... that must be removed from the lamp module. 3M™ Multimedia Projector MP8640 24 © 3M 1997 If the hours are three lamp module screws that cannot be loosened. Allow the projector to cool for at least 30 minutes before replacing the lamp. 6.3.1 Remove lamp access door: The lamp access door is located on the screen. 6.3 Lamp The following message will appear...
... that must be removed from the lamp module. 3M™ Multimedia Projector MP8640 24 © 3M 1997 If the hours are three lamp module screws that cannot be loosened. Allow the projector to cool for at least 30 minutes before replacing the lamp. 6.3.1 Remove lamp access door: The lamp access door is located on the screen. 6.3 Lamp The following message will appear...
Operation Guide
Page 25
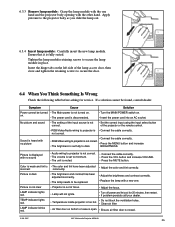
...Replace the lamp with the other hand. Color is weak and tint is out of the lamp access door, then close and tighten the retaining screws to the projector body as you slide the lamp out. 6.3.4 Insert lamp module: Carefully insert the new lamp module. 6.3.3 Remove lamp module: Grasp the lamp...one. Symptom Cause Solution Power cannot be turned • The Main power is closed. © 3M 1997 3M™ Multimedia Projector MP8640 25 Tighten the lamp module retaining screws to projector is not correct. • The volume is disconnected. • Turn the MAIN POWER switch on...
...Replace the lamp with the other hand. Color is weak and tint is out of the lamp access door, then close and tighten the retaining screws to the projector body as you slide the lamp out. 6.3.4 Insert lamp module: Carefully insert the new lamp module. 6.3.3 Remove lamp module: Grasp the lamp...one. Symptom Cause Solution Power cannot be turned • The Main power is closed. © 3M 1997 3M™ Multimedia Projector MP8640 25 Tighten the lamp module retaining screws to projector is not correct. • The volume is disconnected. • Turn the MAIN POWER switch on...


