Installation Guide
Page 3
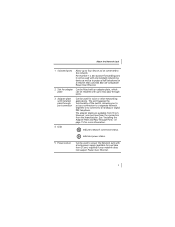
... Power Over Ethernet 10 Using a Multi-port Ethernet Power Supply 10 Using a Single-port Ethernet Power Supply 12 Using the 3Com Local Power Supply 12 Setting the Power Over Ethernet Dip Switches 13 Installing the Adapter Plate and Pass-Through Ports 15 Planning the Installation 17 Setting up the Network Cabling at Your Site 19 Connecting the Network Jack to the Network 19 Mounting the Network Jack 22 Connecting the Local Power Supply (Optional) 23 Connecting Devices to the Network Jack 23 Checking the LEDs 24 Troubleshooting the Network Jack 24 Specifications...
... Power Over Ethernet 10 Using a Multi-port Ethernet Power Supply 10 Using a Single-port Ethernet Power Supply 12 Using the 3Com Local Power Supply 12 Setting the Power Over Ethernet Dip Switches 13 Installing the Adapter Plate and Pass-Through Ports 15 Planning the Installation 17 Setting up the Network Cabling at Your Site 19 Connecting the Network Jack to the Network 19 Mounting the Network Jack 22 Connecting the Local Power Supply (Optional) 23 Connecting Devices to the Network Jack 23 Checking the LEDs 24 Troubleshooting the Network Jack 24 Specifications...
Installation Guide
Page 5
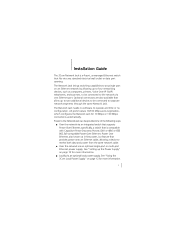
... data port opening. See "Setting up to four networking devices, such as in-line power, is compatible with Capacitive Power Discovery Process (24V or 48V) or IEEE 802.3af-compatible Power Over Ethernet. Power to the Network Jack can be connected to the network via one of the following ways: I Over the network via an optional single-port or multi-port Ethernet power supply. See "Using the 3Com Local Power Supply" on an Ethernet network...
... data port opening. See "Setting up to four networking devices, such as in-line power, is compatible with Capacitive Power Discovery Process (24V or 48V) or IEEE 802.3af-compatible Power Over Ethernet. Power to the Network Jack can be connected to the network via one of the following ways: I Over the network via an optional single-port or multi-port Ethernet power supply. See "Using the 3Com Local Power Supply" on an Ethernet network...
Installation Guide
Page 7
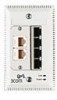
... switch, allowing you must purchase the connectors from 3Com. Port number 1 is also a power-forwarding port; Indicates power status. 5 Power socket Can be connected to an analog or digital PBX telephone. See "Installing the Adapter Plate and Pass-Through Ports" on a network that uses IEEE 802.3af-compatible Power Over Ethernet. 2 Slot for more information. 4 LEDs Indicates network connection status. The adapter plates are available from the manufacturer. However, you to set up to power...
... switch, allowing you must purchase the connectors from 3Com. Port number 1 is also a power-forwarding port; Indicates power status. 5 Power socket Can be connected to an analog or digital PBX telephone. See "Installing the Adapter Plate and Pass-Through Ports" on a network that uses IEEE 802.3af-compatible Power Over Ethernet. 2 Slot for more information. 4 LEDs Indicates network connection status. The adapter plates are available from the manufacturer. However, you to set up to power...
Installation Guide
Page 9
... 802.3af) the Network Jack uses. Setting the dip switches is configured as a standard MDI-X port. 2 Slot for instructions. 5 port Make sure the port on page 13 for adapter Can be fitted with an adapter plate, which the Network Jack is connected is required only if your network supports Power Over Ethernet, or if you are using a multi-port Ethernet power supply. See "Setting the Power Over Ethernet Dip Switches" on the network switch to which can...
... 802.3af) the Network Jack uses. Setting the dip switches is configured as a standard MDI-X port. 2 Slot for instructions. 5 port Make sure the port on page 13 for adapter Can be fitted with an adapter plate, which the Network Jack is connected is required only if your network supports Power Over Ethernet, or if you are using a multi-port Ethernet power supply. See "Setting the Power Over Ethernet Dip Switches" on the network switch to which can...
Installation Guide
Page 10
... adapter plates must be purchased from the network to the Network Jack. 6 I RJ-45 coupler cable (1 per package). Installation Guide Before You Begin Before you begin the installation, make sure you begin installation, register your network cable is available in single- and 20-packs. The Network Jack is terminated with a female RJ-45 connector). I Installation guide (1 per Network Jack) for connecting the Ethernet cable from the manufacturer. For a list...
... adapter plates must be purchased from the network to the Network Jack. 6 I RJ-45 coupler cable (1 per package). Installation Guide Before You Begin Before you begin the installation, make sure you begin installation, register your network cable is available in single- and 20-packs. The Network Jack is terminated with a female RJ-45 connector). I Installation guide (1 per Network Jack) for connecting the Ethernet cable from the manufacturer. For a list...
Installation Guide
Page 11
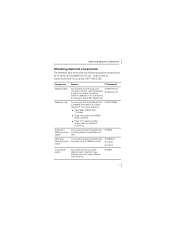
... The Network Jack works with the following optional components, all of your network does not support Power Over Ethernet. 3CNJPSL 7 Component Purpose 3C Number(s) Adapter plates For installing pass-through port 3CNJAP-PA-20 connectors of which are available from 3Com. Order online at www.3com.com or by calling 1-877-949-3266. Multi-port Ethernet power supply For providing Power Over Ethernet to power up to locally power a single Network supply Jack...
... The Network Jack works with the following optional components, all of your network does not support Power Over Ethernet. 3CNJPSL 7 Component Purpose 3C Number(s) Adapter plates For installing pass-through port 3CNJAP-PA-20 connectors of which are available from 3Com. Order online at www.3com.com or by calling 1-877-949-3266. Multi-port Ethernet power supply For providing Power Over Ethernet to power up to locally power a single Network supply Jack...
Installation Guide
Page 12
... verifying the Network Jack installation; optional). 4 Plan the installation (page 17). 5 Set up the power supply (page 10). 2 Set the Power Over Ethernet dip switches (page 13; Installation Guide Component Purpose 3C Number(s) VoIP telephone power cable For powering a VoIP telephone on a Check the 3Com network that uses Capacitive Power web site Discovery Process-compatible Power Over Ethernet. optional, required only if your site (page 19). 6 Connect the Network Jack to the network (page 19). 7 Mount the Network Jack...
... verifying the Network Jack installation; optional). 4 Plan the installation (page 17). 5 Set up the power supply (page 10). 2 Set the Power Over Ethernet dip switches (page 13; Installation Guide Component Purpose 3C Number(s) VoIP telephone power cable For powering a VoIP telephone on a Check the 3Com network that uses Capacitive Power web site Discovery Process-compatible Power Over Ethernet. optional, required only if your site (page 19). 6 Connect the Network Jack to the network (page 19). 7 Mount the Network Jack...
Installation Guide
Page 14
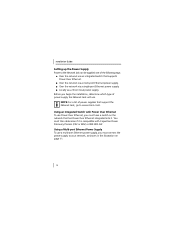
....3af. I Locally via a 3Com local power supply. You must connect the power supply to www.3com.com/. I Over the network via a multi-port Ethernet power supply. I Over the network via a single-port Ethernet power supply. NOTE: For a list of power supplies that supports Power Over Ethernet. Using a Multi-port Ethernet Power Supply To use . Installation Guide Setting up the Power Supply Power to the Network Jack can be supplied one of the following ways: I Over the network via an integrated switch that support the Network Jack, go to your network, as shown in...
....3af. I Locally via a 3Com local power supply. You must connect the power supply to www.3com.com/. I Over the network via a multi-port Ethernet power supply. I Over the network via a single-port Ethernet power supply. NOTE: For a list of power supplies that supports Power Over Ethernet. Using a Multi-port Ethernet Power Supply To use . Installation Guide Setting up the Power Supply Power to the Network Jack can be supplied one of the following ways: I Over the network via an integrated switch that support the Network Jack, go to your network, as shown in...

Installation Guide
Page 15
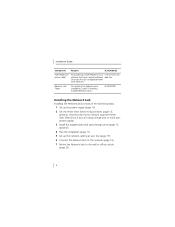
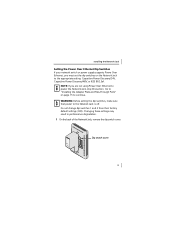
Network switch Wiring closet To network hub/switch To Network Jack Multi-port Ethernet 1 2 power supply 3 4 11 See "Obtaining Optional Components" on page 7 for ordering information. Installing the Network Jack The multi-port Ethernet power supply from 3Com connects to an existing Ethernet or Fast Ethernet infrastructure with standard Category 5 or Category 5e UTP cabling, and powers up to 24 Network Jacks. For complete installation instructions, see the multi-port Ethernet power supply documentation.
Network switch Wiring closet To network hub/switch To Network Jack Multi-port Ethernet 1 2 power supply 3 4 11 See "Obtaining Optional Components" on page 7 for ordering information. Installing the Network Jack The multi-port Ethernet power supply from 3Com connects to an existing Ethernet or Fast Ethernet infrastructure with standard Category 5 or Category 5e UTP cabling, and powers up to 24 Network Jacks. For complete installation instructions, see the multi-port Ethernet power supply documentation.
Installation Guide
Page 17
.... 1 On the back of the Network Jack, remove the dip switch cover. Go to "Installing the Adapter Plate and Pass-Through Ports" on the Network Jack to the Network Jack is off. Do not change dip switches 1 and 2 from their factory default settings (OFF). WARNING: Before setting the dip switches, make sure that power to the appropriate setting: Capacitive Power Discovery/24V, Capacitive Power Discovery/48V, or IEEE 802...
.... 1 On the back of the Network Jack, remove the dip switch cover. Go to "Installing the Adapter Plate and Pass-Through Ports" on the Network Jack to the Network Jack is off. Do not change dip switches 1 and 2 from their factory default settings (OFF). WARNING: Before setting the dip switches, make sure that power to the appropriate setting: Capacitive Power Discovery/24V, Capacitive Power Discovery/48V, or IEEE 802...

Installation Guide
Page 18
The default setting is IEEE 802.3af-compatible Power Over Ethernet. Power Over Ethernet Supported Dip Switch Numbers Setting Capacitive Power Discovery/24V Ethernet 4 (ON) Power Source 3 (ON) 4 3 2 ON 1 Capacitive Power Discovery/48V Ethernet 4 (ON) Power Source 3 (OFF) 4 3 2 ON 1 IEEE 802.3af-compatible Power Over 4 (OFF) Ethernet 3 (OFF) 4 3 2 ON 1 3 Replace the dip switch cover. 14 Installation Guide 2 Set the appropriate dip switches (labeled 3 and 4) for the type of Power Over Ethernet supported.
The default setting is IEEE 802.3af-compatible Power Over Ethernet. Power Over Ethernet Supported Dip Switch Numbers Setting Capacitive Power Discovery/24V Ethernet 4 (ON) Power Source 3 (ON) 4 3 2 ON 1 Capacitive Power Discovery/48V Ethernet 4 (ON) Power Source 3 (OFF) 4 3 2 ON 1 IEEE 802.3af-compatible Power Over 4 (OFF) Ethernet 3 (OFF) 4 3 2 ON 1 3 Replace the dip switch cover. 14 Installation Guide 2 Set the appropriate dip switches (labeled 3 and 4) for the type of Power Over Ethernet supported.
Installation Guide
Page 19
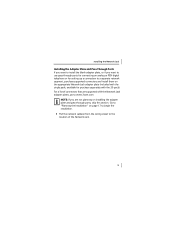
... the Installation" on page 17 to begin the installation. 1 Pull the network cable(s) from the wiring closet to the location of connectors that are not planning on installing the adapter plate and pass-through ports for connecting an analog or PBX digital telephone or for purchase separately with the Network Jack adapter plates, go to www.3com.com. For a list of the Network Jack...
... the Installation" on page 17 to begin the installation. 1 Pull the network cable(s) from the wiring closet to the location of connectors that are not planning on installing the adapter plate and pass-through ports for connecting an analog or PBX digital telephone or for purchase separately with the Network Jack adapter plates, go to www.3com.com. For a list of the Network Jack...

Installation Guide
Page 20
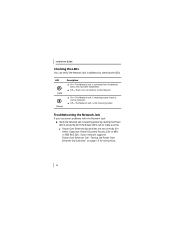
... a connector's manufacturer. Each adapter plate is working. 4 Snap the connector(s) into the appropriate adapter plate. Be sure to the connector manufacturer's instructions for terminating the cable. Wall To wiring closet 3 Terminate the end of the network cable(s) with the name of your connector(s). 5 Mount the adapter plate to the Network Jack using the two adapter plate screws provided. 16 Installation Guide 2 Thread the network cable(s) through the empty...
... a connector's manufacturer. Each adapter plate is working. 4 Snap the connector(s) into the appropriate adapter plate. Be sure to the connector manufacturer's instructions for terminating the cable. Wall To wiring closet 3 Terminate the end of the network cable(s) with the name of your connector(s). 5 Mount the adapter plate to the Network Jack using the two adapter plate screws provided. 16 Installation Guide 2 Thread the network cable(s) through the empty...

Installation Guide
Page 23
... it is terminated (as a standard MDI-X port. 19 Be sure to the Network The method for terminating the cable. Be sure to adhere to local safety and regulatory codes during the cable installation. 1 Connect one end of the cable at the location where the Network Jack is working. Installing the Network Jack Setting up the Network Cabling at Your Site"). CAUTION: Make sure the port on the network switch to...
... it is terminated (as a standard MDI-X port. 19 Be sure to the Network The method for terminating the cable. Be sure to adhere to local safety and regulatory codes during the cable installation. 1 Connect one end of the cable at the location where the Network Jack is working. Installing the Network Jack Setting up the Network Cabling at Your Site"). CAUTION: Make sure the port on the network switch to...

Installation Guide
Page 27
... 3Com. Installing the Network Jack Connecting the Local Power Supply (Optional) If your networking devices (such as computers, printers, etc.) to any standard electrical outlet. Failure to do so may result in a hazardous situation. Connecting Devices to the Network Jack After the Network Jack is installed and mounted, connect your network does not support Power Over Ethernet, or if you are not using a single-port or multi-port Ethernet power supply, you installed the adapter...
... 3Com. Installing the Network Jack Connecting the Local Power Supply (Optional) If your networking devices (such as computers, printers, etc.) to any standard electrical outlet. Failure to do so may result in a hazardous situation. Connecting Devices to the Network Jack After the Network Jack is installed and mounted, connect your network does not support Power Over Ethernet, or if you are not using a single-port or multi-port Ethernet power supply, you installed the adapter...
Installation Guide
Page 28
... power. If the Power LED is not lit, make sure the: I Off-The Network Jack is connected to the network. I Power Over Ethernet dip switches are set correctly (for instructions. 24 Troubleshooting the Network Jack If you encounter problems with the Network Jack: I On-The Network Jack is receiving power by checking the LEDs. Installation Guide Checking the LEDs You can verify the Network Jack installation by viewing the Power LED (it should be lit). See "Setting the Power Over Ethernet...
... power. If the Power LED is not lit, make sure the: I Off-The Network Jack is connected to the network. I Power Over Ethernet dip switches are set correctly (for instructions. 24 Troubleshooting the Network Jack If you encounter problems with the Network Jack: I On-The Network Jack is receiving power by checking the LEDs. Installation Guide Checking the LEDs You can verify the Network Jack installation by viewing the Power LED (it should be lit). See "Setting the Power Over Ethernet...

Installation Guide
Page 29
... working electrical outlet, if your network. I Adheres to the connector manufacturer's instructions for your network does not support Power Over Ethernet. I Local power supply is plugged into the Network Jack and into a working . I Has a valid connection to the network properly by viewing the Link LED (it should be lit). I Is terminated properly. Troubleshooting the Network Jack If using Power Over Ethernet, make sure the network cable: I Make sure the port on the network that has Power Over Ethernet...
... working electrical outlet, if your network. I Adheres to the connector manufacturer's instructions for your network does not support Power Over Ethernet. I Local power supply is plugged into the Network Jack and into a working . I Has a valid connection to the network properly by viewing the Link LED (it should be lit). I Is terminated properly. Troubleshooting the Network Jack If using Power Over Ethernet, make sure the network cable: I Make sure the port on the network that has Power Over Ethernet...

Installation Guide
Page 32
... Free Installation Support 3Com provides free installation and troubleshooting telephone support for this appendix is correct at time of purchase. Hours of services. See "Support from the date of publication. Port number 1 can be used with VoIP standard. This appendix describes these services. For the most recent information, 3Com recommends that do not support Power Over Ethernet Compatible with any standard networking device as well as to change. Installation Guide Features Power Over Ethernet Local power supply...
... Free Installation Support 3Com provides free installation and troubleshooting telephone support for this appendix is correct at time of purchase. Hours of services. See "Support from the date of publication. Port number 1 can be used with VoIP standard. This appendix describes these services. For the most recent information, 3Com recommends that do not support Power Over Ethernet Compatible with any standard networking device as well as to change. Installation Guide Features Power Over Ethernet Local power supply...
Installation Guide
Page 33
... systems: I World Wide Web site I 3Com Knowledgebase Web Services I 3Com FTP site World Wide Web Site To access the latest networking information on most 3Com products. 29 Located on the World Wide Web at http:// knowledgebase.3com.com, this URL into your Internet browser: http://www.3com.com/ This service provides access to online support information, such as technical documentation and a software library, as well as support options that range...
... systems: I World Wide Web site I 3Com Knowledgebase Web Services I 3Com FTP site World Wide Web Site To access the latest networking information on most 3Com products. 29 Located on the World Wide Web at http:// knowledgebase.3com.com, this URL into your Internet browser: http://www.3com.com/ This service provides access to online support information, such as technical documentation and a software library, as well as support options that range...

Installation Guide
Page 34
... into your FTP client: I Host name: ftp.3com.com I User name: anonymous I A list of services, including network planning, installation, hardware maintenance, application training, and support services. Installation Guide 3Com FTP Site Download drivers, patches, software, and MIBs across the Internet from Your Network Supplier If you are qualified to provide a variety of system hardware and software, including revision levels I Diagnostic error messages I Details about recent configuration...
... into your FTP client: I Host name: ftp.3com.com I User name: anonymous I A list of services, including network planning, installation, hardware maintenance, application training, and support services. Installation Guide 3Com FTP Site Download drivers, patches, software, and MIBs across the Internet from Your Network Supplier If you are qualified to provide a variety of system hardware and software, including revision levels I Diagnostic error messages I Details about recent configuration...


