eMachines T2824 Support Question
eMachines T2824 Support Question
Find answers below for this question about eMachines T2824 - 256 MB RAM.Need a eMachines T2824 manual? We have 2 online manuals for this item!
Question posted by bushmanishere on May 14th, 2012
Internet Disconnections
Emachine 256MB Model T2824 Internet connects but shuts down after awhile and runs diagnostic program sometime its fast other times it takes forever to complete Doesn't seem to matter what you are doing on the internet connection is fine then shuts down and goes into the diagnostic mode. Not sure what is happening because it doesnt happen when I use my laptop just on the E machine PC. Internet Service with Belll and problem isnt on there end as my laptop stays connected.
Current Answers
Related eMachines T2824 Manual Pages
User Guide - Page 1

... openings. Please read all of AC power available, consult your dealer or local power company. Only connect this computer on an unstable cart, stand or table. This is provided.
5 Never push objects of... any kind on the product.
6 This computer should not be connected to the risk of the instructions and warnings marked on this product where people will only fit ...
User Guide - Page 5
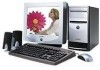
... Depending on the model, your computer's components may vary and look slightly different than those pictured. eMachines, stylized "e" and figure logo are trademarks of their respective owners. ©2003 eMachines, Inc. All ... trademarks of this user's guide is subject to change without notice.
eMachines, Inc. in this material. v shall not be liable for incidental or consequential damages resulting...
User Guide - Page 7
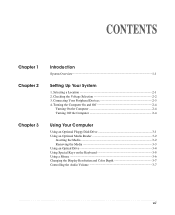
Selecting a Location 2-1 2. Connecting Your Peripheral Devices 2-3 4. Checking the Voltage Selection 2-2 3. CONTENTS
Chapter 1 Chapter 2
Chapter 3
Introduction
System Overview...1-1
Setting Up Your System
1. Turning the Computer On and Off 2-4
Turning ...
User Guide - Page 8

... Device in the Peripheral Bay 4-9
Chapter 5
Using the Restore CDs
Restoring Your Original Software 5-1
Chapter 6
Using the PowerDVD
About DVD ...6-1 Playing the PowerDVD 6-1
How to Run the PowerDVD 6-1 Buttons of the PowerDVD 6-2
Appendix A.
Approval Statements
Battery Warning Instruction B-1 Fuse Warning Instruction B-1 Laser Product ...B-2
viii
User Guide - Page 11

... a safe and convenient location that provides the following:
A large, sturdy desk or table strong enough to support the weight of heat. To prevent static charges, connect all of space around the computer so air can erase data on /off your system too close to any electrical device, such
as a telephone, which...
User Guide - Page 13
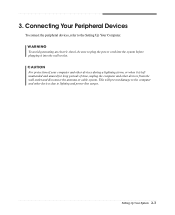
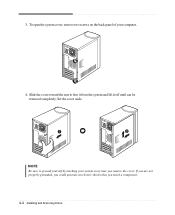
... Your System 2-3 Connecting Your Peripheral Devices
To connect the peripheral devices, refer to plug the power cord into the system before plugging it is left unattended and unused for long periods of time, unplug the computer and other devices due to the computer and other devices from the wall outlet and disconnect the antenna...
User Guide - Page 14

... computer is displayed, click Turn Off to turn on the front panel of your information and close all application programs you use. 2. Before turning off the monitor and any other peripheral devices.
2-4 Setting Up Your System
Press... to turn off . Turn on the computer or to shut down the system. 4. Turning Off the Computer
To turn on the monitor, and any other peripheral devices...
User Guide - Page 16
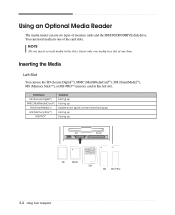
Insert only one media in one time.
NOTE Do not insert several media in this left slot. Inserting the Media
Left Slot
You can use six types of the card slots. Using ...
User Guide - Page 18
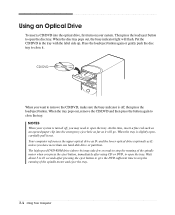
...as it will flash. Wait about 5 to 10 seconds after using CD or DVD, to stop the running of the spindle motor when you have more than one hard disk drive or partition.
The high speed ...button, immediately after pressing the eject button to give the DVD sufficient time to open , carefully pull it . CD/DVD
When you may take few seconds to close it out. When the tray pops out, ...
User Guide - Page 19
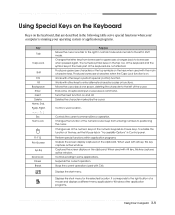
...menu applicable to Windows other keys to uppercase;
Perform special functions within application programs. Outputs the screen display captured on and off. Controls scrolling in Control ... used with other application programs.
Using Your Computer 3-5 Produces lowercase characters when the Caps Lock function is running your operating system or application programs.
Key Tab
Caps Lock...
User Guide - Page 20
... the Control Panel.
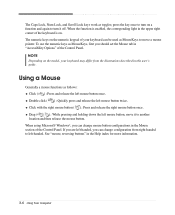
Using a Mouse
Generally a mouse functions as toggles; If you are left mouse button, move a mouse pointer. When the function is on the model, your keyboard can be used as MouseKeys to left-handed.
Drag (
) : While pressing and holding down the left -handed, you can change mouse button configurations...
User Guide - Page 21
... Appearance and Themes, and then click Display.
Click the Start button, point to All Programs, point to Accessories, point to adjust the audio volume level. 3. Using Your Computer ...using the Master Volume window, follow these steps: 1. Or click
the right mouse button on the empty desktop area and click Properties. 2. Click the OK button. When the Master Volume window appears, in the ...
User Guide - Page 23

... and from the back panel. Removing the Cover
You need to remove the cover of all, disconnect the power cable from the electrical outlet and from any telecommunications links, networks, or modems before performing any cables connected to the computer. Installing and Removing Drives 4-1
Turn off the computer. To remove the cover...
User Guide - Page 24
...
NOTE Be sure to free it from the system and lift it off until can be removed completely. If you are not properly grounded, you could generate an electric shock when you remove the cover... open the system cover, remove two screws on the back panel of your system every time you touch a component. 4-2 Installing and Removing Drives 3. Slide the cover toward the rear to ground yourself by touching...
User Guide - Page 27
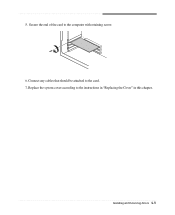
Replace the system cover according to the card. 7. Installing and Removing Drives 4-5
Connect any cables that should be attached to the instructions in "Replacing the Cover" in this chapter. 5. Secure the end of the card to the computer with retaining screw. 6.
User Guide - Page 30

Replace the system cover according to your hard disk drive. (If you removed the hard disk drive cable from the motherboard, replace it with the retaining screw, as shown below.
8. Slide the HDD bracket into the chassis and secure it .)
9. 7. Connect the power and hard disk drive cable to the instructions in "Replacing the Cover" in this chapter. 4-8 Installing and Removing Drives
User Guide - Page 33

... cable marked "SLAVE." If you are to install an optional drive to this 5.25-inch bay, you want to install is an EMI shield that connected to CS (Cable Select). If you can use the spare connector of new device to CS, your optional device to new device. To install an...
User Guide - Page 34
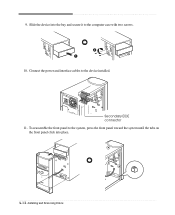
Secondary EIDE connector 11. To reassemble the front panel to the system, press the front panel toward the system until the tabs on the front panel click into the bay and secure it to the device installed. Connect the power and interface cables to the computer case with two screws.
10. Slide the device into place.
4-12 Installing and Removing Drives 9.
User Guide - Page 45

... read the diskette
Solution
Diskette is not properly connected to your computer isn't connected properly.
When the Display Properties window appears, ... depth, use another diskette or check the diskette by running Check Disk. (For detail information, refer to your ... a diskette, slide the small black tab on the empty desktop area and click Properties. 2. Format the diskette. (Refer to...
User Guide - Page 47
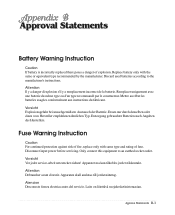
...denselben oder einen vom Hersteller empfohlenen ähnlichen Typ. Approva Statements B-1 Disconnect input power before servicing.
Fuse Warning Instruction
Caution For continued protection against ...only with the same or equivalent type recommended by the manufacturer. Only connect this equipment to the manufacturer's instructions. Vorsicht Explosionsgefahr bei unsachgemä&#...
Similar Questions

What Does The Ram Look Like For Emachine El1300g-02w
(Posted by ITPursailor 9 years ago)

What Is The Ram Capacity Of An Emachine Home Computer Serial Number W3653a, S/n:
S/N: GCJ187 C00 04102
S/N: GCJ187 C00 04102
(Posted by kimsle 11 years ago)


W3622 Wires From Front Disconnected
I accidentally disconnected the two wires that connect to the power switch, and so can't turn comput...
I accidentally disconnected the two wires that connect to the power switch, and so can't turn comput...
(Posted by Tink256 12 years ago)

Emachines T2824
My desktop is too slow to connect my laptop to router. I have the NetgearWNR1000v2 router connected ...
My desktop is too slow to connect my laptop to router. I have the NetgearWNR1000v2 router connected ...
(Posted by mbrownnn 13 years ago)