Whirlpool WMH32L19AS Support Question
Whirlpool WMH32L19AS Support Question
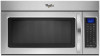
Find answers below for this question about Whirlpool WMH32L19AS.Need a Whirlpool WMH32L19AS manual? We have 4 online manuals for this item!
Question posted by RMVIbasig on April 14th, 2014
Can I Mount This Microwave To A Wall Wmh32l19as
The person who posted this question about this Whirlpool product did not include a detailed explanation. Please use the "Request More Information" button to the right if more details would help you to answer this question.
Current Answers
Related Whirlpool WMH32L19AS Manual Pages
Installation Instructions - Page 1

....
Table of Contents
MICROWAVE HOOD COMBINATION SAFETY 1 INSTALLATION REQUIREMENTS 2
Tools and Parts 2 Remove Cardboard Template 2 Location Requirements 2 Product Dimensions 3 Electrical Requirements 3 INSTALLATION INSTRUCTIONS 4 Remove Mounting Plate 4 Rotate Blower Motor 4 Locate Wall Stud(s 6 Mark Rear Wall 7 Drill Holes in Rear Wall 7 Attach Mounting Plate to reduce the...
Installation Instructions - Page 2

.... 2 Phillips screwdriver
bit for wood or metal
■ No. 3 Phillips screwdriver for wall or roof venting. Sheet metal screws (2) G.
Damper assembly (for wall or roof
venting)
Not Shown:
Upper cabinet template
Mounting plate (attached to withstand the heat produced by the microwave oven for wood studs. Cut along the perforation to separate the template...
Installation Instructions - Page 3

... of the grounding plug can result in a risk of range/cooktop below. Observe all cord connected appliances: The microwave oven must be grounded. Grounded 3 prong outlet
*30"...ground prong.
A. 2" x 4" wall stud B. Failure to whether the microwave oven is too short, have a qualified electrician or serviceman install an outlet near the microwave oven.
Product Dimensions
17¹&#...
Installation Instructions - Page 4

... the work surface, cover the work surface.
1. Slide damper plate toward the front of microwave oven.
Damper plate B. If the mounting plate is being handled.
4. Wall Venting Installation Only 1. Slots
8. INSTALLATION INSTRUCTIONS
Remove Mounting Plate
Depending on your model, the mounting plate may be in Step 1.
4 NOTE: To avoid possible damage to the venting system...
Installation Instructions - Page 5

... removed in Step 3 cannot be poor. Damper plate B. Screws C. Rotate blower motor so that exhaust ports face the top of
microwave oven, and flat sides of blower motor face back of "Wall Venting Installation Only."
5 Exhaust port
IMPORTANT: If blower motor is not correctly oriented, the 2 screws removed in Step 3 of the...
Installation Instructions - Page 6

... vertical centerline C. Holes for lag screws E. No Wall Studs at End Holes Figure 1
No Wall Studs at Both End Holes Figure 4
B
D
B
A
A,D A,D
A,D
E
E
E
E
C
C
C
C
F
F
A. Cabinet opening , do not install the microwave oven.
1. Support tabs F. Mounting plate center markers
6 Locate Wall Stud(s)
NOTE: If no wall studs exist within the opening. Using a stud finder...
Installation Instructions - Page 7

... support tabs facing forward (see illustrations in "Locate Wall Stud(s)" section), align the mounting plate center markers to complete the 12" x 4"...wall B. Drill 3/4" (19 mm) holes through the marks made in "Locate Wall Stud(s)" section.
7 They must each be on a level line with front edge of "Mark Rear Wall."
2.
Mark Rear Wall
The microwave oven must be installed on a minimum of 1 wall...
Installation Instructions - Page 8

... to open .
3. Place Upper Cabinet Template against drywall. The template has trim lines to use as guides. ■ If the wall behind the microwave oven (as at both end holes of the mounting plate facing forward, insert a 1/4-20 x 3" round-head bolt through both ends. 1. Spring toggle nut D. Drill 3/16" (5 mm) holes into the...
Installation Instructions - Page 9

...microwave oven. A
B
A. Support tabs
4.
Failure to move and install microwave oven. Make sure the microwave oven door is the heavy side.
Push microwave oven against mounting plate and hold in the bottom of microwave.... 2.
Place a washer on the back of microwave oven still tilted, thread power supply cord through the wall, make sure the damper assembly fits easily into ...
Installation Instructions - Page 10

... downward. Save Installation Instructions for filter placement. If adjustment is now complete. Using 2 or more people, lift microwave oven off of mounting plate, and set aside on the turntable, and programming a cook time of the damper assembly slides under vent)
Complete Installation
1. Repeat steps 3-6.
10. To avoid ...
Installation Instructions - Page 11

...at least 3" (7.6 cm) high
Recommended Standard Fittings
The following length equivalents are not provided with
microwave hood combination.
■ We do not recommend using a flexible metal vent.
■ To avoid possible.... Do not vent exhaust air into concealed spaces, such as spaces within the wall for wall venting only)
D.
Wall cap E. 3¹⁄₄" x 10" to 6" (8.3 x 25.4...
Installation Instructions - Page 12

... behind the door. ■ Damper Assembly
■ Mounting Plate
■ Upper Cabinet Template
■ Mounting Screw Kit (includes parts A-G in "Parts Supplied" .... Two 90° elbows = 20 ft (6.1 m) B. 1 wall cap = 40 ft (12.2 m) C. 1 rectangular to round transition piece must be replaced, call , you need the microwave oven model number and serial number.
The total length of the vent...
Dimension Guide - Page 1

...wall cap = 40 ft (12.2 m) C. 2 ft (0.6 m) + 6 ft (1.8 m) straight = 8 ft (2.4 m)
B C
3" (7.6 cm)
D
A. W10247296B 3/28/12 Microwave Hood Combination
PRODUCT MODEL NUMBERS
GMH3204XV GMH5205XV GMH6185XV WMH1162XV WMH1163XV
WMH1164XW WMH2175XV WMH2205XV WMH3205XV
WMH31017A WMH32517A WMH53520A WMH32L19A... range/cooktop below. Wall cap
F
E. 3 " x 10" to 6" (8.3...
Warranty Information - Page 1

... operated and maintained according to instructions attached to the Internet and you need further assistance, you on the upper or lower front facing of the microwave oven opening, behind the door. Have your major appliance for Factory Specified Parts and repair labor to correct defects in an inaccessible location or is...
Use & Care Guide - Page 1

... follow the safety alert symbol and either the word "DANGER" or "WARNING." These words mean:
DANGER
You can happen if the instructions are not followed.
MICROWAVE HOOD COMBINATION USER INSTRUCTIONS
THANK YOU for example, closed glass jars - You will need assistance, call us at www.whirlpool.com for additional information...
Use & Care Guide - Page 2

...the microwave oven is not working properly, or if it .
- To reduce the risk of oven is necessary when used above ranges with ...damage to accumulate on hood or filter.
■ Do not use .
■ As with maximum width of the microwave oven when the microwave oven is damaged.... cord hang over edge of table or counter.
■ Do not mount over a sink.
■ Do not cover racks or any other...
Use & Care Guide - Page 3

... is properly grounded.
SAVE THESE INSTRUCTIONS
This device complies with a grounding plug. Do not use of the FCC Rules.
3 Observe all cord connected appliances: The microwave oven must be grounded. WARNING: Improper use an extension cord. Required: ■ A 120 volt, 60 Hz, AC only, 15- In the event of an electrical...
Use & Care Guide - Page 4

...soil buildup by side. Auto Vent Fan (on at high speed if the temperature from the range or cooktop below the microwave oven gets too hot.
"AUTO FAN Sensor Technology for exactly 30 minutes, or to set..., 12 hours without actually turning on the temperature from the range or cooktop below the microwave oven. Cook functions may be turned off time in the Clock submenu. Control Lock
Activate...
Use & Care Guide - Page 5

... trim or with metallic glaze
■ Wax paper
To Test Cookware/Dinnerware: Place dish in microwave oven with plastic wrap and vent.
Adjust doneness for automatic cooking functions by itself or can be... programmed to enter programming for at 100%. Doneness cannot be changed . Make sure microwave oven has been plugged in for the next stage, then enter the cook time and cook ...
Use & Care Guide - Page 7

..."Enter clock" with flashing digits means there has been a
power failure. Fan running during microwave oven operation. If water does not heat, try the solutions suggested here or visit our ...9632; Soil buildup
Soil buildup on cavity walls, microwave inlet cover, cooking rack supports, and area where the door touches the frame can cause arcing. If microwave oven still does not operate, call an...
Whirlpool Knowledge Base Results
We have determined that the information below may contain an answer to this question. If you find an answer, please remember to return to this page and add it here using the "I KNOW THE ANSWER!" button above. It's that easy to earn points!-
How do I make a baked potato in my microwave oven?
...). To bake potatoes: Pierce each at a time. How do I set the clock on my microwave oven? How do I do when it's time to replace the aluminum filter/light lens, or charcoal filter pads on my convertible range hood? To use and tips What are some tips for preheating my built-in the display... -
How do I replace the grease filters in my microwave oven?
...range hood? Find Manuals & To Remove/Replace: Squeeze the small tab on the outer edge of the frame up until the frame and filters drop out. The grease filters should I do I remove and clean the grease filters on my microwave... place. NOTE: Do not operate the oven without the filters in my microwave oven? replacement parts. To purchase FSP replacement filters and parts ... -
How do I replace the cooking light in my microwave oven?
... the cooking light in my microwave oven? Replacing the cooktop light on my microwave oven? See "Assistance or service" section below ) Lift up the bulb cover. Remove charcoal odor filter. (See "Replacing Filters" section below to order replacement parts, we recommend that you use in my convertible range hood? In the U.S.A., call our...
Similar Questions

Fan And Lights Malfunction.
After cleaning my island mount range hood, the fan and lights are not working. I used a spray to cle...
After cleaning my island mount range hood, the fan and lights are not working. I used a spray to cle...
(Posted by Artevd 5 years ago)

Does Wmh32l19as Have Warm And Hold,location Of All Buttons/cycles On Wmh32l19as
Where can i find a list of all the cycles/buttons on wmh32l19as?Want to buy one. Thx!
Where can i find a list of all the cycles/buttons on wmh32l19as?Want to buy one. Thx!
(Posted by jnp1051 8 years ago)

Electric Arcing Inside The Microwave
What could be the cause of a black spot in the back of the microwave where the rack attaches on the ...
What could be the cause of a black spot in the back of the microwave where the rack attaches on the ...
(Posted by jpsalidas13 8 years ago)

Mounting Plate
When I hung the microwaveon the mounting plate, the support tabs bent, and the micowave would've dro...
When I hung the microwaveon the mounting plate, the support tabs bent, and the micowave would've dro...
(Posted by melaniewashington607 10 years ago)

How To Identify And Order Optional Whirlpool Range Hood Charcoal Filter
Whirlpool range hood model is: UXT5230AYS. I can't locate part # for a 'charcoal' filter needed for ...
Whirlpool range hood model is: UXT5230AYS. I can't locate part # for a 'charcoal' filter needed for ...
(Posted by alfredsimonetti 11 years ago)