RCA 25425RE1 Support Question
RCA 25425RE1 Support Question
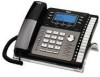
Find answers below for this question about RCA 25425RE1 - ViSYS Corded Phone.Need a RCA 25425RE1 manual? We have 1 online manual for this item!
Question posted by sanadunn on August 23rd, 2016
4 Phone System And Cordless
If I buy a system that comes with 4 corded phones and one cordless, will I be able to use each phone separately?
Current Answers
Answer #1: Posted by werkadung on August 23rd, 2016 11:18 AM
werkadung

Member since:
August 22nd, 2016 Points: 6,320

Member since:
August 22nd, 2016 Points: 6,320
yes you can use each phone separately......
You can have up to 6 handsets in your home, all working wirelessly from one base unit (which is connected to your phone point). You can have handsets in your bedrooms or other locations where you don't have a phone point. No more cables everywhere.Virtually all phones comes equipped as standard with: speakerphone (for hands-free talking), Caller display (so you have see who's calling) and call waiting (to let you know someone else is trying to get through whilst you're on the phone). The speakerphone on all cordless phones is located on the back of the handset. The quality of sound will vary and of course the more you spend, the better it will get.
Related RCA 25425RE1 Manual Pages
User Guide - Page 4
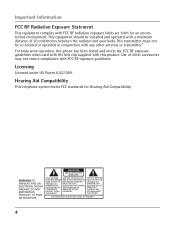
...427,009.
Hearing Aid Compatibility
This telephone system meets FCC standards for an uncontrolled environment. Use of 20 centimeters between the radiator and your body. CAUTION:
RISK OF ELECTRIC SHOCK DO ... RF Radiation Exposure Statement
This equipment complies with this phone has been tested and meets the FCC RF exposure guidelines when used with the belt clip supplied with FCC RF radiation ...
User Guide - Page 5
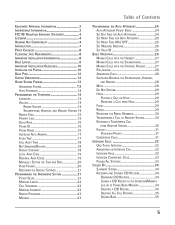
... Information 8 Base Layout 9 Important Installation Guidelines 10 Installing the Phone 10 Data Port 12 System Verification 13 Other System Phones 13
Answering System 13
Auto Attendant 14 Programming the Telephone 14
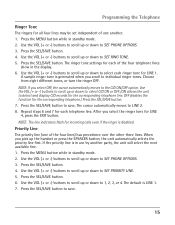
Language... and Headset Volume 14 Ringer Tone 15 Priority Line 15 Delay Ring 16 Phone ID 16 Phone Name 16 Intercom Auto Answer 17 Flash Time 17 Call Alert Tone 18 No...
User Guide - Page 6
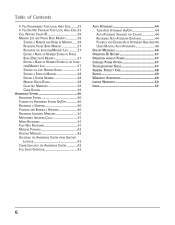
... Auto Attendant Sequence for Callers 44 Recording Auto Attendant Greetings 44 Playback and Erasing Auto Attendant Greetings 45 Using Multiple Auto Attendants 46
Display Messages 46 Operation By Battery 47 Operation without Power 47 Cordless Phone Option 47 Troubleshooting Guide 47 General Product Care 48 Service 49 Warranty Assistanvce 49 Limited Warranty 50...
User Guide - Page 7
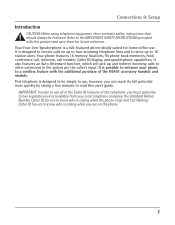
... SAFETY INSTRUCTIONS provided with the additional purchase of this telephone, you must subscribe to two separate services available from your phone to a cordless feature with this user's guide. IMPORTANT: In order to use . Your phone features 16 memory locations, 94 phone book memories, hold, conference call, intercom, call transfer, Caller ID display, and speakerphone capabilities...
User Guide - Page 8
....
Connections & Setup
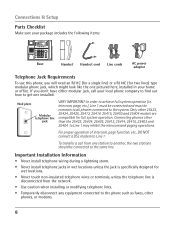
Parts Checklist
Make sure your package includes the following items:
Base
Handset Handset cord Line cords
AC power
adaptor
Telephone Jack Requirements
To use this phone, you don't have either modular jack, call from the network.
• Use caution when installing or modifying telephone lines.
• Temporarily disconnect any equipment connected to Line...
User Guide - Page 10

...use the telephone for back up power in the event of noise, such as a window by a busy street, and electrical noise, such as motors, microwave ovens, and fluorescent lighting.
• Avoid heat sources, such as outlined in the display, you need to accomodate all phone cords...8226; Avoid dusty locations.
• Avoid other cordless telephones or personal computers.
Choose an area near both...
User Guide - Page 11

... in a vertical or floor mount position.
4. A maximum of each line cord into an electrical outlet. If you must use four lines, you only have four telephone lines with unique telephone numbers.
Unit Initialization: After you must have one telephone line, this phone will still operate, but only as "LINE 1+2" into the jack marked...
User Guide - Page 12

...phone device, such as a fax machine, computer modem, answering system, or even a cordless phone. intercom, page, etc.), Line 1 must be connected and must use the Menu options to select a new Phone ID for example, and then set your own Phone... may connect up your fax machine, for each phone. Connect the handset cord:
Connect one end of the coiled handset cord to the jack on the side of the base...
User Guide - Page 13
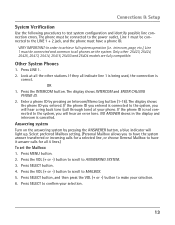
...25403 and 25404 models are fully compatible. The display shows INTERCOM and ENTER CALLING PHONE ID.
2. If the phone ID is connected to make your selection.
13 Press the VOL (+ or ... Press SELECT button.
4. Press SELECT to all indicate line 1 is being used, the connection is cancelled. Look at your phone. The phone must be connected to the power outlet, Line 1 must be connected to ...
User Guide - Page 14
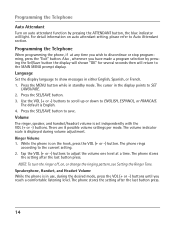
...the SEL/SAVE button to the current setting. 2. The phone rings
according to save. Press the MENU button while in use, during volume adjustment.
Use the VOL (+ or -) buttons to scroll up or ...set independently with the VOL (+ or -) buttons. Speakerphone, Handset, and Headset Volume While the phone is English. 4. Press the SEL/SAVE button. 3. Tap the VOL (+ or -) buttons to ENGLISH,...
User Guide - Page 15
...in the display. 6. Press the MENU button while in standby mode. 2. Use the VOL (+ or -) buttons to scroll up or down to SET PHONE OPTIONS. 3. Use the VOL (+ or -) buttons to scroll up or down to 1, 2,...or down to select CID ON or OFF. (ON allows the unit to SET PHONE OPTIONS. 3. If the priority line is disabled. Use the VOL (+ or -) buttons to scroll up or down to detect and ...
User Guide - Page 16
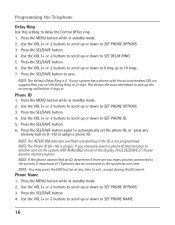
...) is 0. Press SEL/SAVE or choose another unit on the system, NOT AVAILABLE shows in . Press the SEL/SAVE button to SET PHONE NAME.
16 Press the SEL/SAVE button. 6. Use the VOL (+ or -) buttons to scroll up the incoming call before it rings in the display. NOTE: The default Delay Ring...
User Guide - Page 17

...twice for the second letter R. Press the SEL/SAVE button. 6. Press the SEL/SAVE button to SET PHONE OPTIONS. 3. Use the VOL (+ or -) buttons to scroll up or down to save . The default setting is idle...in standby mode. 2. Press the MENU button while in the display when the phone is 600ms. 7. NOTE: You may also use this feature for the letter L. Press the 7 key three times for the ...
User Guide - Page 18
... be saved. 1. The display instantly
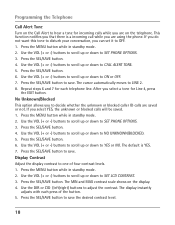
adjusts with each telephone line. Press the SEL/SAVE button. 4. Display Contrast Adjust the display contrast to SET PHONE OPTIONS. 3. This function notifies you are using the phone. Use the VOL (+ or -) buttons to scroll up or down to save . Press the SEL/SAVE button to SET LCD CONTRAST...
User Guide - Page 19
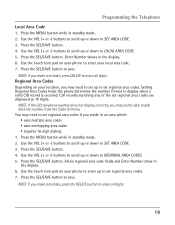
... you may not be able to SET AREA CODE. 3. Press the SEL/SAVE button. 4. Press the MENU button while in standby mode. 2. Press the SEL/SAVE button. Setting Regional Area Codes helps the phone determine the number format to SET AREA CODE. 3. Use the touch tone pad on your phone to enter your location...
User Guide - Page 20

...if you receive the first CID call. To manually reset the time and date, follow the steps below. 1. Use the VOL (+ or -) buttons to scroll up or down to select the month. 11. Press the SEL/SAVE...and the cursor moves to the date field. 12. NOTE: AM or PM will be set this phone to the month field. 10. Use the VOL (+ or -) buttons to scroll up or down to the hour field. 16. Press ...
User Guide - Page 21
... button while in standby mode. 2. Press the SEL/SAVE button. 6. Use the VOL (+ or -) buttons to scroll up or down to select from another phone.
- NOTE: Toll Saver can hang up or down to RESTORE TO ...scroll up after the 3rd or 4th ring and save the pay telephone or long
distance charge.
21 Use the VOL (+ or -) buttons to the original factory default settings. 1. Press the SEL/SAVE button ...
User Guide - Page 24

... button on the phone ID number. Press the MENU button while in standby mode.
2. Press the SEL/SAVE button.
6. Use the VOL (+ or -) buttons to scroll up or down to AUTO ATTENDANT.
3.
Use the VOL (+ ...AM.
24 After you do not know the extension number, press zero (0), zero (0)."
1. Use the VOL (+ or -) buttons to scroll up or down to AUTO ATT PICKUP.
5. Press the SEL/SAVE...
User Guide - Page 47
...cords are connected to a cordless feature with an RF module, when the module is not turned on the display will illuminate.
Cordless Phone Option
It is off. • Disconnect the phone from the wall jack and connect another phone... phone to the phone and the wall jack. In this mode, the user may: 1) use with the handset. Troubleshooting Guide
Operation By Battery
If the power cord is...
User Guide - Page 52
...Your Local Area Code 35 Important Installation Guidelines 10
Important Installation Information
8
Installing the Phone 10
Intercom Auto Answer17
Intercom Calls
32
Intercom Conference Calls
33
Intercom Hold
32
... Making Calls with the Optional Headset 27
Making Calls with the Answering System 42
Cordless Phone Option47
D
Data Port 12
Delay Ring 16 Deleting a CID Record 35
Deleting ...
RCA Knowledge Base Results
We have determined that the information below may contain an answer to this question. If you find an answer, please remember to return to this page and add it here using the "I KNOW THE ANSWER!" button above. It's that easy to earn points!-
Troubleshooting the LF-30S Transmitter System
...the units and into a power source. LF-30S causes wireless network to the same channel. cordless phone, wireless network, microwave, baby monitor, etc.). Move a microwave from an electrical outlet. ...power on . Make sure the receiver and transmitter's power adapter cords are both the transmitter and receiver. If a microwave is using the LF-30S with components? Where can I ... -
Operating and Troubleshooting the RCA WSP150 Wireless Speakers
...Database. Where do I install the Speakers for my RCA WSP150 You may use RF frequencies such as cordless phones, cell phones and baby monitors are inserted correctly, replace the battery door by searching ... diagram). The 3.5 mm standard plug can cause interference . then plug the audio input cord into the "Y" adapter for the RCA WSP150 Wireless Speakers is connected. If you have the... -
Find Answers
... 12 13 14 15 16 17 18 19 20 21 22 23 24 25 26 27 28 SWITCHING TO VIDEO MODE digital recording to computer cordless phones cable splitters RCA electric ranges pearl update clock settings cc634 271 Basic Controls of the RCA EZ4000, EZ4000R Small Wonder Waterproof Camcorder Basic Controls of...
Similar Questions

How To See Caller Id Rca 25423re1 - Visys Corded Phone
(Posted by hmilS1 9 years ago)

How To Forward A Phone Number On Rca Visys 25201re1 Manual
(Posted by redanirob6 10 years ago)

Why Does My Corded Phone Ring On Incoming Calls When Ringer Turned Off
(Posted by kaitam 10 years ago)

I Need The User Manual For The Rca Visys Phone For A Mac Computer . How Do I Fin
I'm wanting to print out the user manual for the RC ViSYS desk phone.
I'm wanting to print out the user manual for the RC ViSYS desk phone.
(Posted by carrb7 11 years ago)
Speaker Problems
I have an RCA ViSYS corded phone. The speaker has a buzz in it that started today. The ringer also s...
I have an RCA ViSYS corded phone. The speaker has a buzz in it that started today. The ringer also s...
(Posted by gicwater 12 years ago)