
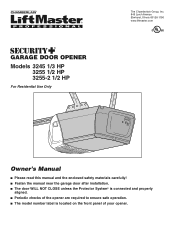
LiftMaster 3255 Support Question
LiftMaster 3255 Support Question
Find answers below for this question about LiftMaster 3255.Need a LiftMaster 3255 manual? We have 1 online manual for this item!
Question posted by Schneidj53 on November 14th, 2012
Liftmaster 3255 Light Will Not Come On
Current Answers
Answer #1: Posted by bojsen on December 16th, 2012 2:22 PM

Member since:
December 16th, 2012 Points: 2,240
http://answers.yahoo.com/question/index?qid=20110124180712AAyTIII
The issue is with the flourescent light bulbs having a slightly shorter base than the old incandscent light bulbs. If the bottom contact in the socket is pushed too far down, the flourescent light bulb will not make contact. This can be easily tested if you have a working incadescent light bulb. Simply screw the incadenscent light bulb in and operate the light. If it comes on, you now know that it is the problem described above. If you would like to continue to use a flourescent light bulb for the electrict bill savings, you can pull the bottom contact in the socket up using needle nosed pliers or pincers. Warning: Make sure to unplug the garage opener before attempting this! Just pull up the contact an 1/8 of an inch or so and the flourescent bulb should be able to make contact and work.
Just to avoid the basic mistakes, make sure to check that your replacement bulb works.
Related LiftMaster 3255 Manual Pages


Similar Questions

I have been using a Chamberlan garage door opener and its remote has been defective since of late.Pl...
My Lift master 8550 inside keypad is Inside wall pad is model #880LM. outside keypad Model # is 877M...

How do I know if I have a 3255 or 3255-2M garage door opener?

i cannot get the keypad programmed to the garage door opener.

Garage door is closed and opens periodically on it's own when nobody activates the interior wall swi...