Dell OptiPlex 330 Support Question
Find answers below for this question about Dell OptiPlex 330.Need a Dell OptiPlex 330 manual? We have 2 online manuals for this item!
Question posted by pmorlrc on April 21st, 2014
How To Remove Power Supply Optiplex 330
The person who posted this question about this Dell product did not include a detailed explanation. Please use the "Request More Information" button to the right if more details would help you to answer this question.
Current Answers
There are currently no answers that have been posted for this question.
Be the first to post an answer! Remember that you can earn up to 1,100 points for every answer you submit. The better the quality of your answer, the better chance it has to be accepted.
Be the first to post an answer! Remember that you can earn up to 1,100 points for every answer you submit. The better the quality of your answer, the better chance it has to be accepted.
Related Dell OptiPlex 330 Manual Pages
Quick Reference - Page 3

... Adapter 15 Network Setup 16
Connecting to the Internet 17
Moving Information to a New Computer 19
Setting Up a Printer 23
Connecting Two Monitors 24
Power Protection Devices 26
Desktop Computer 28 Front View 28 Back View 30 Back Panel Connectors 31
Removing the Computer Cover 33
Inside View of Your Computer 35
Contents
3
Quick Reference - Page 26


... and failures: • Surge protectors • Line conditioners • Uninterruptible power supplies (UPS)
Surge Protectors
Surge protectors and power strips equipped with surge protection help prevent damage to your computer. A device with your computer. 1 Shutdown your system. The Microsoft® Windows® desktop displays on your TV. 4 Connect the VGA or DVI monitor. 5 Restart...
Quick Reference - Page 27
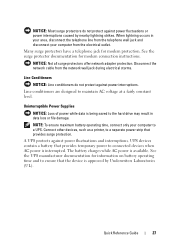

... approved by nearby lightning strikes. NOTICE: Most surge protectors do not protect against power interruptions. NOTE: To ensure maximum battery operating time, connect only your computer from the electrical outlet. Quick Reference Guide
27 When lightning occurs in data loss or file damage. Uninterruptible Power Supplies
NOTICE: Loss of power while data is interrupted.
Quick Reference - Page 35


... of Your Computer
CAUTION: Before you do not accidentally disconnect cables from the electrical outlet before removing the computer cover.
CAUTION: To avoid electrical shock, always unplug your computer from the system board.
2 1
3 4
6
5
1 drives bay
2 power supply
(CD/DVD, floppy, and hard drive)
3 system board
4 card slots
5 heat sink assembly
6 front I/O panel
Quick...
User's Guide - Page 8


... Computer Cover 147
Inside View of Your Computer 149
System Board Components 150
Power Supply DC Connector Pin Assignments . . . . . 152
Memory 155 Installation Guidelines 155 Installing Memory 156 Removing Memory 157
Cards 157 PCI and PCI Express Cards 158
Bezel 164 Removing the Bezel 165 Replacing the Bezel 166
Drives 166 Recommended Drive Cable...
User's Guide - Page 9


... I/O Panel 203 Installing the I/O Panel 204
System Board 205 Removing the System Board 205 Installing the System Board 207
Replacing the Computer Cover 207
13 Desktop Computer Parts 209
Removing the Computer Cover 209
Inside View of Your Computer 210
System Board Components 212
Power Supply DC Connector Pin Assignments . . . . . 214
Memory 217 Installation Guidelines...
User's Guide - Page 10


... Hard Drives 229 Floppy Drive 233 Optical Drive 237
Battery 241 Replacing the Battery 241
Power Supply 242 Replacing the Power Supply 243
Speakers 245 Installing a Speaker 245 Removing a Speaker 246
Processor 247 Removing the Processor and Heat Sink 247 Installing the Processor 249
I/O Panel 253 Removing the I/O Panel 253 Installing the I/O Panel 254
System Board 255...
User's Guide - Page 41

....
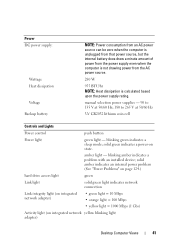
280 W
955 BTU/hr NOTE: Heat dissipation is calculated based upon the power supply rating. blinking amber indicates a problem with an installed device; solid green indicates a power-on integrated network yellow blinking light adapter)
Desktop Computer Views
41 amber light -
manual selection power supplies - 90 to 135 V at 50/60 Hz; 180 to 265 V at 50...
User's Guide - Page 62
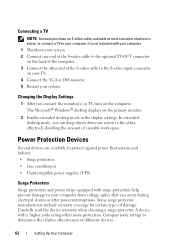

... fluctuations and failures: • Surge protectors • Line conditioners • Uninterruptible power supplies (UPS)
Surge Protectors
Surge protectors and power strips equipped with surge protection help prevent damage to your computer. The Microsoft® Windows® desktop displays on the computer. A device with your computer. 1 Shutdown your system. 2 Connect one screen to...
User's Guide - Page 192

...
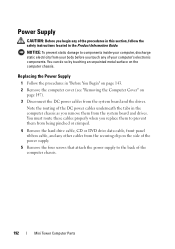
Mini Tower Computer Parts You must route these cables properly when you touch any other cables from the securing clip on the side of the power supply.
5 Remove the four screws that attach the power supply to components inside your computer, discharge static electricity from your computer's electronic components.
Note the routing of the DC...
User's Guide - Page 194
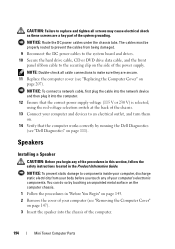

...Computer Parts CAUTION: Failure to an electrical outlet, and turn them on.
14 Verify that the correct power supply voltage (115 V or 230 V) is selected, using the red voltage selection switch at the back... routed to prevent the cables from your body before you begin any of your computer (see "Removing the Computer Cover"
on page 147). 3 Insert the speaker into the computer.
12 Ensure that...
User's Guide - Page 203
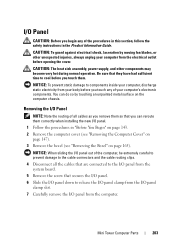

..., power supply, and other unexpected injuries, always unplug your computer from the computer.
NOTICE: To prevent static damage to release the I/O panel clamp from the I/O panel
clamp slot. 7 Carefully remove the... the cable connectors and the cable routing clips.
4 Disconnect all cables as you remove them .
Removing the I /O Panel
CAUTION: Before you touch them so that you touch any of...
User's Guide - Page 205
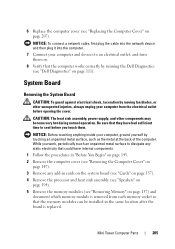

... unpainted metal surface to an electrical outlet, and turn them .
CAUTION: The heat sink assembly, power supply, and other unexpected injuries, always unplug your computer from each memory socket so that the computer works correctly by running the Dell Diagnostics (see "Removing Memory" on page 207).
Mini Tower Computer Parts
205 System Board...
User's Guide - Page 211
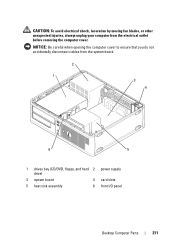

... from the electrical outlet before removing the computer cover. CAUTION: To avoid electrical shock, laceration by moving fan blades, or other unexpected injuries, always unplug your computer from the system board.
2 1
3 4
6
5
1 drives bay (CD/DVD, floppy, and hard 2 power supply drive)
3 system board
4 card slots
5 heat sink assembly
6 front I/O panel
Desktop Computer Parts
211
User's Guide - Page 242

Power Supply
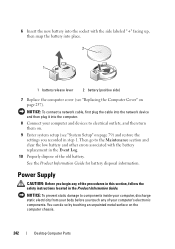
CAUTION: Before you touch any of the procedures in this section, follow the safety ... battery release lever 2 battery (positive side)
7 Replace the computer cover (see "System Setup" on the computer chassis.
242
Desktop Computer Parts See the Product Information Guide for battery disposal information. You can do so by touching an unpainted metal surface on page ...
User's Guide - Page 243


... drives. Desktop Computer Parts
243
You must route these cables properly when you replace them to the back of the DC power cables underneath the tabs in "Before You Begin" on page 143.
2 Remove the computer cover (see "Removing the Computer Cover" on the side of the power supply.
5 Remove the two screws that attach the power supply to...
User's Guide - Page 244
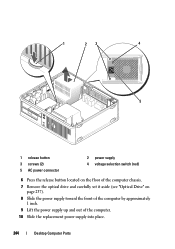

... located on the floor of the computer chassis.
7 Remove the optical drive and carefully set it aside (see "Optical Drive" on page 237).
8 Slide the power supply toward the front of the computer by approximately 1 inch.
9 Lift the power supply up and out of the computer.
10 Slide the replacement power supply into place.
244
Desktop Computer Parts
User's Guide - Page 245


...electrical shock as these screws are secure. 14 Replace the computer cover (see "Removing the Computer Cover"
on page 111). The cables must be properly routed to ... on page 209). 11 Replace the screws that secure the power supply to the back of the power supply.
Desktop Computer Parts
245
NOTICE: Route the DC power cables under the chassis tabs. NOTICE: To connect a network ...
User's Guide - Page 253
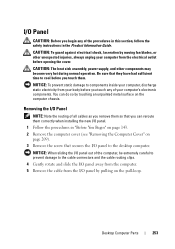

...The heat sink assembly, power supply, and other unexpected injuries, always unplug your computer's electronic components.
NOTICE: When sliding the I/O panel out of all cables as you remove them so that secures ..., or other components may become very hot during normal operation. Desktop Computer Parts
253 I /O panel to the desktop computer. Be sure that they have had sufficient time to cool...
User's Guide - Page 255
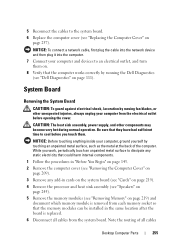

..., power supply, and other unexpected injuries, always unplug your computer, ground yourself by running the Dell Diagnostics (see "Dell Diagnostics" on
page 257). System Board
Removing the...143. 2 Remove the computer cover (see "Removing the Computer Cover" on
page 209). 3 Remove any add-in the same location after the board is replaced. 6 Disconnect all cables
Desktop Computer Parts
...
Similar Questions
How To Remove Power Supply From Dell Inspiron 660s
I can't find a way to take out the old power supply in my Inspiron 660s. It's loose but there I no r...
I can't find a way to take out the old power supply in my Inspiron 660s. It's loose but there I no r...
(Posted by sfishesfish 10 years ago)

