
Dell OptiPlex 330 Support Question
Dell OptiPlex 330 Support Question
Find answers below for this question about Dell OptiPlex 330.Need a Dell OptiPlex 330 manual? We have 2 online manuals for this item!
Question posted by SlicMe on August 17th, 2013
How To Remove Power Supply From Dell Optiplex 330
The person who posted this question about this Dell product did not include a detailed explanation. Please use the "Request More Information" button to the right if more details would help you to answer this question.
Current Answers
Related Dell OptiPlex 330 Manual Pages
Quick Reference - Page 6
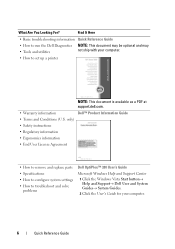
... instructions
• Regulatory information
• Ergonomics information
• End User License Agreement
• How to remove and replace parts • Specifications • How to configure system settings • How to troubleshoot and solve
problems
Dell OptiPlex™ 330 User's Guide
Microsoft Windows Help and Support Center 1 Click the Windows Vista Start button→ Help...
Quick Reference - Page 26

...or TV, turn on the primary monitor.
2 Enable extended desktop mode in the display settings. Power Protection Devices
Several devices are available to protect against power fluctuations and failures: • Surge protectors • Line conditioners • Uninterruptible power supplies (UPS)
Surge Protectors
Surge protectors and power strips equipped with surge protection help prevent damage to...
Quick Reference - Page 35

... accidentally disconnect cables from the electrical outlet before removing the computer cover. Inside View of the procedures in this section, follow the safety instructions in the Product Information Guide. CAUTION: To avoid electrical shock, always unplug your computer from the system board.
2 1
3 4
6
5
1 drives bay
2 power supply
(CD/DVD, floppy, and hard drive)
3 system...
Quick Reference - Page 67

... Dell Diagnostics From the Drivers and Utilities CD, 49
Starting the Dell Diagnostics From Your Hard Drive, 48
support website, 8
system board, 36, 46
Help and Support Center, 9 Network Setup Wizard, 16 reinstalling, 9
wizards Network Setup Wizard, 16
T
troubleshooting Dell Diagnostics, 48 Help and Support Center, 9
TV connect to computer, 24, 26
U
uninterruptible power supply...
User's Guide - Page 4

...61 Connecting a TV 62 Changing the Display Settings 62
Power Protection Devices 62 Surge Protectors 62 Line Conditioners 63 Uninterruptible Power Supplies 63
5 Advanced Features 65
LegacySelect Technology Control 65
Manageability 65 Dell OpenManage™ IT Assistant 65 Dell OpenManage Client Instrumentation . . . . . 65
Power Management 66
Using Multimedia 69 Playing CDs or DVDs 69...
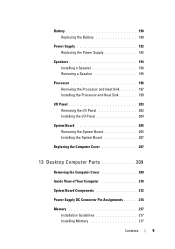
User's Guide - Page 8

... Computer Cover 147
Inside View of Your Computer 149
System Board Components 150
Power Supply DC Connector Pin Assignments . . . . . 152
Memory 155 Installation Guidelines 155 Installing Memory 156 Removing Memory 157
Cards 157 PCI and PCI Express Cards 158
Bezel 164 Removing the Bezel 165 Replacing the Bezel 166
Drives 166 Recommended Drive Cable...
User's Guide - Page 9
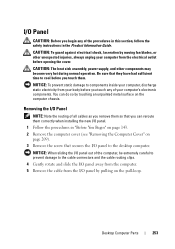
... I/O Panel 203 Installing the I/O Panel 204
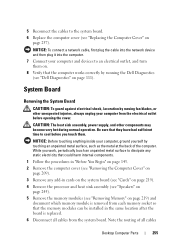
System Board 205 Removing the System Board 205 Installing the System Board 207
Replacing the Computer Cover 207
13 Desktop Computer Parts 209
Removing the Computer Cover 209
Inside View of Your Computer 210
System Board Components 212
Power Supply DC Connector Pin Assignments . . . . . 214
Memory 217 Installation Guidelines...
User's Guide - Page 10
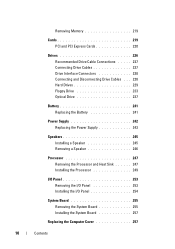
... Hard Drives 229 Floppy Drive 233 Optical Drive 237
Battery 241 Replacing the Battery 241
Power Supply 242 Replacing the Power Supply 243
Speakers 245 Installing a Speaker 245 Removing a Speaker 246
Processor 247 Removing the Processor and Heat Sink 247 Installing the Processor 249
I/O Panel 253 Removing the I/O Panel 253 Installing the I/O Panel 254
System Board 255...
User's Guide - Page 15
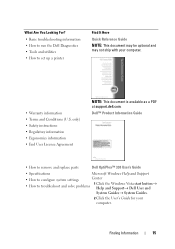
...; Regulatory information • Ergonomics information • End User License Agreement
NOTE: This document is available as a PDF at support.dell.com. Dell™ Product Information Guide
• How to remove and replace parts
Dell OptiPlex™ 330 User's Guide
• Specifications
Microsoft Windows Help and Support
• How to configure system settings
Center
• How to...
User's Guide - Page 41
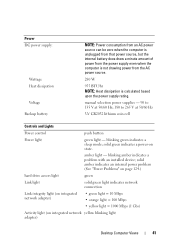
... a minute amount of power from the power supply even when the computer is not drawing power from the AC power source.
280 W
955 BTU/hr NOTE: Heat dissipation is calculated based upon the power supply rating. blinking amber indicates a problem with an installed device; solid green indicates a power-on integrated network yellow blinking light adapter)
Desktop Computer Views
41
User's Guide - Page 62
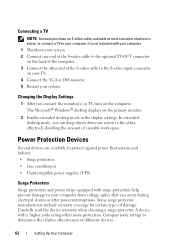
...your computer. In extended desktop mode, you connect the monitor(s) or TV, turn on the primary monitor.
2 Enable extended desktop mode in the display...power fluctuations and failures: • Surge protectors • Line conditioners • Uninterruptible power supplies (UPS)
Surge Protectors
Surge protectors and power strips equipped with a higher joule rating offers more protection. Power...
User's Guide - Page 192
... you begin any other cables from the securing clip on the side of the power supply.
5 Remove the four screws that attach the power supply to the back of the procedures in this section, follow the safety instructions located in the Product Information Guide. You can do so by touching ...
User's Guide - Page 194
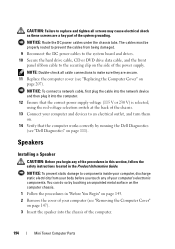
...Installing a Speaker
CAUTION: Before you touch any of the power supply.
You can do so by running the Dell Diagnostics (see "Dell Diagnostics" on the computer chassis.
1 Follow the procedures in...Before You Begin" on page 143. 2 Remove the cover of your computer and devices to an electrical outlet, and turn them on.
14 Verify that the correct power supply voltage (115 V or 230 V) is ...
User's Guide - Page 205
... the electrical outlet before you touch them on page 207).
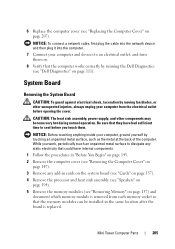
CAUTION: The heat sink assembly, power supply, and other unexpected injuries, always unplug your computer, ground yourself by running the Dell Diagnostics (see "Removing Memory" on page 111).
NOTICE: Before touching anything inside your computer from each memory socket so that could harm internal...
User's Guide - Page 211
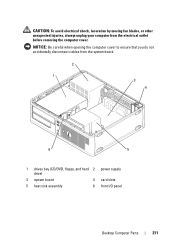
... blades, or other unexpected injuries, always unplug your computer from the system board.
2 1
3 4
6
5
1 drives bay (CD/DVD, floppy, and hard 2 power supply drive)
3 system board
4 card slots
5 heat sink assembly
6 front I/O panel
Desktop Computer Parts
211 NOTICE: Be careful when opening the computer cover to ensure that you do not accidentally disconnect cables...
User's Guide - Page 243
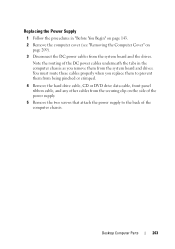
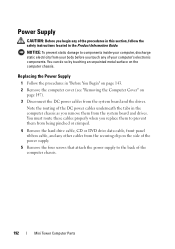
... from the system board and drives. Replacing the Power Supply
1 Follow the procedures in "Before You Begin" on page 143.
2 Remove the computer cover (see "Removing the Computer Cover" on the side of the power supply.
5 Remove the two screws that attach the power supply to the back of the DC power cables underneath the tabs in the computer chassis...
User's Guide - Page 244
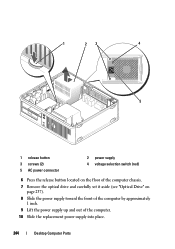
... located on the floor of the computer chassis.
7 Remove the optical drive and carefully set it aside (see "Optical Drive" on page 237).
8 Slide the power supply toward the front of the computer by approximately 1 inch.
9 Lift the power supply up and out of the computer.
10 Slide the replacement power supply into place.
244
Desktop Computer Parts
User's Guide - Page 245

..." on page 143. 2 Remove the cover of the computer chassis.
You can do so by running the Dell Diagnostics (see "Removing the Computer Cover"
on page 111). 11 Replace the screws that secure the power supply to replace and tighten all ... Guide. NOTICE: To prevent static damage to components inside your computer (see "Dell Diagnostics" on page 209). Desktop Computer Parts
245
User's Guide - Page 253
... in "Before You Begin" on page 143. 2 Remove the computer cover (see "Removing the Computer Cover" on the pull-loop. CAUTION: The heat sink assembly, power supply, and other unexpected injuries, always unplug your body before opening the cover.
NOTICE: To prevent static damage to the desktop computer.
Be sure that they have had sufficient...
User's Guide - Page 255
... is removed from each memory socket so that the memory modules can be installed in the same location after the board is replaced. 6 Disconnect all cables
Desktop Computer Parts
255
While you work, periodically touch an unpainted metal surface to an electrical outlet, and turn them . CAUTION: The heat sink assembly, power supply, and...
Similar Questions


How To Remove Power Supply From Dell Inspiron 660s
I can't find a way to take out the old power supply in my Inspiron 660s. It's loose but there I no r...
I can't find a way to take out the old power supply in my Inspiron 660s. It's loose but there I no r...
(Posted by sfishesfish 10 years ago)
