
Dell Inspiron One 2320 Support Question
Dell Inspiron One 2320 Support Question
Find answers below for this question about Dell Inspiron One 2320.Need a Dell Inspiron One 2320 manual? We have 3 online manuals for this item!
Question posted by brandees22 on November 15th, 2012
Computer Is On But Screen Is Black And Unresponsive. White Light Flashing.
I have a Dell 2320. Recently when I try to use it after several hours on but unused, the screen is black and the white light above the power button is flashing regularly. It does not respond to anything I try except holding the power button down until it turns off. What do I need to do?
Current Answers
Answer #1: Posted by NiranjanvijaykumarAtDell on November 20th, 2012 5:40 AM
NiranjanvijaykumarAtDell

Member since:
May 12th, 2012 Points: 807,180

Member since:
May 12th, 2012 Points: 807,180
Hello brandees22,
I am from Dell Social Media and Community.
If the white light is on, it means that the computer is in turned on, as you have mentioned in your comment. However there is no other indicator of failure.
Check if there is any beeps at the system start up and follow the link below to verify the failure if any.
Verify if the monitor is getting power, check the monitor with another know good working system, try to enter system set up (Bios).
Let me know if you need any further assistance.
Dell-Niranjan
Twitter: @NiranjanatDell
NiranjanAtDell
Dell Inc
Related Dell Inspiron One 2320 Manual Pages
Quick Start Guide (PDF) - Page 1
...Dell support.dell.com/manuals | www.dell.com
2011 - 07
Printed in China
0GX7TPA00
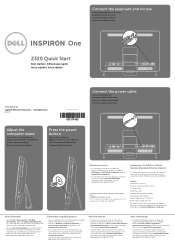
Adjust the computer stand
Pas de stand van de computer aan Réglez le socle inclinable de l'ordinateur Ajuste el soporte del equipo Ajuste o suporte do computador
Press the power button... ao cliente, vá para dell.com/ContactDell. Dell™, the DELL logo, and Inspiron™ are trademarks of problemen ...
Owners Manual - Page 7
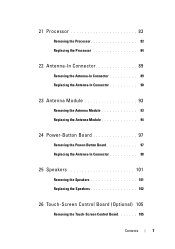
... Antenna-In Connector 89 Replacing the Antenna-In Connector 90
23 Antenna Module 93
Removing the Antenna Module 93 Replacing the Antenna Module 94
24 Power-Button Board 97
Removing the Power-Button Board 97 Replacing the Antenna-In Connector 98
25 Speakers 101
Removing the Speakers 101 Replacing the Speakers 102
26 Touch...
Owners Manual - Page 8
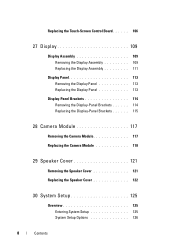
Replacing the Touch-Screen Control Board. . . . . . 106
27 Display 109
Display Assembly 109 Removing the Display Assembly 109 Replacing the Display Assembly 111
Display Panel 113 Removing the Display ...
Owners Manual - Page 9
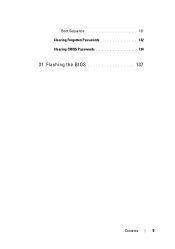
Boot Sequence 131 Clearing Forgotten Passwords 132 Clearing CMOS Passwords 134
31 Flashing the BIOS 137
Contents
9
Owners Manual - Page 11
...
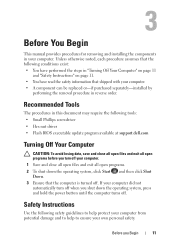
Use the following tools: • Small Phillips screwdriver • Hex nut driver • Flash BIOS executable update program available at support.dell.com
Turning Off Your Computer
CAUTION: To avoid losing data, save and close all open files and exit all open programs.
2 To shut down the operating system, press and hold the power button...
Owners Manual - Page 16
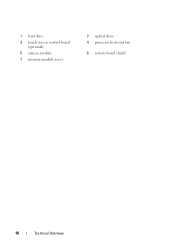
1 hard drive 3 touch-screen control board
(optional) 5 camera module 7 memory-module cover
2 optical drive 4 processor heat-sink fan
6 system-board shield
16
Technical Overview
Owners Manual - Page 18
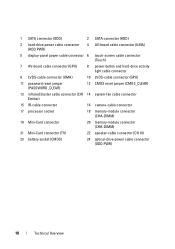
1 SATA connector (ODD)
2 SATA connector (HDD)
3 hard-drive power cable connector (HDD PWR)
4 AV-board cable connector (UMA)
5 display-panel power cable connector 6 touch-screen cable connector (Touch)
7 AV-board cable connector (GPU)
8 power-button and hard-drive activity light cable connector
9 LVDS-cable connector (UMA)
10 LVDS-cable connector (GPU)
11 password reset jumper (...
Owners Manual - Page 57
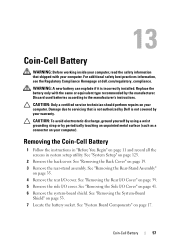
... Coin-Cell Battery
57
For additional safety best practices information, see the Regulatory Compliance Homepage at dell.com/regulatory_compliance. Removing the Coin-Cell Battery
1 Follow the instructions in "Before You Begin"..."
on page 11 and record all the screens in system setup utility. See "System Setup" on page 17. Discard used batteries according to servicing that shipped with the...
Owners Manual - Page 63

...Mini-Card(s) supported by your computer. See "Replacing the Side I /O cover. Use of the Mini-Card down and replace the two screws that no cables or antenna...on the Mini-Card WLAN (2 antenna cables) Main WLAN (white triangle) Auxiliary WLAN (black triangle)
TV tuner (1 antenna cable)
Antenna Cable Color Scheme
white black black
6 Replace the system-board shield. Connectors on page 54.
...
Owners Manual - Page 97
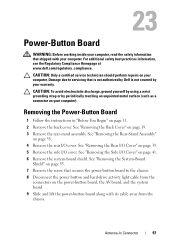
... safety information that is not authorized by Dell is not covered by periodically touching an unpainted metal surface (such as a connector on page 39. 5 Remove the side I/O cover.
Damage due to the chassis. 8 Disconnect the power button and hard-drive activity light cable from the chassis. Removing the Power-Button Board
1 Follow the instructions in "Before...
Owners Manual - Page 98
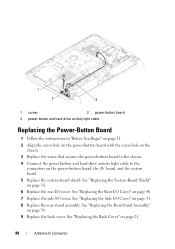
... "Replacing the Rear I/O Cover" on page 36. 9 Replace the back cover. See "Replacing the Rear-Stand Assembly" on page 40. 7 Replace the side I /O cover. 1
2
3
1 screw
2 power-button board
3 power-button and hard-drive activity light cable
Replacing the Power-Button Board
1 Follow the instructions in "Before You Begin" on page 11. 2 Align the screw hole on the...
Owners Manual - Page 105
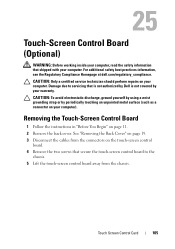
... the Back Cover" on your warranty. For additional safety best practices information, see the Regulatory Compliance Homepage at dell.com/regulatory_compliance. Touch Screen Control Card
105 CAUTION: To avoid electrostatic discharge, ground yourself by using a wrist grounding strap or by your computer. CAUTION: Only a certified service technician should perform repairs on page 19...
Owners Manual - Page 106
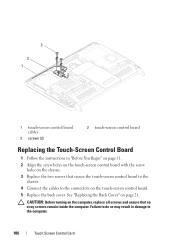
... computer, replace all screws and ensure that secure the touch-screen control board to the
chassis. 4 Connect the cables to the connectors on the touch-screen control board. 5 Replace the back cover.
CAUTION: Before ... in "Before You Begin" on page 11. 2 Align the screw holes on the touch-screen control board with the screw
holes on the chassis. 3 Replace the two screws that no stray screws remain inside...
Owners Manual - Page 110
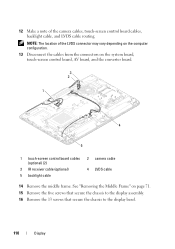
... board cables, backlight cable, and LVDS cable routing. See "Removing the Middle Frame" on the system board, touch-screen control board, AV board, and the converter board.
3 2
1
4
5
1 touch-screen control board cables (optional) (2)
3 IR receiver cable (optional) 5 backlight cable
2 camera cable 4 LVDS cable
14 Remove the middle frame. 12 Make a note of...
Owners Manual - Page 111
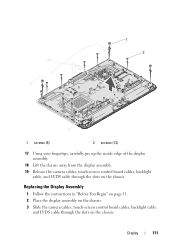
..." on page 11. 2 Place the display assembly on the chassis. 3 Slide the camera cables, touch-screen control board cables, backlight cable
and LVDS cable through the slots on the chassis. Display
111 1 2
1 screws (5)
2 screws (13)
17 Using your fingertips, carefully pry up the inside edge of the display assembly.
18 Lift the...
Owners Manual - Page 112
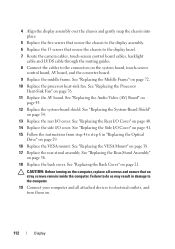
...ensure that secure the chassis to the display bezel. 7 Route the camera cables, touch-screen control board cables, backlight
cable and LVDS cable through the routing guides. 8 Connect ...14 Replace the side I/O cover.
See "Replacing the Side I /O Cover" on the system board, touch-screen
control board, AV board, and the converter board. 9 Replace the middle frame. See "Replacing the Audio...
Owners Manual - Page 125
...screen is recommended that the keyboard has initialized. 29
System Setup
Overview
Use... System Setup Screens The system setup screen displays current or changeable configuration information for ...help screen, and key functions.
See "Turning Off Your Computer" on (or restart) your computer. 2 When the DELL logo...and try again.
Entering System Setup
1 Turn on page 11. If you write down the system setup screen ...
Owners Manual - Page 131
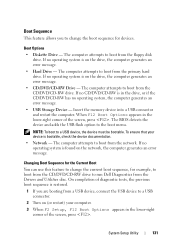
...CD-RW Drive - The BIOS detects the device and adds the USB flash option to a USB device, the device must be bootable. The computer...can use this feature to change the boot sequence for example, to boot from the CD/DVD/CD-RW drive to run Dell Diagnostics.... When F12 Boot Options appears in the lower-right corner of the screen, press .
NOTE: To boot to the boot menu. The computer attempts...
Owners Manual - Page 137
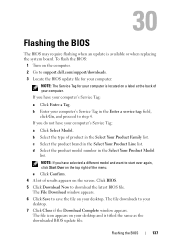
... Now to support.dell.com/support/downloads. 3 Locate the BIOS update file for your computer:
NOTE: The Service Tag for your computer is located on your desktop. e Click Confirm.... 4 A list of product in the Select Your Product Line list. NOTE: If you do not have your computer's Service Tag:
a Click Select Model. To flash the BIOS:
1 Turn on the screen...
Owners Manual - Page 138
8 Double-click the file icon on the desktop and follow the instructions on the screen.
138
Flashing the BIOS
Similar Questions

Dell Dimension 8300 Will Not Turn On Flashing Yellow Light Power Supply
(Posted by petabull 10 years ago)

Desktop Inspiron 1 2320 Black Screen When Restarting
(Posted by tmiskkevi 10 years ago)
Why Wont My Dell Desktop Inspiron 518 Turn On Blinking Amber
(Posted by Flavijvm 10 years ago)

How To Bypass A Bios Password On Dell Desktop Inspiron One 2320
(Posted by bexoxo 10 years ago)

How To Use The Hdmi Cable On Inspiron Desktop Inspiron One 2330
(Posted by mhoras 10 years ago)