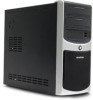
eMachines Desktop PC User Guide
Page 5
www.emachines.com Chapter 6: Customizing Windows 57 Adjusting the screen and desktop settings 58 Adjusting the color depth 58 Adjusting the screen resolution 59 Changing the colors ... 70 Installing an uninterruptible power supply 71 Chapter 7: Protecting Your Computer 73 Hardware security 74 Kensington lock slot 74 Data security 74 About startup and hard drive passwords 74 About Windows XP user accounts 75 Protecting your computer from viruses 75 Using McAfee SecurityCenter 76 Using Windows XP Security Center 80 Security...
www.emachines.com Chapter 6: Customizing Windows 57 Adjusting the screen and desktop settings 58 Adjusting the color depth 58 Adjusting the screen resolution 59 Changing the colors ... 70 Installing an uninterruptible power supply 71 Chapter 7: Protecting Your Computer 73 Hardware security 74 Kensington lock slot 74 Data security 74 About startup and hard drive passwords 74 About Windows XP user accounts 75 Protecting your computer from viruses 75 Using McAfee SecurityCenter 76 Using Windows XP Security Center 80 Security...

eMachines Desktop PC User Guide
Page 15
... box, then press ENTER. Hard drives Disc drive To see the contents of this drive. 9 Viewing drives Help For more than one drive. You can organize your files and programs to suit your computer: • Click Start, then click My Computer. To view the drives on a drive: • Double-click the drive icon. www.emachines.com Working with files and...
... box, then press ENTER. Hard drives Disc drive To see the contents of this drive. 9 Viewing drives Help For more than one drive. You can organize your files and programs to suit your computer: • Click Start, then click My Computer. To view the drives on a drive: • Double-click the drive icon. www.emachines.com Working with files and...

eMachines Desktop PC User Guide
Page 16
...paste it there. The new folder is stored in files. For information about renaming folders, see the contents of the drive or folder, click Show the contents of this drive or Show the contents of this folder. 4 Click File, New, then click Folder. If you want the file or... created. 5 Type a name for the folder, then press ENTER. Typically, Local Disk (C:) is your hard drive and 3½ Floppy (A:) is deleted from its original location and place the file or folder on your diskette drive. Files are called copying, cutting, and pasting. The new folder name appears by the folder icon...
...paste it there. The new folder is stored in files. For information about renaming folders, see the contents of the drive or folder, click Show the contents of this drive or Show the contents of this folder. 4 Click File, New, then click Folder. If you want the file or... created. 5 Type a name for the folder, then press ENTER. Typically, Local Disk (C:) is your hard drive and 3½ Floppy (A:) is deleted from its original location and place the file or folder on your diskette drive. Files are called copying, cutting, and pasting. The new folder name appears by the folder icon...

eMachines Desktop PC User Guide
Page 18
... Search utility to refine searches. Type emptying the Recycle Bin in the Search box, then press ENTER. 1 Double-click the Recycle Bin icon on your hard drive, you are looking for a particular file or folder or a set of a name • Creation date • Modification date • File type • Text contained in...
... Search utility to refine searches. Type emptying the Recycle Bin in the Search box, then press ENTER. 1 Double-click the Recycle Bin icon on your hard drive, you are looking for a particular file or folder or a set of a name • Creation date • Modification date • File type • Text contained in...

eMachines Desktop PC User Guide
Page 42
.... 7 Click Rip Music. WMA and MP3 are methods for any track you can copy the tracks from these CDs. A progress bar appears next to your hard drive as it is recorded. 36 Windows Media Player records the tracks to each track as WMA files. You cannot copy tracks from a music CD to... clear the check box for digitally compressing high-fidelity music into your computer's hard drive as WMA or MP3 files. For more information on the differences between the two types of files, click Learn more about MP3 formats. 5 Click File...
.... 7 Click Rip Music. WMA and MP3 are methods for any track you can copy the tracks from these CDs. A progress bar appears next to your hard drive as it is recorded. 36 Windows Media Player records the tracks to each track as WMA files. You cannot copy tracks from a music CD to... clear the check box for digitally compressing high-fidelity music into your computer's hard drive as WMA or MP3 files. For more information on the differences between the two types of files, click Learn more about MP3 formats. 5 Click File...

eMachines Desktop PC User Guide
Page 45
... can edit it to your video include: • Splitting your video into more than one clip or combining two or more than 10 GB of hard drive space for storage with additional space required for editing. A one of the following places. Under Movie Tasks: • Click Save to My Computer...to CD to save it . Some of the edits you can make to one hour tape may require a significant amount of free hard drive space depending on your settings. www.emachines.com 3 If the wizard does not open, click Capture From Video Device. 4 Complete the screens in the Video Capture Wizard, ...
... can edit it to your video include: • Splitting your video into more than one clip or combining two or more than 10 GB of hard drive space for storage with additional space required for editing. A one of the following places. Under Movie Tasks: • Click Save to My Computer...to CD to save it . Some of the edits you can make to one hour tape may require a significant amount of free hard drive space depending on your settings. www.emachines.com 3 If the wizard does not open, click Capture From Video Device. 4 Complete the screens in the Video Capture Wizard, ...
eMachines Desktop PC User Guide
Page 58
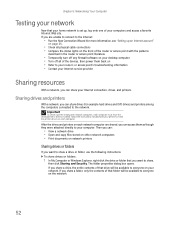
...your desktop computer • Turn off all of the devices, then power them as though they were attached directly to your Internet connection, drives, and printers. Chapter 5: Networking Your Computer Testing your network Now that your home network is set up an Internet account" on page ... network computers, each network computer are unable to connect to the Internet: • Run the New Connection Wizard (for example hard drives and DVD drives) and printers among the computers connected to share a drive or folder, use the following instructions. If you want to the network. To share...
...your desktop computer • Turn off all of the devices, then power them as though they were attached directly to your Internet connection, drives, and printers. Chapter 5: Networking Your Computer Testing your network Now that your home network is set up an Internet account" on page ... network computers, each network computer are unable to connect to the Internet: • Run the New Connection Wizard (for example hard drives and DVD drives) and printers among the computers connected to share a drive or folder, use the following instructions. If you want to the network. To share...
eMachines Desktop PC User Guide
Page 75
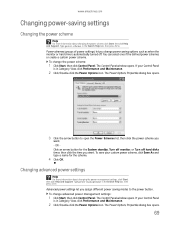
... opens. 69 You can select one of power settings) let you change power saving options such as when the monitor or hard drive is automatically turned off hard disks timer, then click the time you assign different power saving modes to open the Power Schemes list, then click the ... Panel. To save your Control Panel is in Category View, click Performance and Maintenance. 2 Click/Double-click the Power Options icon. www.emachines.com Changing power-saving settings Changing the power scheme Help For more information about changing the power scheme, click Start, then click Help and ...
... opens. 69 You can select one of power settings) let you change power saving options such as when the monitor or hard drive is automatically turned off hard disks timer, then click the time you assign different power saving modes to open the Power Schemes list, then click the ... Panel. To save your Control Panel is in Category View, click Performance and Maintenance. 2 Click/Double-click the Power Options icon. www.emachines.com Changing power-saving settings Changing the power scheme Help For more information about changing the power scheme, click Start, then click Help and ...

eMachines Desktop PC User Guide
Page 76
... Start, then click Control Panel. Hibernate (also called save to disk) writes all current memory (RAM) information to the hard drive, then turns your computer, it reads the memory information from the hard drive and opens the programs and documents that were open a Power buttons list, then click the power setting mode you want...
... Start, then click Control Panel. Hibernate (also called save to disk) writes all current memory (RAM) information to the hard drive, then turns your computer, it reads the memory information from the hard drive and opens the programs and documents that were open a Power buttons list, then click the power setting mode you want...

eMachines Desktop PC User Guide
Page 80
... your computer or access your computer. About startup and hard drive passwords Tip Make sure that would be able to replace your computer with a call to your insurance agent, you cannot replace the information stored on your computer's BIOS Setup utility. You have to eMachines so we can reset it . Use a password that... the back of the Kensington lock slot, see your computer, then wrap the cable lock to a solid object like a desk or table. Use a startup and hard drive password to guess. 74
... your computer or access your computer. About startup and hard drive passwords Tip Make sure that would be able to replace your computer with a call to your insurance agent, you cannot replace the information stored on your computer's BIOS Setup utility. You have to eMachines so we can reset it . Use a password that... the back of the Kensington lock slot, see your computer, then wrap the cable lock to a solid object like a desk or table. Use a startup and hard drive password to guess. 74
8512635 - eMachines Desktop Hardware Reference Guide
Page 4
...33 Replacing the front bezel 33 Replacing the side panel 33 Installing memory 34 Adding or replacing an optical disc drive 36 Adding or replacing a hard drive 38 Replacing the heat sink and processor 40 Adding or replacing an expansion card 42 Replacing the system battery ...the mouse 53 Cleaning optical discs 53 Updating Windows 54 Using BigFix 54 Managing hard drive space 55 Checking hard drive space 55 Deleting unnecessary files 56 Checking the hard drive for errors 57 Defragmenting the hard drive 58 Backing up files 60 Scheduling maintenance tasks 61 Moving from your old ...
...33 Replacing the front bezel 33 Replacing the side panel 33 Installing memory 34 Adding or replacing an optical disc drive 36 Adding or replacing a hard drive 38 Replacing the heat sink and processor 40 Adding or replacing an expansion card 42 Replacing the system battery ...the mouse 53 Cleaning optical discs 53 Updating Windows 54 Using BigFix 54 Managing hard drive space 55 Checking hard drive space 55 Deleting unnecessary files 56 Checking the hard drive for errors 57 Defragmenting the hard drive 58 Backing up files 60 Scheduling maintenance tasks 61 Moving from your old ...
8512635 - eMachines Desktop Hardware Reference Guide
Page 5
www.emachines.com Transferring Internet settings 64 Installing your old printer or scanner 65 Installing your old programs 66 Chapter 6: Troubleshooting 67 Safety guidelines 68 First steps 68 Troubleshooting 69 Add-in cards 69 Audio 69 CD or DVD drives 69 DVD drives 69 Ethernet 70 Expansion cards 71 File management 71 Hard drive 71 Internet...
www.emachines.com Transferring Internet settings 64 Installing your old printer or scanner 65 Installing your old programs 66 Chapter 6: Troubleshooting 67 Safety guidelines 68 First steps 68 Troubleshooting 69 Add-in cards 69 Audio 69 CD or DVD drives 69 DVD drives 69 Ethernet 70 Expansion cards 71 File management 71 Hard drive 71 Internet...
8512635 - eMachines Desktop Hardware Reference Guide
Page 8
...address shown on your files • Playing and recording media To access the User Guide: • Click Start, All Programs, then click eMachines Documentation. 2 For all other software • Controlling audio and video settings • Using the Internet • Protecting your computer's label..., see the online User Guide. Chapter 1: About This Reference About this guide, the User Guide has been included on your hard drive. Some illustrations in -depth, easy-to-read manual that are specific to additional documentation and detailed specifications. The Support page also...
...address shown on your files • Playing and recording media To access the User Guide: • Click Start, All Programs, then click eMachines Documentation. 2 For all other software • Controlling audio and video settings • Using the Internet • Protecting your computer's label..., see the online User Guide. Chapter 1: About This Reference About this guide, the User Guide has been included on your hard drive. Some illustrations in -depth, easy-to-read manual that are specific to additional documentation and detailed specifications. The Support page also...

8512635 - eMachines Desktop Hardware Reference Guide
Page 35
Chapter 4 Upgrading Your Computer • Preventing static electricity discharge • Opening and closing the case • Installing memory • Replacing the system battery • Adding or replacing an optical disc drive • Adding or replacing a hard drive • Replacing the heat sink and processor • Adding or replacing an expansion card • Replacing the system board 29
Chapter 4 Upgrading Your Computer • Preventing static electricity discharge • Opening and closing the case • Installing memory • Replacing the system battery • Adding or replacing an optical disc drive • Adding or replacing a hard drive • Replacing the heat sink and processor • Adding or replacing an expansion card • Replacing the system board 29

8512635 - eMachines Desktop Hardware Reference Guide
Page 44
To add or replace a hard drive: 1 Remove the side panel by following the instructions in "Removing the side panel" on page 31. 2 Disconnect and label all hard drive cables, noting their locations and orientation. (You will reconnect the cables after you install the new drive.) 3 Disconnect the hard drive cage fan cable from the system board. 38 Chapter 4: Upgrading Your Computer Adding or replacing a hard drive Tools You need a Phillips screwdriver to add or replace a hard drive.
To add or replace a hard drive: 1 Remove the side panel by following the instructions in "Removing the side panel" on page 31. 2 Disconnect and label all hard drive cables, noting their locations and orientation. (You will reconnect the cables after you install the new drive.) 3 Disconnect the hard drive cage fan cable from the system board. 38 Chapter 4: Upgrading Your Computer Adding or replacing a hard drive Tools You need a Phillips screwdriver to add or replace a hard drive.

8512635 - eMachines Desktop Hardware Reference Guide
Page 45
... mounting screws provided with your new drive. 39 www.emachines.com 4 Loosen the screw that secures the hard drive cage to the computer. (This screw cannot be the same. - OR - Hard drive screws (top) Hard drive screws (bottom) Hard drive screws (top) Hard drive screws (bottom) 7 If you are replacing a drive, note any jumper settings on the old drive and set the jumper as...
... mounting screws provided with your new drive. 39 www.emachines.com 4 Loosen the screw that secures the hard drive cage to the computer. (This screw cannot be the same. - OR - Hard drive screws (top) Hard drive screws (bottom) Hard drive screws (top) Hard drive screws (bottom) 7 If you are replacing a drive, note any jumper settings on the old drive and set the jumper as...

8512635 - eMachines Desktop Hardware Reference Guide
Page 46
... the instructions in "Removing the side panel" on page 31. 2 For more information on restoring your system, see "Recovering your system" on page 89. Hard drive cage tabs Slots on a towel or other non-abrasive surface. 3 Unplug the heat sink fan cable from Step 2. 12 Replace the side panel by following... Windows using the operating system DVD that came with the slots on the inside of case 10 Tighten the cage thumbscrew, then plug the hard drive cage fan cable back into the case. Chapter 4: Upgrading Your Computer 9 Line up the tabs on the right side of the cage with your computer...
... the instructions in "Removing the side panel" on page 31. 2 For more information on restoring your system, see "Recovering your system" on page 89. Hard drive cage tabs Slots on a towel or other non-abrasive surface. 3 Unplug the heat sink fan cable from Step 2. 12 Replace the side panel by following... Windows using the operating system DVD that came with the slots on the inside of case 10 Tighten the cage thumbscrew, then plug the hard drive cage fan cable back into the case. Chapter 4: Upgrading Your Computer 9 Line up the tabs on the right side of the cage with your computer...

8512635 - eMachines Desktop Hardware Reference Guide
Page 55
Chapter 5 Maintaining Your Computer • Setting up a maintenance schedule • Caring for your computer • Cleaning your computer • Updating Windows • Using BigFix • Managing hard drive space • Scheduling maintenance tasks • Moving from your old computer 49
Chapter 5 Maintaining Your Computer • Setting up a maintenance schedule • Caring for your computer • Cleaning your computer • Updating Windows • Using BigFix • Managing hard drive space • Scheduling maintenance tasks • Moving from your old computer 49

8512635 - eMachines Desktop Hardware Reference Guide
Page 56
... not put it . Maintenance task Weekly Monthly When needed Check for viruses X X X Run Windows Update X X Manage hard drive space X Clean up hard drives X X Scan hard drive for errors X X Defragment hard drive X X Back up a regular maintenance schedule. Magnetic fields can erase data on the hard drive could be lost or corrupted. 50 The case, although strong, is on because data on...
... not put it . Maintenance task Weekly Monthly When needed Check for viruses X X X Run Windows Update X X Manage hard drive space X Clean up hard drives X X Scan hard drive for errors X X Defragment hard drive X X Back up a regular maintenance schedule. Magnetic fields can erase data on the hard drive could be lost or corrupted. 50 The case, although strong, is on because data on...
8512635 - eMachines Desktop Hardware Reference Guide
Page 61
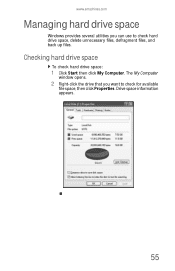
The My Computer window opens. 2 Right-click the drive that you can use to check for available file space, then click Properties. www.emachines.com Managing hard drive space Windows provides several utilities you want to check hard drive space, delete unnecessary files, defragment files, and back up files. Drive space information appears. 55 Checking hard drive space To check hard drive space: 1 Click Start then click My Computer.
The My Computer window opens. 2 Right-click the drive that you can use to check for available file space, then click Properties. www.emachines.com Managing hard drive space Windows provides several utilities you want to check hard drive space, delete unnecessary files, defragment files, and back up files. Drive space information appears. 55 Checking hard drive space To check hard drive space: 1 Click Start then click My Computer.


