
User Guide
Page 3
Contents Overview Contents Overview Introduction ...20 Hardware Installation and Connection ...36 Printer Deployment ...42 Installation Setup Wizard ...50 Quick Setup Wizards ...64 Dashboard ...80 Monitor ...91 Licensing ...131 Wireless ...136 Interfaces ...154 Trunks ...ALG ...239 UPnP ...241 IP/MAC Binding ...248 Layer 2 Isolation ...253 IPnP ...257 Web Authentication ...259 RTLS ...286 Security Policy ...289 Billing ...304 Printer ...322 Free Time ...332 SMS ...336 IPSec VPN ...338 Bandwidth Management ...366 Application Patrol ...376 Content Filtering ...381 Zones ...395 User/Group ...399 AP...
Contents Overview Contents Overview Introduction ...20 Hardware Installation and Connection ...36 Printer Deployment ...42 Installation Setup Wizard ...50 Quick Setup Wizards ...64 Dashboard ...80 Monitor ...91 Licensing ...131 Wireless ...136 Interfaces ...154 Trunks ...ALG ...239 UPnP ...241 IP/MAC Binding ...248 Layer 2 Isolation ...253 IPnP ...257 Web Authentication ...259 RTLS ...286 Security Policy ...289 Billing ...304 Printer ...322 Free Time ...332 SMS ...336 IPSec VPN ...338 Bandwidth Management ...366 Application Patrol ...376 Content Filtering ...381 Zones ...395 User/Group ...399 AP...

User Guide
Page 5
... 2 Hardware Installation and Connection 36 2.1 Rack-mounting (UAG5100) ...36 2.2 Wall Mounting (UAG2100 and UAG4100 37 2.3 Front Panel ...38 2.3.1 Front Panel LEDs ...39 2.4 Rear Panel ...40 2.4.1 UAG2100 or UAG4100 ...40 2.4.2 UAG5100 ...41 Chapter 3 Printer Deployment...42 3.1 Overview ...42 3.2 Attach the Printer to the UAG ...42 3.3 Set up an Internet Connection on the UAG 42 3.4 Allow...
... 2 Hardware Installation and Connection 36 2.1 Rack-mounting (UAG5100) ...36 2.2 Wall Mounting (UAG2100 and UAG4100 37 2.3 Front Panel ...38 2.3.1 Front Panel LEDs ...39 2.4 Rear Panel ...40 2.4.1 UAG2100 or UAG4100 ...40 2.4.2 UAG5100 ...41 Chapter 3 Printer Deployment...42 3.1 Overview ...42 3.2 Attach the Printer to the UAG ...42 3.3 Set up an Internet Connection on the UAG 42 3.4 Allow...

User Guide
Page 6
... 5.3.9 VPN Advanced Wizard - Configuration 72 5.3.5 VPN Express Wizard - Second WAN Interface 55 4.3 Wireless Settings ...56 4.3.1 Wireless and Radio Settings 56 4.4 Web Authentication Settings ...57 4.5 Printer Settings ...58 4.5.1 Printer List and Printout Settings 59 4.6 Billing Settings ...59 4.6.1 Billing Profile ...60 4.6.2 Account Generator Settings 61 4.7 Free Time Settings ...62 4.8 Device Registration ...63 Chapter 5 Quick...
... 5.3.9 VPN Advanced Wizard - Configuration 72 5.3.5 VPN Express Wizard - Second WAN Interface 55 4.3 Wireless Settings ...56 4.3.1 Wireless and Radio Settings 56 4.4 Web Authentication Settings ...57 4.5 Printer Settings ...58 4.5.1 Printer List and Printout Settings 59 4.6 Billing Settings ...59 4.6.1 Billing Profile ...60 4.6.2 Account Generator Settings 61 4.7 Free Time Settings ...62 4.8 Device Registration ...63 Chapter 5 Quick...

User Guide
Page 7
... ...110 7.14 The Radio List Screen ...112 7.14.1 AP Mode Radio Information 114 7.15 The Station List Screen ...115 7.16 Detected Device ...116 7.17 The Printer Status Screen ...118 7.18 The VPN 1-1 Mapping Status Screen 118 7.18.1 VPN 1-1 Mapping Statistics 119 7.19 The IPSec Monitor Screen ...120 7.19.1 Regular Expressions in...
... ...110 7.14 The Radio List Screen ...112 7.14.1 AP Mode Radio Information 114 7.15 The Station List Screen ...115 7.16 Detected Device ...116 7.17 The Printer Status Screen ...118 7.18 The VPN 1-1 Mapping Status Screen 118 7.18.1 VPN 1-1 Mapping Statistics 119 7.19 The IPSec Monitor Screen ...120 7.19.1 Regular Expressions in...

User Guide
Page 12
.../Edit Screen 316 26.5 The Payment Service General Screen 316 26.5.1 The Payment Service Desktop View / Mobile View Screen 318 Chapter 27 Printer ...322 27.1 Overview ...322 27.1.1 What You Can Do in this Chapter 322 27.2 The General Setting Screen ...322 27.2.1 Add/Edit... Printer Rule ...324 27.3 The Printout Configuration Screen 325 27.4 The Printer Manager Screen ...326 27.4.1 Edit Printer Manager ...327 27.4.2 Reports Overview ...328 27.4.3 Key Combinations ...328 UAG Series User's Guide 12
.../Edit Screen 316 26.5 The Payment Service General Screen 316 26.5.1 The Payment Service Desktop View / Mobile View Screen 318 Chapter 27 Printer ...322 27.1 Overview ...322 27.1.1 What You Can Do in this Chapter 322 27.2 The General Setting Screen ...322 27.2.1 Add/Edit... Printer Rule ...324 27.3 The Printout Configuration Screen 325 27.4 The Printer Manager Screen ...326 27.4.1 Edit Printer Manager ...327 27.4.2 Reports Overview ...328 27.4.3 Key Combinations ...328 UAG Series User's Guide 12

User Guide
Page 20
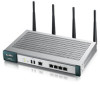
The UAG combines an IEEE 802.11n wireless access point, router, 4-port switch and service gateway in Mode UAG2100 V UAG4100 V V UAG5100 V V V V The UAG is ideal for Internet access. The UAG also provides bandwidth management, NAT, port forwarding, policy routing, DHCP ... web authentication to allow guests to subscribers that seek Internet access. You should have an Internet account already set up and have a "statement printer", such as SP350E, you to easily print subscriber statements. You can also forward the authenticated client's e-mail messages to -Site) Content Filtering...
The UAG combines an IEEE 802.11n wireless access point, router, 4-port switch and service gateway in Mode UAG2100 V UAG4100 V V UAG5100 V V V V The UAG is ideal for Internet access. The UAG also provides bandwidth management, NAT, port forwarding, policy routing, DHCP ... web authentication to allow guests to subscribers that seek Internet access. You should have an Internet account already set up and have a "statement printer", such as SP350E, you to easily print subscriber statements. You can also forward the authenticated client's e-mail messages to -Site) Content Filtering...

User Guide
Page 28
... current AP controller fails. Wireless Controller Configuration Configure how the UAG handles APs that newly connect to configure the UAG's features. Printer Status Printer Status Display information about the connected stations. Configuration Menu Use the configuration menu screens to the network. UAG Series User's Guide ... Introduction Table 6 Monitor Menu Screens Summary (continued) FOLDER OR LINK TAB FUNCTION Station Info Display information about the connected statement printers. Detected Device Display information about suspected rogue APs.
... current AP controller fails. Wireless Controller Configuration Configure how the UAG handles APs that newly connect to configure the UAG's features. Printer Status Printer Status Display information about the connected stations. Configuration Menu Use the configuration menu screens to the network. UAG Series User's Guide ... Introduction Table 6 Monitor Menu Screens Summary (continued) FOLDER OR LINK TAB FUNCTION Station Info Display information about the connected statement printers. Detected Device Display information about suspected rogue APs.

User Guide
Page 29
... to assign a public IP address to each supported interface. HTTP Redirect Set up and manage SMTP redirection rules. IPnP Enable IPnP on the connected statement printer. Web Authentication Web Authentication Define rules to force user authentication for load balancing. Adverstisement Enable and set the UAG's flexible ports as LAN1 or LAN2...
... to assign a public IP address to each supported interface. HTTP Redirect Set up and manage SMTP redirection rules. IPnP Enable IPnP on the connected statement printer. Web Authentication Web Authentication Define rules to force user authentication for load balancing. Adverstisement Enable and set the UAG's flexible ports as LAN1 or LAN2...

User Guide
Page 30
Chapter 1 Introduction Table 7 Configuration Menu Screens Summary (continued) FOLDER OR LINK TAB FUNCTION Printer General Setting Configure the printer list, enable printer management and customize the account printout. SMS SMS Enable the SMS service to define various policies. .... Schedule Schedule Create one-time and recurring schedules. Schedule Group Create and manage groups of content filtering policies. Printer Manager Detect the connected statement printers, change their IP addresses and/or add them to policies as a single object. User/Group User Create and...
Chapter 1 Introduction Table 7 Configuration Menu Screens Summary (continued) FOLDER OR LINK TAB FUNCTION Printer General Setting Configure the printer list, enable printer management and customize the account printout. SMS SMS Enable the SMS service to define various policies. .... Schedule Schedule Create one-time and recurring schedules. Schedule Group Create and manage groups of content filtering policies. Printer Manager Detect the connected statement printers, change their IP addresses and/or add them to policies as a single object. User/Group User Create and...

User Guide
Page 42
...on page 50 for detailed information about paper loading. 1 Connect the Ethernet port of the printer to one of the UAG to set up an Internet Connection on the printer. Refer to the printer documentation for detailed information on how to access the web configurator. 4 Enter your Internet access... SP350E as a DHCP client by default and will : • Attach the Printer to Monitor and Manage the Printer. • Turn on Web Authentication on the UAG. 3 Log into the UAG web configurator. CHAPTER 3 Printer Deployment 3.1 Overview This chapter shows you will obtain an IP address from the...
...on page 50 for detailed information about paper loading. 1 Connect the Ethernet port of the printer to one of the UAG to set up an Internet Connection on the printer. Refer to the printer documentation for detailed information on how to access the web configurator. 4 Enter your Internet access... SP350E as a DHCP client by default and will : • Attach the Printer to Monitor and Manage the Printer. • Turn on Web Authentication on the UAG. 3 Log into the UAG web configurator. CHAPTER 3 Printer Deployment 3.1 Overview This chapter shows you will obtain an IP address from the...

User Guide
Page 43
Write down the printer's IP address. Make sure the IP address is assigned to the printer's MAC address. UAG Series User's Guide 43 Chapter 3 Printer Deployment 3.4 Allow the UAG to Monitor and Manage the Printer Before you add the printer to the UAG's printer list, check the sticker on the printer's rear panel to see its MAC address. 1 Go to the Dashboard of the UAG web configurator. 2 Open the DHCP Table to find the IP address which is reserved for the printer.
Write down the printer's IP address. Make sure the IP address is assigned to the printer's MAC address. UAG Series User's Guide 43 Chapter 3 Printer Deployment 3.4 Allow the UAG to Monitor and Manage the Printer Before you add the printer to the UAG's printer list, check the sticker on the printer's rear panel to see its MAC address. 1 Go to the Dashboard of the UAG web configurator. 2 Open the DHCP Table to find the IP address which is reserved for the printer.

User Guide
Page 44
Click Add in the list. Alternatively, go to create a new entry for your printer and click Add to Mgnt Printer List to the Configuration > Printer > General Setting screen. Select your printer. The UAG automatically detects the connected printer(s) and displays the printer information in the Printer List to the Configuration > Printer > Printer Manager screen and click the Discover Printer icon. Chapter 3 Printer Deployment 3 Go to let the UAG manage it. UAG Series User's Guide 44
Click Add in the list. Alternatively, go to create a new entry for your printer and click Add to Mgnt Printer List to the Configuration > Printer > General Setting screen. Select your printer. The UAG automatically detects the connected printer(s) and displays the printer information in the Printer List to the Configuration > Printer > Printer Manager screen and click the Discover Printer icon. Chapter 3 Printer Deployment 3 Go to let the UAG manage it. UAG Series User's Guide 44

User Guide
Page 45
UAG Series User's Guide 45 Chapter 3 Printer Deployment 4 After the printer's IP address is added to the printer list, select the Enable Printer Manager checkbox in the Configuration > Printer > General Setting screen and then click Apply. 5 Go to the Configuration > Printer > Printer Manager screen to check if the UAG can connect to the printer (the printer status is sync success).
UAG Series User's Guide 45 Chapter 3 Printer Deployment 4 After the printer's IP address is added to the printer list, select the Enable Printer Manager checkbox in the Configuration > Printer > General Setting screen and then click Apply. 5 Go to the Configuration > Printer > Printer Manager screen to check if the UAG can connect to the printer (the printer status is sync success).

User Guide
Page 46
... Note: You may need to log in the the Configuration > Printer > General Setting screen. 3.5 Turn on Web Authentication on this feature. 2 Click Add to the Configuration > Web Authentication > General screen. Select Enable Web Authentication to turn ...on the UAG With web authentication, users need to wait up to 90 seconds for the UAG to synchronize with the printer successfully after you click Apply in through a designated web page or agree to the policy of user agreement before they can access the network(s). 1 Go...
... Note: You may need to log in the the Configuration > Printer > General Setting screen. 3.5 Turn on Web Authentication on this feature. 2 Click Add to the Configuration > Web Authentication > General screen. Select Enable Web Authentication to turn ...on the UAG With web authentication, users need to wait up to 90 seconds for the UAG to synchronize with the printer successfully after you click Apply in through a designated web page or agree to the policy of user agreement before they can access the network(s). 1 Go...

User Guide
Page 47
.... 5 Click OK to save your changes. 6 Click Apply in the Configuration > Web Authentication screen. 3.6 Generate a Free Guest Account You can use the buttons on the printer or web-based account generator to create guest accounts based on the pre-defined billing settings (see Section 26.3 on page 307). 1 Go to the... Configuration > Free Time screen. 2 Select the Enable Free Time option to turn on this feature. UAG Series User's Guide 47 Chapter 3 Printer Deployment 3 The Auth. Policy Add screen displays. Click Apply.
.... 5 Click OK to save your changes. 6 Click Apply in the Configuration > Web Authentication screen. 3.6 Generate a Free Guest Account You can use the buttons on the printer or web-based account generator to create guest accounts based on the pre-defined billing settings (see Section 26.3 on page 307). 1 Go to the... Configuration > Free Time screen. 2 Select the Enable Free Time option to turn on this feature. UAG Series User's Guide 47 Chapter 3 Printer Deployment 3 The Auth. Policy Add screen displays. Click Apply.

User Guide
Page 48
Chapter 3 Printer Deployment 3 Whenever a user tries to access a web page, he/she will be redirected to the default login page. 4 Click the link on the login page to generate and show the account information on the web page. UAG Series User's Guide 48 Click OK to get a free guest account. 5 A Welcome screen displays. Select the free time service.
Chapter 3 Printer Deployment 3 Whenever a user tries to access a web page, he/she will be redirected to the default login page. 4 Click the link on the login page to generate and show the account information on the web page. UAG Series User's Guide 48 Click OK to get a free guest account. 5 A Welcome screen displays. Select the free time service.

User Guide
Page 49
Chapter 3 Printer Deployment 6 Now you can use this account to access the Internet through the UAG for free. UAG Series User's Guide 49
Chapter 3 Printer Deployment 6 Now you can use this account to access the Internet through the UAG for free. UAG Series User's Guide 49

User Guide
Page 58
... click Next to go to the Free Time screen with which you enable the web authentication feature, attach a statement printer and select Yes to have the UAG generate dynamic guest accounts. Figure 30 Printer Settings UAG Series User's Guide 58 Chapter 4 Installation Setup Wizard To block all network traffic or traffic received... on a specific interface, use the Configuration > Web Authentication screens (Section 23.2 on page 260) to create free guest accounts. Figure 29 Web Authentication Settings 4.5 Printer Settings If you can allow the UAG to configure a new policy.
... click Next to go to the Free Time screen with which you enable the web authentication feature, attach a statement printer and select Yes to have the UAG generate dynamic guest accounts. Figure 30 Printer Settings UAG Series User's Guide 58 Chapter 4 Installation Setup Wizard To block all network traffic or traffic received... on a specific interface, use the Configuration > Web Authentication screens (Section 23.2 on page 260) to create free guest accounts. Figure 29 Web Authentication Settings 4.5 Printer Settings If you can allow the UAG to configure a new policy.

User Guide
Page 59
... the MAC address of the printer. Chapter 4 Installation Setup Wizard 4.5.1 Printer List and Printout Settings Use this to add the printer to the managed printer list. • IPv4 Address - Figure 31 Printer List and Printout Settings Printer List • If there is a statement printer attached to the UAG, click Discover Printer to detect the printer that is connected to...
... the MAC address of the printer. Chapter 4 Installation Setup Wizard 4.5.1 Printer List and Printout Settings Use this to add the printer to the managed printer list. • IPv4 Address - Figure 31 Printer List and Printout Settings Printer List • If there is a statement printer attached to the UAG, click Discover Printer to detect the printer that is connected to...

User Guide
Page 92
... (Section 7.16 on page 116) to view the wireless devices passively detected by the UAG. • Use the Printer Status screen (see Section 7.17 on page 118) to view information about the connected statement printers. • Use the VPN 1-1 Mapping screen (see Section 7.18 on page 118) to view the status of...
... (Section 7.16 on page 116) to view the wireless devices passively detected by the UAG. • Use the Printer Status screen (see Section 7.17 on page 118) to view information about the connected statement printers. • Use the VPN 1-1 Mapping screen (see Section 7.18 on page 118) to view the status of...