
User Guide
Page 6
... correct ports. • Place connecting cables carefully so that no one . • Do not use the device outside, and make sure all the connections are indoors. Opening or removing covers can walk on the power adaptor or cord. • Do NOT use the device if the power adaptor or cord is damaged as it properly. 6 NPS-520 User's Guide Contact your local vendor to order a new one will step...
... correct ports. • Place connecting cables carefully so that no one . • Do not use the device outside, and make sure all the connections are indoors. Opening or removing covers can walk on the power adaptor or cord. • Do NOT use the device if the power adaptor or cord is damaged as it properly. 6 NPS-520 User's Guide Contact your local vendor to order a new one will step...
User Guide
Page 11
... Web Configurator: TCP/IP ...40 Figure 19 Web Configurator: Utilities > Firmware Upgrade 42 Figure 20 Firmware Upload Confirmation 42 Figure 21 Firmware Upload Warning ...42 Figure 22 Network Temporarily Disconnected 43 Figure 23 Firmware Upload Successful 43 Figure 24 Web Configurator: Utilities > Load Defaults 43 Figure 25 Web Configurator: Utilities > Restart 44 Figure 26 Windows 2000: Start > Settings > Printers 46 Figure 27 Windows 2000: Add Printer Wizard: Welcome 47 Figure 28 Windows 2000: Add Printer Wizard: Local or Network...
... Web Configurator: TCP/IP ...40 Figure 19 Web Configurator: Utilities > Firmware Upgrade 42 Figure 20 Firmware Upload Confirmation 42 Figure 21 Firmware Upload Warning ...42 Figure 22 Network Temporarily Disconnected 43 Figure 23 Firmware Upload Successful 43 Figure 24 Web Configurator: Utilities > Load Defaults 43 Figure 25 Web Configurator: Utilities > Restart 44 Figure 26 Windows 2000: Start > Settings > Printers 46 Figure 27 Windows 2000: Add Printer Wizard: Welcome 47 Figure 28 Windows 2000: Add Printer Wizard: Local or Network...
User Guide
Page 12
... a test page: Confirmation 68 Figure 75 WIndows 95/98/Me: Network: Configuration 84 Figure 76 Windows 95/98/Me: TCP/IP Properties: IP Address 85 Figure 77 Windows 95/98/Me: TCP/IP Properties: DNS Configuration 86 Figure 78 Windows XP: Start Menu ...87 Figure 79 Windows XP: Control Panel 87 Figure 80 Windows XP: Control Panel: Network Connections: Properties 88 Figure 81 Windows XP: Local Area Connection Properties 88 12 NPS-520 User's Guide
... a test page: Confirmation 68 Figure 75 WIndows 95/98/Me: Network: Configuration 84 Figure 76 Windows 95/98/Me: TCP/IP Properties: IP Address 85 Figure 77 Windows 95/98/Me: TCP/IP Properties: DNS Configuration 86 Figure 78 Windows XP: Start Menu ...87 Figure 79 Windows XP: Control Panel 87 Figure 80 Windows XP: Control Panel: Network Connections: Properties 88 Figure 81 Windows XP: Local Area Connection Properties 88 12 NPS-520 User's Guide
User Guide
Page 18
... your password, you will have been restored and the NPS-520 is ready. 18 NPS-520 User's Guide Then the Ready and Status LEDs flash once. 4 When the Ready LED turns steady on (not blinking). 2 Press the Reset button for Managing the NPS-520 Do the following things regularly to make hardware connections and install the ZyXEL utility. 1.5 The Reset Button If you forget the password and cannot access the ZyXEL utility's TCP/IP Setting and System Setting screens or the web configurator, you will need to...
... your password, you will have been restored and the NPS-520 is ready. 18 NPS-520 User's Guide Then the Ready and Status LEDs flash once. 4 When the Ready LED turns steady on (not blinking). 2 Press the Reset button for Managing the NPS-520 Do the following things regularly to make hardware connections and install the ZyXEL utility. 1.5 The Reset Button If you forget the password and cannot access the ZyXEL utility's TCP/IP Setting and System Setting screens or the web configurator, you will need to...
User Guide
Page 22
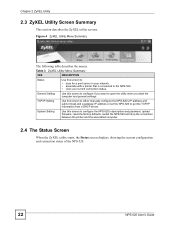
... your network. • associate with a printer that is connected to get the TCP/IP information from a DHCP server. TCP/IP Setting Use this screen to • scan for a print server in your current connection status. Figure 4 ZyXEL Utility Menu Summary The following table describes the menus. General Setting Use this screen to open the utility when you want to configure the NPS-520's description and password, upload firmware, reset the factory defaults, restart the NPS-520 and...
... your network. • associate with a printer that is connected to get the TCP/IP information from a DHCP server. TCP/IP Setting Use this screen to • scan for a print server in your current connection status. Figure 4 ZyXEL Utility Menu Summary The following table describes the menus. General Setting Use this screen to open the utility when you want to configure the NPS-520's description and password, upload firmware, reset the factory defaults, restart the NPS-520 and...
User Guide
Page 24
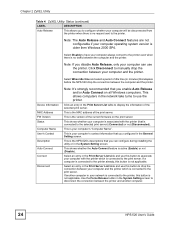
... MAC address of idle time (in your computer can configure during installing the utility or in the General Setting screen. Use the Force Release button in the System Setting screen to disconnect the connection between the computer and the printer. Select an entry in the Print Server List table and use this button to drop the connection between the computer and the printer. This is the NPS-520...
... MAC address of idle time (in your computer can configure during installing the utility or in the General Setting screen. Use the Force Release button in the System Setting screen to disconnect the connection between the computer and the printer. Select an entry in the Print Server List table and use this button to drop the connection between the computer and the printer. This is the NPS-520...
User Guide
Page 27
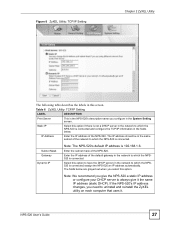
... network to uninstall and reinstall the ZyXEL utility on each computer that uses it the same IP address (static DHCP). Subnet Mask Gateway Dynamic IP Note: The NPS-520's default IP address is connected. The fields below . If the NPS-520's IP address changes, you give the NPS-520 a static IP address or configure your DHCP server to which the NPS520 is connected and configure the TCP/IP information in the fields below are grayed out when you configure in the System Setting screen. NPS-520 User's Guide...
... network to uninstall and reinstall the ZyXEL utility on each computer that uses it the same IP address (static DHCP). Subnet Mask Gateway Dynamic IP Note: The NPS-520's default IP address is connected. The fields below . If the NPS-520's IP address changes, you give the NPS-520 a static IP address or configure your DHCP server to which the NPS520 is connected and configure the TCP/IP information in the fields below are grayed out when you configure in the System Setting screen. NPS-520 User's Guide...
User Guide
Page 35
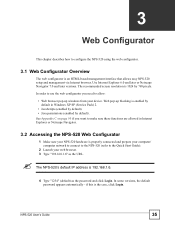
" The NPS-520's default IP address is properly connected and prepare your computer/ computer network to connect to the NPS-520 (refer to the Quick Start Guide). 2 Launch your web browser. 3 Type "192.168.1.6" as the password and click Login. NPS-520 User's Guide 35 In order to use the web configurator you want to make sure these functions are allowed in Windows XP SP (Service Pack) 2. • JavaScripts (enabled by default). • Java permissions (enabled by 768 pixels. See Appendix...
" The NPS-520's default IP address is properly connected and prepare your computer/ computer network to connect to the NPS-520 (refer to the Quick Start Guide). 2 Launch your web browser. 3 Type "192.168.1.6" as the password and click Login. NPS-520 User's Guide 35 In order to use the web configurator you want to make sure these functions are allowed in Windows XP SP (Service Pack) 2. • JavaScripts (enabled by default). • Java permissions (enabled by 768 pixels. See Appendix...
User Guide
Page 37
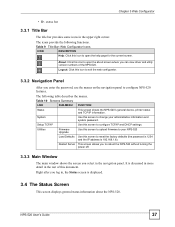
... detail in the navigation panel. NPS-520 User's Guide 37 status bar 3.3.1 Title Bar The title bar provides some icons in , the Status screen is 192.168.1.6). Chapter 3 Web Configurator • D - The following functions. Utilities Firmware Upgrade Use this screen to upload firmware to your NPS-520 Load Defaults Use this icon to reset the factory defaults (the password is 1234 and the IP address is displayed. 3.4 The Status Screen This screen displays general...
... detail in the navigation panel. NPS-520 User's Guide 37 status bar 3.3.1 Title Bar The title bar provides some icons in , the Status screen is 192.168.1.6). Chapter 3 Web Configurator • D - The following functions. Utilities Firmware Upgrade Use this screen to upload firmware to your NPS-520 Load Defaults Use this icon to reset the factory defaults (the password is 1234 and the IP address is displayed. 3.4 The Status Screen This screen displays general...
User Guide
Page 39
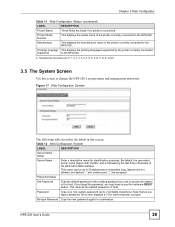
.... Printer Model Number This displays the model name of 1234. Printing Language This displays the printing languages supported by the last three characters of the printer currently connected to access the system in this screen to the NPS-520. Password Setup Old Password Type the default password or the existing password you may have to the NPS-520. NPS-520 User's Guide 39 Table 12 Web Configurator: System LABEL DESCRIPTION Server Name Setup Server Name Enter...
.... Printer Model Number This displays the model name of 1234. Printing Language This displays the printing languages supported by the last three characters of the printer currently connected to access the system in this screen to the NPS-520. Password Setup Old Password Type the default password or the existing password you may have to the NPS-520. NPS-520 User's Guide 39 Table 12 Web Configurator: System LABEL DESCRIPTION Server Name Setup Server Name Enter...

User Guide
Page 40
... you give it . 40 NPS-520 User's Guide If the NPS-520's IP address changes, you need to access the web configurator again. Table 13 Web Configurator: TCP/IP LABEL DESCRIPTION IP Address Assignment Use this screen to which the NPS-520 is a DHCP server in this option to have the DHCP server assign the NPS-520 an IP address automatically when there is connected. Note: We recommend you use the new IP address to access the web configurator again. Chapter 3 Web Configurator Table 12 Web Configurator: System (continued) LABEL...
... you give it . 40 NPS-520 User's Guide If the NPS-520's IP address changes, you need to access the web configurator again. Table 13 Web Configurator: TCP/IP LABEL DESCRIPTION IP Address Assignment Use this screen to which the NPS-520 is a DHCP server in this option to have the DHCP server assign the NPS-520 an IP address automatically when there is connected. Note: We recommend you use the new IP address to access the web configurator again. Chapter 3 Web Configurator Table 12 Web Configurator: System (continued) LABEL...
User Guide
Page 45
In Windows, you can also use the ZyXEL utility to set up a printer and/or associate an existing printer driver with a driver and you need to install an additional software to add a network port for print job using languages, such as PCL or PortScript. It sends print jobs to a print server that runs on a client computer and uses TCP/IP to establish connections between printers and computers on a network. NPS-520 User's Guide 45 " You...
In Windows, you can also use the ZyXEL utility to set up a printer and/or associate an existing printer driver with a driver and you need to install an additional software to add a network port for print job using languages, such as PCL or PortScript. It sends print jobs to a print server that runs on a client computer and uses TCP/IP to establish connections between printers and computers on a network. NPS-520 User's Guide 45 " You...
User Guide
Page 55
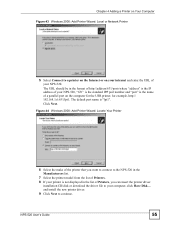
... the Manufacturers list. 7 Select the printer model from the list of the printer that you can insert the printer driver installation CD/disk or download the driver file to your printer is "lpt1". Chapter 4 Adding a Printer on Your Computer Figure 43 Windows 2000: Add Printer Wizard: Local or Network Printer 5 Select Connect to a printer on the Internet or on the computer for the USB printer, for example, http...
... the Manufacturers list. 7 Select the printer model from the list of the printer that you can insert the printer driver installation CD/disk or download the driver file to your printer is "lpt1". Chapter 4 Adding a Printer on Your Computer Figure 43 Windows 2000: Add Printer Wizard: Local or Network Printer 5 Select Connect to a printer on the Internet or on the computer for the USB printer, for example, http...
User Guide
Page 69
.... Contact the vendor to replace any damaged cables. 7 Disconnect and re-connect the power adaptor to the NPS-520. Check the IP address in to its factory defaults. None of the LEDs does not behave as expected. 5 Check the hardware connections. V The NPS-520 does not turn on. 1 Make sure you are using the power adaptor or cord included with the NPS-520. 2 Make sure the power adaptor or cord is turned on page 18. NPS-520 User's Guide 69
.... Contact the vendor to replace any damaged cables. 7 Disconnect and re-connect the power adaptor to the NPS-520. Check the IP address in to its factory defaults. None of the LEDs does not behave as expected. 5 Check the hardware connections. V The NPS-520 does not turn on. 1 Make sure you are using the power adaptor or cord included with the NPS-520. 2 Make sure the power adaptor or cord is turned on page 18. NPS-520 User's Guide 69
User Guide
Page 70
..., but I cannot log in the web configurator. 1 Make sure you are case-sensitive, so make sure your Internet browser does not block pop-up windows and has JavaScripts and Java enabled. See Appendix D on page 647. 6 Reset the device to access the NPS-520 with the default IP address. Chapter 5 Troubleshooting V I forgot the password. 1 The default password is using the correct IP address. • The default IP address is 192.168.1.6. • If you changed the IP address (Section 3.6 on...
..., but I cannot log in the web configurator. 1 Make sure you are case-sensitive, so make sure your Internet browser does not block pop-up windows and has JavaScripts and Java enabled. See Appendix D on page 647. 6 Reset the device to access the NPS-520 with the default IP address. Chapter 5 Troubleshooting V I forgot the password. 1 The default password is using the correct IP address. • The default IP address is 192.168.1.6. • If you changed the IP address (Section 3.6 on...

User Guide
Page 73
... Configuration Tool ZyXEL utility, Web configurator Operating System Supported Windows 98 Second Edition (SE), Windows Me, Windows 2000, Windows 2003, Windows XP, Unix/Linux (with LPR/LPD protocol support), Mac OS 9.x or later NPS-520 Compatible USB Printers The following tables summarize the NPS-520's hardware and firmware features. Table 17 NPS-520 Compatible USB Printers BRAND MODEL TYPE FUNCTIONS PRINT SCAN FAX CARD READER REMARK BenQ CM3000 MFP O O Brother HL-2070 Color Laser O NPS-520 User's Guide 73 APPENDIX A Product Specifications The following is a list...
... Configuration Tool ZyXEL utility, Web configurator Operating System Supported Windows 98 Second Edition (SE), Windows Me, Windows 2000, Windows 2003, Windows XP, Unix/Linux (with LPR/LPD protocol support), Mac OS 9.x or later NPS-520 Compatible USB Printers The following tables summarize the NPS-520's hardware and firmware features. Table 17 NPS-520 Compatible USB Printers BRAND MODEL TYPE FUNCTIONS PRINT SCAN FAX CARD READER REMARK BenQ CM3000 MFP O O Brother HL-2070 Color Laser O NPS-520 User's Guide 73 APPENDIX A Product Specifications The following is a list...
User Guide
Page 83
... using Windows NT/2000/XP, Macintosh OS 7 and later operating systems. After the appropriate TCP/IP components are installed, configure the TCP/IP settings in order to "communicate" with your computer. Windows 3.1 requires the purchase of UNIX/LINUX include the software components you need to open the Network window NPS-520 User's Guide 83 APPENDIX B Setting up Your Computer's IP Address All computers must have a 10M or 100M Ethernet adapter card and TCP/IP installed. TCP/IP...
... using Windows NT/2000/XP, Macintosh OS 7 and later operating systems. After the appropriate TCP/IP components are installed, configure the TCP/IP settings in order to "communicate" with your computer. Windows 3.1 requires the purchase of UNIX/LINUX include the software components you need to open the Network window NPS-520 User's Guide 83 APPENDIX B Setting up Your Computer's IP Address All computers must have a 10M or 100M Ethernet adapter card and TCP/IP installed. TCP/IP...
User Guide
Page 84
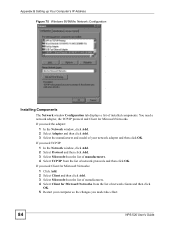
... need TCP/IP: 1 In the Network window, click Add. 2 Select Protocol and then click Add. 3 Select Microsoft from the list of manufacturers. 4 Select TCP/IP from the list of manufacturers. 4 Select Client for Microsoft Networks. Appendix B Setting up Your Computer's IP Address Figure 75 WIndows 95/98/Me: Network: Configuration Installing Components The Network window Configuration tab displays a list of network protocols and then click OK. If you need the adapter: 1 In the Network window, click Add. 2 Select Adapter...
... need TCP/IP: 1 In the Network window, click Add. 2 Select Protocol and then click Add. 3 Select Microsoft from the list of manufacturers. 4 Select TCP/IP from the list of manufacturers. 4 Select Client for Microsoft Networks. Appendix B Setting up Your Computer's IP Address Figure 75 WIndows 95/98/Me: Network: Configuration Installing Components The Network window Configuration tab displays a list of network protocols and then click OK. If you need the adapter: 1 In the Network window, click Add. 2 Select Adapter...
User Guide
Page 92
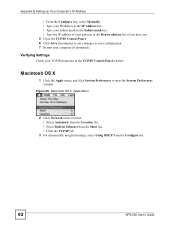
... the Configure list. 92 NPS-520 User's Guide Verifying Settings Check your computer (if prompted). Macintosh OS X 1 Click the Apple menu, and click System Preferences to your configuration. 7 Restart your TCP/IP properties in Ethernet from the Show list. • Click the TCP/IP tab. 3 For dynamically assigned settings, select Using DHCP from the Location list. • Select Built-in the TCP/IP Control Panel window. Appendix B Setting up Your Computer's IP Address...
... the Configure list. 92 NPS-520 User's Guide Verifying Settings Check your computer (if prompted). Macintosh OS X 1 Click the Apple menu, and click System Preferences to your configuration. 7 Restart your TCP/IP properties in Ethernet from the Show list. • Click the TCP/IP tab. 3 For dynamically assigned settings, select Using DHCP from the Location list. • Select Built-in the TCP/IP Control Panel window. Appendix B Setting up Your Computer's IP Address...
User Guide
Page 99
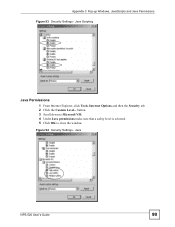
Figure 94 Security Settings - button. 3 Scroll down to Microsoft VM. 4 Under Java permissions make sure that a safety level is selected. 5 Click OK to close the window. Java NPS-520 User's Guide 99 Java Scripting Java Permissions 1 From Internet Explorer, click Tools, Internet Options and then the Security tab. 2 Click the Custom Level... Appendix C Pop-up Windows, JavaScripts and Java Permissions Figure 93 Security Settings -
Figure 94 Security Settings - button. 3 Scroll down to Microsoft VM. 4 Under Java permissions make sure that a safety level is selected. 5 Click OK to close the window. Java NPS-520 User's Guide 99 Java Scripting Java Permissions 1 From Internet Explorer, click Tools, Internet Options and then the Security tab. 2 Click the Custom Level... Appendix C Pop-up Windows, JavaScripts and Java Permissions Figure 93 Security Settings -


